Can You Drill Through a Magnet: Proven Technique
Can you drill through a magnet? Yes, it is absolutely possible to drill through a magnet using the right tools and techniques. While it might sound daunting, with careful preparation and a methodical approach, you can successfully create holes in most magnets without shattering them or demagnetizing them permanently. This guide will show you how.
Ever found yourself holding a strong magnet and thinking, “Could I actually drill a hole in this?” It’s a common question for DIYers and makers! Magnets are fascinating, useful things, and sometimes we need to attach them, suspend them, or integrate them into projects in a way that requires a hole. The thought of drilling into such a brittle and powerful material can seem impossible. Will it shatter? Will it lose its magnetism? These are valid concerns.
But don’t let that stop your creative ideas! With the right knowledge and a steady hand, drilling through a magnet is a perfectly achievable task. We’re going to walk through a proven technique step-by-step, making it simple and safe for you to tackle this challenge. Get ready to learn how to create precisely drilled holes in your magnets, opening up a world of new project possibilities!
Why Would You Want to Drill Through a Magnet?
Before we dive into the “how,” let’s consider the “why.” Understanding the practical applications can inspire your next project. Common reasons for drilling holes in magnets include:
- Mounting: Attaching magnets to surfaces like wood, metal, or plastic for crafts, displays, or tool organizers. A drilled hole allows for screws, bolts, or even strong adhesives to create a permanent fixture.
- Suspension: Creating magnetic hanging systems for lightweight items, decorations, or even as part of a kinetic sculpture.
- Jewelry and Crafts: Incorporating magnets into custom jewelry pieces, keychains, or decorative items where a clean, finished look is desired.
- Scientific and Educational Projects: Modifying magnets for experiments or demonstrations that require them to be part of a larger assembly.
- Custom Tool Modifications: Adding magnets to tool handles, jigs, or workpieces to hold fasteners or small metal parts.
Whatever your reason, the ability to drill a magnet cleanly adds a professional touch and greatly expands your creative potential. Now, let’s get to the heart of it: how to actually do it!
Understanding Your Magnet Type
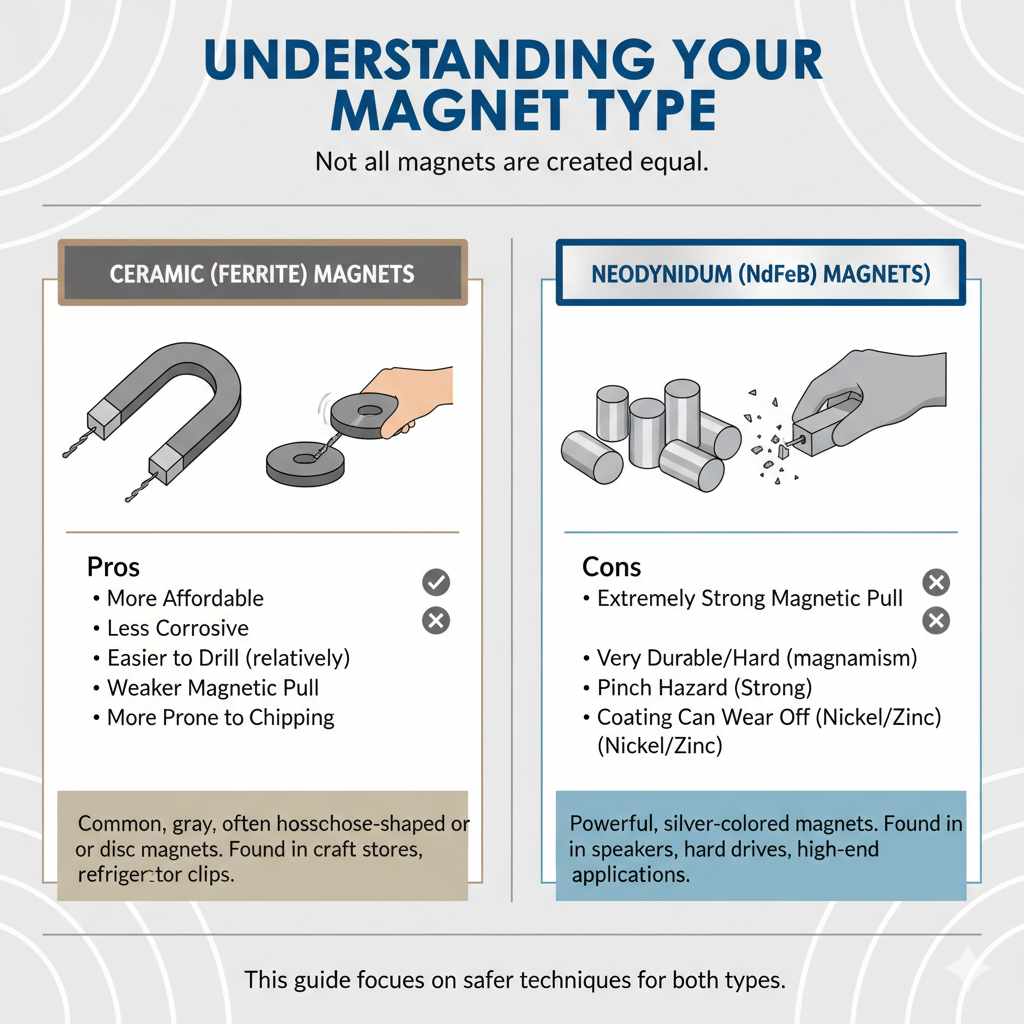
Not all magnets are created equal, and their composition significantly impacts how they can be drilled. Most common magnets you’ll encounter in DIY projects are either ceramic (ferrite) or neodymium (rare-earth) magnets. Knowing which you have is crucial.
Ceramic (Ferrite) Magnets
These are the common, gray, often horseshoe-shaped or disc magnets you might find in craft stores or on refrigerator clips. They are relatively brittle and less powerful than neodymium magnets.
- Pros: More affordable, less corrosive, easier to drill than neodymium magnets.
- Cons: Weaker magnetic pull, more prone to chipping if not handled carefully.
Neodymium (NdFeB) Magnets
These are the powerful, silver-colored magnets, often found in speakers, hard drives, and high-end magnetic applications. They offer a very strong magnetic force but are also extremely brittle and can be challenging to work with.
- Pros: Extremely strong magnetic pull, very durable in terms of magnetism.
- Cons: Very brittle, much harder to drill without breaking, can be hazardous due to their strength (pinching fingers), often coated (nickel, zinc) which can wear off.
For the purpose of this guide, we will focus on techniques that work well and are safer for both types, with special considerations for the more delicate neodymium magnets.
Tools and Materials You’ll Need
Having the right setup makes all the difference. Here’s a list of what you’ll want to gather before you start drilling:
- Drill: A variable-speed drill is ideal. A drill press offers the most stability and control, which is highly recommended, especially for smaller or more brittle magnets.
- Drill Bits: This is critical. For ceramic magnets, carbide-tipped masonry bits or even diamond-tipped bits can work. For neodymium magnets, diamond-tipped drill bits are almost essential. Standard steel bits will likely overheat and fail.
- Safety Glasses: Absolutely non-negotiable. Magnet fragments can fly!
- Gloves: To protect your hands, especially from pinching with neodymium magnets or from sharp edges.
- Dust Mask: Magnet dust can be harmful if inhaled.
- Coolant/Lubricant: Water is often best for ceramic magnets. For neodymium magnets, a specialized cutting lubricant or even a slow drip of water can help prevent overheating and cracking.
- Clamps or Vice: To secure the magnet firmly. Never try to hold a magnet by hand while drilling.
- Magnets: The materials you intend to drill!
- Marker: To mark your drilling spot.
- Screwdriver (Optional): For creating an initial dimple.
- Piece of Scrap Wood: To act as a backing and prevent tear-out, especially for the material the magnet is attached to.
Choosing the Right Drill Bit
The drill bit is your most important tool here. Standard HSS (High-Speed Steel) bits are not suitable for drilling magnets. They will dull instantly, generate excessive heat, and are very likely to shatter the magnet.
Here’s a breakdown:
- Carbide-Tipped Bits: Often used for drilling tile or masonry. They can be effective for ceramic magnets if used cautiously at very low speeds.
- Diamond-Tipped Bits: These are the gold standard for drilling hard, brittle materials like glass, tile, and strong ceramics. They work by grinding away material rather than cutting. For neodymium magnets, these are highly recommended, if not mandatory, for a clean hole. They are available in various forms, including core drill bits (like a hole saw) or solid bits.
External Resource: For more information on specific drill bit types and their applications, the Bosch Tools guide to choosing drill bits offers excellent general advice that can be applied to selecting appropriate bits for specialized materials.
The Proven Technique: Step-by-Step Drilling
Now, let’s get down to the actual process. This method prioritizes safety, control, and minimizing the risk of damaging your magnet.
Step 1: Prepare Your Workspace and Safety Gear
Clear a well-lit area. Ensure good ventilation if possible. Put on your safety glasses, gloves, and dust mask. This is the most important first step. Never skip it.
Step 2: Secure the Magnet
This is crucial. Magnets, especially neodymium ones, are strong and can jump unexpectedly. They are also brittle. Placing the magnet in a vice or clamping it securely to a workbench is essential. Use soft jaws or padding (like a piece of cloth) in your vice to avoid damaging the magnet’s coating or surface. If the magnet is already attached to another material (like wood), clamp both the magnet and the material. You can also place a piece of scrap wood underneath the drilling area to support the material and prevent tear-out.
Tip: For very strong neodymium magnets, consider placing another magnet on the opposite side of the clamp to help hold it steady, but be EXTREMELY careful not to pinch your fingers!
Step 3: Mark Your Drilling Spot
Use a marker to clearly indicate where you want to drill. For precise holes, especially center holes, you might want to use a center punch lightly tapped with a hammer to create a small indentation for the drill bit to start in. However, on very brittle magnets, even a light tap can cause issues. Often, for diamond bits on magnets, you can start the drill very slowly without a punch.
Step 4: Set Up Your Drill and Drill Bit
If you’re using a variable-speed drill, set it to its lowest speed setting. A drill press is ideal because it maintains a consistent speed and provides a stable vertical path for the drill bit. Choose the appropriate drill bit (diamond-tipped is best for neodymium, carbide-tipped can work for ceramic).
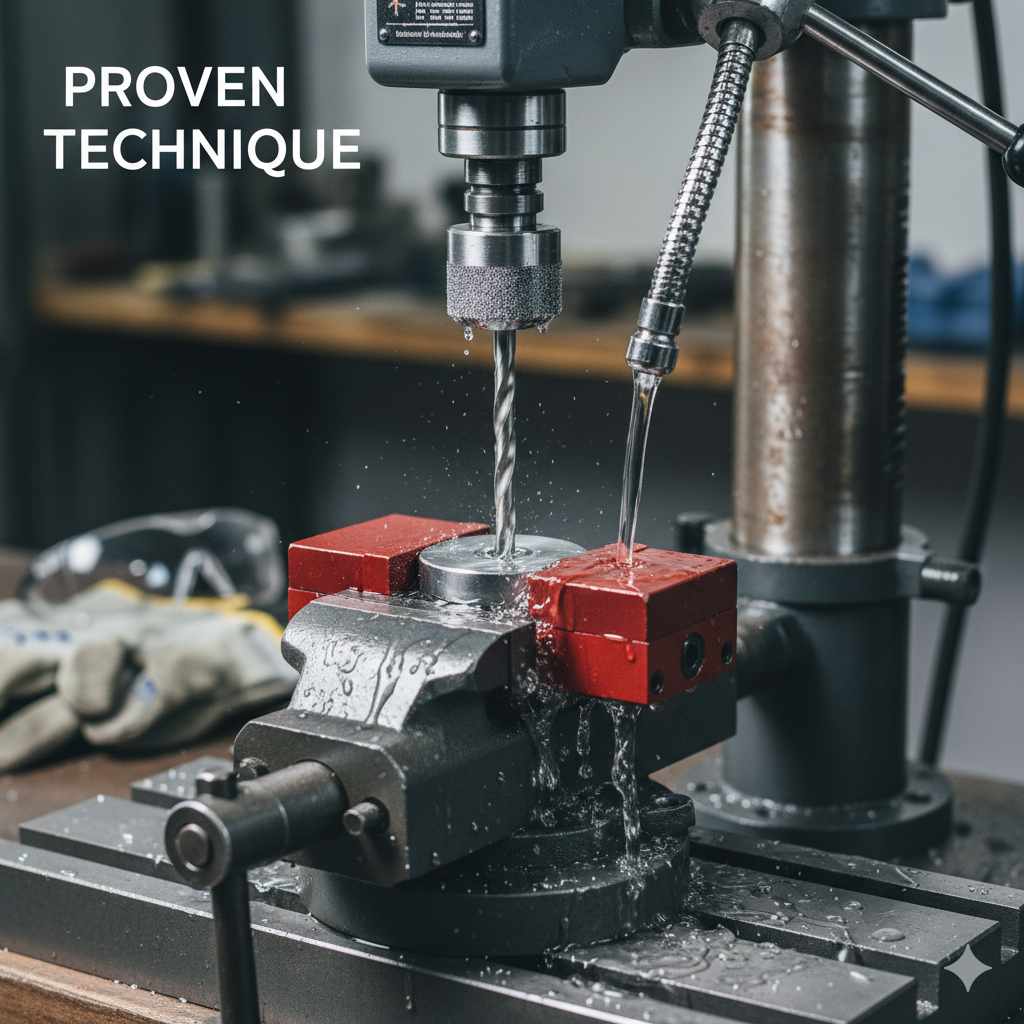
Step 5: The Drilling Process – Slow and Cool
- Start Slowly: Begin drilling at the lowest possible speed. Gently bring the drill bit into contact with the marked spot.
- Apply Light Pressure: Do not force the drill. Let the bit do the work. Applying too much pressure is the number one cause of shattering.
- Keep it Cool: This is vital. Drilling generates heat, which can demagnetize magnets and drastically increase the risk of cracking.
- For Ceramic Magnets: Periodically dip the bit and the magnet in water, or use a slow, steady drip of water onto the drilling site.
- For Neodymium Magnets: Water is still a good choice. Some prefer a light oil-based cutting lubricant. The key is constant cooling. You’ll likely need to pause frequently to allow for cooling and to clear dust.
- Clear Debris: As you drill, the bit will create dust and small fragments. Periodically lift the drill bit slightly to allow coolant to get to the bit and to help flush out debris. This also prevents the bit from overheating.
- Drill Partway, Back Out, and Cool: Don’t try to drill all the way through in one go, especially with neodymium magnets. Drill a little way (e.g., 1/8 to 1/4 inch), back the bit out completely, clear the debris, and reapply coolant. Repeat this process until you are about to break through the other side.
- Finish Carefully: As you approach the exit point, reduce pressure even further. If possible, drill from both sides to meet in the middle, which can reduce chipping on the exit side. If drilling from one side only, support the exit area well and drill a few final turns with extreme gentleness.
Step 6: Clean Up
Once the hole is complete, carefully remove the magnet from your clamp. Clean off any residual dust or coolant. Be mindful of any sharp edges that might have formed. You can sometimes smooth these very lightly with a fine-grit sandpaper or a diamond file if necessary, but be cautious not to alter the magnet’s shape significantly or overheat it.
Can Drilling Demagnetize a Magnet?
This is a critical question. Excessive heat is the primary enemy of magnetism. If the magnet gets too hot during the drilling process, it can indeed become demagnetized, or at least significantly weakened. This is why using a coolant and drilling at very slow speeds is paramount. The physical act of drilling does not inherently demagnetize a magnet, but the heat generated can.
Neodymium magnets are particularly susceptible to heat, and exceeding their Curie temperature can cause irreversible demagnetization. The Curie temperature is the point at which a magnetic material loses its permanent magnetic properties. For common Neodymium magnets, this is typically around 80°C (176°F), though some high-temperature variants exist.
By keeping the magnet cool throughout the process, you can minimize this risk and preserve its magnetic strength.
Alternative Methods and Considerations
While drilling is a common method, other approaches might be suitable depending on the magnet type, desired hole size, and available tools.
Water Jet Cutting
This is a professional method that uses a high-pressure stream of water (often mixed with an abrasive) to cut through materials. It generates very little heat and can produce precise holes without risking magnetism or causing brittleness. However, it requires specialized industrial equipment and is not usually accessible for DIY projects.
Laser Cutting
Similar to water jet cutting, laser cutting can create precise holes. However, the intense heat from a laser can be a significant concern for demagnetization, particularly with sensitive magnets like neodymium. Specific laser parameters and cooling would be required, making it a specialized technique.
External Resource: The risks associated with heat and magnetism are complex. For a deeper understanding of magnetic materials and their properties, exploring resources from institutions like the National Institute of Standards and Technology (NIST) Materials Science Division archives can offer valuable insights, though many resources are technical.
Using Pre-Drilled Magnets
The simplest solution for many projects is to purchase magnets that already have holes drilled in them. These are readily available from many online specialty magnet suppliers and reduce the risk and effort involved.
Table: Magnet Type vs. Drilling Difficulty and Bit Recommendation
Here’s a quick comparison to help inform your approach:
| Magnet Type | Drilling Difficulty | Risk of Demagnetization/Cracking | Recommended Drill Bits | Coolant/Lubricant | General Approach |
|---|---|---|---|---|---|
| Ceramic (Ferrite) | Moderate | Moderate (primarily from heat/pressure) | Carbide-tipped masonry bits, Diamond-tipped bits | Water | Slow speed, light pressure, frequent cooling |
| Neodymium (NdFeB) | High | High (heat, pressure, dropping) | Diamond-tipped bits (essential) | Water, specialized cutting fluid | Very slow speed, extremely light pressure, constant cooling, careful handling |
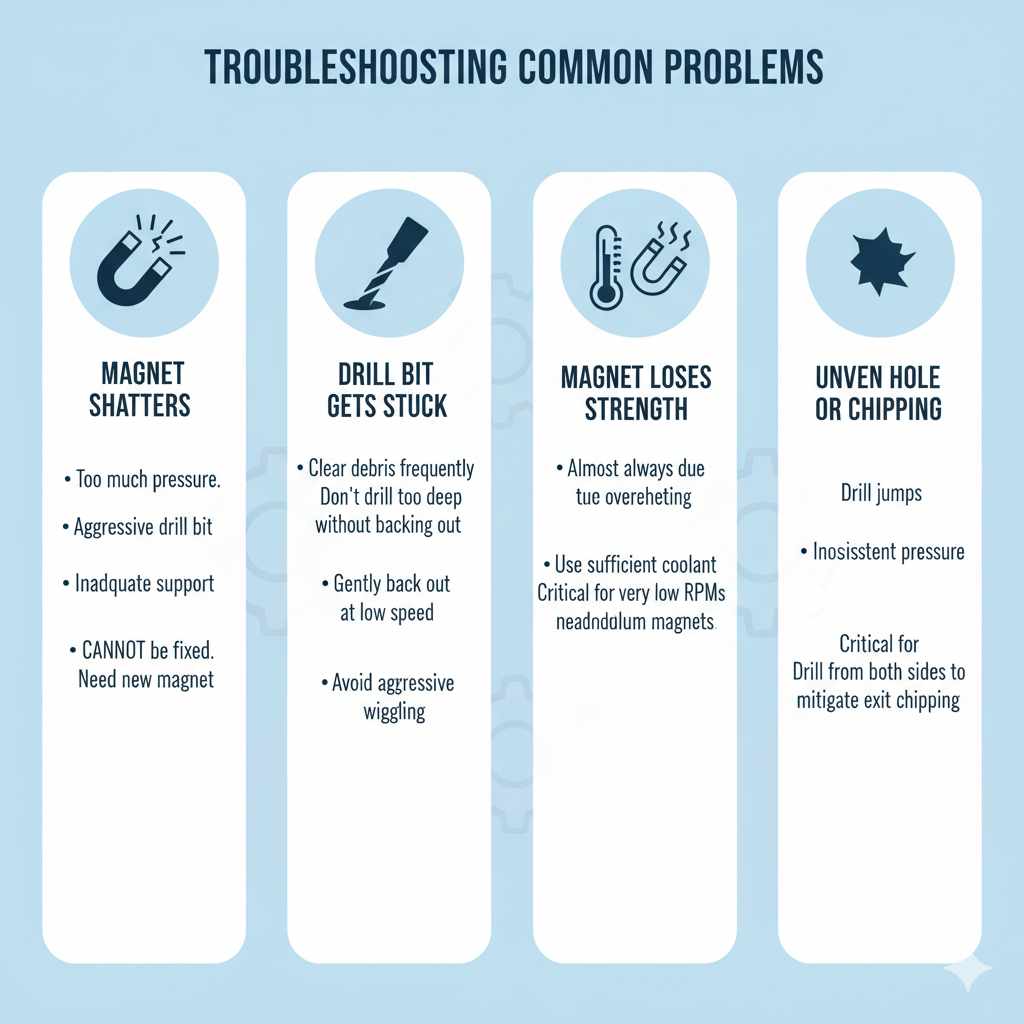
Troubleshooting Common Problems
Even with the best preparation, things can sometimes go awry. Here are a few common issues and how to address them:
- Magnet Shatters: This usually means too much pressure was applied, the drill bit was too aggressive, or the magnet wasn’t adequately supported. Unfortunately, if a magnet shatters, it cannot be “fixed.” You’ll need a new magnet. Learn from the experience and apply even gentler techniques next time.
- Drill Bit Gets Stuck: Ensure you are clearing debris frequently and not drilling too deep without backing out. If it gets stuck, try to gently back it out at low speed. Avoid wiggling the drill aggressively.
- Magnet Loses Strength: This is almost always due to overheating. Ensure you are using sufficient coolant and drilling at very low RPMs. For small, weak magnets, this might be less of a concern, but for powerful neodymium magnets, it’s critical.
- Uneven Hole or Chipping: This can happen if the drill jumps or if pressure is inconsistent. Trying to drill from both sides can often mitigate exit chipping.
FAQ: Drilling Magnets
Q1: Can I use a regular drill bit to drill through a magnet?
A1: No, standard steel drill bits are not recommended. They will dull quickly and can cause the magnet to shatter. You need specialized bits like carbide-tipped or diamond-tipped bits.
Q2: How do I prevent a neodymium magnet from cracking?
A2: The key is to use a diamond-tipped drill bit, drill at very slow speeds, apply minimal pressure, and keep the magnet constantly cooled with water or a cutting fluid. Avoid any sudden shocks or impacts.
Q3: Will drilling permanently weaken the magnet?
A3: If done correctly with proper cooling, the magnetic strength should remain largely unaffected. However, excessive heat generated during drilling can cause irreversible demagnetization.
Q4: Is it safe to drill magnets?
A4: With proper safety equipment (especially eye protection) and careful handling, it is safe. Neodymium magnets are powerful and can pinch fingers, so caution is needed when securing them. Always wear safety glasses to protect from flying fragments.
Q5: What’s the best way to hold a magnet while drilling?
A5: Never hold a magnet by hand. Use clamps or a vice with soft jaws to secure it firmly to your workbench. For very strong magnets, consider using additional magnets to aid in clamping, but be extremely careful of pinching.
Q6: Can I drill through any kind of magnet?
A6: You can drill through most common types like ceramic and neodymium, but the difficulty and risk vary greatly. Very rare or specialized magnets might have specific properties that make them un-drillable with standard DIY methods.
Q7: What if I don’t have a drill press?
A7: You can use a handheld variable-speed drill. Set it to its lowest speed, use a steady hand, and try to keep the drill as vertical as possible. Securing the magnet and material is even more critical with a handheld drill.