Can You Epoxy Over Wood? Proper Prep Guide (Step-by-Step)
Yes, you can epoxy over wood, and the finish’s success comes down almost entirely to prep: the right sanding progression, matching your technique to whether the wood is porous, dense, or oily, and using a thin seal coat before the final pour. Skip the seal coat specifically and you’ll likely fight bubbles the whole project, no matter how careful your mixing is.
Here’s the full process: picking an epoxy type, prepping different wood species correctly, the seal-coat technique most beginner guides skip, mixing and pouring without trapping air, and the real skin-contact safety risk that builds with repeated exposure.

Choosing the Right Epoxy
Best Table Top Epoxy
 |
TotalBoat Table Top Epoxy Resin, 1-Gallon Kit – $59.99 A self-leveling, UV-resistant 1:1 mix epoxy rated for pours up to about 1/4 inch (deeper in small molds), sized right for coating a tabletop, charcuterie board, or bar top over properly prepped wood.
|
Table top epoxy and deep-pour (casting) epoxy are not interchangeable. Table top formulas are built for thin coats, typically up to about a quarter inch per pour, and self-level into a smooth, glassy surface. Deep-pour epoxy cures more slowly and generates less heat per pour, which lets you fill a river-table gap or a thick mold an inch or more deep without the resin overheating, clouding, or cracking. Using a table top formula for a deep pour (or vice versa) is one of the most common reasons a DIY epoxy project fails, so match the product to the pour depth first.
Prepping Different Wood Types
- Porous woods (pine, fir, cedar): Absorb epoxy readily, which is exactly what causes bubbles as trapped air works its way out through the resin. A seal coat (below) is close to mandatory here.
- Dense woods (maple, walnut, oak): Absorb less, so they need less seal-coat insurance, but still need a full sand-and-clean pass — don’t skip prep just because the wood is dense.
- Oily woods (teak, rosewood): Natural oils in the wood interfere with epoxy adhesion. Wipe the surface with a solvent like acetone or naphtha immediately before applying epoxy to cut through the oil at the surface; test on scrap first, since some finishes react differently.
Sanding and Cleaning
Sand with the grain through a progression: 80-120 grit to remove any old finish and level the surface, 150-180 grit to erase the scratches the first pass left, then 220-320 grit as the final pass before epoxy. Vacuum and wipe with a tack cloth after sanding — any dust left on the surface ends up suspended in your finish. If the wood has any oil, wax, or old finish residue, wipe it down with denatured alcohol before moving on. A random orbital sander speeds up this whole progression on a large tabletop — see our sheet sander vs. random orbital comparison if you don’t already have one.
The Seal Coat: The Step Most Guides Skip
This is the single technique that separates a bubble-free finish from a frustrating one, and it’s different from “sealing the wood with a sealer product.” A seal coat is a thin layer of the epoxy itself, brushed on with a foam or bristle brush over your final-sanded wood. Because it’s thin, it soaks into the wood’s pores and lets the air trapped in those pores escape upward through the thin layer instead of getting stuck under a thick pour later. Let the seal coat sit until it’s tacky, commonly around 4 hours depending on the product and room temperature, then pour your thicker flood coat on top while the seal coat is still slightly sticky so the two layers bond as one piece rather than as two separate layers.

Mixing and Pouring the Flood Coat
Measure resin and hardener to the exact ratio the manufacturer specifies (commonly 1:1 by volume for table top epoxy) — guessing the ratio is a common cause of a soft or tacky cure that never fully hardens. Mix slowly for the full time the instructions call for, scraping the sides and bottom of the container, since unmixed resin clinging to the container walls will stay soft in the final pour. Pour steadily rather than all at once, and use a heat gun or small torch passed lightly over the surface to pop bubbles while the epoxy is still workable — once it starts to gel, trapped bubbles are there to stay.
Curing Conditions
Cure in a warm (not hot), dry, dust-free space, and keep the piece level the entire time — epoxy stays self-leveling only while it’s still liquid, so an unlevel surface during cure means a permanently unlevel finish. Cover the piece loosely to keep dust off without trapping heat or moisture underneath. Follow the manufacturer’s stated cure time before handling, and their full cure time (often several days longer than the “tack-free” time) before heavy use.
Skin Contact Safety: A Risk That Builds Over Time
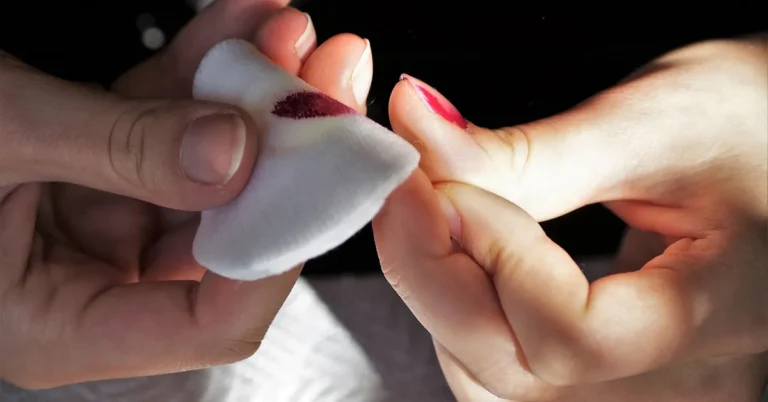
Uncured epoxy resin and, especially, the amine-based hardener are real skin and eye irritants, and repeated skin contact carries a genuine risk most casual guides skip: allergic sensitization. The first few times epoxy touches your skin, you might see no reaction at all — but sensitization builds with cumulative exposure, and once you’re sensitized, even brief future contact can trigger a rash, swelling, or a more serious reaction. This is exactly why the safety warnings printed on epoxy product labels aren’t boilerplate. Wear nitrile gloves rather than latex (nitrile holds up better against resin and hardener), wear safety glasses, work in a ventilated space, and wash any skin contact off immediately with soap and water instead of waiting.
Sanding, Polishing, and UV Protection
If the cured surface needs leveling or has minor imperfections, wet-sand starting around 220 grit and work up through progressively finer grits (up to 3000 grit for a glass-clear polish), then buff with a polishing compound for the final shine. For anything that will see sunlight, use a UV-resistant epoxy from the start and consider a UV-protective topcoat — standard epoxy yellows with UV exposure regardless of how well you applied it, so this isn’t a workmanship problem to sand your way out of after the fact.
Frequently Asked Questions
Can I Use Any Type Of Wood For Epoxy?
Most woods work, but they behave differently. Porous woods like pine need a seal coat to prevent air bubbles, oily woods like teak or rosewood need a solvent wipe-down first so the epoxy can actually bond, and dense woods like maple or walnut generally need the least prep beyond sanding and cleaning.
What Is An Epoxy Seal Coat And Do I Really Need One?
A seal coat is a thin first layer of epoxy, not a separate sealer product, brushed over sanded wood and left to become tacky (commonly around 4 hours) before you pour the thicker flood coat on top. It fills the wood’s pores so trapped air escapes through the thin layer instead of getting stuck under a thick pour, which is the single most effective way to prevent bubbles on porous wood.
How Do I Remove Air Bubbles From Epoxy?
Pass a heat gun or small kitchen torch lightly over the wet surface, which thins the epoxy just enough for trapped air to rise and pop; a toothpick works for a few stubborn bubbles. Do this within the epoxy’s open working time, since bubbles can’t escape once it starts to gel.
Is Epoxy Resin Safe To Work With?
Uncured epoxy resin and hardener are skin and eye irritants, and repeated skin contact can cause an allergic sensitization that gets worse with each future exposure, not better. Wear nitrile gloves (not latex) and safety glasses, work in a ventilated area, and wash any skin contact immediately rather than waiting until you’re done for the day.
How Do I Protect Epoxy From UV Yellowing?
Use a UV-resistant epoxy formula to begin with, since standard epoxy will yellow with sun exposure regardless of how carefully it’s applied. A UV-protective topcoat adds further protection, and keeping the piece out of direct, prolonged sunlight slows yellowing further.
Conclusion
Epoxy goes over wood successfully when the prep matches the wood: sand through the full grit progression, wipe oily species with solvent first, and use a thin seal coat on anything porous before your final pour. Mix to the exact ratio, deal with bubbles while the epoxy is still workable, and protect your skin the whole time — sensitization is cumulative, and the label warnings on that bottle are there for a reason.
Sponsored / affiliate links. As an Amazon Associate I earn from qualifying purchases. I may earn additional commission from eligible campaigns.