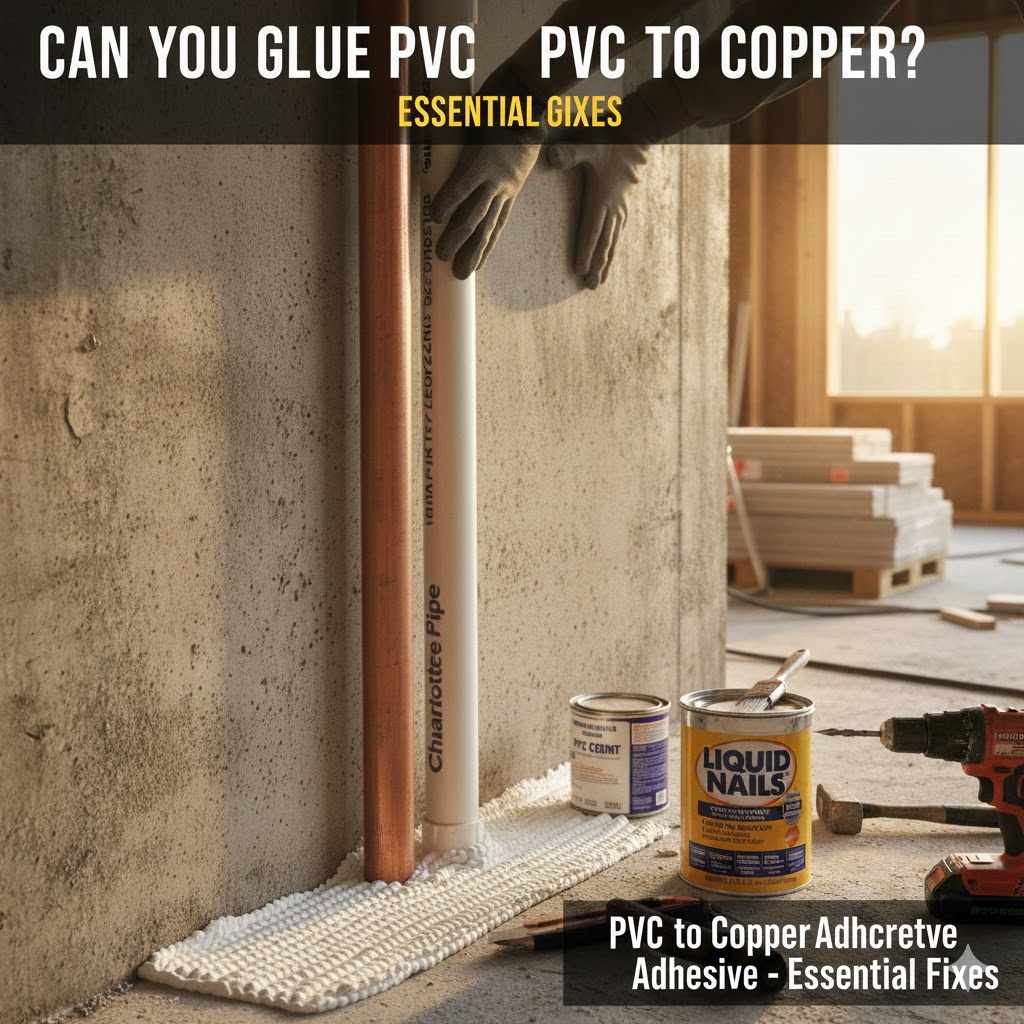
Can You Glue PVC To Copper? Essential Guide
Generally, you cannot reliably or safely glue PVC directly to copper pipe using standard PVC cement. PVC cement chemically fuses PVC to itself, not to metal like copper. A proper, leak-free transition requires specific mechanical fittings, adapters, and often soldering or professional connection methods.
Hello there! I’m Md Meraj, and I know the frustration when two different materials just won’t stick together. You have a piece of PVC pipe and a shiny copper line, and you think, “A little glue should do it, right?” Unfortunately, plumbing materials aren’t always that simple. Trying to use standard PVC cement on copper is a recipe for leaks down the road. But don’t worry! It’s a common snag, and fixing it is easy once you know the right steps. We’ll walk through exactly why plain glue fails and the tried-and-true methods to create a strong, permanent connection between PVC and copper, making your DIY project sturdy and stress-free. Let’s grab our tools and solve this puzzle together!
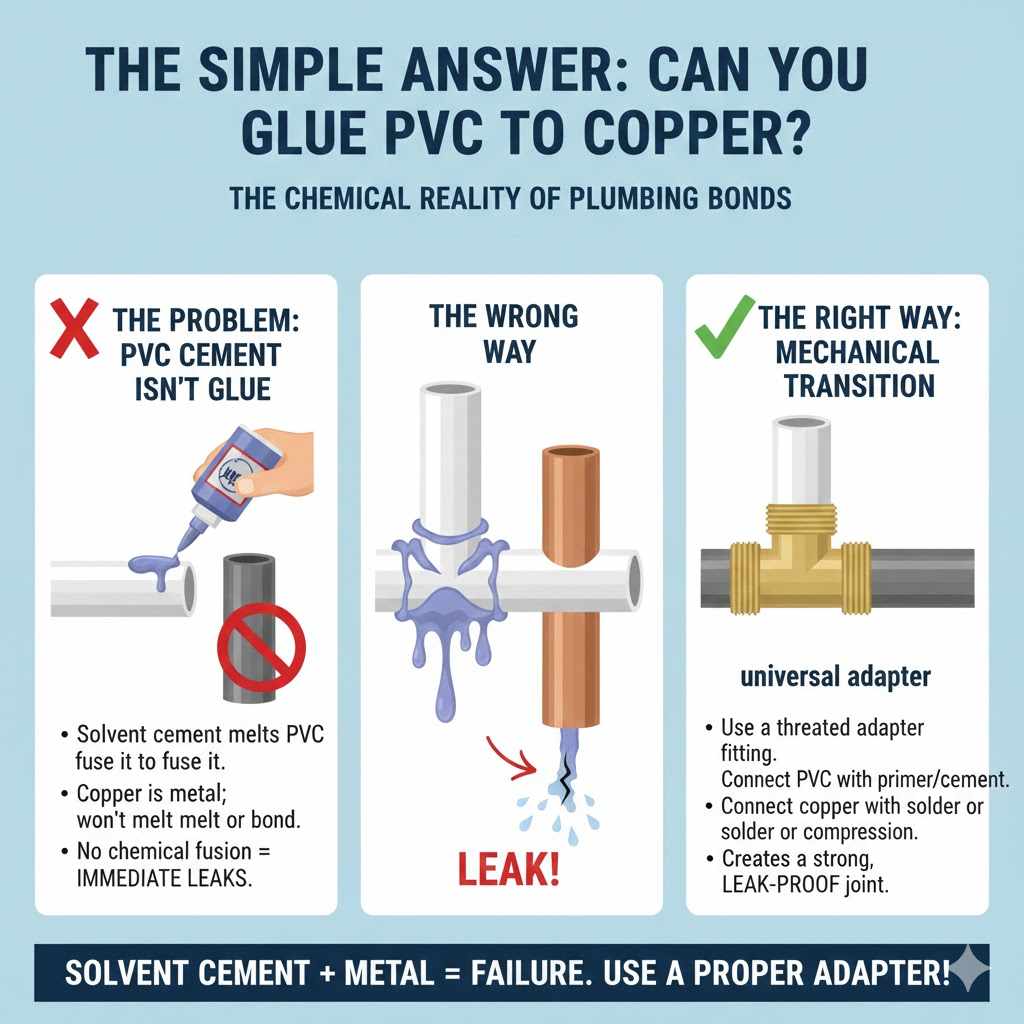
The Simple Answer: Can You Glue PVC to Copper?
The straightforward answer to “Can you glue PVC to copper?” is a resounding no, not with typical PVC cement.
When we talk about “glue” for plumbing, especially for plastic like PVC, we are usually talking about a chemical solvent cement. This cement doesn’t work like regular household superglue. Instead, it briefly melts the surface of the PVC pipe and the fitting, allowing them to fuse together into one solid piece as the solvents evaporate. This creates an incredibly strong, integrated seal.
Here’s the sticking point: Copper is metal. PVC cement has zero chemical effect on metal surfaces. If you put PVC cement on copper and then press PVC pipe against it, you’ve just applied a sticky liquid between two materials that won’t chemically bond. This connection will fail almost immediately or slowly degrade under pressure, leading to frustrating and messy leaks.
For a successful project, you need a proper mechanical transition. Think of it as needing a universal adapter rather than a single glue. We need a bridge that understands both materials.
Why Standard PVC Cement Fails on Metal Surfaces
Understanding why something doesn’t work is half the battle in DIY. Let’s break down the chemistry so you know what to avoid.
The Science of PVC Solvent Welding
PVC cement is essentially a mix of solvents (like tetrahydrofuran or MEK) and PVC resins. These chemicals work by:
- Softening the Plastic: The solvents attack the molecular structure of the PVC, making the surfaces temporarily gooey and pliable.
- Fusing the Surfaces: When pressed together, the softened plastic layers blend.
- Curing: As the solvents evaporate, the plastic hardens again, but now it’s one seamless piece of plastic, not two pieces held by glue.
Copper’s Resistance
Copper, being a dense, non-porous metal, doesn’t react to these same solvents. The solvents will sit on the copper surface without etching or softening it. You are essentially putting a weak adhesive layer between plastic and an unconditioned metal surface. It will hold for a few seconds or minutes, but water pressure and thermal expansion will push it apart easily.
The Correct Way to Join PVC to Copper: Using Transition Fittings
Since we can’t glue them directly, the trusted method involves creating a physical transition point. This means using specialized plumbing parts designed to bridge dissimilar materials. This usually involves a specific type of fitting that is compatible with both systems—often using compression, threaded connections, or specialized solvent seals.
Essential Components for a Strong Connection
Before starting, you’ll need a few specific parts. Don’t try to substitute these; they are engineered for this job. We are essentially building a secure ‘bridge.’
| Component | Purpose | Key Consideration |
|---|---|---|
| Copper-to-PVC Adapter Fitting | The bridge piece; often threaded on one end and socketed for PVC glue on the other. | Must be sized correctly (e.g., 3/4 inch connection). |
| Dielectric Union (Optional but Recommended) | Prevents galvanic corrosion when connecting dissimilar metals (though less of an issue directly between PVC and Copper). | Use if connecting to other metal pipes later in the run. |
| Pipe Thread Sealant (Teflon Tape or Pipe Dope) | Used on any threaded joints within the transition assembly for a leak-free seal. | Ensure tape wraps in the correct (tightening) direction. |
| PVC Primer and Cement | Used only for bonding the PVC side of the adapter to the PVC pipe. | Choose the correct type for the pressure/application (e.g., Schedule 40). |
Step-by-Step Guide: Transitioning PVC to Copper
This process assumes you have clean, cut pipe ends. We will create a transition point using a common slip/threaded adapter. Always verify local plumbing codes, especially for pressurized water lines (e.g., check guidelines from plumbing organizations like the International Plumbing Code).
Step 1: Prepare Both Pipes
Cleanliness is next to godliness in plumbing. A messy connection always leaks eventually.
- Copper Pipe Preparation: Use emery cloth or fine-grit sandpaper to clean the exterior surface of the copper pipe where the fitting will attach. It should be smooth and bright, free of oxidation or oils. If using a compression fitting later, you might need a deburring tool or flaring tool depending on the specific adapter chosen.
- PVC Pipe Preparation: Use a square tool or hacksaw to make a clean, square cut on the PVC pipe. Sand off any rough edges (burrs) from both the inside and outside edge of the cut pipe end.
Step 2: Select and Assemble the Transition Fitting
The goal here is to use one fitting that has a connection for PVC (usually a solvent weld socket) on one side and a connection for copper (often threaded or compression) on the other.
For our example, let’s assume a fitting that goes from PVC Solvent Weld Socket to a Female Pipe Thread (FPT).
- Dry Fit: Put the components together without glue or sealant first. Make sure everything lines up perfectly. Mark the insertion depth on the PVC pipe so you know exactly how far to push the pipe into the fitting during the actual cementing process.
- Attach the Copper Side: This side depends heavily on your adapter.
- If using a compression adapter: Slide the nuts and ferrules (or olive rings) onto the copper pipe, then secure the adapter fitting onto the copper, tightening the nut according to the manufacturer’s specifications.
- If using a threaded adapter: Wrap the copper male threads (if the adapter is female) generously with PTFE (Teflon) tape in the direction the female fitting will turn. Screw the adapter onto the copper line until snug.
Step 3: Cement the PVC Connection
This is where we use the ‘glue’ correctly—only on the PVC side!
- Apply Primer: Apply PVC primer liberally to the outside of the PVC pipe end and inside the PVC socket of the adapter fitting. The primer chemically cleans and softens the plastic. It usually leaves a purplish stain to show you covered the area.
- Apply Cement: Immediately after priming, apply a liberal, even coat of PVC cement over the primed areas. Again, coat both the outside of the pipe and the inside of the fitting socket. Don’t be stingy; a good solvent weld needs plenty of wet cement.
- Join and Twist: Quickly push the PVC pipe fully into the fitting socket (up to your dry-fit mark) while giving it a quarter-turn twist. This spreads the cement evenly. Hold the joint firmly for about 30 seconds without movement to allow the fusion process to start locking.
Step 4: Allow Curing Time
This step is critical for durability! While PVC seems instantly solid, it needs time for the solvents to completely evaporate and the weld to achieve full strength. If you turn the water on too soon, pressure will blow out the joint.
- For small, non-pressurized applications, allow at least 1 hour.
- For standard residential water supply lines (Schedule 40), consult the specific PVC cement manufacturer’s guide, but a safe minimum is 2 hours, and often 24 hours for high-pressure applications or cold weather conditions.
Alternative: The All-Metal Transition (When Solder is Used)
In professional plumbing, especially for pressurized hot water lines or when maximizing longevity, sometimes the copper end isn’t connected via a threaded adapter but by transitioning through a mechanical fitting that is soldered directly onto the copper.
Using Sweat Fittings (Soldering)
If you are comfortable with soldering, this method offers maximum strength on the copper side before meeting the transition piece.
- Solder a standard brass or bronze fitting (like a coupling or adapter) directly onto the copper pipe using lead-free solder and flux.
- This soldered fitting is often one that has NPT (National Pipe Thread) connections, allowing you to screw in a threaded adapter (like a ‘Male Adapter’) that then connects to your PVC system using Teflon tape.
Safety Note: Soldering involves open flame and high heat. Always have a fire extinguisher nearby, keep flammable materials away, and ensure the copper pipe is completely drained and dry before heating. Never solder near PVC, as melting PVC releases toxic fumes.
Understanding Galvanic Corrosion: A Quick Lesson
When you connect two different types of metal (like copper and steel/iron) in the presence of an electrolyte (like water), they can corrode quickly. This is called galvanic corrosion. While PVC isn’t a metal, transitions often involve small amounts of dissimilar metals in the adapter itself (e.g., brass or galvanized components).
For Copper-to-PVC transitions, the primary concern is usually the durability of the connection itself, not galvanic corrosion on the copper. However, if your copper line is connected to an older galvanized steel service line, that section needs special care. Using a specialized dielectric union between the copper and any steel/iron part prevents this corrosion by inserting a non-conductive barrier.
For the specific Copper-to-PVC link, the reliance on specialized plastic-bodied adapters or high-quality brass/bronze fittings minimizes the risk compared to direct metal-to-metal contact, but good quality components are always key to a long-lasting fix.
PVC to Copper Quick Reference: What Glue to Use?
Since this is such a common question, let’s be explicit about what products belong where in this connection process. You will never use one single ‘glue’ for the entire transition.
| Pipe Material | Connection Type | Required Product |
|---|---|---|
| PVC to Adapter (Plastic Side) | Solvent Weld | PVC Primer and PVC Solvent Cement |
| Copper to Adapter (Threaded Connection) | Threaded Seal | PTFE (Teflon) Tape or Pipe Dope |
| Copper to Adapter (Compression Connection) | Mechanical Seal | Friction fit (No chemicals needed on the pipe itself) |
| Copper to Adapter (Soldered Connection) | Metal Fusion | Plumbing Flux and Lead-Free Solder |
Tips for Maximum Connection Strength and Longevity
We want your repair or new installation to last years, not months. Here are a few extra pointers from the workshop that ensure durability.
- Check Pressure Ratings: Make sure the PVC fittings you buy (e.g., Schedule 40 or Schedule 80) are rated for the water pressure in your home. Copper plumbing systems often operate at higher pressures than non-pressure PVC drain lines. If you are connecting into a pressure line, you must use pressure-rated PVC parts.
- Support the Joints: Pipes shouldn’t put stress on fittings. Support both the PVC and the copper lines near the transition point with appropriate pipe hangers or supports. Excessive weight or bending at the connection spot will compromise the seal over time, even with the right fittings.
- Temperature Matters: When applying PVC cement, cooler temperatures mean slower curing. If you are working in a very cold area, extend your cure time significantly, perhaps doubling the recommended minimum. PVC glue cures much slower below 40°F (4°C).
- Inspect the Adapters: Ensure the adapter you use is certified for potable water use if this is for drinking water supply. Look for NSF/ANSI certifications. Resources like the EPA often detail standards for plumbing materials that affect water safety (though specific standards might require professional consultation).
Remember, the success lies entirely in using the right intermediary fitting. You are not gluing plastic to metal; you are creating a durable, leak-proof bridge between two different worlds!

Frequently Asked Questions (FAQ) for Beginners
Q1: Can I use epoxy putty or construction adhesive instead of proper fittings?
A: While strong epoxy can sometimes hold for a short time, it is not recommended for plumbing where pressure or constant moisture is involved. Plumbing systems rely on engineered fittings for reliable sealing. Epoxy will likely fail under standard household water pressure or temperature changes.
Q2: Do I need to clean the copper even if I’m using a threaded connection?
A: Yes, absolutely! Even for a threaded connection, you must clean the copper pipe so the Teflon tape or pipe dope can seal effectively against a clean surface. Dirt and oil prevent these sealants from making a perfect barrier.
Q3: What if I only have PVC drain pipes (DWV) and copper supply lines? Can I still connect them?
A: Be very careful. Drain-Waste-Vent (DWV) fittings are generally not rated for pressure. You must transition from the pressure-rated copper to a pressure-rated PVC adapter (like Schedule 40 or pressure-rated CPVC adapter if necessary) before using standard PVC pipe downstream if the pressure is higher than standard atmospheric drain pressure.
Q4: How long should I wait before turning the water on after cementing the PVC joint?
A: This depends on the cement type and temperature, but as a rule of thumb for indoor, moderate-temperature work, wait at least 2 hours. For maximum safety, especially outdoors or in cold conditions, wait 24 hours. Always check the label on your cement can.
Q5: What if my copper pipe is old and oxidized?
A: If the copper is heavily scaled or brittle, a threaded or compression fitting might not grab securely. For old, weak copper, it’s best to cut back to the nearest point where the copper is strong and clean, and use a proper fitting there. Sometimes, replacing the failed section of copper with a small section of new copper tube that can be properly sweated or connected compression-style is the best route.
Q6: Is there any specific adhesive rated to glue plastic directly to metal?
A: There are heavy-duty industrial adhesives and some specialized “All-Purpose” or “Plumbing Repair Epoxies” that claim metal-to-plastic bonding. However, even these are often less reliable than using the industry-standard mechanical transition fittings, especially for concealed or high-stress applications like water supply.
Conclusion: Building Confidence in Transitions
Learning how to transition between PVC and copper might seem like a confusing hurdle when you first look at your materials. But as we’ve seen, the reason you can’t just “glue” them together is purely chemical. It’s not a lack of trying; it’s about respecting how different materials work.
By utilizing the correct Copper-to-PVC transition adapter, supported by Teflon tape for threads and professional PVC primer and cement for the plastic side, you are building a connection that plumbing professionals trust. Remember the steps: clean both surfaces well, use the right tools for the specific joint (solder, thread sealant, or cement), and always, always allow sufficient cure time before testing your work.
You now have the knowledge to confidently tackle any joint where these two popular piping materials meet. Get those parts, follow the steps carefully, and you’ll finish your project with sturdy, leak-free results that you installed yourself. Happy building, and here’s to solid craftsmanship!