Tongue and Groove Composite Decking: Install Rules, Colors, Cons
Tongue and groove composite decking locks each board into its neighbor, so TimberTech’s Advanced PVC porch boards leave minimal gaps and hide their screws. But they are porch flooring, not a waterproof roof: joists must sit no more than 16 inches apart and slope 1/4 inch per foot. This guide covers colors, sizes, installation rules, screw counts, and when grooved deck boards fit better.
What Is Tongue and Groove Composite Decking?
Best Porch Board Screw Pick | |
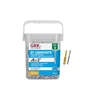 |
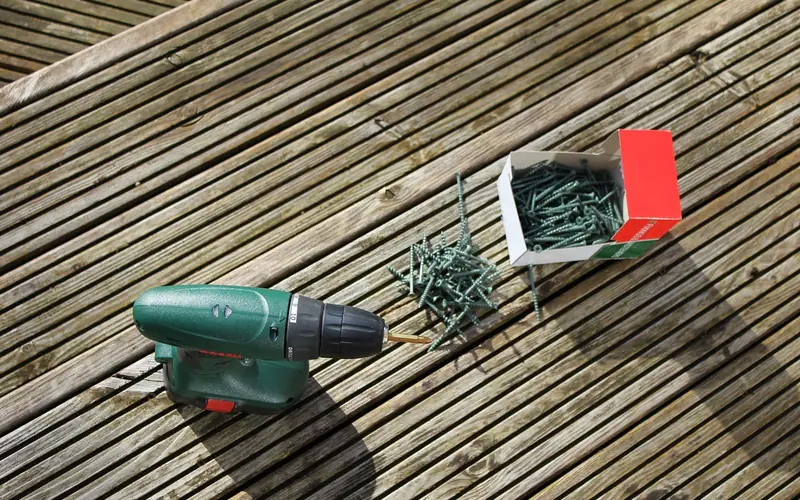
GRK RT Composite #8 x 2″ 305 Stainless Trim Head Screws (600 Count), $135.90 A 2-inch, 305 stainless trim head screw is the kind of fastener TimberTech’s porch guide names as its minimum, which makes this tub a straightforward match for the screw-count table below.
|
As an Amazon Associate we earn from qualifying purchases.
Tongue and groove composite decking is a board with a raised tongue on one long edge and a matching slot on the other, so each plank slides over its neighbor and the seam stays tight. The best-known version is the TimberTech Advanced PVC Porch collection, which TimberTech describes as an interlocking tongue-and-groove connection made with about 60% recycled material and no wood fibers.
It is easy to confuse with two other composite board styles, and the difference decides how the boards are fastened and how water leaves the surface.
| Board style | How it is fastened | Surface gaps | Best fit |
|---|---|---|---|
| Tongue and groove porch board | Screws driven through the tongue, hidden by the next board | Minimal | Porch floors and covered patios |
| Grooved deck board | Hidden clips in grooves along both edges (TimberTech grooved boards) | Standard board gap stays open | Open decks that need drainage between boards |
| Square-shoulder deck board | Visible top screws, or hidden fasteners with plugs | Standard board gap stays open | Stairs, borders, and picture frames |
Several older guides, including the previous version of this one, describe TimberTech’s porch boards as clip-fastened. TimberTech’s own porch install guide says otherwise: you drive a fastener through the tongue at each joist, and the next board’s groove covers it. Hidden clips belong to the grooved deck boards. If you are still comparing options, our guide to grooved, smooth, and grained deck boards shows how those surfaces differ.
TimberTech Porch Board Sizes, Colors and Specs
TimberTech’s product page lists the porch line as one-inch-thick boards in two widths, with a slightly different color range for each. Lengths vary by color and width, so confirm with a dealer before you plan your seams.
| Spec | Standard width | Wide |
|---|---|---|
| Thickness | 1 inch | 1 inch |
| Width | 3.13 inches | 5.5 inches |
| Listed lengths | 10, 12 and 16 feet (varies by color) | 10, 12 and 16 feet (varies by color) |
| Colors | Coastline, Cypress, Dark Hickory, English Walnut, Mahogany, Oyster, Weathered Teak, Slate Gray | Coastline, Cypress, Dark Hickory, English Walnut, Mahogany, Weathered Teak |
| Fire note | Listed as WUI (Wildland Urban Interface) compliant | Listed as WUI compliant |
That is eight standard-width colors and six wide ones, more than the six some older articles list. TimberTech also lists a 50-year fade and stain limited warranty and a lifetime limited product warranty for the line. Warranty terms carry conditions, including following the install guide, so read the current document before you buy. For a side-by-side look at the full TimberTech range, see our TimberTech decking colors comparison.
Installation Rules That Decide Whether the Floor Lasts
Most tongue and groove problems are framing problems. These are the requirements from the manufacturer’s porch install guide, which is worth downloading and reading in full before you cut a board.
| Item | What the TimberTech guide says |
|---|---|
| Joist spacing | Never more than 16 inches on center; 12 inches if you want a stiffer feel or run boards at 45 degrees |
| Blocking | Solid wood blocking between joists in rows every 4 to 6 feet at most |
| Slope | Joists pitched 1/4 inch per foot away from the house |
| Fasteners | Minimum #7 x 2 inch 305 stainless trim head screws; 316 stainless near salt water |
| Screw depth | Seat each screw about 1/16 inch below the surface above the tongue so the next board can seat fully |
| Board ends | Fasten within 1/2 inch of each end or joint; stagger splices; do not scarf-cut butt joints |
| Sealants | No caulk or adhesive in the tongue and groove |
| Overhang | Do not cantilever more than 1/2 inch |
| Existing porch | Boards cannot be installed on top of an existing porch surface |
Three of those lines are easy to miss. First, the guide says the boards are not intended to be waterproof and should not be used in any waterproof application, so a tight seam does not turn the floor into a roof for a finished room below. Second, the substructure must be fixed to the building or footings, never floating. Third, the boards are one-sided, with the embossed grain facing up.
The guide lists screws and, for pneumatic nailers, 2 inch stainless cleat nails, yet it also carries a general warning against nailing, so ask TimberTech before using a nailer. It also asks for a fine-toothed carbide blade of at least 60 teeth and says not to use cordless saws because chipping will occur. For the cut ends that show at the edge, see how to finish the ends of composite decking.
How to install the boards, in order
- Check the frame: Confirm joists are 16 inches on center or closer, in plane on a string line, and blocked.
- Set the starting board: Place the grooved edge against the house, screw down through the board near the groove, then screw through the tongue at every joist.
- Seat the next board: Slide its groove over the tongue with light pressure, never a hammer blow.
- Fasten through the tongue: Drive a screw at each joist, slightly countersunk so the following board closes tightly.
- Stagger the seams: Keep butt joints off the same joist from row to row and screw within 1/2 inch of each end.
- Finish the last board: Remove the tongue or rip the board to width, then face-screw or toe-screw it along the outer edge.
How Many Screws Does a Tongue and Groove Porch Need?
With one screw per board at every joist, the count follows from board width and joist spacing. These figures are our own arithmetic for 16 inch spacing, assuming the board face covers its full listed width, and they ignore waste and the extra screws at the starting and last boards. They include 10% spare. For a deeper look at fastener choices, see our guide to composite decking fasteners and spacing.
| Porch area | Standard 3.13 inch boards | Wide 5.5 inch boards |
|---|---|---|
| 100 sq ft | about 320 screws | about 180 screws |
| 200 sq ft | about 630 screws | about 360 screws |
| 300 sq ft | about 950 screws | about 540 screws |
A 600-count tub therefore covers roughly 190 sq ft of standard-width boards or 330 sq ft of wide boards. Because the face width of an interlocking board is a little less than its listed width, real counts run slightly higher, so buy a margin.
Pros and Cons of Tongue and Groove Composite Decking
What it does well
- Smooth, continuous surface: minimal gaps suit bare feet, furniture legs, and a floor-like look.
- Hidden fasteners: screws sit in the tongue, so the field of the floor shows no screw heads.
- No wood fibers: TimberTech’s porch line is all polymer, so the board itself has no wood to absorb moisture.
Where it falls short
- Not waterproof: TimberTech says so directly, so plan drainage and a separate waterproofing system if there is living space below.
- Tight framing demands: 16 inch maximum joist spacing and blocking add framing work.
- Heat: TimberTech notes all decking gets hot in the sun, and darker colors feel hotter. Our look at composite decking heat resistance covers surface temperatures.
- Awkward repairs: because every board interlocks with both neighbors, replacing one in the middle usually means cutting it out. This is our inference from the design, not a manufacturer statement.
- Surface care: the guide warns that rubber or vinyl mats can discolor the boards and that masonry dust or construction debris can damage the finish.
Tongue and Groove vs Grooved Boards for an Open Deck
An open deck with no roof needs water to leave through the surface or the seams, which is the case for grooved boards with a normal gap. Our recommendation is a simple split: choose tongue and groove for a porch floor you want to look continuous, and choose grooved boards with hidden clips for a freestanding deck. Trex sells grooved and square-edge Lineage boards that use its Hideaway clip system, and publishes its own porch flooring guide, so follow whichever brand’s instructions match the boards you buy. If you are weighing brands, our composite decking brand comparison lines up price and warranty.
If you plan a covered patio, the same advice applies to a roof, and our notes on how slippery composite gets when wet help you judge the surface. Stair treads follow separate rules: TimberTech’s guide says to set stringers at 10 inches on center to meet the AC174 requirement, and to check local code.
FAQs
Can you use tongue and groove composite decking on an open deck?
TimberTech’s product page does not limit the porch boards to covered areas, but its install guide says they are not intended to be waterproof and must sit on joists sloped 1/4 inch per foot. For an open deck, grooved boards with a normal gap drain more freely, so many builders prefer them.
Can you install tongue and groove composite decking over plywood?
Not according to TimberTech’s porch guide, which says the boards cannot be installed on top of an existing porch surface and must be supported by joists no more than 16 inches on center. Call TimberTech if your situation is unusual.
Do you glue or caulk the tongue and groove joint?
No. TimberTech’s guide says caulks, adhesives, and similar products should not be used in the tongue and groove areas. The boards are held by screws through the tongue, not by sealant.
What screws should you use for tongue and groove composite decking?
TimberTech’s guide names a minimum of #7 x 2 inch 305 stainless trim head screws, and suggests 316 stainless for salt water coastal installs. Seat each screw about 1/16 inch below the surface so the next board closes fully.
How far apart should joists be for tongue and groove composite decking?
No more than 16 inches on center. TimberTech says 12 inches gives a more rigid feel and is required if you run boards at a 45 degree angle. Add solid blocking every 4 to 6 feet.
Tongue and groove composite decking rewards careful framing more than careful shopping: get the joists, slope, and fasteners right and the seamless look follows. Before you order, confirm board lengths and warranty terms on the TimberTech porch page and read the full install guide.
Sponsored / affiliate links. As an Amazon Associate I earn from qualifying purchases. I may earn additional commission from eligible campaigns.
 SuperStructuring Plugs for Decking - 1/4" Trex Composite Decking Wood Plugs, Weather-Resistant, UV Protection, Hole Covers for Outdoor Home Improvement & Repair - Enhance Naturals Foggy Wharf, 100-PcSuperStructuring Plugs for Decking - 1/4" Trex Composite Decking Wood Plugs, Weather-Resistant, UV Protection, Hole Covers for Outdoor Home Improvement & Repair - Transcend Tiki Torch, 100-Pc