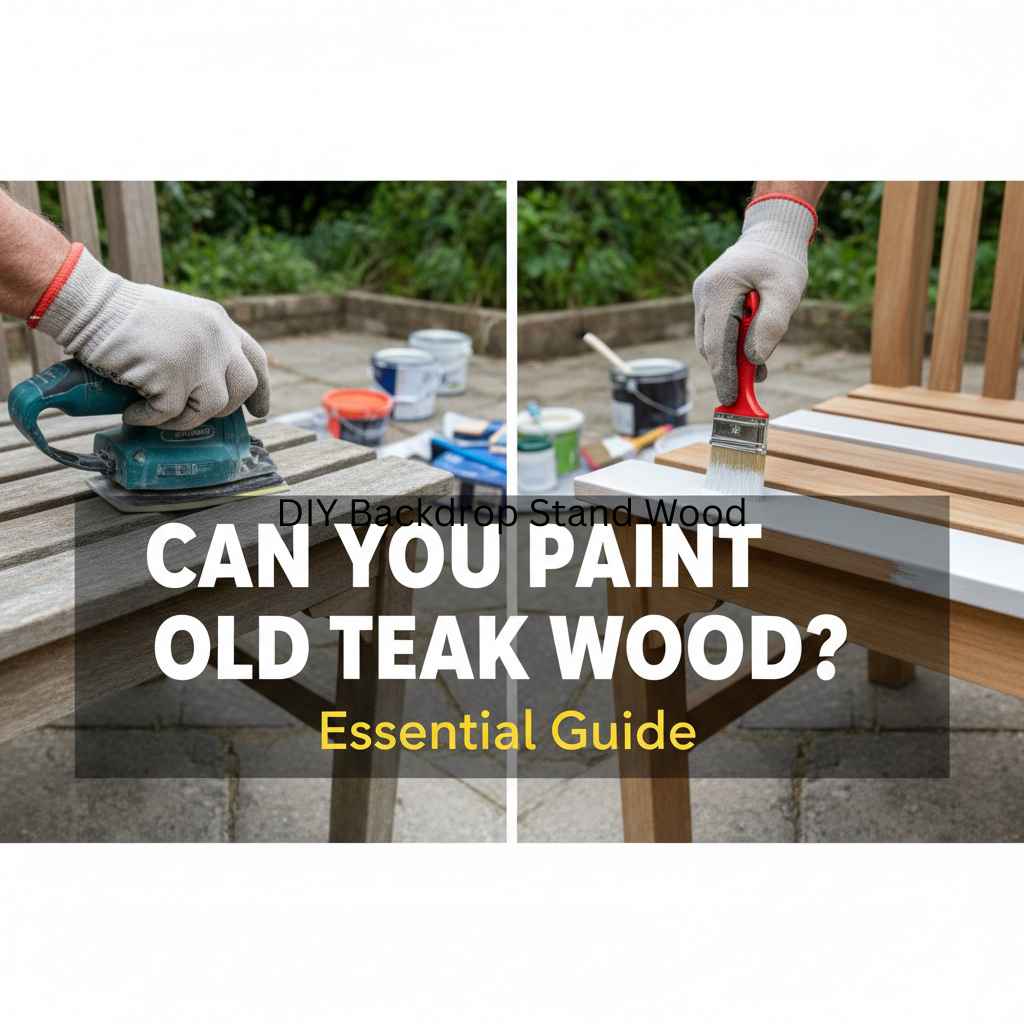
Can You Paint Old Teak Wood: Essential Guide
Yes, you absolutely can paint old teak wood! With the right preparation and paint, you can give your aged teak furniture a stunning new look, even in vibrant colors. This guide will walk you through the simple steps to achieve a beautiful, lasting finish.
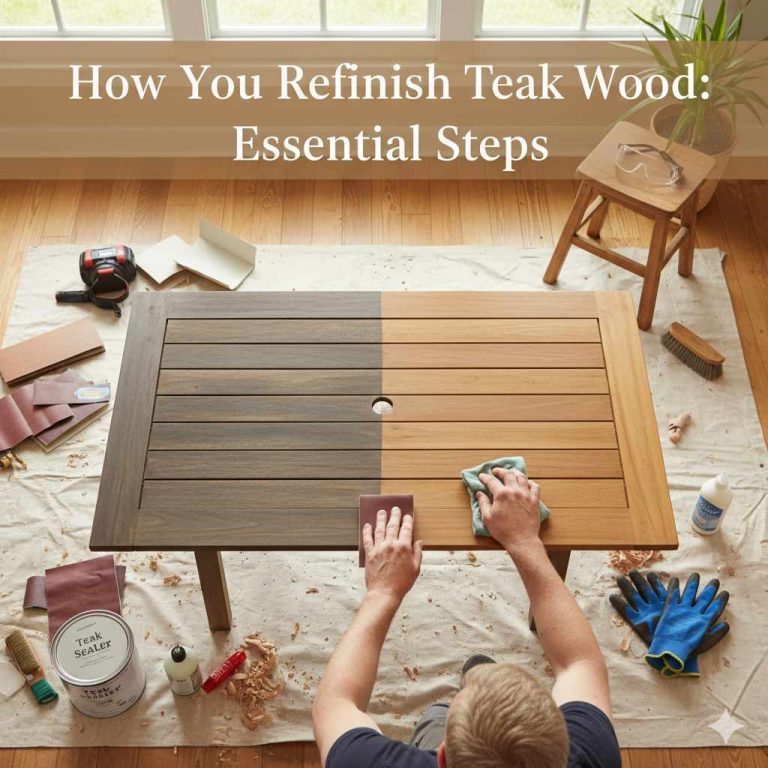
That old teak bench or table might be looking a bit tired, perhaps faded by the sun or showing its age. You might be wondering if it’s even worth the effort to refresh it, or if painting is even an option for such a fine wood. Many of you have asked, “Can you paint old teak wood?” The good news is, yes, you can! Teak is a durable wood, and with a few straightforward steps, you can transform its appearance. We’ll guide you through preparing the wood, choosing the right paint, and applying it for a finish that looks amazing and lasts. You’ll be surprised at how easy it is to give your beloved teak pieces a brand-new life, even in those lovely bright colors you’ve been dreaming of!
Why Paint Old Teak Wood?
Teak wood is renowned for its natural beauty and durability. However, over time, exposure to the elements can cause it to fade, become discolored, or develop a dull, gray patina. This doesn’t mean the wood is ruined! Painting is a fantastic way to:
- Revitalize Appearance: Bring back color and vibrancy to faded teak furniture.
- Protect the Wood: Add an extra layer of protection against UV rays, moisture, and wear.
- Match Decor: Seamlessly integrate your teak pieces with your home or garden’s aesthetic, especially with bold color choices.
- Cover Imperfections: Hide minor surface scratches, stains, or discoloration that can’t be easily sanded out.
- Personalize Your Items: Express your style by choosing unique colors that stand out.
If you’ve seen beautiful teak patio furniture painted in cheerful yellows, deep blues, or crisp whites, you’ll know the transformative power of a good paint job. Don’t let your old teak pieces languish; a coat of paint might be just what they need!
Is Painting Teak the Best Option?
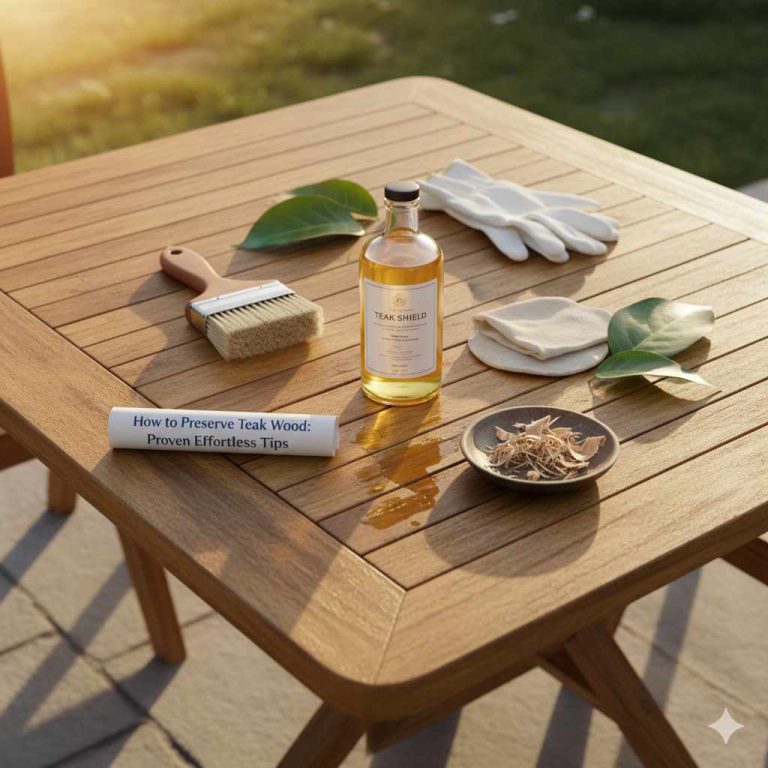
Before diving into painting, it’s worth considering if it’s the right choice for your specific teak item and your goals. Teak’s natural oils make it resistant to rot and water, which is why it’s so popular for outdoor furniture. Paint can preserve these qualities while offering a decorative finish.
When painting is a great idea:
- The teak is already faded and you don’t necessarily want to maintain its natural look.
- You want to cover up minor damage or discoloration.
- You’re aiming for a specific color scheme that the natural wood can’t provide.
- The piece is going to be exposed to harsh elements and needs an extra protective layer.
When you might reconsider:
- The teak is in excellent condition, and you love its natural grain and golden hue. In this case, a good oil or sealant might be better.
- You want a very low-maintenance finish. Painted surfaces can sometimes chip or peel if not maintained, whereas oiled teak is often easier to touch up.
Essential Supplies for Painting Old Teak Wood
Gathering the right tools and materials is key to a smooth painting process. Here’s what you’ll need:
Tools:
- Safety glasses
- Gloves
- Dust mask
- Scrub brushes (stiff and soft)
- Sandpaper (various grits: 80, 120, 180, 220)
- Sanding block or orbital sander
- Clean cloths or rags
- Paint trays
- Paint brushes (high-quality synthetic for latex/water-based, natural bristle for oil-based)
- Paint rollers (small foam or high-density nap rollers)
- Painter’s tape
Materials:
- Mild detergent or specialized teak cleaner
- Water
- Denatured alcohol or mineral spirits (for de-glossing/cleaning)
- Wood primer (exterior-grade, stain-blocking primer is best for teak)
- Exterior-grade paint (latex, acrylic, or oil-based)
- Exterior-grade topcoat or sealant (optional, for extra durability)
Having these items ready will make the job much more efficient and enjoyable. Remember to choose a well-ventilated area for your work, especially when sanding or using strong cleaners and paints.
Step-by-Step Guide: How to Paint Old Teak Wood
Painting old teak wood might seem daunting, but breaking it down into manageable steps makes it quite achievable. Here’s how to do it right:
Step 1: Clean the Teak Thoroughly
This is arguably the most critical step for a lasting paint job. Teak can accumulate dirt, mildew, and old finishes. You need a perfectly clean surface for the primer and paint to adhere properly.
- Remove Loose Debris: Brush off any loose dirt, cobwebs, or debris with a dry cloth or a soft brush.
- Wash with Soap and Water: Mix a mild detergent with warm water. Use a scrub brush to gently scrub the entire surface of the teak. Rinse thoroughly with fresh water and allow it to dry completely. This helps remove surface grime.
- Deep Clean (If Necessary): For stubborn dirt, mold, or mildew, use a specialized teak cleaner or a solution of 1 part bleach to 3 parts water. Apply the cleaner, let it sit for a few minutes (but don’t let it dry), and scrub gently. Rinse extremely well with clean water to remove all traces of the cleaner. A good teak cleaner can be found at most marine supply stores or large hardware stores.
- Dry Completely: Allow the teak to dry thoroughly for at least 24-48 hours, especially if it has been soaked. Moisture trapped under the paint will cause problems later on.
Step 2: Sand the Surface
Sanding creates a slightly rough surface, giving the primer and paint something to grip onto. Since teak has natural oils, it’s important to get a good mechanical bond.
- Start with Coarse Grit: Begin with 80-grit sandpaper. If you’re using an orbital sander, keep it moving consistently to avoid creating divots. If sanding by hand, use a sanding block for even pressure. Sand the entire piece, ensuring you remove any remaining old finish, surface grime, or grayness.
- Move to Medium Grit: Switch to 120-grit sandpaper and sand again. This will smooth out the scratches left by the coarser grit.
- Fine Sanding: Finish with 180 or 220-grit sandpaper for a smooth, ready-to-paint surface.
- Wipe Away Dust: After sanding, thoroughly wipe down the entire piece with a clean, slightly damp cloth to remove all dust. For stubborn dust, you can use a tack cloth. For those concerned about the lingering oils, a wipe-down with denatured alcohol or mineral spirits after sanding and dusting can help remove any remaining surface oils and ensure maximum adhesion. Let this evaporate completely.
Step 3: Apply a Quality Primer
Primer is your insurance policy for a smooth, durable paint finish. Teak’s natural oils can sometimes bleed through paint, causing discoloration. A good stain-blocking primer will prevent this.
- Choose the Right Primer: Select an exterior-grade, stain-blocking primer. Look for one specifically designed for hard, oily woods like teak.
- Apply the First Coat: Using a high-quality brush or roller, apply a thin, even coat of primer over the entire teak surface. Pay attention to edges and corners.
- Allow to Dry: Let the primer dry completely according to the manufacturer’s instructions. This is crucial for proper adhesion.
- Light Sanding (Optional but Recommended): Once dry, lightly sand the primed surface with 220-grit sandpaper. This smooths out any imperfections and ensures an even base for your paint.
- Wipe Again: Wipe away any dust with a clean cloth or tack cloth.
- Apply Second Coat (If Needed): If the primer looks patchy or if you notice any areas where oils might still bleed through, apply a second coat of primer, repeating the drying and light sanding steps.
Step 4: Apply the Paint
Now for the fun part – adding color! You can opt for classic shades or go bold with bright colors.
- Choose Exterior Paint: Select a high-quality exterior paint. Latex or acrylic paints are common choices and offer good durability and flexibility. Oil-based paints can also be used for a very hard finish, but they require different cleanup. Make sure the paint is suitable for outdoor use. For those asking “can you paint old teak wood with bright colors,” vibrant shades work just as well as neutrals, but ensure your primer and topcoat are robust enough to prevent fading from UV exposure. Reputable paint brands like Benjamin Moore or Sherwin-Williams offer excellent exterior lines.
- Mix the Paint: Stir the paint thoroughly. If you’re using multiple cans of the same color, it’s a good idea to “box” them by pouring them all into a larger container and mixing them together. This ensures color consistency across the entire project.
- Apply the First Coat: Using your chosen brush or roller, apply a thin, even coat of paint. Work in long, smooth strokes, and avoid overloading your brush. Ensure good coverage without drips.
- Allow to Dry: Let the first coat dry completely, adhering to the manufacturer’s recommended drying times.
- Light Sanding (Optional): For an ultra-smooth finish, you can lightly sand with 220-grit sandpaper after the first coat dries. This helps eliminate any tiny imperfections and ensures better adhesion for the next coat. Wipe away all dust.
- Apply Subsequent Coats: Apply at least one or two more thin, even coats of paint, allowing each to dry thoroughly. Two to three thin coats are always better than one thick coat for a durable and smooth finish.
Step 5: Apply a Topcoat (Optional but Recommended)
For added protection, especially on outdoor furniture, a clear topcoat can extend the life and vibrancy of your paint job.
- Choose a Protective Topcoat: Select an exterior-grade clear sealant or topcoat. Polyurethane or acrylic-based sealers are common choices. If you want to keep the color bright, ensure the topcoat has UV inhibitors.
- Apply Thin Coats: Apply one or two thin coats of the topcoat, following the same process as painting: brush or roll evenly, allow to dry completely between coats.
- Allow to Cure: Let the final coat cure fully before exposing the furniture to heavy use or the elements. This can take several days, so check the product instructions.
Choosing the Right Paint for Teak
The type of paint you choose significantly impacts the durability and appearance of your painted teak. Here’s a breakdown:
Paint Types:
- Latex/Acrylic Paints: These are water-based, easy to clean up, and offer good flexibility. They are a popular choice for outdoor furniture. Look for “100% Acrylic” for the best durability.
- Oil-Based Paints (Alkyd): These create a hard, durable finish. However, they can be more prone to cracking in extreme temperatures and require mineral spirits for cleanup.
- Enamels: Often oil-based, enamels provide a very hard, glossy finish. They are durable but can be less flexible than latex.
Key Considerations:
- Exterior Grade: Always select paint and primer that are specifically rated for exterior use. They are formulated to withstand UV rays, moisture, and temperature fluctuations.
- Adhesion: Teak’s natural oils can make adhesion tricky. A high-quality stain-blocking primer is essential.
- Color Retention: If you’re painting with bright colors, especially reds, blues, or yellows, be mindful of UV fading. Look for paints with good UV resistance or plan to use a clear topcoat with UV protection. A dark, rich color can sometimes hide imperfections better than very pale or very bright ones, but the preparation will make any color look great.
- Sheen: Satin or semi-gloss finishes tend to be more durable and easier to clean than flat finishes, making them ideal for furniture.
When asking “can you paint old teak wood with bright colors,” the answer is a resounding yes, but choosing a quality paint designed for exterior applications with good UV protection will be vital to keeping those colors vibrant over time.
Pros and Cons of Painting Teak Wood
Like any DIY project, painting teak has its advantages and disadvantages. Understanding these will help you make an informed decision.
Pros:
- Aesthetic Transformation: Completely change the look and feel of your teak furniture.
- Enhanced Durability: The paint and primer add a protective layer against the elements.
- Hides Imperfections: Great for covering up damage, stains, or the dull grayness of aged teak.
- Customization: Allows for personalization with a wide range of colors, including bright, bold hues.
- Cost-Effective Refresh: Often cheaper than replacing old, worn teak furniture.
Cons:
- Requires Thorough Preparation: Skipping steps like cleaning or sanding can lead to peeling or flaking.
- Maintenance: Painted surfaces may require touch-ups over time due to chips or wear.
- Can Mask Natural Beauty: Hides the unique grain and color of teak.
- Potential for Peeling/Chipping: If not properly prepped or if the wrong paint is used, the finish might not last as long as intended.
- Environmental Factors: Extreme weather can still impact the paint job over the years.
For a beginner, the key is patience and meticulous preparation. If you follow the steps carefully, the pros of painting your old teak furniture will far outweigh the cons.
Frequently Asked Questions (FAQ) About Painting Teak Wood
Q1: Can I paint over an existing teak oil or sealant?
Answer: Generally, it’s best to remove old oils or sealants before painting. Oil and sealant can prevent primer and paint from adhering properly, leading to premature failure of the finish. Thorough cleaning and thorough sanding (or even stripping) are usually required.
Q2: How do I prepare teak wood that has molded or mildewed?
Answer: Use a dedicated teak cleaner or a mild bleach solution (1 part bleach to 3 parts water). Scrub gently with a stiff brush, let it sit briefly, then rinse very thoroughly. Ensure the wood dries completely for at least 2-3 days before proceeding with sanding and priming.
Q3: What’s the best type of primer for teak?
Answer: For teak, you need an exterior-grade, stain-blocking primer. These primers are formulated to seal in the natural oils of the wood and provide an excellent base for paint adhesion. Look for products specifically designed for oily woods or outdoor applications.
Q4: Can I use spray paint on teak wood?
Answer: Yes, you can use spray paint, especially for smaller items or intricate details. Ensure you use exterior-grade spray paint and apply it in very thin, even coats. Proper surface preparation (cleaning, sanding, priming) is still essential for good adhesion and durability. Multiple thin coats are key, as is working in a well-ventilated area.
Q5: How often will I need to repaint my teak furniture?
Answer: With proper preparation and a good quality exterior paint and topcoat, your painted teak furniture could last for several years. However, this depends heavily on the climate, exposure to direct sun, and usage. Regular cleaning and periodic inspections for wear can help you address issues before they become significant, extending the paint job’s life.
Q6: My painted teak is peeling. What went wrong?
Answer: Peeling paint is almost always a sign of poor adhesion. This usually stems from inadequate cleaning (leaving dirt, grease, or mold), insufficient sanding (not creating a receptive surface for primer), or not using a stain-blocking primer suitable for oily woods like teak. Moisture trapped beneath the paint can also cause it to lift and peel.
Q7: Can you paint old teak wood with bright colors and expect them to last?
Answer: Yes, you can paint teak with bright colors. To ensure longevity and prevent fading, use a high-quality exterior paint with good UV resistance. Applying a clear exterior topcoat with UV inhibitors will further protect the vibrant color from sun damage. Proper preparation and priming are still the most critical factors for any color.