How to Cover Scratches in Wood Floors (Markers, Wax, Filler)
Color-matched wood markers close light surface scratches in under 30 seconds each, while wax fill sticks press into deeper grooves and buff flush in a couple of minutes — but neither one repairs the floor’s finish, it only hides the mark. Using the wrong product for the depth of the scratch is the #1 reason cover-up jobs look worse than the original scratch. This guide covers picking the right method by scratch depth, the exact technique for markers, wax sticks, and wood filler, and when covering isn’t enough and you actually need a repair.
Quick Answer
Cover light scratches with a color-matched wood touch-up marker (blends in seconds), medium scratches with a wax fill stick pressed in at a 45-degree angle, and deep gouges with wood filler applied with a putty knife and sealed with matching stain. All three cover the scratch cosmetically — none of them restore the floor’s original finish coating, so deep or widespread damage still needs sanding and refinishing.
Covering a Scratch vs. Repairing One — Know the Difference First
Best Scratch Cover-Up Pick
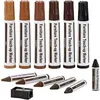
Furniture Repair Kit — 13-Piece Wood Markers & Wax Sticks
Six marker shades plus six matching wax sticks and a sharpener, covering most oak, maple, cherry, walnut, and mahogany floor tones in one kit.
- Best for: Covering both light scratches (marker) and medium scratches (wax) with one kit
- Why we picked it: Six color options cover most common floor tones without buying separate products
- Main drawback: Colors are close matches, not custom-mixed — test on a hidden spot first
Compare more scratch cover-up options
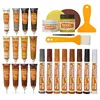 Option 1 REALINN 28-Piece Touch-Up Marker Kit
|
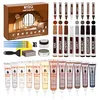 Option 2 41-Piece Laminate & Vinyl Floor Repair Kit
|
 Option 3 Guardsman Markers & Wax Filler Sticks (3 Colors) – $7.82
|
As an Amazon Associate we earn from qualifying purchases.
Most articles blur these together, but they’re not the same job. Covering a scratch means disguising it with pigment, wax, or filler so it’s not visible at a glance — the finish underneath is still compromised, it’s just camouflaged. Repairing a scratch means restoring the actual protective finish (sanding, staining, and resealing with polyurethane or wax), which is the only way to stop moisture and dirt from getting into the exposed wood.
For a single light scuff or a scratch in a low-traffic spot, covering is genuinely enough — that’s what markers and wax sticks are built for. For a deep gouge in a high-traffic hallway or a floor with a dozen visible scratches, covering is a stopgap; the finish is still open to water damage and the scratch will darken with dirt over time. If your floor needs the deeper fix, our full hardwood floor scratch repair guide walks through sanding and refinishing step by step.
Assessing the Damage: Light vs. Medium vs. Deep
Run a fingernail across the scratch before you buy or apply anything. If your nail glides over it, it’s in the finish only. If your nail catches or you can see raw wood color underneath, it’s gone deeper and needs a different product.
| Scratch Type | How to Tell | Best Cover-Up Method |
|---|---|---|
| Light Scuff | Barely visible, nail glides over it, finish only | Touch-up marker |
| Medium Scratch | Nail catches slightly, may show a thin line of raw wood | Wax fill stick |
| Deep Gouge | Nail catches hard, raw wood clearly visible, may feel rough | Wood filler + stain + sealant |
Check the scratch in daylight, not overhead lighting — artificial light flattens shadows and makes shallow scratches look deeper than they are, which leads people to over-treat a scuff that a marker would have fixed in seconds.
How to Cover Light Scratches with a Wood Touch-Up Marker
- Clean the area: Wipe the scratch and a couple inches around it with a barely damp cloth so grit doesn’t get dragged into the finish, then let it dry fully.
- Test the color first: Try the marker on a hidden spot — inside a closet or under a rug — since floor stain shades vary even within the “same” wood species.
- Apply in thin passes: Draw the marker along the scratch in one direction. Two thin passes blend better than one heavy pass — a heavy single stroke leaves a dark line that’s more obvious than the original scratch.
- Let it set, then buff: Wait about a minute, then buff gently with a soft cloth to blend the edges into the surrounding finish.
- Reapply only where needed: If the mark is still visible after buffing, add one more thin pass rather than saturating the spot.
A walnut rubbed over a light scratch on dark, oil-finished wood can work in a pinch — the nut’s natural oils darken and fill hairline marks — but it’s a temporary trick, not a lasting fix, and it doesn’t work on lighter or polyurethane-sealed floors.
Best Wood Scratch Cover-Up Kits
How to Cover Medium and Deep Scratches with a Wax Fill Stick
Wax sticks work like a crayon for your floor — they fill the groove rather than just tinting the surface, which is why they hold up better than a marker on anything a fingernail can catch on.
- Match the color: Hold the stick against a hidden section of floor in daylight — wax sticks come in narrower shade ranges than markers, so this step matters more here.
- Press at a 45-degree angle: Push the wax into the groove at an angle rather than straight down, so it compresses into the void instead of just sitting on top of it.
- Smear across both directions: Drag the wax across the gouge lengthwise, then crosswise, to fully pack the depression.
- Buff level: Use a soft cloth (or a plastic putty knife edge for stubborn spots) to scrape and buff the wax flush with the surrounding floor.
- Protect high-traffic spots: If the repair is in a walkway, a very thin top coat of matching wax polish over it helps protect the color from foot traffic.
How to Cover Deep Gouges with Wood Filler
For gouges deep enough to catch a fingernail hard or expose a visible channel of raw wood, wax alone won’t hold — it needs a filler with some structure to it.
- Choose a color-matched filler: Wood filler putty, not wood glue-based filler, holds color better under a stain coat — test the dried color on scrap or a hidden spot first, since filler often dries lighter than it looks wet.
- Pack it in: Press the filler into the gouge with a plastic putty knife, slightly overfilling since it shrinks a little as it cures.
- Sand flush: Once fully dry (check the product’s cure time — rushing this step is the most common mistake), sand level with 220-grit sandpaper, working with the grain only.
- Stain to match: Apply a wood stain marker or small-batch stain over the sanded filler to blend it with the surrounding color.
- Seal it: Finish with a thin coat of polyurethane (for polyurethane-finished floors) or wax polish (for waxed floors) so the repair is protected the same way the rest of the floor is.
Marker vs. Wax Stick vs. Wood Filler vs. Scratch-Cover Pen: Which Lasts Longest?
| Method | Best For | Typical Durability |
|---|---|---|
| Touch-up marker | Light surface scuffs | Weeks to a few months in high-traffic spots |
| Wax fill stick | Medium scratches with a felt groove | Several months before needing a touch-up |
| Wood filler + stain + sealant | Deep gouges with exposed wood | Years — it’s the closest to a true repair |
| Store-bought scratch-cover pen/oil | Multiple light scratches at once | Weeks — pigment sits on top and wears off with foot traffic |
Note the honesty gap in that table: scratch-cover pens and oils marketed specifically as “floor scratch cover” products use the same pigment-and-dye approach as a marker, just packaged differently — they hide the damage, they don’t restore the finish, and they typically wear fastest of all four methods because nothing seals the pigment in.
Common Mistakes That Make a Covered Scratch More Obvious
- Using a dark marker on a light floor “to be safe” — it stands out worse than the original scratch. Always match the exact tone, not just “close enough.”
- Skipping the color test spot. Wood tones shift with sun exposure over time, so a marker that matched the sample chip at the store may not match your actual floor.
- One heavy marker stroke instead of two thin ones. Heavy application pools ink at the edges and creates a visible dark outline.
- Applying wax or filler straight down instead of at an angle. This leaves the product sitting on top of the groove instead of packed into it, so it pops out with foot traffic.
- Skipping the sealant step on deep repairs. An unsealed filler repair absorbs moisture and dirt faster than the surrounding finish, making it darken and stand out again within weeks.
Preventing the Next Scratch
Felt pads under furniture legs, a doormat at every entrance to catch grit before it reaches the floor, and trimmed pet nails prevent most of the scratches these cover-up methods are used for in the first place — see our full wood flooring care hub for more upkeep guides. If pets are your main source of scratches, check whether your robot vacuum’s caster wheels are contributing too — it’s a more common cause than most people realize. For furniture specifically, our guide to protecting wood tables from scratches covers pad types and placement in more detail.
Frequently Asked Questions
Can I use a regular marker to cover a wood floor scratch?
No. Regular permanent markers or crayons sit on top of the finish rather than blending into it, and the ink often looks flat or too dark compared to real wood grain. Wood touch-up markers are formulated to penetrate slightly and match actual wood tone families, which is why they blend and a regular marker doesn’t.
Do scratch-cover products actually repair the floor, or just hide the scratch?
They just hide it. Scratch-cover pigments, markers, and wax sticks add color to disguise the mark, but the floor’s protective finish stays compromised underneath. For a scratch that’s exposing raw wood over a large area, covering is a short-term fix — sanding and refinishing is the only way to actually restore the finish.
How long does a wax stick or marker fix last on a wood floor?
A marker fix on a low-traffic scratch can last months; on a high-traffic walkway, expect to touch it up every few weeks. Wax stick repairs hold up longer than markers because the wax physically fills the groove rather than just tinting the surface, but neither is permanent the way a sanded-and-resealed repair is.
Will covering a scratch damage my floor’s finish further?
Not if you use products made for wood floors and test them on a hidden spot first. The real risk is using the wrong finish type — wax-based products on a polyurethane floor, for example, can leave a cloudy film. Wipe a drop of water on a hidden spot: if it beads up, you have a polyurethane finish and should stick to polyurethane-compatible markers; if it soaks in, you likely have a wax or oil finish.
What’s the actual difference between covering and repairing a scratch?
Covering adds color or filler on top of the damage so it’s less visible; repairing removes the damaged finish layer through sanding and applies a fresh matching finish underneath. Covering takes minutes and costs a few dollars; repairing a section properly can take an afternoon and, for widespread damage, is often worth handing to a flooring professional.
A single scratch rarely needs more than a marker or a wax stick — match the product to how deep the damage actually is, test the color first, and you’ll get an invisible fix in a few minutes rather than a repair project.
Sponsored / affiliate links. As an Amazon Associate I earn from qualifying purchases. I may earn additional commission from eligible campaigns.