Can You Paint Over Stain on a Deck? Proven, Essential Tips
Yes, you can absolutely paint over a stained deck, but success depends entirely on proper preparation. You must thoroughly clean, sand, and prime the surface first. Skipping these critical steps will lead to the paint peeling and failing quickly. A high-quality bonding primer is the key to ensuring the paint adheres properly to the old stain.
Hello there, fellow creator! I’m Md Meraj, and today we’re tackling one of the most common questions I hear from homeowners: can you put a coat of paint over that old, tired deck stain? Maybe the stain is faded, patchy, or you’re just ready for a fresh new color. It’s a frustrating spot to be in, but I’m here to tell you that a beautiful, painted deck is well within your reach.
Painting over stain isn’t as simple as just grabbing a brush and going for it. There’s a right way to do it that ensures your hard work lasts for years, and a wrong way that leads to peeling paint in just a few months. Don’t worry, though. I’m going to walk you through every step, from prep to the final coat, in a way that’s easy to understand. Together, we’ll get your deck looking brand new.
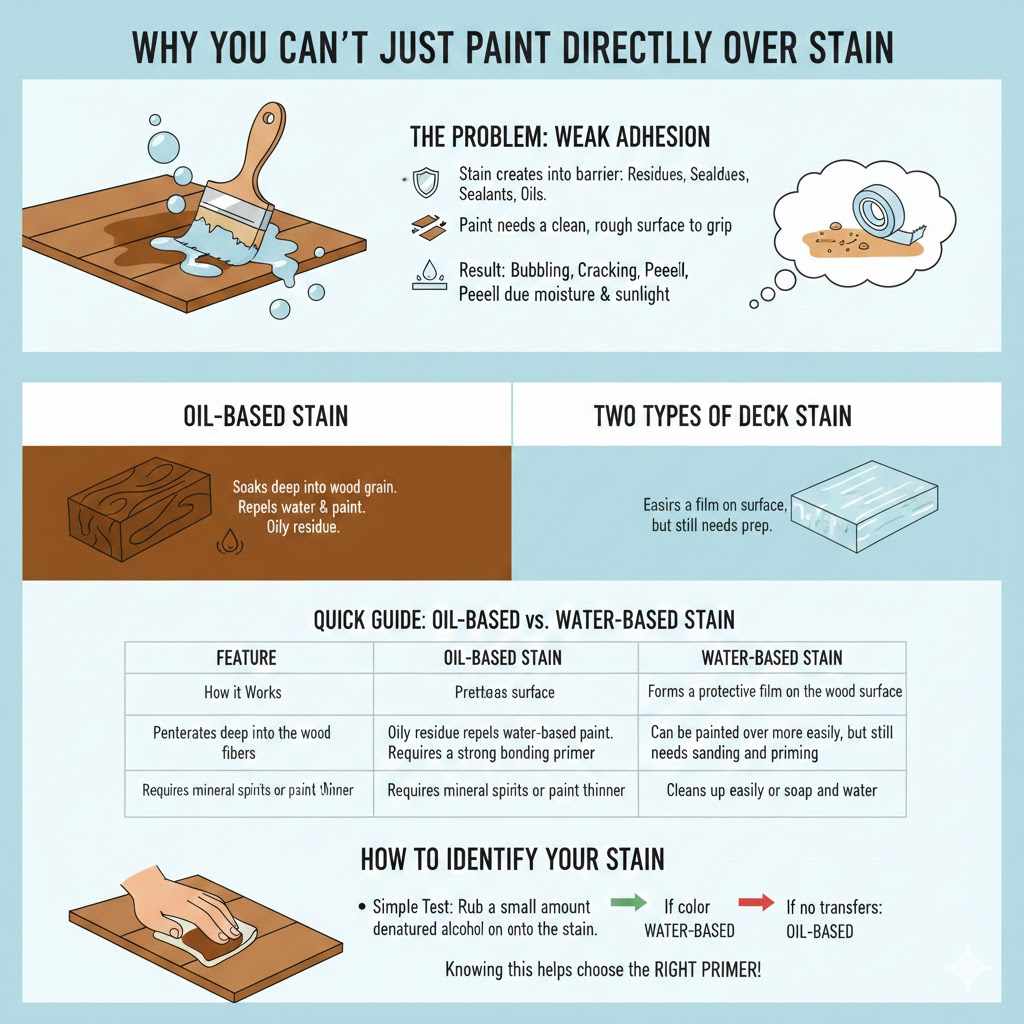
Why You Can’t Just Paint Directly Over Stain
Before we grab our tools, it’s helpful to understand why we need to do some prep work first. Think of it like trying to stick a piece of tape to a dusty or oily surface—it just won’t hold. The same principle applies to your deck.
Deck stain is designed to penetrate and protect the wood. This process leaves behind residues, sealants, and oils that create a barrier. Paint needs a clean, slightly rough surface to grip onto. If you apply paint directly over an unprepared stained surface, you’re creating a weak bond. Moisture, sunlight, and foot traffic will quickly cause the paint to bubble, crack, and peel away, revealing the old stain underneath.
The Two Types of Deck Stain: Oil vs. Water-Based
The type of stain currently on your deck is the biggest factor in how you prepare it for paint. Most deck stains are either oil-based or water-based, and they behave very differently.
- Oil-Based Stain: This type soaks deep into the wood grain. It repels water (and paint!) and can leave an oily residue on the surface, making it difficult for water-based paint to stick.
- Water-Based Stain: This type forms more of a film on the surface of the wood. While sometimes easier to paint over, it still requires proper preparation to ensure a strong bond.
Not sure what you have? Here’s a simple test. Find a small, out-of-the-way spot on your deck. Pour a small amount of denatured alcohol on a clean rag and rub the stained area. If the stain color transfers onto the rag, you likely have a water-based stain. If nothing comes off, it’s probably an oil-based stain. Knowing this will help you choose the right primer later on.
| Feature | Oil-Based Stain | Water-Based Stain |
|---|---|---|
| How it Works | Penetrates deep into the wood fibers. | Forms a protective film on the wood surface. |
| Paint Adhesion Issues | Oily residue repels water-based paint. Requires a strong bonding primer. | Can be painted over more easily, but still needs sanding and priming. |
| Cleanup | Requires mineral spirits or paint thinner. | Cleans up easily with soap and water. |
Painting vs. Re-Staining: Making the Right Choice
Painting your deck is a fantastic option for a dramatic change, but it’s not the only choice. Deciding whether to paint or apply a new coat of stain is a big decision. Let’s look at the pros and cons of each to help you feel confident in your choice.
Pros of Painting Your Deck
- Hides Imperfections: Paint is opaque, which means it creates a solid film that completely covers the wood grain. This is perfect for older decks with lots of repairs, stains, or discolored boards. It creates a clean, uniform look.
- Unlimited Color Choices: Your color palette is virtually endless! You can match your deck to your house trim, siding, or any other color you can imagine.
- Good UV Protection: A quality coat of paint provides an excellent barrier against the sun’s harsh UV rays, which can damage wood over time.
Cons of Painting Your Deck
- Hides Wood’s Natural Beauty: If you love the look of natural wood grain, paint will cover it up completely. Once a deck is painted, it’s very difficult and labor-intensive to go back to a stained finish.
- Can Trap Moisture: If the prep work isn’t done perfectly, moisture can get trapped underneath the paint film. This can lead to wood rot and decay that you can’t see until it’s a major problem.
- More Maintenance: Painted decks show dirt and scuffs more easily. They also require more upkeep. You’ll likely need to scrape, sand, and repaint high-traffic areas every few years to manage peeling or chipping.
Ultimately, the choice is yours. If your deck is older and you want a complete color transformation, painting is an excellent solution. If your wood is in great shape and you love its natural character, re-staining might be the better path.
Your Step-by-Step Guide to Painting Over Deck Stain
Ready to get to work? I knew you were! Follow these steps carefully, and you’ll end up with a beautifully painted deck that you can be proud of. Don’t rush the prep work—it accounts for about 80% of your success. Patience here pays off big time.
Step 1: Gather Your Tools and Materials
Having everything you need on hand before you start makes the whole process smoother. You won’t have to stop mid-project for a trip to the store.
- Safety Gear: Safety glasses, dust mask, and gloves are non-negotiable.
- Cleaning Supplies: A stiff-bristled brush, a bucket, a good quality deck cleaner, and a garden hose with a spray nozzle. A pressure washer is optional but very helpful (use it on a low setting!).
- Repair Tools: A hammer, a nail set, a drill/driver, and exterior-grade deck screws.
- Sanding Equipment: An orbital sander (or a pole sander for stand-up work) and 80-grit sandpaper.
- Priming & Painting Tools: A high-quality exterior bonding primer, exterior porch and floor paint, paint trays, paint brushes for cutting in, and a paint roller with an extension pole.
- Extras: Painter’s tape, plastic sheeting to protect your house siding, and wood filler for cracks.
Step 2: Inspect and Repair the Deck
Before you do anything else, give your deck a thorough inspection. A solid foundation is crucial for a lasting paint job.
- Look for Loose Boards: Walk across the entire deck and feel for any boards that move or creak. Secure them with deck screws.
- Check for Popped Nails: Hammer any raised nail heads back down below the surface using a nail set. Better yet, pull them out and replace them with screws, which hold much better.
- Find Signs of Rot: Gently poke any discolored or soft-looking spots with a screwdriver. If the wood is soft and spongy, it needs to be replaced. Painting over rotted wood will only trap moisture and make the problem worse. The U.S. Forest Service offers excellent guides on identifying and dealing with wood decay.
Step 3: A Deep and Thorough Cleaning
Now it’s time to get rid of all the dirt, grime, mildew, and loose stain that could prevent your primer from sticking. A clean deck is a happy deck!
Start by sweeping the deck clear of all leaves and debris. Then, mix your deck cleaner according to the manufacturer’s instructions. Apply the cleaner generously and use a stiff brush to scrub the entire surface, paying extra attention to stubborn spots and areas with mildew. For tough jobs, a pressure washer can be a huge help, but be careful! Use a low-pressure setting (around 1200-1500 PSI) and a fan tip, keeping the nozzle at least a foot away from the wood to avoid damaging the fibers.
Rinse the deck thoroughly with your garden hose until all the suds and residue are gone. Then comes the hardest part: waiting. The deck must be completely dry before you move on to sanding. This can take 24-48 hours, depending on the weather. Patience is key here; sanding or painting on damp wood is a recipe for disaster.
Step 4: Sanding for a Perfect Grip
Sanding is the most important step for ensuring your paint will last. I can’t stress this enough. The goal isn’t to remove all the old stain but to scuff up the surface and remove any remaining loose stain particles. This creates a microscopic texture that the primer can grab onto, like millions of tiny little hands.
Using an orbital sander with 80-grit sandpaper, go over every surface of the deck—the floorboards, railings, and steps. You’re looking for a uniformly dull, slightly rough finish. You don’t need to press hard; let the sander do the work. Once you’re done sanding, sweep or vacuum away all the dust. A final wipe with a damp cloth can help pick up any lingering particles.
Step 5: Applying the Right Primer
Primer is the magic bridge that connects the old stained surface to your new coat of paint. It seals in any remaining stain residue and creates the ideal surface for the paint to bond to. Do not skip this step!
So, what kind of primer should you use?
| If Your Old Stain Is… | The Best Primer to Use Is… | Why It Works |
|---|---|---|
| Oil-Based | An exterior oil-based bonding primer or a high-adhesion shellac-based primer. | These primers are formulated to block stains and stick aggressively to slick, oily surfaces where water-based primers might fail. |
| Water-Based | A high-quality acrylic (water-based) exterior bonding primer. | This will bond well with the old water-based finish and provide an excellent base for your new water-based paint. |
| Unknown/Unsure | An oil-based stain-blocking bonding primer is your safest bet. | It will work over both oil and water-based stains, offering the best chance for long-term adhesion. |
Using a brush, “cut in” all the edges and hard-to-reach areas first. This includes the gaps between boards and around railing posts. Then, use a roller on an extension pole to apply a thin, even coat of primer to the flat surfaces. Don’t apply it too thick, as this can lead to peeling. Let the primer dry completely according to the manufacturer’s instructions—this could be a few hours or a full day.
Step 6: It’s Time to Paint!
You’ve made it to the fun part! All that careful prep is about to pay off. For your paint, choose a high-quality exterior paint designed specifically for porches and floors. These paints are formulated to withstand foot traffic and tough weather conditions. Both acrylic latex and oil-based options are available, but modern acrylic paints offer great durability with easier cleanup.
Just like with the primer, start by cutting in the edges with a brush. Then, use your roller to apply a thin, even coat to the main deck boards. Work in small sections, always maintaining a “wet edge” to avoid lap marks. The goal is two thin coats, not one thick one. A thick coat of paint is more likely to peel and will take much longer to cure properly.
Allow the first coat to dry completely before applying the second. Check the paint can for recommended recoat times. After the second coat is on, stay off the deck for at least 24-48 hours. The paint may feel dry to the touch sooner, but it needs several days to fully cure and harden. Avoid placing heavy furniture on it for at least a week.
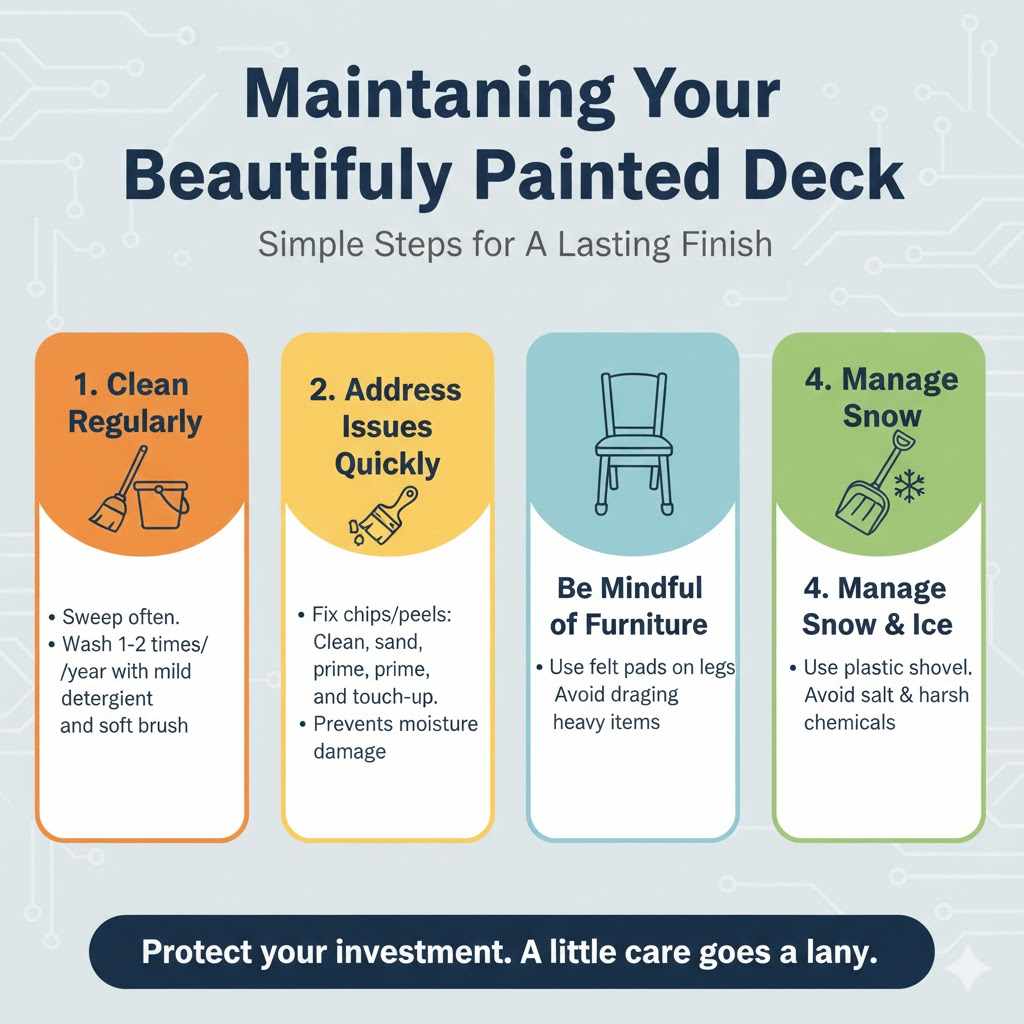
Maintaining Your Beautifully Painted Deck
Congratulations, your deck looks amazing! Now, let’s keep it that way. A little regular maintenance goes a long way in extending the life of your new paint job.
- Clean Regularly: Sweep your deck often to prevent dirt and debris from grinding into the paint. Wash it once or twice a year with a mild detergent and a soft-bristled brush.
- Address Issues Quickly: If you notice a small chip or peel, don’t ignore it. Clean the area, lightly sand the edges, prime, and apply a touch-up coat of paint right away. This prevents moisture from getting under the paint and causing more widespread failure.
- Be Mindful of Furniture: Use felt pads on the legs of chairs and tables to prevent scratches. Avoid dragging heavy items across the surface.
- Manage Snow and Ice: Use a plastic shovel to clear snow in the winter to avoid gouging the paint. Avoid using salt or harsh chemical de-icers, as they can damage the paint finish. For more information on safe de-icing, the Environmental Protection Agency (EPA) offers helpful tips.
Frequently Asked Questions (FAQ)
1. Do I really have to sand the deck before painting?
Yes, absolutely. Sanding is the single most important preparation step. It roughs up the surface of the old stain, removing any loose finish and creating a texture for the primer to grip onto. Without sanding, your paint is almost guaranteed to peel within a year.
2. What kind of paint is best for a deck?
The best paint is a high-quality acrylic latex “Porch & Floor” paint. These products are specifically designed to be durable, flexible, and resistant to foot traffic, UV rays, and moisture. They offer great performance with easy, water-based cleanup.
3. How long will a painted deck last?
With proper preparation and high-quality materials, a painted deck can last 3-5 years before needing significant touch-ups or a new coat. High-traffic areas may show wear sooner. The key to longevity is cleaning it regularly and touching up any chips or peels as soon as you see them.
4. What happens if I paint over a wet deck?
Painting over a wet or even slightly damp deck is a critical mistake. The moisture gets trapped underneath the paint film, preventing it from adhering to the wood. This will cause widespread blistering, bubbling, and peeling as the moisture tries to escape.
5. Can I use a pressure washer to remove all the old stain instead of sanding?
While a pressure washer is great for cleaning, it’s not a substitute for sanding. It can remove some loose, flaking stain, but it won’t create the uniform, microscopic roughness that is essential for primer adhesion. Using a pressure washer with too much force can also damage the wood fibers, leaving your deck looking fuzzy.
6. Can I use a paint-and-primer-in-one product?
For this specific project, I strongly recommend using a separate, dedicated bonding primer. “Paint-and-primer-in-one” products are great for many applications, but they aren’t formulated for the tough job of sticking to an old, weathered deck stain. A separate stain-blocking, bonding primer will give you a much more reliable and long-lasting result.
7. Is there a way to paint a deck without it being slippery?
Yes! Many paint manufacturers offer an anti-slip additive that you can mix directly into your final coat of paint. This is usually a fine grit, like sand, that creates a textured surface, providing more traction when the deck is wet. It’s an excellent safety feature, especially for steps.
Final Thoughts From the Workshop
Painting over a stained deck is a project that you can absolutely conquer. It’s not about having fancy tools or professional skills; it’s about patience and a commitment to doing the prep work right. By cleaning, repairing, sanding, and priming properly, you are creating the perfect foundation for a beautiful finish that will stand the test of time.
Think of each step as an investment in the final result. A few extra hours spent on preparation can save you days of scraping and repainting down the road. You have the ability to transform your outdoor space, and this guide gives you the roadmap to do it with confidence. So roll up your sleeves, put on some music, and get ready to enjoy a deck that looks brand new—all because you took the time to do it right. Happy building!