How Many Coats of Pre-Stain Conditioner? (1 vs. 2, Explained)
Most wood needs just one coat of pre-stain conditioner. Minwax’s own instructions call for exactly one application before staining, with a second coat only on end grain or extremely porous spots. Wait too long after conditioning and the wood’s pores start closing back up: stain applied more than 2 hours later often goes on blotchy. This guide covers coat counts by wood type, drying windows, and the mistakes that ruin an otherwise good conditioning job.
How Many Coats of Pre-Stain Conditioner Do You Need by Wood Type?
One coat is the standard recommendation on the label of every major pre-stain conditioner, including Minwax’s oil-based formula, and it’s enough for most projects. This is one piece of a full wood finishing process, and how much benefit you actually get from the conditioning coat depends heavily on the wood species.
| Wood Type | Coats Needed | Why |
|---|---|---|
| Pine, fir, spruce (soft, porous) | 1 (2 on end grain) | Absorbs stain unevenly; the most blotch-prone group |
| Birch, maple, aspen | 1 | Tight, closed grain that still blotches despite being a hardwood |
| Oak, walnut, cherry (open-grain hardwood) | Usually none, or one thin partial coat | Already absorbs fairly evenly; a full coat can wash out the stain color |
| MDF and plywood (factory face) | Skip the face; 1 coat on raw cut edges only | The factory veneer resists blotching; the exposed edge is the porous part |
If you’re unsure which category your board falls into, test on an offcut first. Apply one coat, let it penetrate, wipe off the excess, then brush on a small patch of your actual stain. If the color looks even, one coat is doing its job.
Best Pre-Stain Conditioner Pick
 |
Minwax Pre-Stain Wood Conditioner (Oil-Based) The same conditioner referenced throughout this guide; evens out absorption on pine, fir, birch, and other blotch-prone softwoods before an oil-based stain.
|
As an Amazon Associate we earn from qualifying purchases.
How to Apply Pre-Stain Conditioner in 4 Steps
- Sand and de-dust first: work up to at least 150 to 180 grit, then remove every trace of dust with a tack cloth or shop vacuum. Conditioner applied over sanding dust just seals that dust into the surface. Some woodworkers water-pop the grain at this stage instead of using conditioner; pick one method, not both.
- Stir well, don’t shake: stir the can thoroughly so the light-bodied oil is fully mixed. Shaking whips in air bubbles that can leave tiny craters once the finish dries.
- Apply a generous, even coat with the grain: brush or wipe it on following the direction of the wood grain, covering the whole surface in one pass rather than working in small patches that dry unevenly relative to each other.
- Wipe off excess and time your stain: let it penetrate 5 to 15 minutes, wipe off every bit of standing liquid with a clean cloth, then start staining within the 2-hour window covered below.
How Long Should Pre-Stain Conditioner Dry Before You Stain?
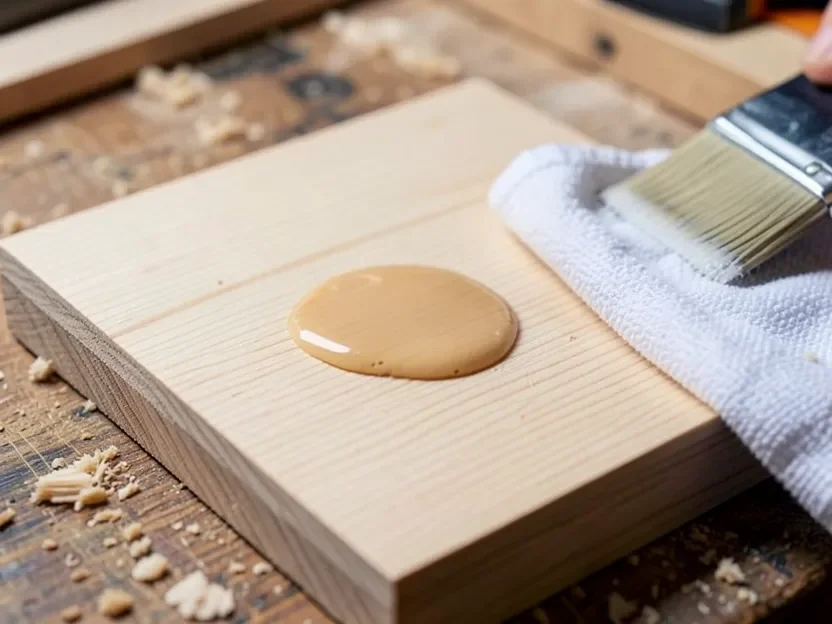
Let the conditioner penetrate for 5 to 15 minutes, then wipe off the excess with a clean, dry cloth so no puddled liquid sits on the surface. From there, you’re on the clock.
“Apply stain within 2 hours of Pre-Stain Wood Conditioner.”
Source: Minwax, official product application instructions
That 2-hour window matters more than most guides mention. Wood conditioner works by temporarily filling the wood’s pores with a light, fast-evaporating oil so stain pigment can’t sink in unevenly. Once too much of that oil evaporates, the pores start opening back up, and staining hours later defeats the reason you conditioned the wood in the first place. On a hot, dry day in the shop, that window can close even faster than 2 hours, so plan to condition and stain in the same session rather than conditioning a batch of boards in the morning and staining in the evening. Once you’re within that window, the next question is usually how many coats of stain to actually apply on top.
Do End Grain and Highly Porous Wood Need Extra Coats?
Yes. End grain (the exposed cut ends of a board, where you’re looking at the tree’s growth rings rather than the face grain) drinks up far more stain than the flat faces, which is why chair legs, table edges, and the ends of shelves so often turn almost black compared to the rest of the piece.
- Apply a second coat on end grain specifically: condition the whole piece once, then go back and add a second, lighter coat only on the cut ends.
- Watch knots and glue lines the same way: resinous knots and areas near glue squeeze-out absorb conditioner (and stain) differently than clean, straight grain, so an extra light pass helps those spots blend in.
- Don’t add a second coat across the whole board “just in case”: over-conditioning a flat face makes stain color look washed out and pale, which is the opposite problem from blotching.
What Happens If You Apply Too Many Coats?
Extra coats of conditioner past what a spot actually needs cause two separate problems, not just one.
First, the wood becomes over-saturated with oil, so it can no longer absorb stain pigment properly. The result is a lighter, flatter, sometimes patchy color, even though your goal was an even finish. Second, if the excess conditioner isn’t fully wiped off before it starts to set, it leaves a thin, slightly sticky film on the surface. Stain applied over that film can bead up, look streaky, or take noticeably longer to dry because it’s curing on top of unabsorbed oil instead of bare wood.
If you’ve already over-conditioned a section, wipe it down hard with a clean cloth (and a little mineral spirits for oil-based products) to pull out as much of the excess oil as you can before moving on to stain.
Oil-Based vs. Water-Based Pre-Stain Conditioner: Does the Coat Count Change?
Coat count stays the same (one coat, two on end grain) regardless of base type. What changes is timing, cleanup, and which stain you’re allowed to pair it with.
| Type | Working/Dry Time | Pair With | Cleanup |
|---|---|---|---|
| Oil-based | Penetrate 5 to 15 min; stain within 2 hours | Oil-based stains only | Mineral spirits |
| Water-based | Dries faster, typically 30 min or less | Water-based stains only | Soap and water |
That pairing rule trips people up more than the coat count does: an oil-based conditioner under a water-based stain (or the reverse) can prevent the stain from bonding evenly, since the two products aren’t formulated to interact. Match the conditioner’s base to the stain’s base before you buy either one. If your project needs more than one coat of the stain itself, remember that sanding between those stain coats is a separate step from anything covered here.
Common Mistakes That Ruin a Pre-Stain Conditioner Job
- Skipping the sanding step first. Conditioner applied over mill marks or rough sanding scratches just seals those flaws in place; sand through at least 150 to 180 grit before conditioning.
- Staining before the conditioner has penetrated. Rushing the 5 to 15 minute window doesn’t let the oil do its job, so blotching still shows through.
- Waiting past the 2-hour window. As covered above, this is the single most common reason people report the conditioner “didn’t work.”
- Mixing oil-based and water-based products. Conditioner and stain need to be the same base type.
- Skipping a test patch. The only reliable way to know if your specific board and stain combination needs one coat or two is to test on an offcut of the same wood.
Frequently Asked Questions
How many coats of pre-stain conditioner do you need?
One coat, applied to the whole piece. Add a second, lighter coat only on end grain or unusually porous spots like knots. Manufacturers including Minwax specify one coat as the standard recommendation for their pre-stain conditioners.
Can you skip pre-stain conditioner altogether?
Yes, but expect more blotching on soft or porous woods like pine, fir, and birch. On tighter-grained hardwoods such as oak or walnut, skipping it is common practice and rarely causes a problem.
Can you apply stain the next day, or does pre-stain conditioner expire before then?
No, don’t wait until the next day. Manufacturer instructions call for staining within 2 hours of conditioning, not because the product “expires” but because the wood’s pores gradually close back up as the conditioner’s carrier oil evaporates. If more than a few hours pass, re-condition the wood before staining.
Does pre-stain conditioner work on MDF or plywood?
Not on the factory face, which is already sealed and doesn’t absorb stain the way raw wood does. It’s still worth a light coat on any raw cut edges of MDF or plywood, since those exposed edges are far more porous than the veneer face and are the parts most likely to blotch or over-darken.
Getting the coat count right is a small step, but it’s the one that decides whether your stain goes on smooth or blotchy. One coat, wiped clean within 15 minutes and stained within 2 hours, covers the vast majority of projects; the only real exception is a second light pass on end grain and knots. Once the stain itself has dried, the next decision is whether you need to seal it to protect that finish long-term.
Sponsored / affiliate links. As an Amazon Associate I earn from qualifying purchases. I may earn additional commission from eligible campaigns.