Can You Refinish 1.5 mm Engineered Hardwood? A Detailed Guide
Thinking about refreshing your floors? You might wonder, Can You Refinish 1.5 mm Engineered Hardwood? It’s a common question, especially for those new to home improvement. The thin wear layer can seem like a hurdle. Don’t worry, though! This post will explore the ins and outs, making it super easy to grasp. We’ll guide you step by step, showing you what to look for and how to decide. Get ready to learn about your flooring options and find the best path for your project!
What is 1.5 mm Engineered Hardwood?
Engineered hardwood is a clever blend of real wood and layers of other materials. The top layer, called the wear layer, is the actual wood you see and walk on. Beneath that, there are layers of plywood or high-density fiberboard (HDF). This construction gives engineered hardwood several advantages. It’s often more stable than solid hardwood, meaning it’s less likely to warp or buckle with changes in temperature and humidity. It is also usually easier to install and can be a more budget-friendly choice.
The wear layer is key to how long your floor lasts and whether it can be refinished. A 1.5 mm wear layer is relatively thin compared to the thicker layers found on some engineered wood. This thinner top layer means that you have a limited number of refinishing opportunities. Refinishing removes a bit of the wood each time, so you want to ensure there is enough wear layer remaining to withstand the process. The composition of engineered hardwood allows for a beautiful wood look without the downsides of solid hardwood.
Wear Layer Explained
The wear layer is the visible, top layer of engineered hardwood flooring. This is the portion of the floor that takes the brunt of daily use, including foot traffic, scratches, and spills. It is made of real hardwood, and the thickness of this layer is a major factor in determining the floor’s durability, lifespan, and ability to be refinished. Different types of hardwood are used for wear layers, each impacting appearance and longevity.
When selecting engineered hardwood, the wear layer thickness is a critical detail. Thicker wear layers are more durable and can be refinished more often. They also provide a more authentic hardwood feel and appearance. Thinner wear layers, like the 1.5 mm option, may be more affordable but offer fewer opportunities to refinish. The choice depends on the specific needs of the living space and the desired longevity of the flooring.
- Durability: A thicker wear layer, usually 3 mm or more, offers greater durability against scratches, dents, and general wear. Thinner layers, such as 1.5 mm, are less resilient.
- Refinishing Potential: The primary determinant of whether a floor can be refinished is the thickness of the wear layer. Thicker layers can be refinished multiple times, while thinner layers may only permit one refinishing or none.
- Appearance: The type of wood used in the wear layer affects the floor’s overall look. Different wood species have different grain patterns and colors, which will impact the room’s aesthetic.
- Cost: Generally, floors with thicker wear layers are more expensive. While thinner layers may save money upfront, they may result in earlier replacement costs.
Construction of Engineered Hardwood
Engineered hardwood is made by bonding together multiple layers of wood. The top layer, the wear layer, is a thin slice of real hardwood. Underneath this, there are typically multiple layers of plywood or high-density fiberboard (HDF). These core layers are designed to provide stability and resist warping. This layered construction makes engineered wood less susceptible to changes in humidity and temperature than solid hardwood.
The core layers are crucial to the overall performance of the floor. They are often made with cross-directional grain patterns, increasing the board’s dimensional stability. This means the boards are less likely to expand or contract, reducing the risk of gaps or buckling. Adhesives bind the layers, and the quality of the adhesive significantly influences the floor’s longevity. Different manufacturing processes may be employed to maximize stability and durability.
- Top Wear Layer: Made from real hardwood. It is the visible surface, determining the floor’s appearance and how well it wears.
- Core Layers: Usually constructed from layers of plywood or HDF. These layers provide structural support and stability.
- Backing Layer: This layer, at the bottom, can be another layer of wood or a moisture barrier. It helps to balance the construction and prevent moisture from damaging the floor.
- Adhesives: High-quality adhesives are essential for bonding the layers together and ensuring the structural integrity of the flooring.
Can You Refinish 1.5 mm Engineered Hardwood? The Answer
The short answer is: possibly, but it’s a delicate situation. Whether you Can You Refinish 1.5 mm Engineered Hardwood? depends heavily on a few key factors. The condition of the floor, the type of finish applied originally, and your goals all matter. The thin wear layer is a key consideration. The thinness means only a small amount of sanding is possible. Careful assessment is required before deciding to refinish.
Refinishing removes a small layer of the wood. With a 1.5 mm wear layer, you have very little room for error. The floor’s current condition also plays a big part. Deep scratches, dents, or excessive wear might mean the wear layer is too damaged to withstand refinishing. If the floor has significant damage, replacement might be the best route. Consider the cost of refinishing versus replacing the floor.
Assessment of the Floor’s Condition
Before deciding to refinish, carefully examine your floor. Look for deep scratches, signs of wear, and other damage. The extent of the damage will help determine whether refinishing is even an option. If the damage is extensive, sanding might expose the core layers. The core layer is not meant to be exposed and can cause moisture issues. It can also cause the floor to deteriorate much quicker than anticipated.
Check the finish to see if it’s worn through in high-traffic areas. Use a straight edge to see if there are any uneven spots, which could indicate the wood has been worn down unevenly. If the damage is superficial, such as surface scratches, you might get away with refinishing. However, if the wear layer is thin, even light sanding might not be possible. Consider the overall appearance and function of the floor to decide if refinishing is worth it.
- Visual Inspection: Examine the floor in good lighting. Note any scratches, dents, or areas where the finish is worn away.
- Depth of Damage: Use a magnifying glass to check how deep the scratches are. Deep scratches could mean the wood beneath the wear layer is damaged.
- Evenness of Surface: Feel the surface with your hand. Are there any uneven patches or areas where the wear layer is very thin?
- Moisture Damage: Look for any signs of moisture damage, such as cupping, which can impact the floor’s structure and the refinishing process.
Factors Impacting Refinishing Feasibility
Several factors will influence the success of refinishing. The type of finish used on your floor matters. Some finishes are easier to remove and refinish than others. The condition of the floor is a major factor. The existing damage and wear impact whether sanding is even possible. The sanding process, and the equipment used, can also impact the outcome. A skilled contractor will use the right tools and techniques.
The type of wood and its density also play a role. Some wood species are softer and more susceptible to damage, making refinishing a more delicate process. The type of adhesive used to bond the layers can also matter. The quality of the adhesion can determine whether the top layer will separate during the sanding process. Ensure that you consult with a professional who can assess the condition of your floor and determine the best approach.
- Finish Type: Oil-based finishes are often easier to refinish than some water-based or UV-cured finishes.
- Damage Level: The depth and amount of damage on the wear layer is important. Deep scratches or excessive wear might make refinishing impossible.
- Wood Species: Softer woods might not withstand the sanding process as well as hardwoods.
- Sanding Techniques: The equipment and techniques used during sanding can affect how much material is removed and the overall outcome.
Refinishing Process for Thin Engineered Hardwood
If your 1.5 mm engineered hardwood can be refinished, the process is similar to that for other engineered floors, but with extra care. The steps involve preparing the floor, sanding, applying a new finish, and protecting the refinished surface. Because of the thin wear layer, each step requires precision and attention to detail. Hire a professional. This can help prevent irreversible damage.
Before you begin, ensure the area is clear of furniture and any items that could be damaged. Proper ventilation is essential during sanding and finishing, both for your health and the quality of the finish. Always follow the manufacturer’s guidelines for the chosen finish. These steps will help you achieve a beautiful, renewed floor, but it is best to leave it to the professionals.
Preparation and Initial Assessment
Begin by carefully inspecting the floor. Note any areas needing special attention or repair. Protect the surrounding walls, baseboards, and doorways with painter’s tape and plastic sheeting. Use a vacuum with a brush attachment to remove any dust and debris. This prepares the surface for the sanding process. These steps ensure a smooth refinishing process.
Consider the room’s layout and lighting. These factors can affect how the new finish looks. Remove any nails or staples. These can damage the sanding equipment. Clean the floor with a recommended cleaner. Cleaning will remove dirt, wax, and grease. Proper preparation is essential to prevent these things from interfering with the new finish and causing an uneven appearance.
- Clear the Area: Remove all furniture, rugs, and anything else that might get in the way or be damaged.
- Protect Surfaces: Use painter’s tape and plastic sheeting to protect walls, baseboards, and any other areas.
- Clean Thoroughly: Vacuum the floor to remove any dust, dirt, or debris.
- Inspect and Repair: Check for any loose planks or areas needing repair before sanding.
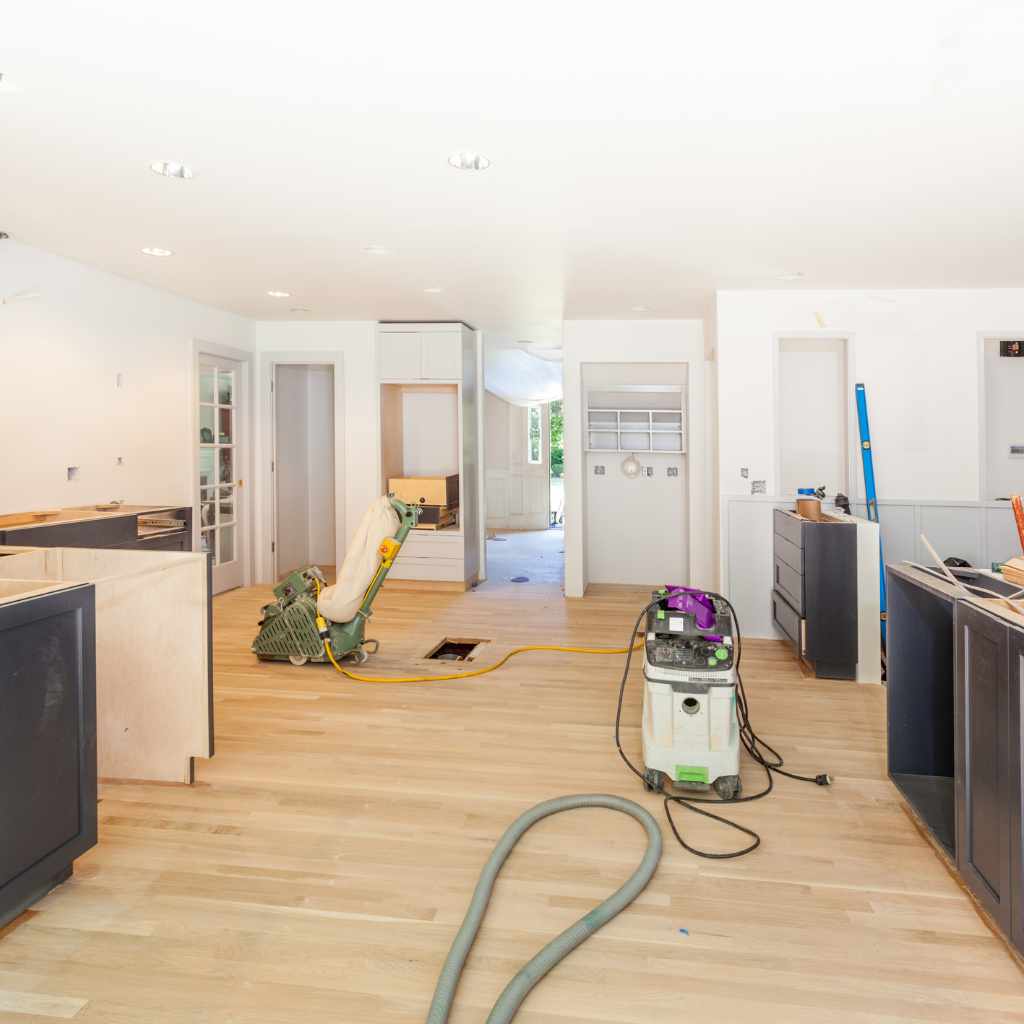
Sanding Techniques and Considerations
The key to sanding thin engineered hardwood is to remove as little material as possible. Use a drum sander or an orbital sander. It offers more control over the sanding process. Use fine-grit sandpaper to avoid removing too much of the wear layer. Start with a higher grit sandpaper. Only move to lower grits if necessary. Proceed with caution. You want to avoid sanding through the wear layer.
Sand in the direction of the wood grain. This helps to achieve a smoother finish. Work in small sections, moving the sander evenly across the surface. Regularly check the floor to ensure that you are not sanding through the wear layer. Use a shop vacuum to remove the dust after each pass. Sanding thin engineered hardwood needs patience, precision, and good equipment.
- Use the Right Sander: Orbital sanders are often preferred. They are less aggressive than drum sanders, reducing the risk of over-sanding.
- Start with Fine Grit: Begin with a higher grit sandpaper to minimize material removal. Increase grit as needed for smoothness.
- Sand Evenly: Overlap each pass slightly to ensure an even sanding.
- Dust Removal: Vacuum frequently during sanding to remove dust and debris.
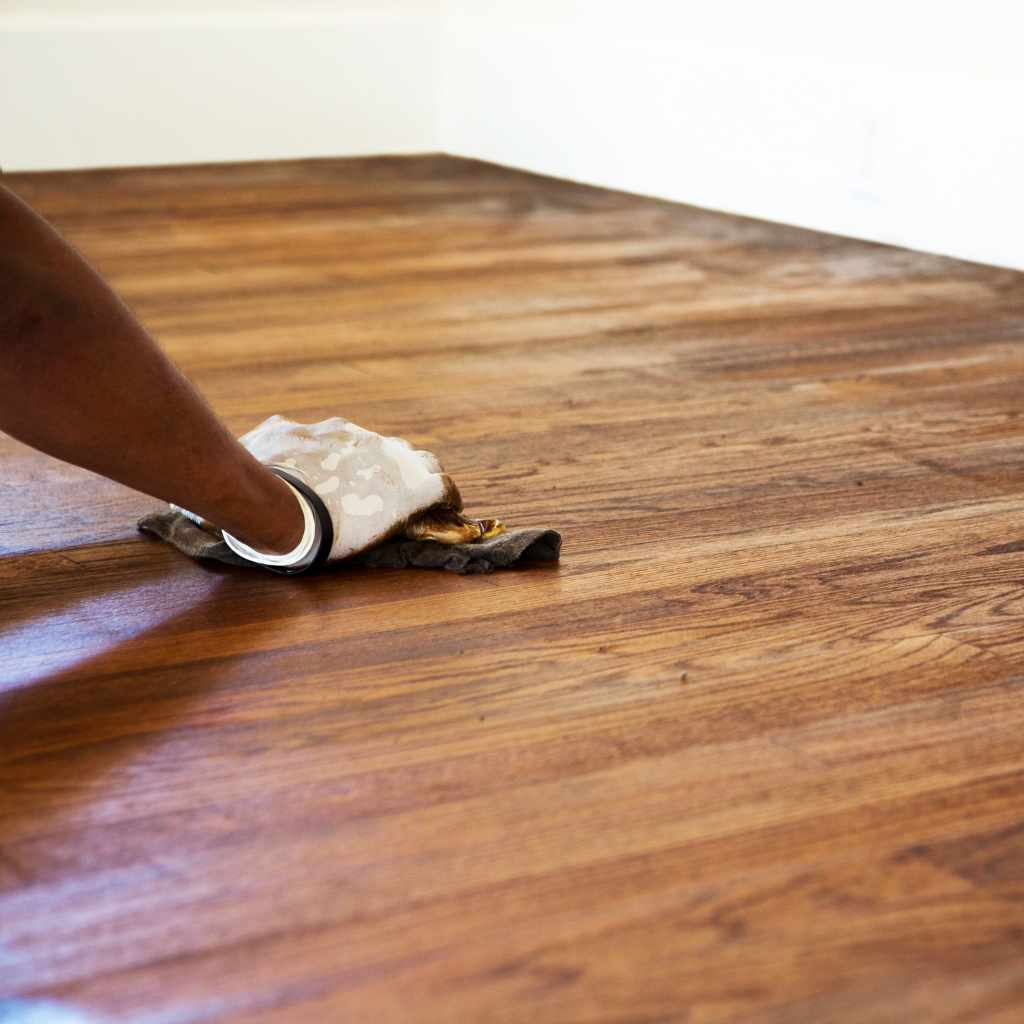
Applying the Finish and Protective Measures
Choose a finish suitable for engineered hardwood. Water-based polyurethane finishes are often recommended because they dry quickly and emit fewer fumes. After sanding and cleaning the floor, apply the finish with a brush, roller, or applicator. Apply thin, even coats, following the manufacturer’s instructions. Allow each coat to dry completely before applying the next coat. Multiple coats provide better protection and durability.
Once the finish is completely dry, you can use protective measures. Place felt pads under furniture legs to prevent scratches. Use rugs in high-traffic areas to minimize wear. Regularly sweep or vacuum the floor to remove any dust and debris. Clean spills immediately to avoid moisture damage. The right care will keep your refinished floor looking good for a long time.
- Choose the Right Finish: Select a finish designed for hardwood floors, such as polyurethane.
- Apply Thin Coats: Apply the finish in thin, even coats. Avoid drips or puddles.
- Allow Drying Time: Let each coat dry completely before applying the next coat. Follow the manufacturer’s drying times.
- Add Protective Measures: Place felt pads under furniture and use rugs in high-traffic areas.
Alternatives to Refinishing
If Can You Refinish 1.5 mm Engineered Hardwood? isn’t an option, or if the process seems too risky, other solutions are available. These alternatives can help rejuvenate your floors without the challenges of sanding. Each offers different benefits in terms of cost, effort, and appearance. Consider these options before deciding to replace your floor.
These alternatives offer practical and effective ways to improve the look and function of your engineered hardwood. They are often less disruptive and can be done without professional help. Consider these alternatives if your floor is showing signs of wear and tear, and refinishing is not possible or the best choice. Explore these options to find what works best for your flooring project.
Surface Treatments and Coating Options
Surface treatments can revitalize the appearance of your floor without sanding. Floor waxes can add a layer of protection and shine. They are easy to apply. You might consider a floor polish. This will fill minor scratches and improve the appearance. UV-cured coatings are another option. These are durable and can provide a long-lasting finish.
Floor cleaners designed for hardwood can also play a role. They can remove dirt and grime, helping to restore the floor’s original appearance. The products vary in their longevity and how much they protect the floor. Carefully consider the specific needs of your floor and the amount of traffic it receives. Consider the ease of application and the desired finish to choose the best option.
- Floor Wax: Apply wax to add a layer of protection and improve the floor’s shine.
- Floor Polish: Polish fills minor scratches and evens out the floor’s appearance.
- UV-Cured Coatings: These coatings are durable and provide a long-lasting finish.
- Specialty Cleaners: Use cleaners designed for hardwood to remove dirt, grime, and restore shine.
Covering and Layering Solutions
Consider covering or layering your engineered hardwood. Area rugs can protect high-traffic areas and add a touch of style. These are easy to move. They can be
The choice depends on your needs and budget. Covering solutions are often the easiest and most cost-effective approach. These options offer immediate benefits in terms of protection and aesthetics. Layering provides a more permanent solution. It may change the floor’s appearance and feel. Careful planning is key. Consider the overall design and functionality.
- Area Rugs: Use area rugs to protect high-traffic areas and add style.
- Floor Mats: Place floor mats at entryways to minimize wear and tear.
- Overlay Flooring: Install new flooring over the existing hardwood, such as LVP or laminate.
Cost and Considerations
The cost of refinishing or replacing a floor varies based on several elements. Labor costs, material expenses, and the scope of the project all affect the final price. Refinishing often costs less than replacing the entire floor. However, the exact cost depends on factors such as the size of the area, the type of finish, and the degree of damage.
Other factors to consider include the long-term benefits and the potential return on investment. Refinishing can extend the life of your existing floor. This makes it a great choice if the structural integrity of your floor is still good. Replacing your floor might offer a fresh look and greater design flexibility. Compare the costs and benefits of each choice. Then you can make a decision that suits your budget and your home’s needs.
Budgeting for Refinishing vs. Replacement
Understand the costs associated with refinishing versus replacing your floors. For refinishing, budget for sandpaper, finish, and any necessary repair materials. The primary cost is usually labor, especially if you hire a professional. Replacement involves the cost of the new flooring material, labor for removing the old floor, and installation of the new one.
Consider the size of the area to be refinished or
| Factor | Refinishing | Replacement |
|---|---|---|
| Material Costs | Lower: Primarily sandpaper and finish | Higher: Cost of new flooring |
| Labor Costs | Variable: Depends on the size and complexity | Higher: Demolition and installation costs |
| Timeline | Shorter: Often completed in a few days | Longer: Demolition, preparation, and installation |
| Durability | Extends the life of the existing floor | Depends on the new flooring material |
Long-Term Value and Return on Investment
Consider the long-term value. Refinishing can extend the life of your existing floor. It can significantly boost the value of your home.
Look at your home’s overall design and the current trends in flooring. Refinishing can update the existing look. It can be a cost-effective way to improve the floor’s appearance. Replacement allows you to choose materials that match the rest of your décor. The right flooring option can improve your home’s overall appeal. Take the time to evaluate the long-term value of each choice.
Frequently Asked Questions
Question: Can I sand and refinish my 1.5 mm engineered hardwood myself?
Answer: It’s possible, but it is recommended that you hire a professional. The thin wear layer leaves little room for error. A mistake could lead to significant damage.
Question: How often can a 1.5 mm engineered hardwood floor be refinished?
Answer: With careful sanding and appropriate techniques, you may get one refinishing. However, it is always best to assess the floor’s condition first.
Question: What type of finish is best for engineered hardwood floors?
Answer: Water-based polyurethane finishes are often recommended because they’re durable, dry quickly, and emit fewer fumes.
Question: What are some signs that my engineered hardwood needs refinishing?
Answer: Look for deep scratches, areas where the finish is worn through, and overall dullness. These are all signs it might be time to refinish.
Question: What are some alternatives if I cannot refinish my engineered hardwood floor?
Answer: Surface treatments like floor waxes or polishes can help. Alternatively, you can use rugs or overlay with new flooring.
Final Thoughts
So, Can You Refinish 1.5 mm Engineered Hardwood? The answer is complex. It often depends on the floor’s condition and the expertise of those involved. You now understand the key aspects: the wear layer, the overall construction, and the refinishing process. Remember the importance of assessing the floor carefully and choosing the right approach for your situation. Consider the alternatives to refinishing, such as surface treatments or covering options, if refinishing isn’t the best choice.
Before you decide, carefully evaluate your flooring. If the wear layer is in good shape and the damage is minimal, refinishing might be possible. If not, explore other options. Regardless of what you do, consider the advice in this post. Take action. A little effort can make a big difference in the look and feel of your home. With the right information, you can make informed decisions to refresh your flooring. Good luck!