Can You Refinish Your Hardwood Floors Yourself? A Simple Guide
Thinking about updating your home and wondering, Can I Refinish My Hardwood Floors Myself? It’s a question many homeowners have. Refinishing hardwood floors can seem tricky at first. Don’t worry, it’s totally manageable, even for beginners. This guide will break it down step-by-step, making it easier than you think. You’ll learn everything from gathering tools to applying the final coat of finish. Let’s explore how to revitalize your floors!
What You Need to Know Before Refinishing Floors
Before you get started, it’s important to figure out whether your floors are a good candidate for refinishing. Not all hardwood floors can be refinished, and the process involves several steps. Assess the condition of your floors and ensure you have the right tools and equipment. This section covers what you should consider before you begin, so you can decide if it’s the right DIY project for you. Getting this assessment done correctly can save you a lot of time and potential problems later on. This includes checking for things like the type of wood, existing finishes, and any signs of damage. Making sure the floor is ready for the refinishing process. You will need to take the time to prepare the space and protect your home.
Assessing the Condition of Your Hardwood Floors
Before you even think about buying sandpaper, take a good look at your floors. Are they solid hardwood or engineered wood? Solid hardwood can be refinished multiple times, while engineered wood might have a thinner top layer, limiting the number of times it can be sanded. Look for signs of damage like deep scratches, water stains, or areas where the finish has worn away completely. A quick test is to see how much wood is exposed. You can tell the wood’s durability by its grain, and this also affects sanding. It’s smart to check with professionals at times. Sometimes damage can be worse than you think, which may require you to replace sections of the floor. Consider testing a hidden area first, like inside a closet. This will give you a feel for the process and any surprises.
Wood Type: Solid hardwood is the best option for refinishing. Check if your floor is solid wood or engineered wood. Solid wood can be sanded more often. Engineered wood has a thin veneer that can limit refinishing.
Solid hardwood is typically made from a single piece of wood, which gives it its strength and ability to be refinished multiple times. Engineered wood, on the other hand, consists of several layers of wood with a thin top layer of hardwood. This top layer is the only part that can be sanded.
Finish Condition: Observe the current finish. Does it have scratches, dents, or is it worn in high-traffic areas? Minor wear is usually fine.
The finish protects the wood from moisture and damage. Regular foot traffic, furniture movement, and spills can cause wear and tear. If the finish is only slightly worn, a light sanding and a fresh coat of finish might be enough. But severe wear, like deep scratches or peeling, means it’s time for a full refinish.
Damage Inspection: Look for water damage, cracks, or gaps between boards. These issues might need extra attention or repair before refinishing.
Water damage can cause the wood to swell, warp, and discolor. Cracks and gaps can allow moisture to seep in, worsening damage. Before you start sanding, address these problems. You may need to
Test Area: Sand a small, hidden area to see how the wood reacts to sanding. This will give you an idea of the process.
Try sanding a small, out-of-the-way spot first, like a closet floor. This will show you how easily the finish comes off and if the wood sands evenly. It also helps you practice before working on the main areas.
Gathering Your Refinishing Tools and Materials
Having the right tools is key to a successful project. You will need to gather essential tools like a drum sander or orbital sander, safety equipment, and the right finish. This also means making sure you have enough sandpaper in various grits. Do not forget to get the right type of finish to match the look you want. Also, you may need some basic tools like a hammer, nails, and a putty knife to prepare the floor. Having everything ready saves time and frustration. Let’s make sure you have everything ready before you begin, and make sure you’re equipped for the job.
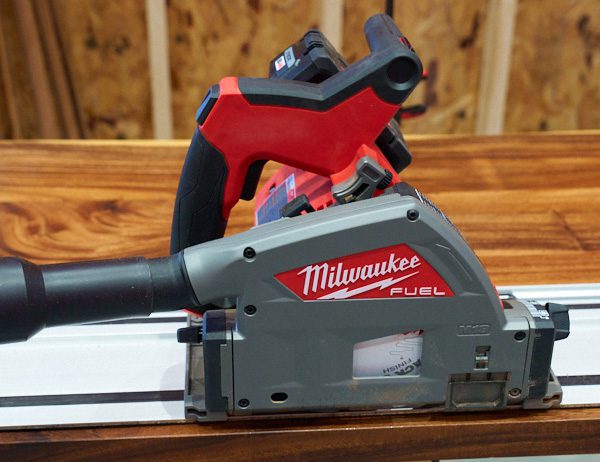
Sanding Machines: You’ll need a drum sander for the main areas and an edge sander for the edges and corners.
A drum sander is great for large areas, but it can be tricky for beginners, as it can remove a lot of material quickly. An orbital sander is easier to control and works well for less aggressive sanding. An edge sander will help get those areas close to the wall. You can rent these tools from home improvement stores.
Sandpaper: Have a variety of grits. Start with coarser grits (like 36 or 60 grit) for removing the old finish. Then gradually move to finer grits (like 80, 100, and 120 grit) for a smooth finish.
You need different grits of sandpaper for different stages of sanding. Coarse grit removes the old finish and any imperfections. Medium grit smooths the wood, and fine grit prepares it for the finish. Changing grits at the correct times is essential for an even look.
Safety Gear: Dust mask, eye protection, and ear protection are a must. Gloves are a good idea, too.
Sanding creates a lot of dust, and the fumes from the finish can be harmful. The correct gear keeps you safe. Make sure you have a good quality dust mask or respirator. Goggles or safety glasses protect your eyes from debris, and ear protection prevents hearing damage from the sanding machines.
Finish and Supplies: Choose a finish (polyurethane is popular) and get applicators (brushes, pads), and a roller.
Polyurethane is durable and protects the wood from wear and spills. There are oil-based and water-based finishes; each has its pros and cons. Be sure to select the right finish for your needs. Also, get applicators like brushes and rollers for even coverage. You might also need a can opener, stirring sticks, and drop cloths.
Sanding Your Hardwood Floors: A Step-by-Step Guide
Sanding is a vital part of the refinishing process. Here’s a detailed guide to help you sand your floors like a pro. From removing the old finish to smoothing the wood, this section will walk you through each step. Sanding prepares the wood to receive the new finish. It also removes any imperfections, ensuring a beautiful result. Following these steps and using the right equipment will help you achieve a smooth, even surface. This includes preparing the area, selecting the right sandpaper, and using the machines correctly.
Preparing the Area for Sanding
Before you begin, make sure the area is ready for work. This includes clearing the room of furniture, taping off doorways, and cleaning the floors. Also, take steps to protect your surroundings from dust. Proper preparation makes the sanding process easier. It also protects your home from damage. You will also want to make sure the area is well-ventilated for safety reasons. Do not start until you have taken all necessary precautions. Remember, safety always comes first, and a well-prepared space will lead to a better outcome.
Clear the Room: Remove all furniture, rugs, and anything else from the room.
Remove furniture and other items to avoid damaging them. Also, this allows you to move around freely when you’re working. This also protects them from dust.
Clean the Floor: Sweep, vacuum, and mop the floor to remove any dirt or debris.
Before sanding, clean the floor. Even small pieces of debris can get trapped under the sandpaper. This may create scratches. Vacuuming the floor will remove loose dirt and debris, which will result in better sanding.
Protect the Surroundings: Seal off doorways with plastic sheeting to keep dust from spreading.
Sanding creates a lot of dust. This dust can get into the rest of your house. Seal off doorways and air vents. Tape plastic sheeting around doorways. This prevents the dust from spreading. This is especially important if you have HVAC systems.
Inspect for Nails: Countersink any nails that are sticking up.
Check for nails or staples that may stick up. These will catch on the sandpaper and damage your sander. Use a nail set to countersink any protruding nails. This will prevent scratches and damage to your sanding equipment.
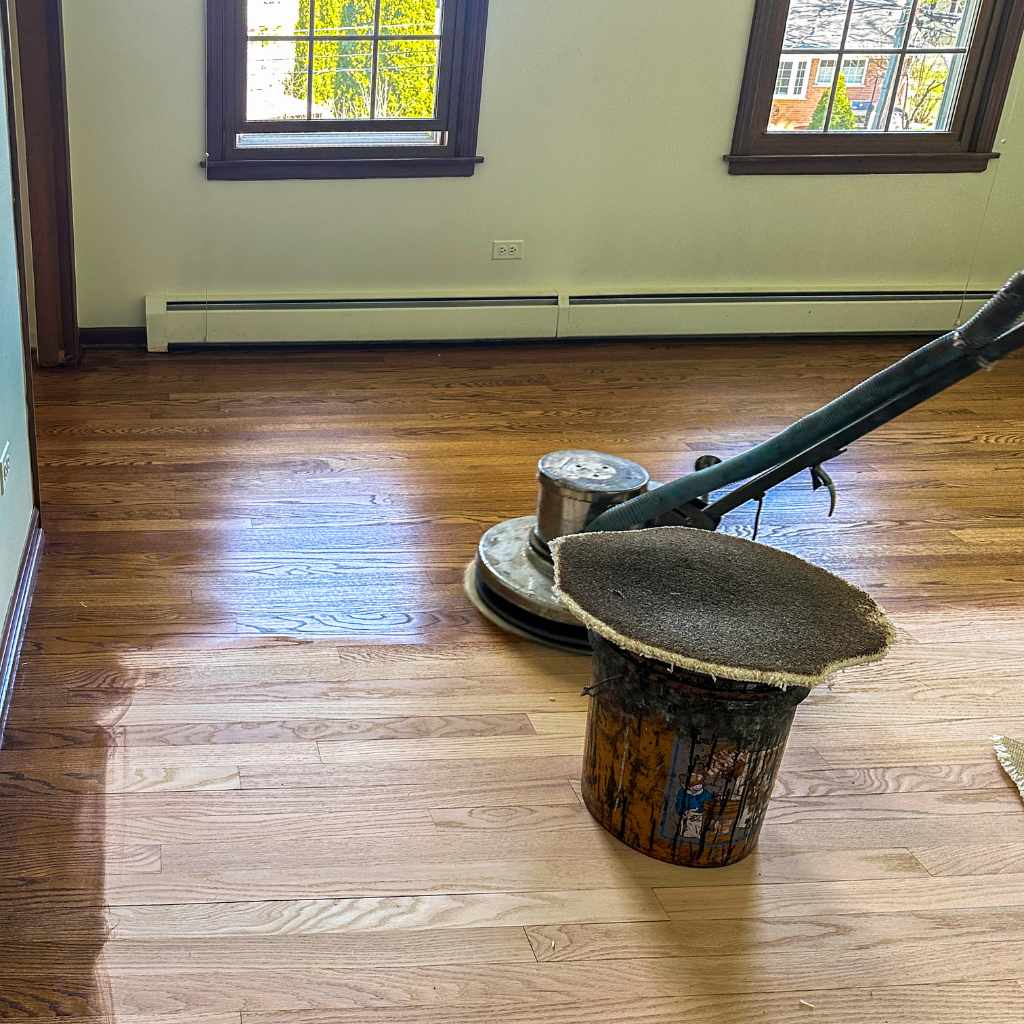
Using a Drum Sander to Refinish Floors
The drum sander is your main tool for refinishing hardwood floors. It’s important to use it carefully, as it can remove a lot of material quickly. This section explains how to use the drum sander safely and effectively. It covers how to maneuver the machine and how to overlap passes. It shows you how to use the right sandpaper grit. You’ll learn how to avoid common mistakes, such as creating dips or uneven spots. With practice and patience, the drum sander can help you achieve a smooth and beautiful surface.
Start with Coarse Grit: Begin with 36- or 60-grit sandpaper to remove the old finish.
Start with the coarsest grit to remove old finishes, scratches, and imperfections. Ensure the drum is properly loaded with the sandpaper. Go slowly and carefully.
Sanding Direction: Sand with the grain of the wood. Make overlapping passes, each about 4-6 inches.
Always sand with the wood grain. This ensures you remove the old finish evenly. Overlap each pass by 4–6 inches to avoid ridges. Work in a straight line, avoiding stopping in one place for too long. This will prevent dips in the floor.
Moving the Sander: Always move the drum sander forward and do not stop while it’s in contact with the floor. Lift the drum at the end of each pass.
Starting and stopping the sander on the floor can create uneven spots. As you reach the end of a pass, lift the drum before turning or moving backward. This will help you get an even result.
Changing Sandpaper: Switch to finer grits (80, 100, and 120) to smooth the wood, vacuum between each grit.
After the coarse sanding, switch to a medium grit (80 grit) to smooth out the scratches from the first sanding. Then, move to a finer grit (100 or 120) for the final smoothing. Vacuum thoroughly between each grit to remove dust.
Edge Sanding and Hand Sanding Techniques
The drum sander cannot reach the edges and corners of the room. These areas require an edge sander. In some cases, you may need to hand-sand areas that the edge sander can’t get to. Here, you’ll learn how to use these techniques effectively. This ensures a uniform look for the entire floor. You will learn the importance of using the right sandpaper and how to avoid damaging the walls. You will also learn about the right techniques for the corners and other hard-to-reach spots. This step helps create a smooth and professionally finished look.
Using an Edge Sander: Use the edge sander to get close to the walls. Overlap passes, going with the grain.
The edge sander gets into areas the drum sander can’t. Make sure to sand with the grain of the wood. Make overlapping passes for even coverage. Avoid pressing too hard, as this can create marks.
Hand Sanding Techniques: Use a sanding block and sandpaper to sand corners and areas the sander can’t reach.
Hand-sand areas where the sanders can’t reach, such as corners and the edges of built-ins. Use a sanding block to keep the sanding surface flat. Use the same grit sequence as you did with the drum sander.
Dust Removal: Vacuum thoroughly after sanding with both the edge sander and by hand.
Dust can interfere with the finish. It can also cause imperfections. Vacuum thoroughly after each sanding step, including edge sanding and hand sanding. Make sure to remove any dust before the finish.
Inspection: Check the floor for any imperfections, scratches, or uneven areas before moving on.
Inspect the floor carefully after each round of sanding. Use a bright light to check for scratches or uneven spots. Fix any issues. This step helps ensure that the final result looks perfect.
Applying the Finish and Achieving a Perfect Look
Once you’ve finished sanding, it’s time to apply the finish. This is where you bring out the beauty of your hardwood floors. The application of the finish protects and enhances the wood. This section covers all the essential steps. It details how to prepare the surface. It covers the best application techniques for different types of finishes. You’ll learn about the importance of multiple coats and drying times. This includes tips on achieving a perfect, durable finish that will last for years. The final step is crucial to get that perfect look for your floors.
Surface Preparation Before Finishing
Before applying the finish, the floor must be perfectly clean. Surface preparation is the most important step in the finishing process. This section shows you how to remove sanding dust and how to apply the first coat of finish. You will learn about the need for proper ventilation and how to avoid imperfections. Paying attention to these steps will help you achieve a smooth and professional finish. Careful preparation ensures the finish adheres properly to the wood. This also helps you achieve a beautiful, long-lasting result. Also, consider any potential issues that may occur, so you can be prepared for them.
Dust Removal: Vacuum the floor thoroughly, then wipe it with a tack cloth to remove any remaining dust.
Sanding creates fine dust, which can ruin the finish. Vacuum the entire floor thoroughly. Use a tack cloth to wipe away any remaining dust. This will improve the finish’s adhesion and create a better final product.
Primer Application (if needed): Some finishes require a primer. Apply it according to the manufacturer’s instructions.
Some finishes, especially oil-based ones, require a primer. Primer helps the finish adhere better and provides a more even result. Follow the manufacturer’s instructions for application and drying times.
Ventilation: Ensure the room is well-ventilated during the application and drying of the finish.
Ventilation is vital for drying and safety. Open windows and doors. Use fans to circulate the air. Be mindful of the fumes. Proper ventilation will help the finish dry evenly and safely. It also prevents the buildup of harmful fumes.
Checking for Imperfections: Inspect the floor for any imperfections. Use wood filler for small cracks or dents.
Before applying the finish, inspect the floor for any remaining imperfections. Fill any small cracks or dents with wood filler. Lightly sand the filled areas when dry. This will create a smooth surface before you apply the finish.
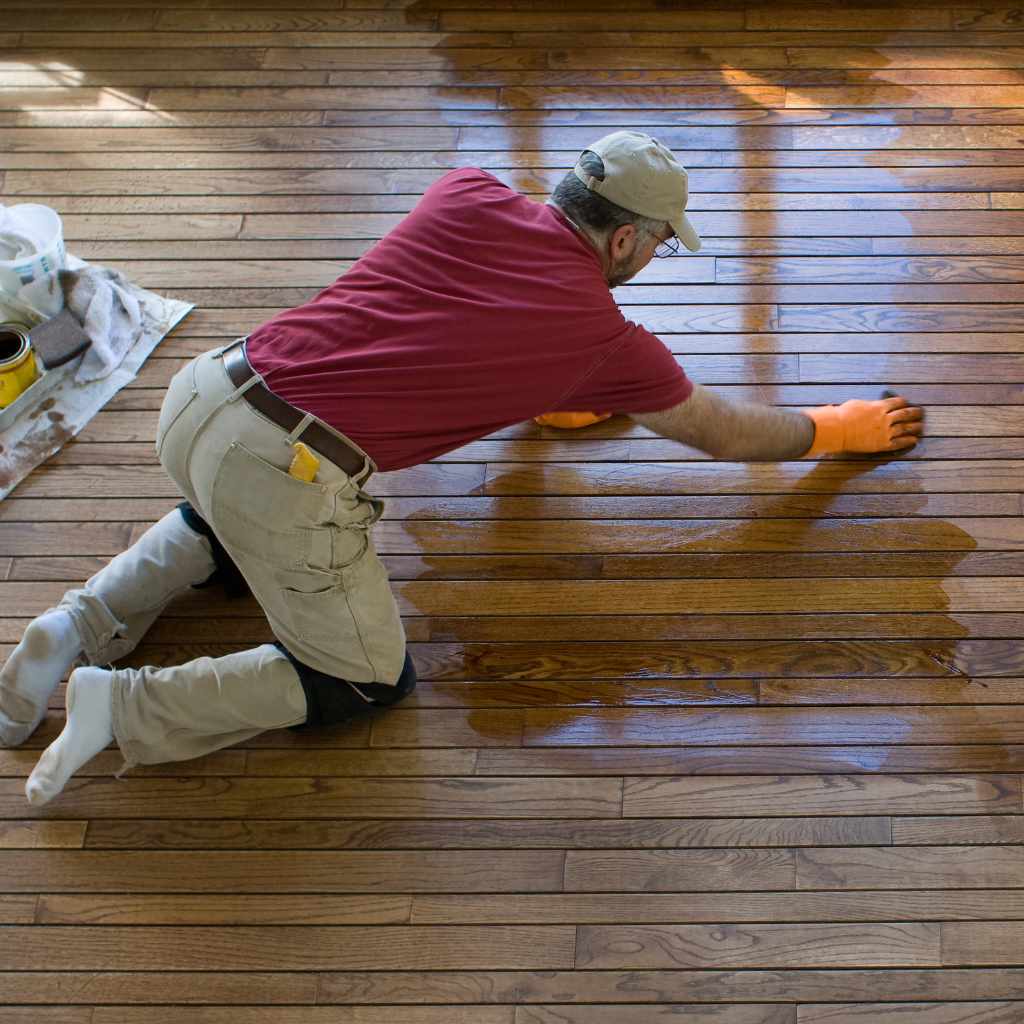
Applying the First Coat of Finish
Applying the first coat of finish is a critical step in the refinishing process. This section shows you how to choose the right tools and how to apply the finish evenly. You will learn about how to avoid lap marks and how to achieve a smooth and uniform surface. You will also learn about the importance of drying times and how to prepare the surface for subsequent coats. Following these steps and taking your time will ensure a professional-looking result. This will protect your floors and enhance their beauty.
Choosing Application Tools: Use a brush, pad applicator, or roller, depending on the type of finish.
The right tools make a big difference in the application process. For oil-based finishes, you can use a brush. For water-based finishes, applicators or rollers are better. Choose the tools recommended by the finish manufacturer.
Application Technique: Apply the finish with the grain of the wood in long, even strokes.
Apply the finish smoothly and evenly with the grain of the wood. Avoid applying too much finish at once. Use long, even strokes. This will help to prevent lap marks and ensure an even finish.
Avoiding Lap Marks: Work in sections and maintain a wet edge to avoid lap marks.
Lap marks happen when the finish starts to dry before you apply the next coat. Work in sections to prevent this. Maintain a wet edge to avoid overlap issues. Overlap the edges slightly as you go.
Drying Time: Allow the first coat to dry completely, according to the manufacturer’s instructions.
Drying times vary. Always follow the manufacturer’s instructions. Allow the first coat to dry completely. This is vital before you apply subsequent coats. Drying times are different for oil-based and water-based finishes.
Applying Multiple Coats and Achieving a Smooth Finish
Applying multiple coats is essential for a durable and beautiful finish. This section explores how to sand between coats. It also discusses how to apply subsequent coats to achieve a smooth, even surface. You will learn about the techniques needed to remove dust and debris between coats. You will learn how to check the finish and how to avoid common mistakes. Following these steps will help you create a long-lasting, professional look. You will learn how to maintain the quality of the floor finish for years to come.
Light Sanding Between Coats: After the first coat has dried, lightly sand the floor with fine grit sandpaper to remove any imperfections.
After the first coat has dried, sand lightly with fine-grit sandpaper. This will remove any imperfections or raised grain. Sand lightly to avoid cutting through the finish. This will improve the adhesion of the next coat. It also creates a smoother surface.
Dust Removal: Vacuum and wipe the floor with a tack cloth before applying the next coat.
After sanding, vacuum the floor to remove dust. Wipe it with a tack cloth to remove any remaining particles. Dust between coats is critical for a smooth finish. Thoroughly removing the dust ensures the finish adheres correctly.
Applying Subsequent Coats: Apply the second and third coats following the same technique as the first.
Apply the second and third coats of finish, following the same methods as the first coat. Work in the same direction, using long, even strokes. Allow each coat to dry completely. You will also need to sand and dust between each application.
Checking the Finish: Inspect the floor in good lighting to make sure the finish is even and free of defects.
After each coat, check the floor under good lighting. Look for any imperfections, uneven spots, or areas where the finish is not right. Fix these issues immediately. Proper inspection ensures you get a professional result.
| Feature | Oil-Based Polyurethane | Water-Based Polyurethane |
|---|---|---|
| Dry Time | Longer (8-12 hours per coat) | Shorter (2-4 hours per coat) |
| Odor | Stronger odor | Milder odor |
| Durability | Very durable | Highly durable |
| Color | Amber hue, may yellow over time | Clear, maintains natural wood color |

Frequently Asked Questions
Question: How often should I refinish my hardwood floors?
Answer: It depends on the amount of foot traffic and wear. Typically, hardwood floors need refinishing every 7-10 years, but high-traffic areas might require it more often.
Question: Can I refinish my hardwood floors in stages?
Answer: Yes, you can. You can divide the room into sections and work on one part at a time. This is especially useful if you have to move furniture.
Question: What’s the best type of finish for hardwood floors?
Answer: Polyurethane is a popular choice for its durability and water resistance. You can choose from oil-based or water-based polyurethane. Consider the appearance and drying time. Choose the option that fits your needs.
Question: How much does it cost to refinish hardwood floors yourself versus hiring a professional?
Answer: Doing it yourself can save you money, as you only pay for materials. Hiring a professional is more expensive, but the labor is included. The cost depends on the floor’s size and the finish.
Question: What do I do if I make a mistake during the refinishing process?
Answer: Don’t worry, mistakes happen. If you catch them early, you can often sand out imperfections. If the mistake is more severe, you may need to sand down the area and reapply the finish. For major issues, consider consulting a professional.
Final Thoughts
Can I Refinish My Hardwood Floors Myself? Absolutely, with patience and the right steps, you can achieve amazing results. From assessing the floor’s condition to applying the final coat, this guide has given you all the information you need. You’ve learned about the necessary tools, how to sand and prepare the floor, and how to apply the finish. Remember that the key is proper preparation and taking your time throughout the process. Do not rush, and don’t hesitate to ask for help or research any questions. Now it’s time to take your skills to the floors and create a beautiful look in your home. Get ready to enjoy the transformed beauty of your floors!