Cutting Plywood to Size: Quick & Accurate Techniques
To cut plywood to size, use a circular saw with the front face pointing downwards to minimize chipping. Support the plywood and keep it tightly pushed into the fence to ensure clean cuts.
When using a circular saw, a guide or jig can help maintain straight cuts. Additionally, using painter’s tape, rigid insulation, or clamping a board as a guide can also prevent chipping and support the plywood during cutting. These methods can help you achieve precise and clean cuts when cutting plywood to size.
Cutting plywood to size requires attention to detail and the use of proper techniques to ensure accurate and clean cuts. Whether you are using a circular saw or a table saw, it’s essential to support the plywood and use the right tools and methods to minimize chipping and achieve the desired dimensions. In this guide, we’ll explore the best practices for cutting plywood to size, including tips for using different cutting tools and minimizing chipping for a professional finish.
Essential Tools For Cutting Plywood
When it comes to cutting plywood to size, having the right tools is essential for achieving accurate and clean cuts. Here are the essential tools you’ll need:
Circular Saw Basics
A circular saw is a common tool used for cutting plywood. It allows you to make long and straight cuts with ease. To ensure precise cuts, follow these basic tips:
- Set the saw blade depth according to the thickness of the plywood.
- Support the plywood properly to avoid splintering.
- Make sure the front face of the plywood is facing downwards as circular saws cut on the upstroke.
Choosing The Right Blade
Choosing the right blade for your circular saw is crucial for achieving clean and smooth cuts. Consider the following factors when selecting a blade:
- Blade type: For cutting plywood, a fine-toothed blade with more teeth per inch (TPI) is recommended.
- Blade material: Carbide-tipped blades are known for their durability and ability to stay sharp for longer periods.
- Blade size: Ensure the blade size is compatible with your circular saw.
By following these tips and using the right tools, you’ll be able to cut plywood to size accurately and efficiently. Remember to prioritize safety by wearing appropriate protective gear and working in a well-ventilated area.
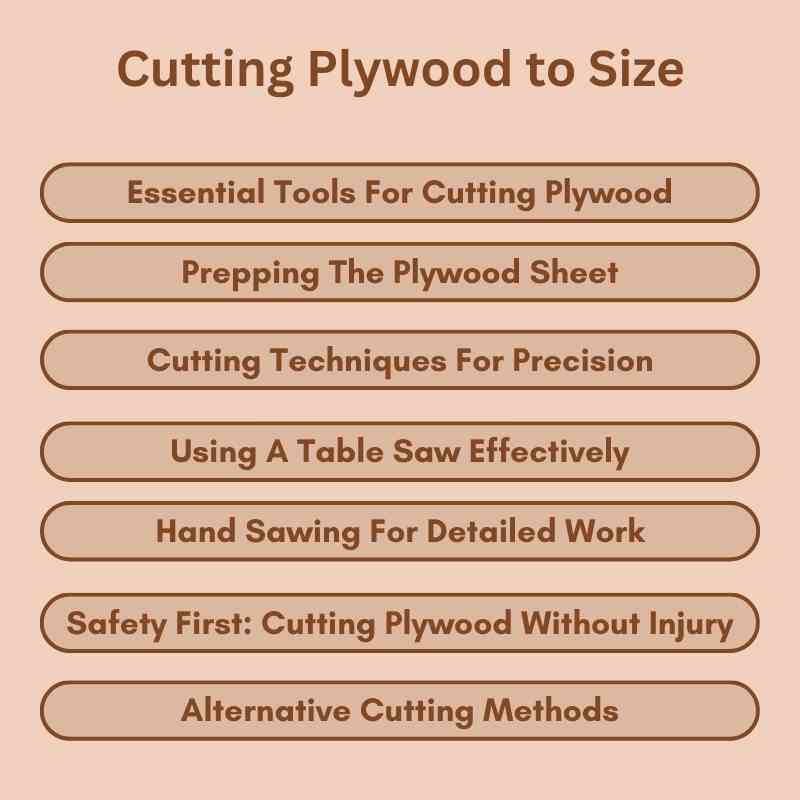
Prepping The Plywood Sheet
To prep the plywood sheet for cutting it to size, start by selecting the right blade and setting the saw blade depth. Support the plywood properly and cut with the front face pointing downwards to minimize chipping. You can use painters tape or rigid insulation for additional support and keep the stock pushed tightly into the fence if using a table saw.
Remember, a circular saw or skill saw is commonly used for this task.
Measuring And Marking Accurately
Before you start cutting plywood to size, it’s crucial to measure and mark accurately. This ensures that you achieve precise cuts and avoid any wastage. Here are the steps to follow:
- Start by measuring the dimensions you need for your project using a tape measure. Measure twice to ensure accuracy.
- Once you have the measurements, use a pencil or a marking tool to mark the cutting lines on the plywood sheet. Make sure the lines are clear and visible.
- If you’re cutting multiple pieces from the same sheet, it’s helpful to label each piece with corresponding measurements to avoid confusion.
Supporting Plywood During Cuts
Proper support during the cutting process is essential to prevent splintering and ensure clean cuts. Here are a few methods to support the plywood:
- When using a circular saw, place the plywood sheet on a stable surface such as sawhorses or a workbench. Make sure the sheet is fully supported to minimize vibrations.
- If using a table saw, adjust the saw’s fence to provide proper support for the plywood. Keep the stock pushed tightly against the fence throughout the cut.
- For added support and to minimize tear-out, you can use a piece of rigid insulation or foam board under the plywood sheet when cutting with a circular saw.
By following these steps and ensuring accurate measurements and proper support, you’ll be well-prepared to cut plywood to size for your project. Remember to always prioritize safety and use appropriate safety equipment when operating power tools.
Cutting Techniques For Precision
Cutting plywood to size with precision is essential for achieving professional-looking results in woodworking projects. Whether you are a DIY enthusiast or a professional carpenter, mastering the right cutting techniques can make a significant difference in the quality of your work. Here are some essential cutting techniques to help you achieve precision when cutting plywood.
Straight Cuts With A Guide
One of the most effective ways to ensure precise cuts on plywood is by using a saw guide. This can be a straight piece of wood or a commercial saw guide, which helps to maintain a straight cutting line and prevents the saw from veering off course. By securing the guide firmly in place and running the saw along its edge, you can achieve perfectly straight cuts with ease.
Avoiding Splintering And Chipping
To avoid splintering and chipping when cutting plywood, there are several techniques you can employ. Using painter’s tape or frog tape along the cut line can help minimize splintering. Additionally, supporting the plywood adequately on a table saw or using a piece of rigid insulation when using a circular saw can also prevent splintering. Keeping the stock pushed tightly into the fence when using a table saw can further reduce the risk of splintering.
Using A Table Saw Effectively
Cutting plywood to size using a table saw can be an efficient and precise method when done correctly. It’s important to understand the key techniques and considerations for using a table saw effectively. By following the proper guidelines, you can achieve accurate and clean cuts, ensuring the desired results for your woodworking projects.
Setting The Blade Depth
When using a table saw to cut plywood, setting the blade depth is crucial for achieving precise cuts. Ensure that the blade depth is just slightly deeper than the thickness of the plywood. This prevents excessive tear-out on the bottom surface of the plywood and helps in achieving clean and smooth edges. Always make sure to adjust the blade depth before initiating the cutting process to avoid any potential issues.
Fence And Miter Gauge Tips
Utilizing the table saw’s fence and miter gauge effectively is essential for accurate and safe plywood cutting. The fence should be set parallel to the saw blade to ensure straight cuts. When using the miter gauge for angled cuts, securely lock it in place to maintain the desired angle throughout the cutting process. Properly aligning the plywood with the fence and miter gauge is crucial for achieving precise and consistent cuts.
Hand Sawing For Detailed Work
Hand sawing is a great option for cutting plywood to size when you need detailed work. It allows for more precision and control compared to power tools, making it a popular choice for DIY projects and woodworking. To ensure a clean cut, make sure to choose the right blade and support the plywood properly.
Utilizing A Japanese Pull Saw
When it comes to hand sawing, a Japanese pull saw is an excellent choice for detailed work. This type of saw is designed to cut on the pull stroke, which allows for greater accuracy and control. The blade is thin and flexible, which makes it ideal for intricate cuts and curves. Additionally, the teeth on a Japanese pull saw are designed to cut cleanly and smoothly, which means less sanding and finishing work after the cut is made.
Knife Scoring For Clean Edges
If you want to achieve clean edges when hand sawing plywood, consider using a knife to score the surface first. This technique involves running a sharp knife along the cut line to create a shallow groove. This groove will help guide the saw blade and prevent splintering or tearing of the plywood. It’s important to use a sharp knife and apply firm pressure when scoring the plywood to ensure a clean and precise cut.
When using a hand saw for detailed work, it’s important to take your time and use proper technique to achieve the best results. Some additional tips to keep in mind include:
- Use a saw with a comfortable grip that fits your hand well
- Choose a blade with the appropriate number of teeth for the thickness of the plywood
- Mark your cut line clearly and double-check your measurements before making the cut
- Support the plywood on sawhorses or a workbench to prevent it from shifting during the cut
- Wear eye and ear protection to prevent injury
By following these tips and utilizing a Japanese pull saw or knife scoring technique, you can achieve clean and precise cuts when hand sawing plywood for your next project.
Safety First: Cutting Plywood Without Injury
Learn how to cut plywood to size without risking injury. Follow safety guidelines and use the right tools to ensure a smooth and precise cutting process. With proper techniques, you can achieve accurate cuts and protect yourself from accidents.
Cutting plywood is a crucial part of any woodworking project. However, it can also be a dangerous task if proper safety measures are not taken. In this blog post, we will focus on the subheading “Safety First: Cutting Plywood Without Injury.” We will discuss the importance of proper saw handling and personal protective equipment.
Proper Saw Handling
When cutting plywood, it is essential to use the right saw and handle it correctly. A circular saw is the most commonly used saw for cutting plywood. To use it safely, follow these steps:
- Make sure the saw is unplugged when changing the blade or adjusting the depth.
- Keep the blade sharp, clean, and well-maintained.
- Always use both hands to hold the saw, with one hand on the trigger and the other on the handle.
- Make sure the blade guard is in place before making any cuts.
- Start the saw before it touches the wood and keep the blade moving at a steady pace throughout the cut.
Personal Protective Equipment
Protecting yourself when cutting plywood is vital. Some essential personal protective equipment (PPE) that you should wear include:
- Safety glasses or goggles to protect your eyes from sawdust and flying debris.
- Earplugs or earmuffs to protect your hearing from the loud noise of the saw.
- A dust mask to prevent inhaling sawdust and other particles.
- Gloves to protect your hands from the blade and any sharp edges on the wood.
It is crucial to use proper saw handling techniques and wear PPE when cutting plywood. By following these safety measures, you can avoid injuries and complete your project successfully. Remember to always keep safety at the forefront of your mind when working with power tools.
Alternative Cutting Methods
Cutting plywood to size can be achieved through various alternative methods that offer flexibility and precision. These methods include using a jigsaw for curves and employing router techniques for plywood. Each method provides unique advantages, allowing woodworkers to tailor their cutting approach based on specific project requirements.
Using A Jigsaw For Curves
When cutting curved shapes from plywood, a jigsaw is an ideal tool due to its maneuverability and ability to make intricate cuts. To achieve optimal results, select a fine-tooth blade for smoother edges, and secure the plywood firmly in place to minimize vibrations. Guide the jigsaw steadily along the marked curve, ensuring a consistent cutting speed to avoid splintering.
Router Techniques For Plywood
Employing a router for cutting plywood offers precise control and the ability to create decorative edges and shapes. Utilize a straight bit for standard cuts and consider using a template to guide the router for intricate designs. Additionally, employing a router table enhances stability, resulting in cleaner and more accurate cuts.
Finishing Touches After The Cut
Once you have successfully cut your plywood to the desired size, it’s essential to perform a few finishing touches to ensure a professional and polished outcome. The final steps of sanding edges for smoothness and sealing and protecting the cut plywood are crucial for both aesthetic and practical reasons.
Sanding Edges For Smoothness
After cutting the plywood, it’s important to sand the edges to create a smooth and clean finish. This not only enhances the overall appearance but also prevents any splinters or rough edges that could cause injury. Use a fine-grit sandpaper to gently sand the edges in a back-and-forth motion until they are smooth to the touch.
Sealing And Protecting Cut Plywood
Sealing the cut edges of the plywood is essential to protect it from moisture and damage. Apply a wood sealer or primer to the exposed edges, ensuring complete coverage to prevent warping or delamination. Additionally, applying a coat of paint or varnish to the edges can provide a cohesive and professional look while offering further protection against environmental elements.
Troubleshooting Common Cutting Issues
To troubleshoot common cutting issues when cutting plywood to size, ensure you’re using a sharp blade and supporting the plywood properly. Use a circular saw with the front face of the plywood pointing downwards to minimize chipping. Additionally, consider using a guide or jig for long, straight cuts to achieve accurate results.
Blade Burn And How To Prevent It
Cutting plywood to size can sometimes come with its own set of challenges. One common issue that many DIYers face is blade burn. Blade burn occurs when the saw blade generates excessive heat during the cutting process, resulting in burn marks on the plywood surface. Not only does this affect the aesthetic appeal of the finished project, but it can also weaken the plywood.
To prevent blade burn and ensure a clean cut, there are a few steps you can take:
- Choose the right blade: It’s important to select a high-quality blade specifically designed for cutting plywood. Look for blades with fine teeth and carbide tips, as they provide cleaner cuts and reduce the risk of burn marks.
- Adjust the speed: If your saw has variable speed settings, make sure to adjust it to a slower speed when cutting plywood. Slower speeds help to reduce friction and heat buildup, minimizing the chances of blade burn.
- Use a scoring technique: To further prevent burn marks, consider using a scoring technique. This involves making a shallow cut along the cutting line before making the full-depth cut. The shallow cut helps to break the surface tension and reduces the likelihood of blade burn.
- Keep the blade sharp: A dull blade generates more heat and increases the risk of blade burn. Regularly inspect and sharpen your saw blade to ensure optimal cutting performance.
By following these steps, you can minimize the occurrence of blade burn and achieve clean, professional-looking cuts when working with plywood.
Dealing With Plywood Warping
Another common issue when cutting plywood is dealing with warping. Plywood can sometimes warp due to changes in temperature, humidity, or improper storage. Warped plywood can be challenging to work with and may affect the accuracy of your cuts.
Here are a few tips to help you deal with plywood warping:
- Store plywood properly: To prevent warping, store plywood in a dry, temperature-controlled environment. Avoid areas with high humidity or extreme temperature fluctuations.
- Check for flatness: Before cutting, inspect the plywood for any signs of warping. Lay the sheet flat on a level surface and check for gaps or irregularities. If you notice any warping, try to flatten the plywood by placing weights or clamps on the affected areas.
- Support the plywood: When cutting large sheets of plywood, provide adequate support to prevent sagging or flexing. Use sawhorses or a sturdy workbench to support the plywood throughout the cutting process.
- Consider a straight edge guide: Using a straight edge guide or a cutting jig can help ensure straight and accurate cuts, even on warped plywood. These guides provide stability and prevent the saw blade from deviating off course.
By following these tips, you can effectively deal with plywood warping and achieve precise cuts, regardless of any potential warping issues.
Cutting plywood to size doesn’t have to be a daunting task. By troubleshooting common cutting issues like blade burn and plywood warping, you can achieve clean, accurate cuts and create impressive projects with ease.
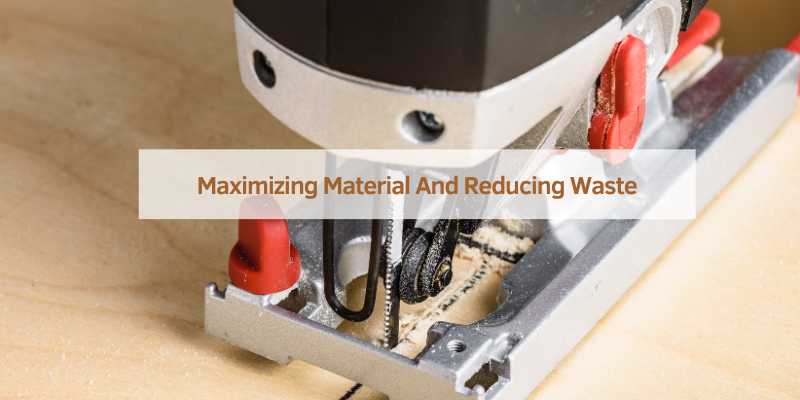
Maximizing Material And Reducing Waste
When it comes to cutting plywood to size, one of the key considerations is maximizing material and reducing waste. By implementing layout optimization strategies and reusing offcuts creatively, you can make the most out of your plywood sheets and minimize unnecessary waste.
Layout Optimization Strategies
Layout optimization involves carefully planning the placement of your cuts on the plywood sheet to minimize waste. By strategically arranging your cuts, you can maximize the number of usable pieces and reduce the amount of scrap left over.
Here are some layout optimization strategies to consider:
- Plan your cuts in advance: Before making any cuts, take the time to plan out the dimensions and quantities of the pieces you need. This will help you determine the most efficient layout for your plywood sheet.
- Optimize sheet orientation: Consider the direction of the wood grain and any imperfections in the plywood when planning your cuts. By aligning your cuts with the grain and avoiding areas with knots or defects, you can minimize waste.
- Minimize kerf loss: The kerf refers to the width of the cut made by the saw blade. By choosing the appropriate blade thickness and adjusting your measurements accordingly, you can reduce kerf loss and maximize material utilization.
- Use nesting software: If you’re working on a larger project or have multiple pieces to cut, consider using nesting software. These programs can help optimize the layout of your cuts, taking into account various factors such as sheet size, material dimensions, and cutting constraints.
Reusing Offcuts Creatively
Instead of discarding the offcuts and small pieces of plywood, you can find creative ways to reuse them, further reducing waste. Not only does this help maximize your material usage, but it also provides an opportunity for unique design elements.
Here are some ideas for reusing plywood offcuts:
- Create smaller projects: Use the leftover plywood pieces to build smaller projects such as shelves, picture frames, or decorative items. With a little creativity, you can transform those offcuts into something useful and visually appealing.
- Make templates or jigs: If you frequently work with specific shapes or angles, you can use plywood offcuts to create templates or jigs. These reusable guides will help you achieve accurate and consistent results in future projects.
- Donate or sell: If you have excess plywood offcuts that you don’t need, consider donating them to a local maker space or selling them to other woodworkers. This way, you can ensure that the material is put to good use and doesn’t go to waste.
By implementing layout optimization strategies and finding creative ways to reuse plywood offcuts, you can make the most out of your materials and minimize waste. Not only will this help you save money, but it will also contribute to a more sustainable approach to woodworking.
Frequently Asked Questions
When Cutting Plywood Is The Best Side Up Or Down?
When cutting plywood with a circular saw, make sure the front face of the plywood is pointing downwards as circular saws cut on the upstroke. This means the blade enters the wood from below and exits out the top. Most plywood generally has one higher quality “front” face and a slightly downgraded “back” face.
How To Cut Plywood Without Chipping?
To cut plywood without chipping, follow these tips:
1. Use painters tape or frog tape to prevent splintering.
2. Support the plywood with a table saw or rigid insulation when using a circular saw.
3. Keep the stock pushed tightly into the fence if using a table saw.
4. Use a jig or guide to make long and straight cuts with a circular saw.
5. Make several light cuts instead of one big cut with a knife and straight edge when trimming thin plywood sheets.
How To Cut A 4×8 Sheet Of Plywood?
To cut a 4×8 sheet of plywood, follow these steps:
1. Measure and mark the desired cut line on the plywood.
2. Use a circular saw with a sharp blade suitable for plywood.
3. Set the saw blade depth to slightly deeper than the thickness of the plywood.
4. Place the plywood on a stable surface and secure it with clamps or weights.
5. Align the saw blade with the marked cut line and start the saw.
6. Slowly and steadily guide the saw along the cut line, keeping it straight.
7. Apply even pressure to ensure a clean and accurate cut.
8. Once the cut is complete, remove any rough edges with sandpaper. Remember to wear appropriate safety gear, such as goggles and gloves, when using power tools.
Can You Cut Plywood With A Stanley Knife?
Yes, you can cut plywood with a Stanley knife. Using a sharp and sturdy blade, you can make clean and precise cuts in plywood sheets. It is important to apply steady pressure and make multiple passes to achieve the desired cut.
Remember to use a straight edge as a guide for accurate cutting.
Conclusion
Cutting plywood to size is an essential skill for any DIY enthusiast or professional carpenter. With the right tools and techniques, it is a straightforward process that can be done accurately and efficiently. Remember to choose the right blade, support the plywood, and position it correctly to avoid chipping or splintering.
Whether you are using a circular saw or a table saw, take your time and make precise cuts to achieve the desired result. With these tips in mind, you can confidently tackle any plywood cutting project.