Do I Need Polyurethane After Staining? Here’S The Truth
The honest answer is, most of the time, yes, you absolutely need some kind of topcoat after staining wood. Polyurethane is a very popular choice because it offers excellent protection. Stains add color, but they don’t protect the wood from daily wear and tear. A good topcoat seals that color in and keeps your wood looking its best for longer.
Understanding Wood Stains and Finishes
Think of staining wood like coloring a drawing. The stain itself is the color. It seeps into the wood grain, giving it a new hue.
But the paper the drawing is on is still just paper. It can smudge, get dirty, or tear easily. That’s where a finish, like polyurethane, comes in.
A finish is like a clear protective layer you put over the drawing. It seals everything in place.
Wood stains are made to change the color of the wood. They often have pigments or dyes that soak into the wood fibers. Some stains also contain a bit of binder to help the color stick.
But the main job of a stain is cosmetic. It changes how the wood looks.
On the other hand, finishes are all about protection and durability. They sit on top of the wood. They create a barrier against moisture, spills, scratches, and fading from sunlight.
Without a protective finish, your beautiful stained wood is quite vulnerable. It can easily get damaged from everyday use.
There are many kinds of finishes available. Polyurethane is just one of them. Others include lacquer, varnish, shellac, and oils.
Each has its own pros and cons. But the goal is always the same: to protect the wood and the stain.

Why Polyurethane is a Popular Choice
Polyurethane is a synthetic material. It creates a very tough and durable film when it dries. This makes it excellent for protecting wood surfaces that see a lot of action.
Think about tabletops, chairs, or even floors. These surfaces get bumped, wiped, and exposed to spills. Polyurethane can handle it.
It comes in different forms. You can find it as oil-based or water-based. Oil-based polyurethane is known for its tough finish.
It also gives a bit of a warm, amber tone to the wood. Water-based polyurethane dries clear. It’s also lower in odor and cleans up with soap and water.
This makes it a great choice for indoor projects where you want a quick, easy finish.
One of the best things about polyurethane is its resistance. It resists water well. It also fights against chemicals like alcohol or nail polish remover.
And it’s quite good at resisting scratches and scuffs. This combination of traits makes it a go-to for many DIYers and professionals alike.
When you apply polyurethane, you’re building up thin layers. Each layer adds more protection. Most projects will need at least two or three coats.
High-traffic areas might need even more. The more coats you add, the stronger the protective barrier becomes.
When You Might Not Need Polyurethane (and What to Use Instead)
While polyurethane is great, it’s not always the only answer. There are times when you might choose a different finish or no finish at all. This often depends on the type of stain you used and the intended use of the item.
Some wood stains are actually “gel stains” or “all-in-one” products. These might already contain some level of protection built into the stain. Always read the product label carefully.
If it says it’s a “stain and finish in one,” you might be able to skip the extra step. However, even these often benefit from an additional clear coat for maximum durability.
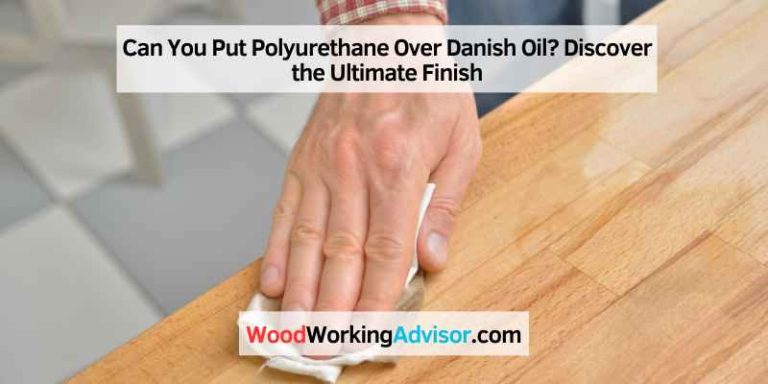
Another option is using a penetrating oil finish. Products like Tung oil or Danish oil soak into the wood. They enhance the wood’s natural beauty and offer some protection.
They also feel more natural to the touch, as they don’t form a thick film on the surface. These are great for furniture where you want a natural look and feel.
However, oil finishes typically offer less protection against scratches and spills than polyurethane. They also require reapplication more often to maintain their look and protection. So, for something like a kitchen countertop or a high-traffic table, an oil finish might not be enough on its own.
For outdoor projects like decks or fences, specialized deck stains and sealers are often used. These are formulated to withstand weather, UV rays, and mildew. They might contain some level of waterproofing already.
But again, a dedicated deck sealer or topcoat provides the best long-term protection.
Finally, for purely decorative items that won’t be touched or exposed to anything, you could skip a finish. But honestly, even decorative pieces can benefit from a light coat of protection. It keeps dust from sticking and makes them easier to clean.
Personal Experience: That Time I Learned a Hard Lesson
I remember working late one night on a coffee table I was building for my living room. I had found this amazing dark walnut stain. It made the cheap pine boards look like solid hardwood.
I brushed it on, wiped it off, and was so thrilled with the rich, deep color. It looked fantastic under the workshop lights.
My thought was, “It’s a coffee table. It’s going to get some use, but nothing too extreme. The stain looks so good, I don’t want to cover it up with a thick, glossy finish.
Maybe just a coat of wax.” So, I skipped the polyurethane and went straight for some paste wax. I buffed it to a nice sheen. It felt smooth and looked natural.
Fast forward about three weeks. My daughter spilled a glass of water on the table. No big deal, right?
I wiped it up quickly. But a faint white ring was already starting to form where the water had sat. Then, my son accidentally slid a board game across it.
A tiny scratch appeared, showing the lighter wood underneath the stain. That’s when the panic set in.
I had spent hours staining this table, and now it looked damaged after just a few weeks. The wax offered almost no real protection. It looked nice, but it was too delicate for a real-life coffee table.
That’s when I realized the critical importance of a proper topcoat. I ended up having to sand down the entire table again and apply several coats of polyurethane. It took more time and effort, but that table has held up perfectly ever since.
That experience taught me never to skip the protection step again, especially for items that get daily use.
Stain vs. Finish: The Key Differences
Stain: Adds color and enhances wood grain. It doesn’t protect the wood.
Finish (Topcoat): Seals the wood and protects it from damage. It also locks in the stain color.
Think of it like paint on a wall. The paint is the color. The primer and sealant under the paint and the clear coat over it are the protection.
How Stains Work with Different Wood Types
The way a stain interacts with wood can vary a lot. Different wood species have different densities and grain patterns. This affects how deeply the stain penetrates and how evenly it spreads.
Knowing this helps you understand why a finish is so important, as it helps to even out the look after staining.
Hardwoods like oak, maple, and birch have tighter grain structures. Stains often go on more evenly on these woods. However, some hardwoods, like maple, can be quite dense.
This can make it harder for the stain to soak in deeply. Sometimes, a pre-stain wood conditioner is recommended for these.
Softwoods like pine, fir, and poplar have more open grain. Stains can penetrate these woods very deeply. But this can also lead to blotchiness.
Pine, in particular, is notorious for absorbing stain unevenly. This is where the even layer of a topcoat becomes crucial. It helps to create a uniform look over any slight inconsistencies left by the stain.
You might also notice that the final color looks different on different woods. The same stain can look lighter or darker depending on the wood it’s applied to. This is normal.
The finish you choose on top can also slightly alter the final color. Oil-based polyurethanes, for example, tend to add a warmer, slightly amber tone. This can make a dark stain appear even richer.
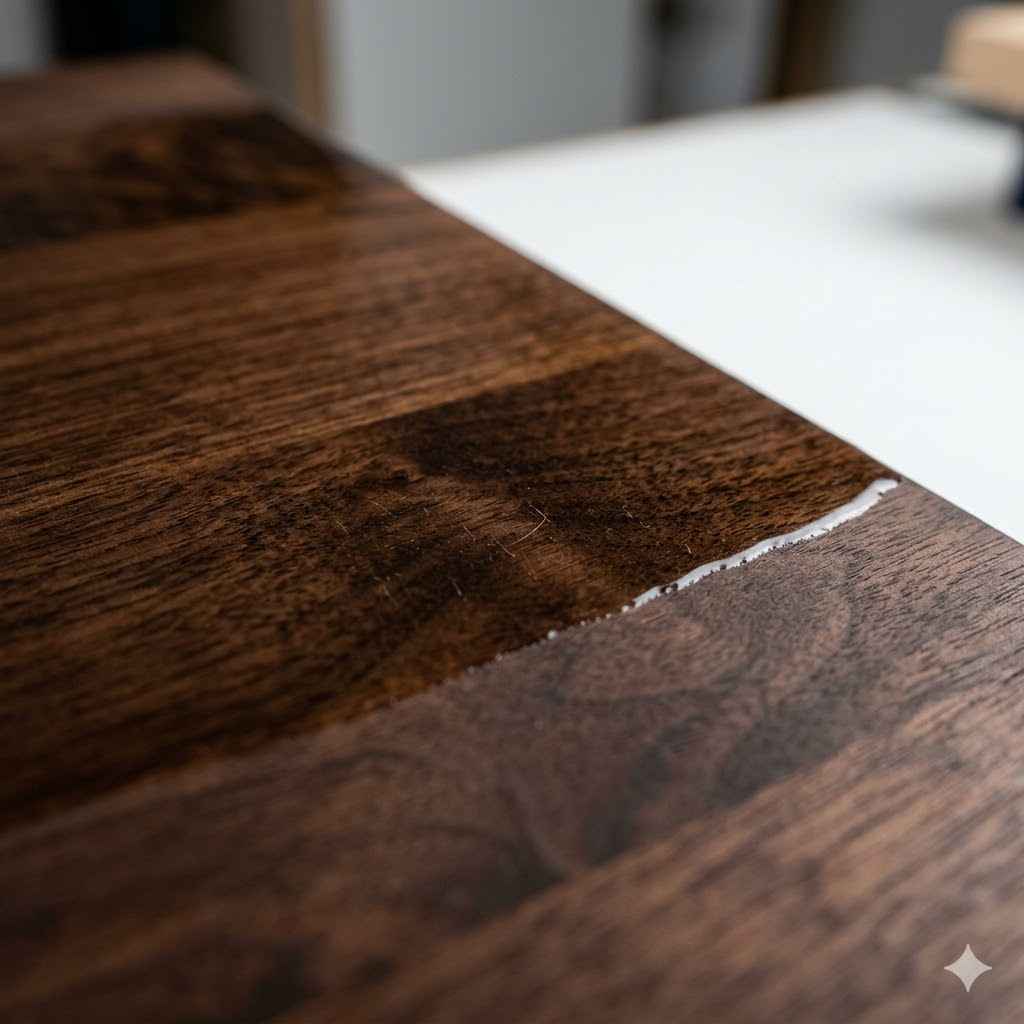
When you apply polyurethane over a stained piece, it essentially seals the color into the wood. It locks the pigments in place. This prevents the stain from rubbing off onto other surfaces or from being washed away if the wood gets wet.
It’s the crucial step that makes your stained project durable.
Quick Guide: Choosing a Stain’s Partner
For Maximum Protection (Tables, Floors): Stain + Polyurethane (oil or water-based)
For Natural Look & Feel (Decorative Furniture): Stain + Penetrating Oil (Tung, Danish)
For Outdoor Wood (Decks, Fences): Specialized Deck Stain + Deck Sealer
For Quick Projects (Crafts): Stain + Acrylic Sealer or Polyurethane
The Application Process: Getting it Right
Applying polyurethane correctly is key to getting a good, protective finish. It’s not just about slapping it on. There’s a right way to do it for the best results.
The goal is to build up thin, even coats.
First, make sure your stained wood is completely dry. Check the stain manufacturer’s instructions for drying times. This can range from a few hours to 24 hours or more, depending on the stain and humidity.
Applying polyurethane too soon can cause problems, like the stain not curing properly or the finish lifting.
Next, prepare your workspace. You want a clean, dust-free area. Dust is the enemy of a smooth finish.
A clean cloth or a tack cloth can help pick up any lingering dust before you start. Make sure the temperature is right, too. Extreme heat or cold can affect how the polyurethane dries.
When you open the can of polyurethane, stir it gently. Don’t shake it! Shaking creates bubbles, which you don’t want in your finish.
Use a good quality brush or a foam applicator. For water-based poly, a synthetic brush is best. For oil-based, a natural bristle brush works well.
Apply a thin, even coat. Start along the grain of the wood. Work in one direction.
Avoid applying too much at once, as this can lead to drips and an uneven surface. If you see any drips, smooth them out immediately.
Let the first coat dry completely. Again, check the product directions for drying times. Water-based poly usually dries in 1-2 hours.
Oil-based can take 4-6 hours or more. Once dry, you’ll want to lightly sand the surface. Use very fine-grit sandpaper, like 220 or 320 grit.
This is called “de-nibbing.” It smooths out any tiny bumps or dust specks.
After sanding, wipe away all the dust with a tack cloth. Then, apply your second coat of polyurethane. Repeat this process for each subsequent coat.
Most projects will need at least three coats for good protection. For very high-wear surfaces, you might want four or even five coats.
The final result should be a smooth, durable surface that protects your stain and enhances the wood’s beauty. Taking your time with the application process makes a huge difference in the final look and how long the finish lasts.
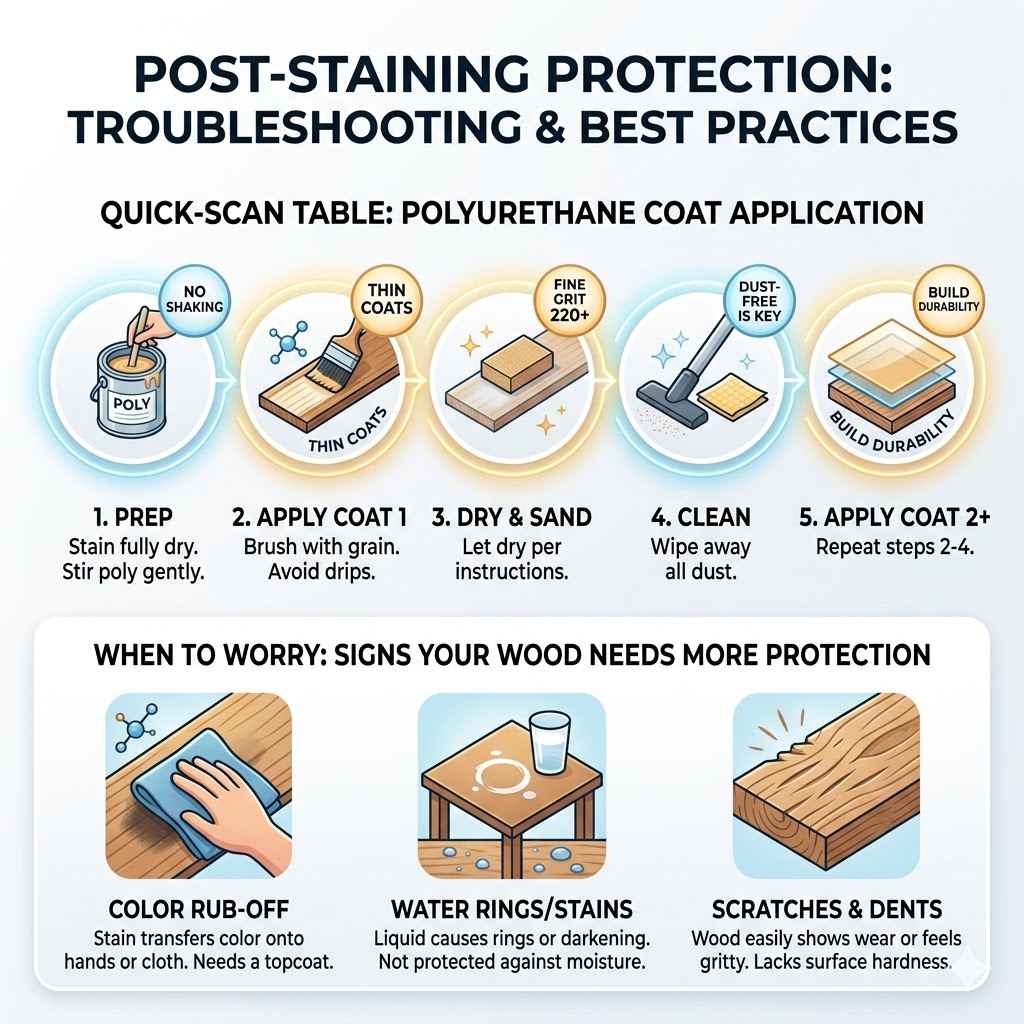
Quick-Scan Table: Polyurethane Coat Application
| Step | Action | Notes |
| 1. Prep | Ensure stain is fully dry. Clean workspace. Stir poly gently. | No shaking! Dust-free is key. |
| 2. Apply Coat 1 | Brush thin, even coat along the grain. | Avoid drips. |
| 3. Dry & Sand | Let dry per instructions. Lightly sand with fine grit (220+). | Smooths imperfections. |
| 4. Clean | Wipe away all dust with a tack cloth. | Crucial for a smooth finish. |
| 5. Apply Coat 2+ | Repeat steps 2-4. | Build up layers for durability. |
Real-World Scenarios: Where Finishes Matter Most
Let’s look at some common items you might stain and why a protective finish is so vital for each.
Kitchen Cabinets: These see constant use. They get touched, bumped, and splashed with all sorts of things, from grease to cleaning products. A good polyurethane finish is essential to protect the stain from wear and tear, and to make them easy to wipe clean.
Without it, the stain could fade or rub off in high-contact areas.
Dining Tables: This is the heart of many homes. It’s where meals are eaten, homework is done, and games are played. Spills are inevitable – drinks, sauces, even paint from craft projects.
A robust finish like polyurethane can withstand these daily battles. It prevents stains from penetrating the wood and protects against scratches from plates and cutlery.
Wooden Floors: Floors take the most abuse. They endure foot traffic, furniture being moved, pets, and general daily life. Staining floors without a super-durable finish is a recipe for disaster.
Polyurethane, especially floor-specific formulations, creates a hard, protective layer that seals the stain and withstands heavy wear for years.
Outdoor Furniture/Decks: While often stained, these items face extreme conditions. Sun, rain, snow, and temperature changes can quickly degrade unprotected wood. Specialized exterior stains and sealers are designed to handle this.
They contain UV inhibitors to prevent fading and mildewcides to stop mold growth. A good topcoat is absolutely non-negotiable for longevity here.
Picture Frames & Decorative Items: Even things that don’t get touched much can benefit. A simple coat of clear finish protects the stain from dust, making cleaning easier. It also prevents accidental knocks from chipping the stain.
It’s a small step that adds a lot of value and longevity.
The environment and how the item will be used are the biggest factors in deciding how much protection you need. But in almost all cases, a stain is just the color. The finish is what makes it last.
What This Means for You
When is it Normal? It’s normal for wood stain to look “raw” or have a slightly matte finish before a topcoat. It’s also normal for it to feel a bit rougher than a finished piece.
When to Worry: Worry if the stain rubs off easily onto your hands or other surfaces after the recommended drying time. This suggests the stain isn’t bonding well or needs a finish.
Simple Checks: After staining and drying, run a clean white cloth over the wood. If color transfers, you need a finish. If the wood feels like it could scratch easily, you need a finish.
When to Worry: Signs Your Wood Needs More Protection
It’s important to know when your stained wood isn’t getting the protection it needs. Sometimes, you might see warning signs even before you apply a topcoat, or if you used a less robust finish.
Color Rub-Off: The most obvious sign is if the stain transfers color onto your hands, clothes, or surrounding surfaces. This means the stain isn’t properly bonded to the wood and will likely fade or wear away quickly. This is a clear indicator that a protective topcoat is needed, or that the stain itself was not applied correctly.
Water Rings or Stains: If even a small amount of moisture causes a visible mark, ring, or darkening of the wood, your surface is not protected. Stains alone offer very little resistance to water. This is why a waterproof topcoat is so important for items like tables or countertops.
Scratches and Dents: If the wood surface easily shows scratches, dings, or dents from light contact, it lacks sufficient hardness. A good finish adds a protective layer that is much harder than the wood or stain itself. Soft woods are more prone to this, and therefore need robust finishing.
Fading: If the wood starts to look dull or lighter in areas exposed to sunlight, the stain is being degraded by UV rays. While some finishes offer UV protection, this is a sign that the initial stain is not protected from the elements. A quality topcoat will prevent this fading.
Feeling Rough or Porous: After staining, the wood might feel slightly rougher than before due to raised grain. However, if it feels porous and like it will easily absorb dirt or oils, it’s unprotected. A smooth, sealed finish will feel uniform and somewhat slick.
If you notice any of these signs, it’s a strong signal that you need to apply a protective topcoat immediately. It’s much easier to fix these issues before extensive damage occurs.
Quick Fixes & Tips for a Better Finish
Tip 1: Pre-Stain Conditioner Use a pre-stain wood conditioner on softwoods like pine. This helps the stain absorb more evenly, preventing blotchiness.
Tip 2: Stir, Don’t Shake Always stir your stain and polyurethane gently. Shaking introduces air bubbles that mar the finish.
Tip 3: Thin Coats are Best Multiple thin coats of polyurethane are far more durable and look better than one or two thick coats.
Tip 4: Sand Between Coats Lightly sanding with fine-grit sandpaper between coats removes dust and ensures a smooth surface for the next layer.
Tip 5: Test First! Always test your stain and finish combination on a scrap piece of the same wood. This shows you the final look and how the products interact.
Frequently Asked Questions About Staining and Finishing
Do I need to sand after staining wood?
Generally, you don’t sand the stain itself. You sand the wood before staining to create a smooth surface. After the stain has dried, you might lightly sand the finished wood (after applying a coat of topcoat) to create a smoother surface for the next layer of finish.
Can I use polycrylic instead of polyurethane after staining?
Yes, you can! Polycrylic is a water-based finish. It dries clear and is great for lighter stains because it won’t yellow like some oil-based polyurethanes can.
It’s also easier to clean up.
How many coats of polyurethane should I apply?
For most furniture, 2-3 coats are usually enough. For high-traffic items like floors or tabletops, 4-5 coats or even more might be needed for maximum durability.
What is the difference between oil-based and water-based polyurethane?
Oil-based poly offers a harder, more durable finish and adds a warm amber tone. It requires mineral spirits for cleanup and has stronger fumes. Water-based poly dries faster, is clear, low-odor, and cleans up with soap and water.
It’s a bit less durable than oil-based.
Can I stain over an existing finish?
No, not typically. Stains need to penetrate raw wood. If there’s already a finish (like paint or varnish), you’d need to remove it completely by sanding or stripping before you can stain the wood.
How long does it take for polyurethane to fully cure?
Polyurethane dries to the touch relatively quickly, usually within a few hours. However, it can take 24-72 hours for it to be fully dry and ready for light use. Full curing, where the finish reaches its maximum hardness and durability, can take 30 days or even longer.
Be gentle with newly finished items during this time.
Conclusion: Protecting Your Hard Work
So, to wrap things up: do you need polyurethane after staining? In most cases, yes. Stains are for color, but finishes like polyurethane are for protection.
They seal in that beautiful color and shield your wood from daily wear, spills, and sun. Skipping this step often leads to disappointment down the road.