Can You Apply Polyurethane Over Paint? Here’S The Truth
It’s a question many DIYers and home decorators ask: “Can I put polyurethane over paint?” You’ve just finished painting a piece of furniture or a wall, and you want to add that extra layer of protection. Maybe you want to seal in a beautiful mural or protect a painted surface from wear and tear. It sounds simple enough, right?
But the reality can be a bit trickier. Getting it wrong can lead to peeling, bubbling, or a dull finish. Let’s dive into what you need to know to get a great result.
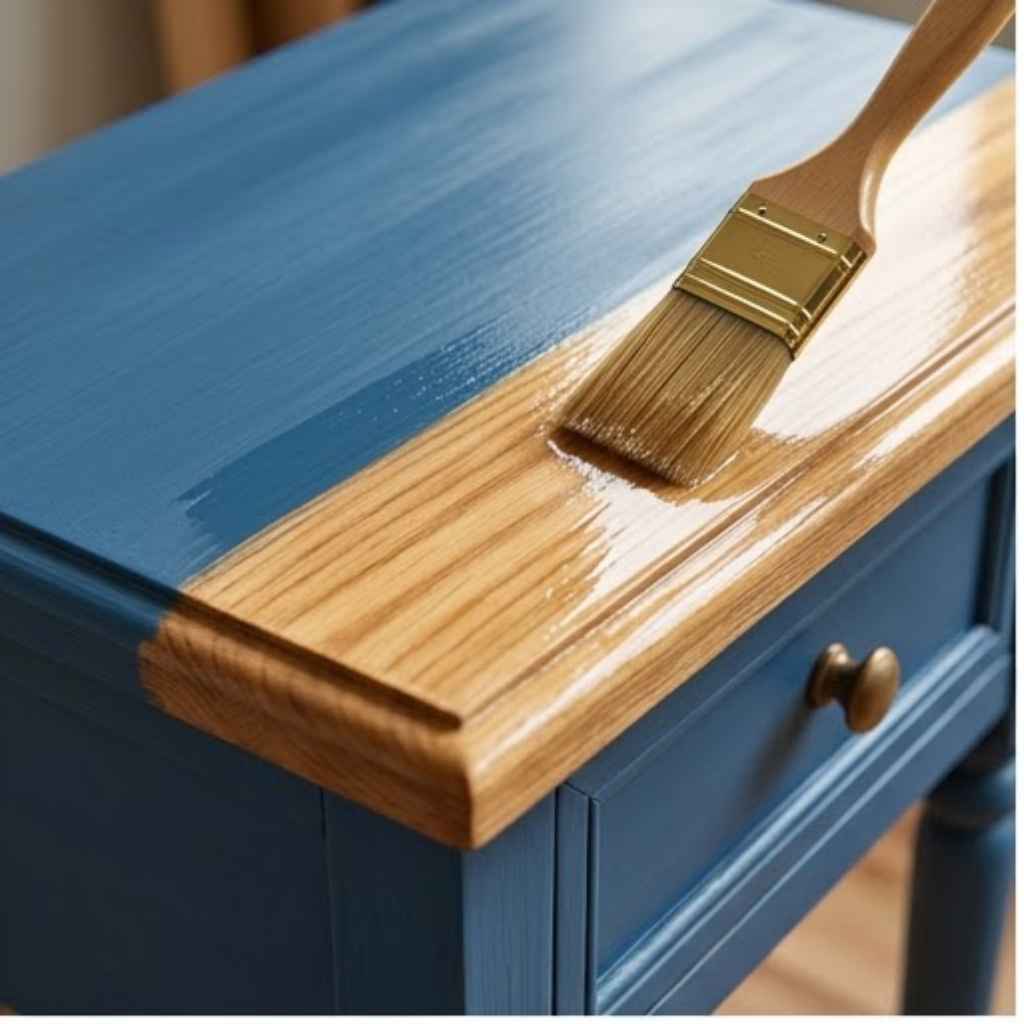
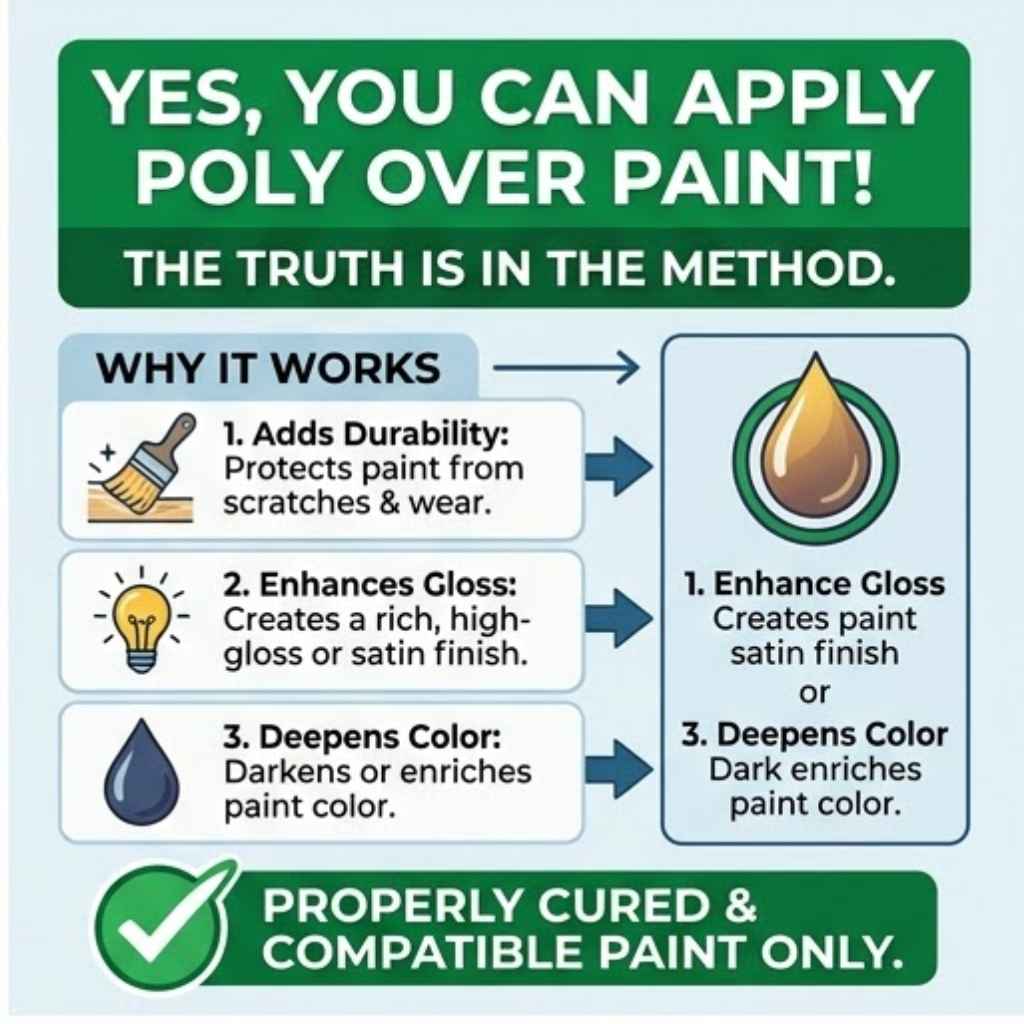
Yes, you can generally apply polyurethane over paint, but success depends heavily on the type of paint used, proper surface preparation, and choosing the right polyurethane. Not all paints and polyurethanes are compatible, and skipping crucial steps can cause failure. This guide explains how to do it right.
Understanding Polyurethane and Paint Compatibility
Polyurethane is a type of plastic. It’s known for its tough, durable finish. It’s often used to protect wood surfaces.
Paint, on the other hand, is a colored coating. It comes in many different types. The way these two interact is key.
Some paints and polyurethanes just don’t play well together. This is often because of their chemical makeup. Oil-based paints and water-based (latex) paints are very different.
They need different kinds of protection. Knowing your paint type is the first step. Then you can pick a polyurethane that works with it.
When we talk about applying polyurethane over paint, we’re aiming for a few things. We want to add protection. We want to make the painted surface last longer.
We also want to enhance the look. Sometimes, people worry that polyurethane will yellow or change the paint color too much. This is a valid concern, especially with lighter paint colors.
The finish of the polyurethane also matters. Do you want a shiny look? Or something more matte?
The biggest hurdle is often adhesion. Will the polyurethane stick to the paint? Or will it just slide off?
This depends on the paint’s finish. A very glossy paint might be too slick. The polyurethane might not grip it well.
Also, some paints contain waxes or silicones. These can prevent anything from sticking to them. It’s a bit like trying to glue something to a greased surface.
It’s not going to hold.
Types of Paint and How They Affect Polyurethane Application
The type of paint you used makes a huge difference. Let’s break down the common ones. This will help you decide if polyurethane is the right choice for your project.
Latex or Water-Based Paints
These are very common for walls and furniture. Think of interior wall paints. Many craft paints and chalk paints are also water-based.
Latex paints are generally easier to work with. They dry faster. They clean up with soap and water.
The good news is that latex paints usually accept polyurethane well. But there’s a catch. You need to make sure the paint is fully cured.
This can take several weeks. If it’s not fully cured, the polyurethane can trap moisture. This can cause problems later on.
For latex paints, a water-based polyurethane is often the best choice. They are compatible. They also tend to be lower in VOCs (volatile organic compounds).
This means less smell and easier cleanup. If you use an oil-based polyurethane over latex paint, it can sometimes cause yellowing. This is more noticeable with white or very light colors.
It’s also possible for the oil and water bases to not bond perfectly.
Chalk paint is a special case within water-based paints. It has a very matte, porous finish. This means it soaks up things easily.
Many people use wax over chalk paint. But if you want a more durable finish, you can use polyurethane. You just need to be sure the chalk paint is completely dry and cured.
Sometimes, a light sanding helps the polyurethane grip better. Always test this on a small, hidden area first.
Oil-Based or Alkyd Paints
These paints are known for their durability and smooth finish. They often have a slight sheen even when dry. Oil-based paints are common for trim, doors, and cabinets.
They are also used on some furniture. Oil-based paints can also be painted over with polyurethane. In fact, oil-based polyurethane often bonds very well with oil-based paint.
This is because they are chemically similar.
The challenge with oil-based paints is drying time. They take longer to cure than latex paints. You must wait for them to be fully dry and hard before applying polyurethane.
Rushing this step can lead to lifting or cracking. Oil-based polyurethanes offer excellent durability. They resist water and chemicals well.
However, they often have a strong odor. They also tend to dry with a slight amber tint. This can deepen colors over time, which might be desirable for some projects but not for others.
Spray Paints
Spray paints are popular for their speed and ease of use. Many spray paints are lacquer-based or acrylic-based. Some are more flexible than others.
Applying polyurethane over spray paint can be tricky. The surface might be very smooth or very porous. Adhesion is the main concern here.
If the spray paint is not fully cured, the solvents in the polyurethane can re-dissolve it. This causes a sticky mess or bubbling. It’s crucial to let spray paint cure for a good amount of time.
Also, test a small area. A water-based polyurethane is often safer over spray paint. It has milder solvents.
Enamel Paints
Enamel paints are designed for tough finishes. They can be oil-based or water-based. They are often used on high-traffic areas like cabinets and doors.
Enamels are usually quite hard and durable. If you’ve painted with an oil-based enamel, an oil-based polyurethane will likely work well. For water-based enamels, a water-based polyurethane is the safer bet.
The key is to ensure the enamel paint has fully hardened. This can take days or even weeks depending on the product and conditions.
The Critical Role of Surface Preparation
This is where most DIY projects go wrong. You cannot just slap polyurethane over paint and expect it to last. Preparation is everything.
It ensures the polyurethane can stick properly. It also helps the finish look smooth and even.
Cleaning the Surface
Dirt, grease, and dust are the enemies of a good finish. Even if your paint looks clean, there could be a thin layer of grime. This is especially true for furniture or surfaces in a kitchen or bathroom.
Always start by cleaning the painted surface thoroughly. Use a mild detergent mixed with water. A degreaser can be helpful for kitchens.
Rinse the surface well with clean water. Let it dry completely. A damp cloth can leave streaks if not wiped dry.
For high-gloss painted surfaces, you might need a special cleaner. Some cleaners are designed to etch surfaces slightly. This gives the next layer something to grip.
But be careful. You don’t want to damage the paint. A good scrub with a clean sponge and a bit of patience usually does the trick.
Make sure no soap residue is left behind. Soap can also interfere with adhesion.
Sanding for Adhesion
This step is often skipped, but it’s vital, especially if your paint is glossy or satin. Polyurethane needs a slightly rough surface to bond to. You’re not trying to remove the paint.
You’re just scuffing it up. Use a fine-grit sandpaper. Something like 220-grit or even 320-grit is ideal.
Sand the entire area where you plan to apply polyurethane. Be gentle. You just want to dull the shine.
Don’t sand through the paint layer.
After sanding, you must remove all the dust. This is super important. Use a tack cloth.
A tack cloth is slightly sticky. It picks up fine dust particles that vacuuming or wiping might miss. Wipe the surface down gently with the tack cloth.
Do this in one direction. If you have a lot of dust, you might need to vacuum first, then wipe with a damp cloth, and then use the tack cloth. The surface should feel smooth and clean.
No dust should be visible.
Allowing the Paint to Cure Fully
This is the waiting game. Paint needs time not just to dry, but to cure. Drying means the surface is no longer wet.
Curing means the paint has hardened completely. This process can take days, weeks, or even a month or more, depending on the paint type. For latex paints, curing can take 21-30 days.
For oil-based paints, it can be similar or even longer. If you apply polyurethane too early, it can trap solvents. This can cause bubbling, peeling, or a soft, gummy finish.
The polyurethane might also soften the paint underneath.
How do you know if the paint is cured? Manufacturers usually provide this information on the can. If you’re unsure, err on the side of waiting longer.
It’s better to wait an extra week than to have to redo the whole project. You can do a small scratch test in an inconspicuous area. If the paint scratches off easily, it’s not cured enough.
Choosing the Right Polyurethane
Not all polyurethanes are created equal. Your choice will affect the durability, look, and how well it adheres to your painted surface.
Water-Based (Polyacrylic) vs. Oil-Based (Oli-Based Polyurethane)
This is the first big decision.
- Water-Based Polyurethane: These are also called polyacrylics. They are clear and dry clear. They don’t yellow over time. This makes them ideal for light-colored paints. They have lower VOCs and less odor. Cleanup is easy with soap and water. They dry faster than oil-based. However, they are not quite as durable as oil-based in some situations. They are great for furniture and cabinets.
- Oil-Based Polyurethane: These are more durable and resist abrasion and chemicals better. They tend to have a warmer, amber tone. This can deepen colors and add a rich look. However, they yellow over time. This can make white or pastel paints look dingy. They have strong odors and require mineral spirits for cleanup. They also dry much slower.
For most projects over latex paint, a water-based polyurethane is the best choice. It’s less likely to cause yellowing and is easier to work with. If you have an oil-based paint and want maximum durability, an oil-based polyurethane might be better.
But always consider the color of the paint first.
Finishes: Gloss, Semi-Gloss, Satin, Matte
The finish determines how shiny your final surface will be.
- Gloss: Very shiny, reflects a lot of light. Shows imperfections easily.
- Semi-Gloss: A good balance of shine and durability.
- Satin: A soft sheen. More forgiving of imperfections. Very popular.
- Matte (or Flat): Very little shine. Hides imperfections well. Can sometimes look chalky if not applied well.
Your choice depends on the look you want. A satin finish is often a safe bet for furniture and cabinets. It provides some protection without being too shiny.
A matte finish can look very sophisticated on some pieces. High gloss can look great but requires a perfect surface underneath.
Application Methods
How you apply the polyurethane also matters.
- Brush: Good for most surfaces. Use a high-quality synthetic brush for water-based poly. Use a natural bristle brush for oil-based poly.
- Roller: Best for large, flat areas like tabletops or walls. Use a foam roller or a very fine-nap mohair roller.
- Spray: Offers a very smooth, even finish. Requires a spray gun or aerosols. Needs careful ventilation and protection.
Whichever method you choose, apply thin, even coats. It’s better to apply three thin coats than one thick coat. Thick coats can lead to drips, runs, and uneven drying.
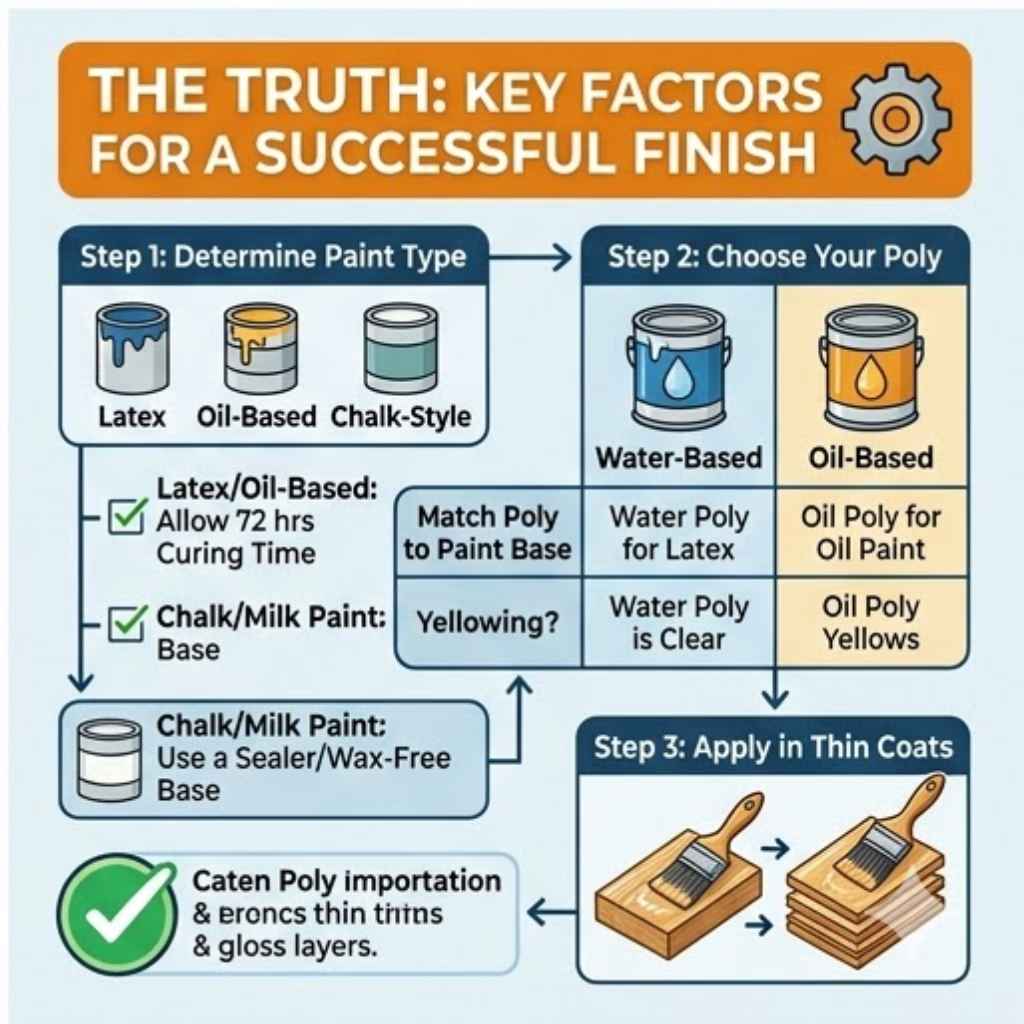
Quick Polyurethane Selector Guide
Paint Type: Latex/Water-Based
Recommended Polyurethane: Water-Based (Polyacrylic)
Finish: Satin or Semi-Gloss recommended for most projects.
Surface Prep: Clean, light sand (220-320 grit), tack cloth, and full paint cure.
Paint Type: Oil-Based/Alkyd
Recommended Polyurethane: Oil-Based (for max durability) OR Water-Based (to avoid yellowing).
Finish: Varies based on desired look and yellowing tolerance.
Surface Prep: Clean, light sand (220-320 grit), tack cloth, and full paint cure.
The Application Process: Step-by-Step
Once you’ve prepped your surface and chosen your materials, it’s time to apply. Patience and care are key here. Rushing will only lead to disappointment.
Step 1: Final Clean and Dust Removal
Before you open the can of polyurethane, give the surface one last wipe. Use a tack cloth again. Even a little dust can ruin a smooth finish.
Make sure your brushes or rollers are clean and free of lint. Work in a well-ventilated area. Avoid dusty environments.
Step 2: Stir, Don’t Shake
If you’re using polyurethane, especially oil-based, you need to stir it well. Do not shake the can. Shaking creates bubbles.
These bubbles can transfer to your finish. Use a stir stick. Gently mix the polyurethane.
Make sure any settled pigment or solids are mixed in. If you’re using a water-based product, gentle stirring is still best.
Step 3: Applying the First Coat
Dip your brush or roller into the polyurethane. Don’t overload it. For a brush, use long, even strokes.
Apply the polyurethane in the direction of the grain if it’s wood. Try to keep your strokes consistent. For a roller, use light pressure.
Aim for an even layer. Don’t let the polyurethane pool or drip. If you see a drip forming, gently brush it out immediately.
Work in manageable sections. If you’re doing a tabletop, do one side or one section at a time. This helps you maintain a wet edge.
A wet edge means you’re applying new polyurethane next to an area that is still wet. This prevents lap marks. Lap marks are visible lines where one stroke of polyurethane ended and the next began.
Step 4: Drying Between Coats
Check the polyurethane can for drying times. These are usually estimates. Factors like humidity and temperature can affect drying.
Water-based polyurethanes dry faster. They might be ready for a second coat in 2-4 hours. Oil-based ones can take 6-8 hours or longer.
Don’t rush this. The first coat needs to be dry to the touch. It should not feel tacky.
Step 5: Light Sanding Between Coats
This is another crucial step for a smooth finish. Once the first coat is dry, you need to lightly sand it. Use very fine-grit sandpaper, like 320 or 400 grit.
Or use a synthetic steel wool (0000 grade). The goal is not to remove the polyurethane. It’s to knock down any tiny bumps or dust nibs.
These are imperfections that settled into the wet coat. Sand gently and evenly over the entire surface.
After sanding, clean the surface again with a tack cloth. This removes all the dust. This step might seem tedious, but it makes a huge difference in the final look.
It ensures each layer bonds well to the one below it.
Step 6: Applying Subsequent Coats
Apply the second coat just like the first. Remember to work in thin, even layers. Let it dry completely.
Then, lightly sand again with fine-grit sandpaper and remove dust with a tack cloth. Repeat this process for all desired coats. Most projects benefit from 2-3 coats.
High-traffic areas might need 3-4 coats. Always follow the manufacturer’s recommendations.
Step 7: The Final Cure
Even after the last coat is dry to the touch, the polyurethane is not fully cured. Like paint, polyurethane needs time to harden completely. This can take 7 to 30 days.
During this time, be gentle with the surface. Avoid heavy use or harsh cleaning. Avoid placing very hot or very cold items directly on the surface.
This can cause damage. After the full cure, your painted surface will be protected and durable.
Applying Polyurethane: Top Tips
Thin Coats: Always apply thin, even coats. Multiple thin coats are better than one thick one.
Don’t Shake: Stir polyurethane gently to avoid bubbles.
Wet Edge: Maintain a wet edge to prevent lap marks.
Light Sanding: Lightly sand between coats (320-400 grit) and always use a tack cloth.
Full Cure: Allow the final coat to cure for at least 7-30 days before heavy use.
Ventilation: Work in a well-ventilated area, especially with oil-based products.
Common Problems and How to Avoid Them
Even with careful work, things can sometimes go wrong. Here are common issues and how to fix or prevent them.
1. Bubbling
Bubbles can appear during application or as the polyurethane dries.
- Cause: Shaking the can, applying too thickly, applying over uncured paint, or applying in too hot or humid conditions.
- Avoidance: Stir gently. Apply thin coats. Ensure paint is fully cured. Work in moderate temperatures (60-75°F or 15-24°C) with moderate humidity.
- Fix: If caught early while wet, gently brush out bubbles. If dry, lightly sand the bubble down and reapply a thin coat. For widespread bubbling, you may need to remove the finish and start over.
2. Peeling or Chipping
This means the polyurethane isn’t sticking to the paint.
- Cause: Poor surface preparation (dirty or not sanded), applying over a waxy or glossy paint without proper prep, or applying over paint that isn’t fully cured.
- Avoidance: Thorough cleaning, light sanding for adhesion, and ensuring the paint is fully cured are essential.
- Fix: You’ll likely need to scrape or sand off the peeling areas. Then, re-prep the surface and reapply polyurethane.
3. Yellowing or Discoloration
This is especially noticeable on white or light-colored paints.
- Cause: Using an oil-based polyurethane over latex paint. Oil-based polyurethanes have an amber tint that can yellow over time.
- Avoidance: Always use a water-based (polyacrylic) polyurethane over latex or water-based paints, especially if you want to maintain a true white or pastel color.
- Fix: If yellowing has occurred, the only real fix is to remove the polyurethane and reapply a water-based product.
4. Milky or Cloudy Finish
The polyurethane looks opaque instead of clear.
- Cause: Applying too thickly, applying in high humidity, or applying over a damp surface. Moisture can get trapped.
- Avoidance: Apply thin coats. Ensure the surface is bone dry. Work in dry conditions.
- Fix: For light hazing, sometimes a bit of gentle sanding can fix it. If it’s severe, you might need to strip the finish.
5. Uneven Sheen or Texture
Some spots are shinier than others. Or you can feel ridges.
- Cause: Inconsistent application, not sanding between coats, or brush strokes showing.
- Avoidance: Apply evenly with consistent pressure. Sand lightly between coats. Use the right brush or roller.
- Fix: Gently sand the uneven areas and reapply a thin coat, feathering it into the surrounding area.
Contrast Matrix: Polyurethane Over Paint
| Myth | Reality |
|---|---|
| You can apply polyurethane over any paint immediately. | No, paint must be fully cured, and surfaces prepped properly (cleaned, lightly sanded). |
| Oil-based polyurethane is always best for durability. | It’s durable, but water-based (polyacrylic) is better for light paints to avoid yellowing and offers good protection for most uses. |
| One coat of polyurethane is enough. | Typically, 2-3 thin coats are needed for adequate protection and a smooth finish. |
| Sanding between coats isn’t necessary. | Light sanding with fine-grit sandpaper between coats removes imperfections and ensures better adhesion for the next layer. |
Real-World Scenarios: Where This Matters Most
Understanding the practical application helps visualize the process. Think about common places you might want to add this extra layer of protection.
Kitchen and Bathroom Cabinets
These are high-use areas. They face moisture, grease, and frequent wiping. Painting cabinets is a popular upgrade.
Applying a protective polyurethane coat can make them last much longer. Ensure you use a durable oil-based or high-quality water-based polyurethane. Proper prep here is key to avoid peeling due to humidity or grease.
Furniture Makeovers
From antique dressers to modern tables, painted furniture can get scuffed. Adding polyurethane protects the paint. It makes the piece more functional and prevents wear and tear.
For tables, choose a durable finish. For decorative pieces, a satin or matte might be preferred.
Interior Doors and Trim
These get touched and bumped constantly. Painting them is common. A polyurethane topcoat will seal the paint and make it washable.
This is especially useful for doors in busy hallways or kids’ rooms.
Painted Walls in High-Traffic Areas
While walls are often painted with durable finishes, areas like behind a sofa, hallways, or entryways can benefit. A clear coat can make them easier to clean. However, applying polyurethane over wall paint can change the sheen.
Test this in a hidden spot first. A matte or satin finish might be suitable for walls.
It’s important to note that applying polyurethane over certain types of specialty paints might not be recommended. Always check the paint manufacturer’s guidelines. For example, some metallic or iridescent paints may have specific coating requirements.
What This Means for You: When It’s Normal and When to Worry
Knowing when your project is on track is important. It helps you feel confident in your work.
When It’s Normal to See Slight Changes
It’s normal for the sheen of your paint to change slightly when you apply polyurethane. A matte paint will likely get a bit shinier. A satin paint will become more reflective.
This is expected. Also, some water-based polyurethanes might slightly deepen the color of the paint. This is usually very subtle.
Oil-based polyurethanes will definitely add an amber tone, making colors warmer.
A very slight tackiness after the first coat is also normal. This indicates it’s ready for sanding and the next coat. You might also notice a very faint smell when applying.
This is normal, especially with oil-based products. Ensure good ventilation.
When to Worry and What It Might Mean
If you see large bubbles forming during application, that’s a sign of trouble. It could mean the paint isn’t dry enough or the temperature is too high. If the polyurethane seems to be peeling away from the paint even as you apply it, stop.
Something is wrong with the adhesion. This usually points to a prep issue or incompatible materials.
A significant change in paint color (beyond a slight deepening or yellowing from oil-based products) is also a red flag. This could mean the polyurethane is reacting with the paint in an unwanted way. Or, the paint itself might be unstable.
Milky or cloudy patches are almost always a sign of a problem with moisture or application.
If you encounter major issues, it’s often best to stop. Try to remove the problematic finish. Re-prep the surface.
Then try again, perhaps with different products or a more cautious approach.
Quick Tips for a Smooth Finish
Here are some simple things to remember that can make your project easier.
- Test, Test, Test: Always test your chosen polyurethane on a scrap piece of painted material or an inconspicuous area first.
- Work in Good Light: Make sure you can see what you’re doing. Good lighting helps you spot drips and ensure even coats.
- Use Quality Tools: Cheap brushes and rollers can leave lint and streaks. Invest in good quality application tools.
- Ventilation is Key: Open windows and doors. Use fans to ensure fresh air circulation. This is important for your health and for proper drying.
- Read the Labels: Always read the instructions on both your paint can and your polyurethane can. They contain vital information specific to those products.
Frequently Asked Questions
Can I put polyurethane directly over chalk paint?
Yes, you can apply polyurethane over chalk paint. However, chalk paint is very porous. Ensure it is fully dry and cured.
Lightly sanding the chalk paint surface and wiping with a tack cloth will help the polyurethane adhere better. A water-based polyurethane is often recommended.
Will polyurethane change the color of my paint?
Water-based polyurethanes are designed to dry clear and should not significantly change the color of your paint. Oil-based polyurethanes will add a slight amber tone, which can deepen and warm up colors. This effect is more noticeable on white or light colors and can cause them to look yellow over time.
How many coats of polyurethane should I apply over paint?
For most projects, 2-3 thin coats of polyurethane are recommended for adequate protection. For high-traffic surfaces like tabletops or cabinet doors, 3-4 coats may be necessary. Always follow the manufacturer’s specific recommendations.
What is the difference between polyurethane and polyacrylic?
Polyurethane is the general term for a type of plastic coating. Polyacrylic is a type of water-based polyurethane. Water-based polyurethanes (polyacrylics) are clear, low-odor, and easy to clean up.
Oil-based polyurethanes are generally more durable but have a distinct amber color and require mineral spirits for cleanup.
Can I put polyurethane over a high-gloss latex paint?
Yes, but preparation is crucial. High-gloss finishes are very smooth and can resist adhesion. You must lightly sand the surface with fine-grit sandpaper (220-320) to create a dull, slightly rough texture for the polyurethane to grip.
Then, clean thoroughly with a tack cloth.
My paint feels sticky after applying polyurethane. What should I do?
A slight tackiness on the first coat before sanding is normal. However, if the paint remains sticky after the polyurethane has dried, it indicates a problem. This could be due to the paint not being fully cured, the polyurethane not being compatible with the paint, or applying the polyurethane too thickly.
You may need to remove the polyurethane and allow the paint to cure longer, or try a different type of polyurethane.
Conclusion
So, can you apply polyurethane over paint? The answer is a resounding yes, but with important conditions. Proper preparation, including cleaning, light sanding, and crucially, ensuring your paint is fully cured, is non-negotiable.
Choosing the right type of polyurethane—water-based for light colors and latex paint, or oil-based for maximum durability—also plays a huge role. By following these steps, you can successfully add a protective, beautiful finish to your painted surfaces, making them last longer and look great for years to come.