Best Way To Put Polyurethane On Wood (Pro Tips Inside)
You’ve got a beautiful piece of wood. Maybe it’s a table you refinished, a new shelf, or some crafts. Now you want to protect it.
You’ve heard polyurethane is the way to go. But how do you get it on perfectly? It can feel a bit tricky.
You want a smooth, even finish. No drips, no bumps, no streaks. Getting it right makes all the difference.
We’ll walk through the steps. You’ll feel much more confident. Let’s make that wood look amazing.
The best way to put polyurethane on wood involves careful prep, using the right tools, applying thin, even coats, and allowing proper drying time between coats. This ensures a durable, smooth, and beautiful protective finish on your wood projects.
Understanding Polyurethane for Wood
Polyurethane is a liquid plastic. When it dries, it forms a hard, clear coat. This coat protects your wood from water, scratches, and stains.
It’s a very popular choice for many wood projects. Think of your kitchen table, wooden floors, or even outdoor furniture. Polyurethane is often the shield keeping them looking good.
There are a few main types you’ll see. Oil-based polyurethane is strong and lasts a long time. It gives a warm, amber look to the wood.
It also takes longer to dry. Water-based polyurethane dries faster. It stays clear, so it doesn’t change the wood’s color much.
It’s also easier to clean up.
For most home projects, both work well. Water-based is often easier for beginners. It dries fast, so you can do more coats in a day.
It doesn’t have as strong a smell either. Oil-based is great for high-traffic areas like floors. It’s a bit tougher.
But it needs more ventilation and longer drying times.
Knowing which type you have helps. It also helps to know what you want the final finish to look like. Do you want the natural wood color?
Or a warmer tone? This choice guides your application. It also guides your cleanup.
Always read the can. It has important info for your specific product.
My First Polyurethane Project: A Tale of Wobbly Table Legs
I remember my very first serious woodworking project. It was a simple coffee table. I’d found an old, sturdy oak table.
The top was great, but the legs were wobbly and bare. I sanded them down. I thought, “This is where the magic happens!” I bought a can of oil-based polyurethane.
The can looked so official.
I slapped on the first coat. It was thick. Very thick.
I didn’t think much about it. The can said “apply liberally.” Or maybe I just imagined that part. I left it to dry.
It was sticky for days. When it finally felt hard, I looked closer. There were drips.
Big, ugly drips. And I missed a spot on one leg. Totally bare wood.
Panic set in. This was supposed to be beautiful!
I tried to sand down the drips. It made things worse. The finish looked uneven and bumpy.
It felt like a disaster. I almost gave up. But then I found some advice.
About thin coats. About letting each coat dry fully. About wiping off dust.
It was a game-changer. My next attempt was much, much better. The legs looked smooth and protected.
It taught me a big lesson about patience and technique. That experience is why I always stress the small steps now.
Polyurethane Application Quick Guide
Prep is Key: Sand wood smooth. Wipe dust away. Work in a clean, dust-free spot.
Good light helps a lot.
Choose Your Tool: Foam brush, good quality natural bristle brush, or a clean rag for wiping. A synthetic brush works for water-based.
Thin Coats Only: Apply a thin, even layer. Don’t over-apply. Less is more here.
Sand Between Coats: Lightly sand with fine grit sandpaper (220 or higher) after each coat dries. This makes it super smooth.
Wipe Again: Always wipe away sanding dust before the next coat. This is crucial for a flawless finish.
Patience Pays: Let each coat dry fully. Follow the can’s instructions. Rushing leads to problems.
Getting Your Wood Ready for Polyurethane
This is the step most people rush. But it’s the most important. Think of it like getting ready for a big event.
You wouldn’t just throw on your clothes, right? Your wood needs the same care. A good finish starts with a great surface.
First, you need to sand the wood. Start with a medium grit sandpaper. Something like 100 or 120 grit works well.
This gets rid of old finishes or rough spots. Sand with the grain of the wood. Always go in the same direction.
This is very important.
After the medium grit, move to a finer grit. Use 180 grit. Then finish with 220 grit.
This makes the wood feel super smooth. The smoother the wood, the better the polyurethane will look. It also helps the polyurethane stick well.
Once sanding is done, you MUST get rid of all the dust. Wood dust is sneaky. It gets everywhere.
Use a tack cloth. These are sticky cloths made for picking up dust. Or use a vacuum with a brush attachment.
Follow up with a damp cloth. Make sure the wood is totally clean and dry. Any dust left behind will show up in your finish.
It will look like tiny bumps under the clear coat. You don’t want that.
Make sure your workspace is also clean. Dust in the air will settle on your wet polyurethane. Try to work in a room with good ventilation but also one that’s easy to keep clean.
Close windows and doors while you apply coats. This keeps dust out. It also stops drafts from making the finish uneven.
Contrast Matrix: Sanding Grit Expectations
Myth: Any Sanding is Fine
Reality: Using the right grit sequence is vital for smoothness and adhesion. Too coarse leaves scratches. Too fine might not grip well.
Normal: 100/120 Grit → 180 Grit → 220 Grit
This sequence builds a smooth surface for a flawless finish. It removes imperfections without creating new ones.
Concerning: Skipping Fine Grits or Using Too Coarse
This leads to a rough, dull finish. The polyurethane won’t look its best. It might even peel later.
Choosing the Right Tools for the Job
The tools you use matter a lot. They affect how smoothly the polyurethane goes on. And how it looks when it’s dry.
You don’t need a lot of fancy gear. Just the right kind.
For applying polyurethane, a good brush is key. A high-quality natural bristle brush is best for oil-based polyurethane. For water-based, a synthetic brush works well.
Foam brushes are also a popular choice. They are cheap and don’t leave brush marks if used carefully. Whatever you choose, make sure it’s clean and new.
Or a brush you’ve cleaned very well.
You can also use a clean, lint-free rag. This is often called the “wiping method.” It’s great for thin coats and a very natural look. It’s especially good if you’re using a water-based polyurethane.
You will need sandpaper for between coats. Get fine-grit sandpaper. Around 220 grit is perfect.
You can also use steel wool (0000 grade). This is very fine and won’t scratch the finish. It’s great for smoothing out any little bumps.
And don’t forget a good supply of clean, lint-free cloths. You’ll use these for wiping dust. You’ll also use them for cleaning up spills.
Or for wiping away excess product if you apply too much.
A good work light is also a must. You need to see what you’re doing. A bright light helps you spot drips or thin spots.
It helps you see dust you might have missed. Good lighting makes for a better finish.
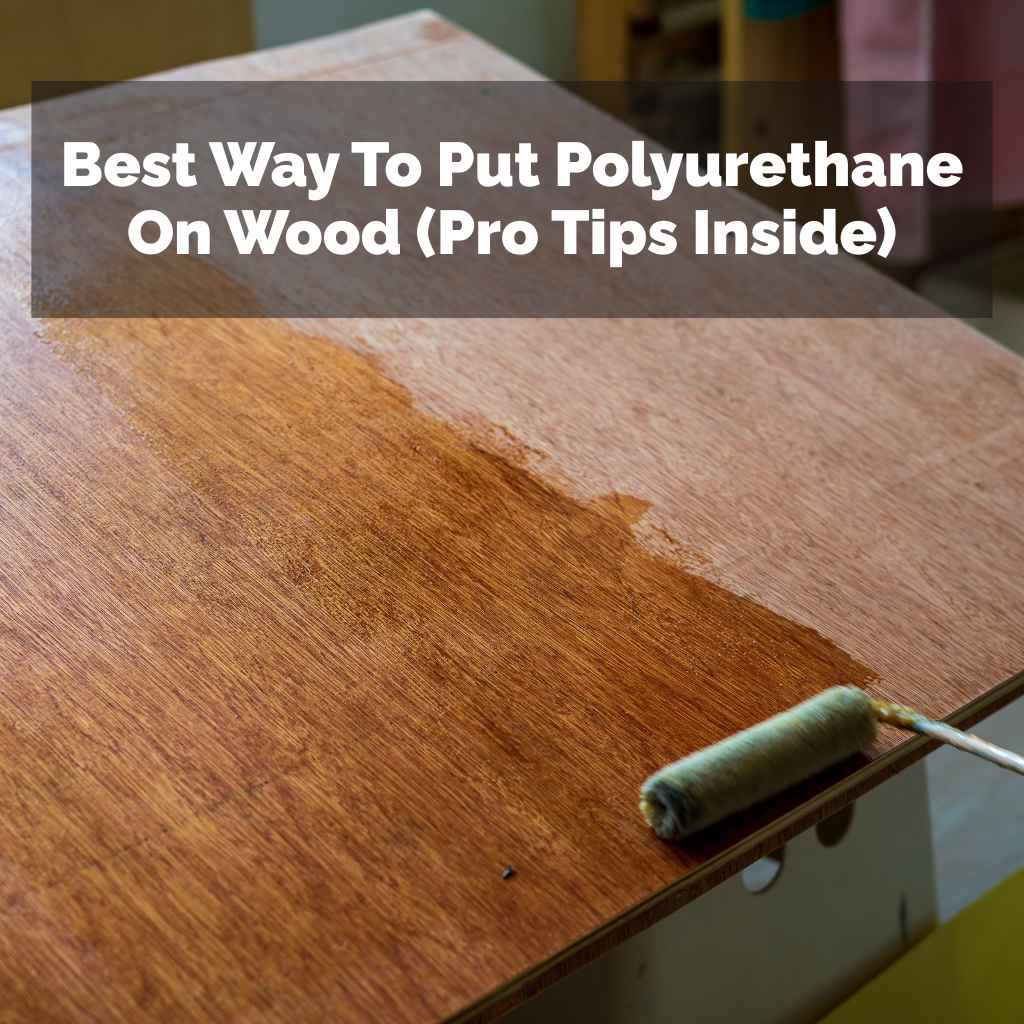
The Application Process: Step-by-Step
Now for the actual application. Take your time here. This is where patience really pays off.
You’ll be applying thin coats. Each one needs to dry fully before the next.
First, stir the polyurethane gently. Don’t shake it. Shaking creates bubbles.
Bubbles are bad for a smooth finish. Just stir it slowly until it’s mixed well. If you are using oil-based, you might need a stirrer you don’t plan to use for anything else.
Dip your brush or foam applicator into the polyurethane. Don’t load it up. You want just a thin layer on the brush.
For a brush, use the edge of the can to remove most of the excess. For a rag, just get a light amount on it.
Start applying the polyurethane to your wood. Always brush in the direction of the wood grain. Make long, smooth strokes.
Try to cover the area evenly. Don’t go back and forth too much. This can create streaks.
Just one or two smooth passes per area is best.
Work in sections. For a tabletop, do one side, then the other. Or do one plank at a time.
This helps you keep a “wet edge.” A wet edge means you are joining the new coat to the part that is still wet. This prevents lap marks. Lap marks are lines where one coat meets another that has started to dry.
As you brush, watch for drips. Especially on edges and corners. Gently brush them out.
Or wipe them away with a clean rag. Thin coats are key. It’s better to do three thin coats than one thick one.
A thick coat will run and sag. It will also take much longer to dry.
If you are using the wiping method with a rag, pour a small amount of polyurethane onto the rag. Then wipe it onto the wood. Use long, even strokes with the grain.
It’s like you are polishing the wood. This method leaves a very thin coat. It’s great for a natural, subtle look.
After applying one coat, let it dry completely. Check the can for drying times. This can be several hours.
For oil-based, it might be 6-8 hours or even overnight. Water-based dries faster, maybe 1-2 hours. Don’t rush this step.
It’s vital.
Stacking Micro-Sections: Application Tips
Gentle Stirring: Always stir, never shake. Protects against bubbles.
Thin Layers: Apply thin, even coats. Avoid thick patches.
Follow the Grain: Always brush or wipe with the wood grain.
Smooth Strokes: Use long, steady strokes. Avoid over-brushing.
Work Wet-to-Wet: Maintain a wet edge to avoid lap marks.
Watch for Drips: Catch and smooth drips immediately.
Patience is Paramount: Let each coat dry fully.
Sanding Between Coats: The Secret to Smoothness
This step is often skipped. But it’s what separates a good finish from a great one. Sanding between coats might sound odd.
But it’s essential. It smooths out any tiny imperfections.
Once the first coat of polyurethane is completely dry, it’s time to sand. Use very fine sandpaper. 220 grit or even higher is good.
You can also use 0000 steel wool. It’s super fine. You are not trying to remove the polyurethane.
You are just very lightly scuffing the surface.
Move the sandpaper or steel wool lightly over the entire surface. Again, always go with the wood grain. You are just trying to knock down any dust nibs.
Or any slight bumps or rough spots that have appeared.
The surface will look dull after sanding. That’s okay. That’s exactly what you want.
It means you’ve created a surface for the next coat to grab onto. This helps the coats bond together better.
After you finish sanding, you have to do the dust removal all over again. Use a tack cloth or a vacuum. Then a slightly damp cloth.
Make sure the wood is perfectly clean before you apply the next coat. This step is super important. Dust trapped from sanding will show up in your new coat.
This process repeats for every coat. So, sand, clean, apply. Let dry.
Sand, clean, apply. Let dry. Most projects need at least three coats.
Sometimes more, depending on the use. Furniture that gets a lot of wear might need four or even five.
Drying and Curing: What’s the Difference?
Polyurethane goes through two stages: drying and curing. It’s important to understand both.
Drying is when the liquid solvent evaporates. The surface feels dry to the touch. This happens fairly quickly, especially with water-based poly.
But the finish is still soft underneath.
Curing is when the polyurethane fully hardens and reaches its maximum hardness. This takes much longer. For oil-based polyurethane, it can take 30 days or more to fully cure.
Water-based poly cures faster, but still takes about 7 days.
During the drying stage, be gentle. Avoid placing heavy objects on the surface. Don’t put anything that could scratch it.
If you must use the furniture, do so with extreme care. You can put a blanket down. Or a drop cloth.
During the curing stage, the finish is still not at its toughest. Avoid placing hot or wet items directly on the surface. Use coasters for drinks.
Use placemats for hot dishes. Even though it feels hard, it’s still vulnerable.
Understanding these stages helps you take care of your project. It helps you avoid damaging the finish before it’s truly ready. The longer you can let it cure undisturbed, the harder and more durable it will be.
Quick-Scan Table: Drying vs. Curing
| Feature | Drying | Curing |
|---|---|---|
| What Happens | Solvent evaporates. Surface feels dry. | Chemical hardening. Max hardness achieved. |
| Time (Water-based) | 1-2 hours | Approx. 7 days |
| Time (Oil-based) | 6-8+ hours | Approx. 30+ days |
| Surface Feel | Dry to touch, but soft | Very hard and durable |
| Care Needed | Gentle handling, avoid scratches | Avoid extreme heat/moisture, use protection |
Common Problems and How to Avoid Them
Even with careful work, you can run into issues. Knowing common problems helps you prevent them. Or fix them if they happen.
Brush Marks: These happen when you apply too much pressure. Or when you go back and forth too much. Or if your brush is too dry.
Use a good brush. Apply light pressure. Use long, smooth strokes in one direction.
Drips and Runs: These occur when too much polyurethane is applied. Or when it pools on edges and corners. Apply thin coats.
Wipe away drips as you see them. Don’t let excess product build up.
Bubbles: Caused by shaking the can. Or by brushing too quickly. Or from dust in the air.
Stir the poly gently. Brush slowly and smoothly. Work in a clean, dust-free area.
If you see bubbles on the surface, you might be able to pop them with the brush tip.
Streaks or Lap Marks: This happens when you try to brush over an area that’s already started to dry. Or when coats are uneven. Work with a wet edge.
Apply the poly in one direction. Avoid over-brushing.
Orange Peel Texture: This is a rough, bumpy finish. It can be caused by applying too thickly. Or by applying in cold, damp conditions.
Or if the brush is too dry. Try to apply thinner coats. Ensure good temperature and humidity.
Use a damp-proof environment if possible.
Cloudy or Hazed Finish: This can happen if the finish is applied too thickly. Or if it’s applied in humid conditions. It can also be from moisture contamination.
Water-based poly is more sensitive to humidity. Ensure good ventilation and moderate temperatures.
Scratches or Dents: This is usually due to not letting the finish cure fully. Or from placing heavy or sharp objects on the surface too soon. Be patient.
Let the finish cure for the recommended time. Always use protective pads and coasters.
When to Worry: Signs of Trouble
Most issues are minor and fixable. But sometimes, things go wrong and you need to know when to be concerned.
If the polyurethane just won’t dry after 24 hours, something is wrong. This could be due to very high humidity. Or the temperature being too low.
It could also be a bad batch of polyurethane. If it’s still tacky or soft after a few days, you might have to sand it all off and start over.
If you have large runs or drips that you can’t sand out smoothly, it might mean you need to remove the coat. It’s better to remove a bad coat than to live with a poor finish.
If the finish looks cloudy or milky and doesn’t clear up after a few days, it’s likely a moisture issue. This is hard to fix. It often requires sanding down to the wood.
Then reapplying.
For large projects or expensive wood, if you’re really unsure, consider calling a professional. They have the experience and tools to handle tricky situations. But for most DIY projects, understanding the basic steps and common issues is enough.
Real-World Scenarios: Polyurethane in Action
Let’s look at how polyurethane performs in different home settings. This shows its versatility and the importance of proper application.
The Kitchen Table: High Traffic, High Expectations
Your kitchen table sees a lot. Spills, hot dishes, kids’ art projects, and daily meals. A good polyurethane finish is essential here.
For this, oil-based polyurethane is often preferred. It offers superior durability and water resistance. Multiple thin coats, sanded between each, are a must.
The application needs to be flawless. Even a small missed spot can lead to a stain penetrating the wood. Using placemats and coasters is still advised, even with a cured finish.
Especially for hot items that can leave marks. The goal is a smooth, easy-to-clean surface that can withstand daily life.
Wooden Countertops: A Different Kind of Challenge
Wooden countertops are beautiful but demanding. They are constantly in contact with water and food. Many people use oil-based polyurethane for these.
But a hard, durable topcoat is critical. Some prefer a food-safe finish like mineral oil and beeswax. But for a true polyurethane finish, it must be applied perfectly and sealed very well.
These require frequent reapplication over time. Especially around the sink area. The finish can wear down from constant moisture.
The key is to catch wear early. Light sanding and a new thin coat can often bring it back. Never let water sit on the surface for long.
Even a well-polyurethaned surface needs care.
Picture Frames and Decor: Less Wear, More Aesthetic
For smaller items like picture frames, decorative boxes, or wooden toys, water-based polyurethane is often a great choice. It dries fast, so you can finish a project quickly. It also stays clear, which is usually desired for these items.
The application is simpler too. You still want smooth coats. But the level of extreme durability needed is lower.
A few coats are usually sufficient. Focus on getting a nice sheen. And ensuring the edges are sealed well to prevent chipping.
Cleaning is easy with a damp cloth.
Outdoor Furniture: Facing the Elements
When putting polyurethane on outdoor furniture, you need a product specifically designed for outdoor use. These contain UV inhibitors. They also have better resistance to moisture and temperature changes.
Preparation is still key. But the finish needs to be tougher. Multiple coats are essential.
Sanding between coats is still important for smoothness. However, even the best outdoor polyurethane will need reapplication every few years. Exposure to sun, rain, and dew takes its toll.
A yearly inspection is a good idea. Touch up any spots that show wear.
What This Means for You
So, what’s the takeaway from all this? It means you can achieve a beautiful, long-lasting finish on your wood projects. It’s not magic.
It’s about following a process.
When It’s Normal: It’s normal to feel a little nervous the first time. It’s normal to see a few tiny imperfections in your first coat. It’s normal to need a few coats to get it just right.
The key is that the wood is protected and looks much better than it did before.
When to Worry: You should worry if the finish is extremely bumpy or streaky after multiple coats. Worry if it feels soft and sticky after days of drying. Worry if you see large drips that you can’t fix.
These are signs that you might need to start over. But don’t let that discourage you. It’s a learning process.
Simple Checks: After applying a coat, look at it in good light. Run your hand over it. Does it feel mostly smooth?
Are there any obvious drips? Check the edges and corners. After it dries, do a light sanding and wipe down.
This check helps you catch problems early.
Quick Tips for a Professional Finish
Here are some final tips to help you get that professional look:
- Use a drop cloth: Protect your floor and surrounding areas from drips.
- Work in good light: You need to see every detail.
- Thin coats, many times: This is the golden rule of finishing.
- Sand gently between coats: 220 grit or finer is your friend.
- Wipe off dust thoroughly: A tack cloth is a must.
- Don’t over-brush: Smooth, even strokes are best.
- Follow the grain: Always.
- Ventilation is key: Especially for oil-based.
- Patience: Let it dry and cure properly.
Frequently Asked Questions about Applying Polyurethane
How many coats of polyurethane should I apply?
For most furniture, three to four coats are recommended. High-traffic areas like tabletops or floors might need four to five coats. Each coat should be thin and allowed to dry completely before applying the next.
Sanding lightly between coats is crucial for smoothness.
Can I apply polyurethane over stain?
Yes, you can apply polyurethane over wood stain. Make sure the stain is completely dry first. This can take 24-72 hours depending on the stain and humidity.
Then, follow the same steps for applying polyurethane: thin coats, sanding between coats, and allowing proper drying times.
What’s the difference between oil-based and water-based polyurethane?
Oil-based polyurethane is more durable and gives a warmer, amber tone. It’s harder to clean up and has strong fumes. Water-based polyurethane dries faster, stays clear, has less odor, and is easier to clean with soap and water.
Water-based is often better for beginners and lighter wood tones.
How long does polyurethane take to dry completely?
Drying time varies. Water-based polyurethane can dry to the touch in 1-2 hours. Oil-based can take 6-8 hours or longer.
However, “curing” to full hardness takes much longer, often up to 30 days for oil-based. Always check the product label for specific drying and curing times.
Can I use polyurethane on outdoor projects?
Yes, but you need to use a polyurethane specifically formulated for outdoor use. These products contain UV protection and are designed to withstand weather. Standard interior polyurethane will not hold up well outdoors and will likely peel or degrade quickly.
My finish is sticky. What did I do wrong?
A sticky finish usually means it didn’t dry properly. This can be due to applying the coat too thick, insufficient ventilation, low temperatures, or high humidity. Rushing to apply the next coat before the previous one was dry can also cause stickiness.
Ensure you’re applying thin coats in appropriate conditions and waiting for full drying.
Conclusion: Your Wood’s New Protective Layer
Putting polyurethane on wood doesn’t have to be intimidating. By focusing on preparation, using the right tools, and applying thin, even coats, you can achieve a fantastic result. Remember that patience is key.
Let each layer do its job. Your efforts will be rewarded with a beautiful, protected surface that lasts for years. Enjoy your newly finished wood!