Can You Apply Polyurethane Over Stain? Yes, Here’s How
You can apply polyurethane over wood stain, but proper drying and preparation are key. A well-dried stain and a light sanding before poly application ensure a smooth, durable finish without compromising the stain color.
Understanding Polyurethane and Wood Stain
Wood stain is a colorant. It soaks into the wood fibers. This gives the wood its new hue.
It doesn’t form a hard layer on top. Think of it like dye for fabric. Polyurethane, on the other hand, is a clear finish.
It forms a protective film. This film sits on top of the wood. It shields the wood from spills, scratches, and wear.
It’s like a coat of armor for your project.
When you stain wood, the stain’s job is to change the wood’s color. It penetrates deeply. Polyurethane’s job is to seal and protect that color.
It also protects the wood itself. The two work together. The stain gives the beauty.
The polyurethane gives the protection. This is why applying polyurethane over a properly dried stain is standard practice. It’s how most wood finishing works.
There are many types of stains and polyurethanes. Oil-based stains are common. Water-based stains are also popular.
Polyurethane comes in oil-based and water-based forms too. The type of stain you use can affect how the polyurethane goes on. But the basic principle remains the same.
You need the stain to be dry. You need a good surface for the poly to stick to.
The Crucial Step: Letting Stain Dry Completely
This is the most important part. It cannot be stressed enough. Your wood stain MUST be completely dry before you even think about applying polyurethane.
What does “dry” mean here? It’s not just dry to the touch. Many stains can feel dry on the surface after a few hours.
But the deeper layers might still be curing. This is especially true for oil-based stains.
If you apply polyurethane too soon, you’ll trap moisture and solvents underneath. This can cause big problems. The polyurethane might not stick properly.
It can look cloudy or milky. You might see wrinkles or bubbles form. The color could even change or become blotchy.
It’s a mess that’s hard to fix. Patience here saves a lot of heartache later.
How long does stain need to dry? This depends on the product. Always check the manufacturer’s instructions.
It’s usually on the can. For oil-based stains, it’s common to wait 24 to 72 hours. Some even say up to a week for a full cure.
Water-based stains usually dry faster. They might be ready in 24 hours. But again, read the label.
Consider your environment, too. Humidity and temperature play a big role. If it’s very humid, drying takes longer.
If it’s cold, it also slows things down. Good air circulation helps. Open a window or use a fan.
This can speed up the drying process. But never rush it. A little extra waiting time is always better than a failed finish.
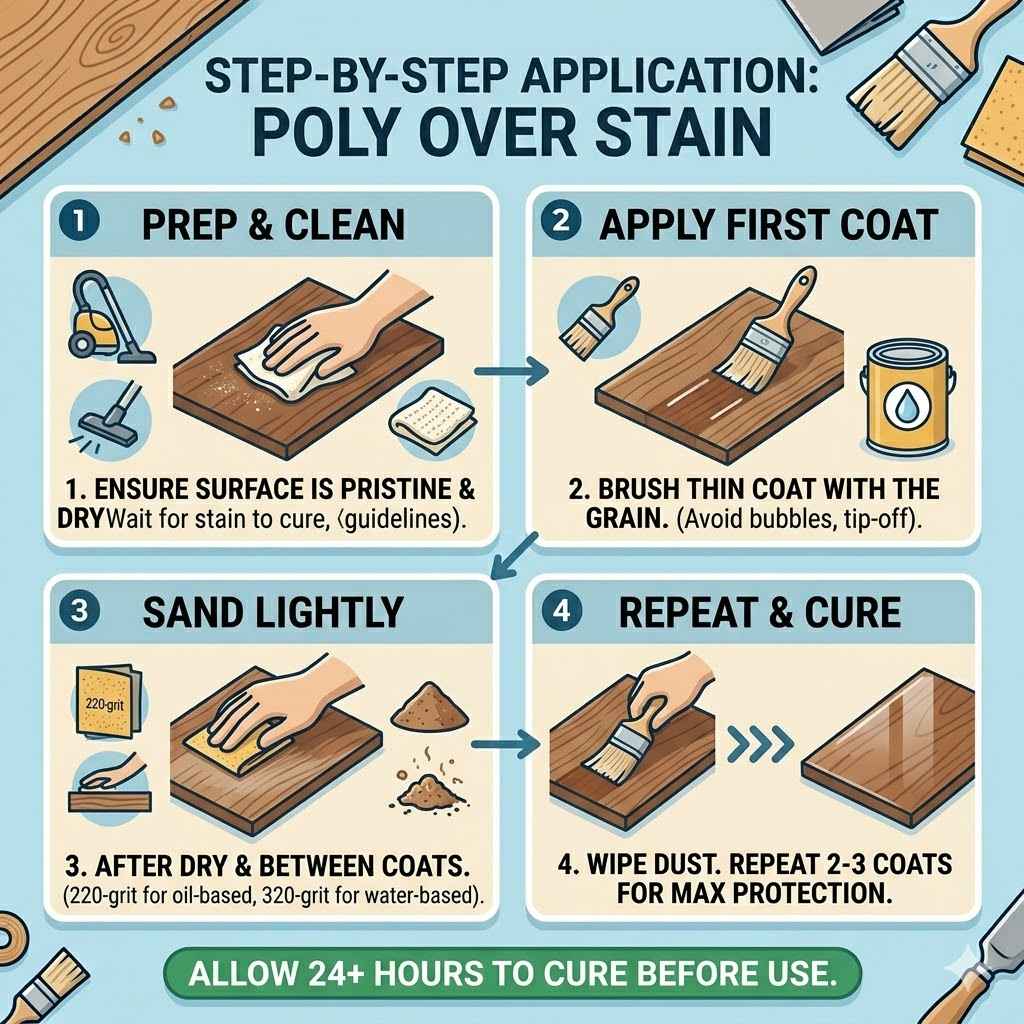
Preparing the Stained Surface for Polyurethane
Once your stain is fully cured, the surface needs a little prep. This ensures the polyurethane adheres well. It also helps create a smoother final look.
Think of it like preparing a wall for paint. You don’t just slap paint on a dirty, bumpy wall. The same applies to wood finishing.
First, clean the surface. Dust is your enemy. It can get trapped in the polyurethane.
This makes the finish look bumpy and dull. Use a tack cloth. A tack cloth is sticky.
It picks up fine dust particles. Gently wipe down the entire stained surface. Make sure all dust is gone.
Pay attention to corners and edges.
Next, you might need to do some very light sanding. This sounds strange, right? Sanding after staining?
Yes, but it’s crucial for adhesion. You’re not trying to remove the stain. You’re just creating a slightly rough surface.
This gives the polyurethane something to grip onto. A smooth, fully cured stain can sometimes be too slick for the poly.
Use a very fine-grit sandpaper. Something like 220-grit or even 320-grit is perfect. Sand very lightly.
Just a few gentle strokes are enough. The goal is to scuff the surface a little. After sanding, you’ll have more dust.
So, you need to clean again. Use your tack cloth to remove all sanding dust. Make sure the surface is spotless.
Surface Prep Checklist
Clean First: Always start by wiping down the stained wood. Use a tack cloth or a slightly damp (not wet) lint-free cloth. Remove all surface dust.
Light Sanding: Use very fine sandpaper (220-320 grit). Sand gently to scuff the surface. This helps the polyurethane grip.
Clean Again: After sanding, all dust must be removed. Use a tack cloth. Ensure the surface is completely clean and dry.
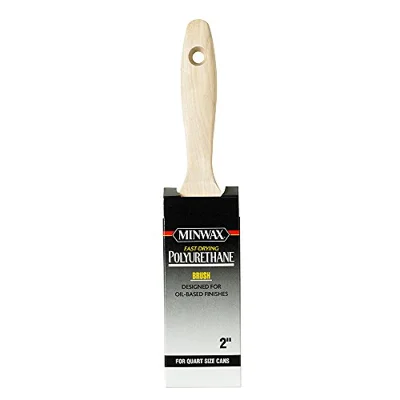
Minwax Polyurethane Trim Brush, 2″
A china-bristle blend brush made specifically for oil-based polyurethane, which lays down a thin, even coat and avoids the streaking a cheap brush leaves behind.
Best for: applying oil-based polyurethane over cured stain
Why we picked it: the bristle blend holds enough finish to keep a wet edge without dripping
Main drawback: not the right brush for water-based poly — use a synthetic brush for that
View Our Pick on Amazon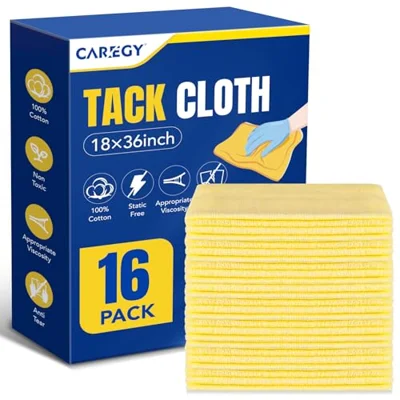
Tack Cloth (Multi-Pack)
Best for: removing dust before and after sanding between coats
Why we picked it: wax-and-silicone-free formula won’t leave a residue that keeps polyurethane from bonding
Main drawback: single-use, so a multi-pack is worth it for a multi-coat job
Check on Amazon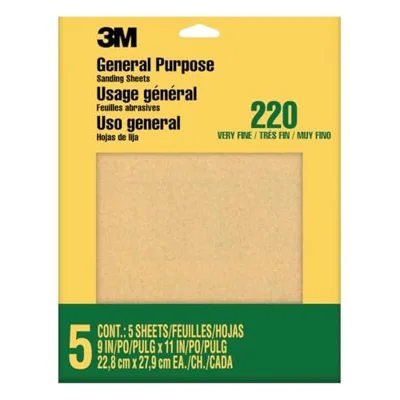
3M 220-Grit Sandpaper
Best for: the light scuff-sand between coats the article recommends
Why we picked it: fine enough to scuff the surface for adhesion without cutting through the stain
Main drawback: for the final coat, some finishers prefer even finer 320-grit
Check on AmazonAs an Amazon Associate we earn from qualifying purchases.
Choosing the Right Polyurethane
There are several types of polyurethane. Knowing the difference helps you pick the best one for your project. The main types are oil-based and water-based.
Oil-Based Polyurethane: This is a classic choice. It’s very durable. It has a warm amber tone.
This can slightly deepen the color of your stain. This might be desirable or not, depending on your goal. It’s also more forgiving if you make small mistakes.
It tends to level out nicely. But it has strong fumes. Cleanup requires mineral spirits.
It also takes longer to dry between coats.
Water-Based Polyurethane: This type is clear. It won’t yellow over time. It also won’t change the color of your stain much, if at all.
Cleanup is easy with soap and water. The fumes are much less noticeable. Water-based poly dries faster than oil-based.
This means you can apply multiple coats in a day. However, it can sometimes raise the wood grain more. It might also not be as hard-wearing as oil-based in some applications.
Types of Finish Sheen: Polyurethane also comes in different sheens. You’ll see names like:
- Gloss: Very shiny. Reflects a lot of light. Shows imperfections easily.
- Semi-Gloss: A nice shine, but less intense than gloss. Good balance of shine and durability.
- Satin: A soft, low sheen. Hides imperfections better than gloss or semi-gloss. Very popular.
- Matte/Flat: Very little shine. Looks very natural. Hides imperfections the best.
Choose a sheen that matches the look you want. Satin is a safe bet for most projects.
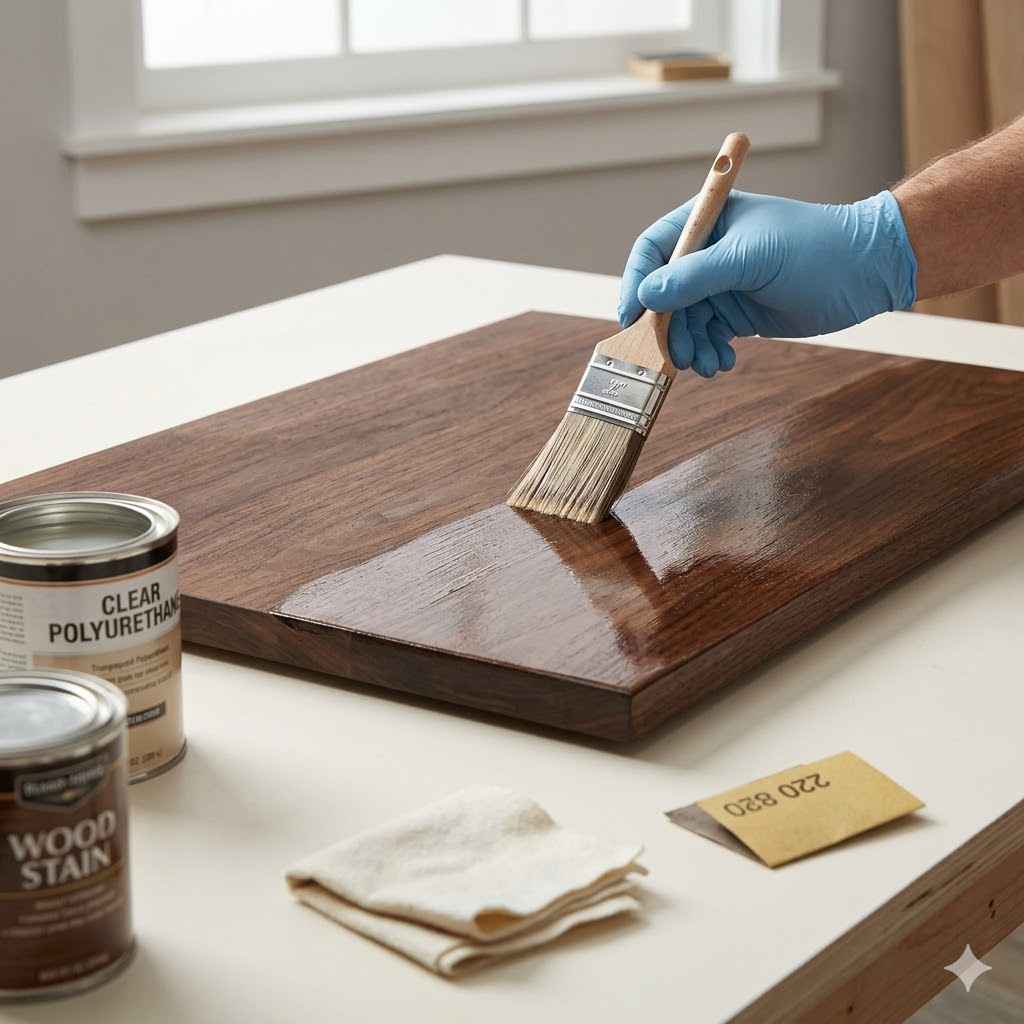
Applying the First Coat of Polyurethane
Now for the fun part: applying the protective coat! Get your chosen polyurethane. Open the can carefully.
Stir it gently. Don’t shake it! Shaking creates bubbles.
Bubbles in the poly will transfer to your wood. This makes for a bumpy finish.
Use a good quality brush or a foam applicator. A natural bristle brush works well for oil-based poly. A synthetic brush is better for water-based.
Foam applicators are great for smooth, even coats. Work in a well-ventilated area. Wear gloves if you like.
Start by applying a thin, even coat. Work with the grain of the wood. Don’t try to apply too much at once.
It’s better to apply several thin coats than one thick one. A thick coat can pool and drip. It also takes much longer to dry properly.
Overlap your strokes slightly. This ensures full coverage. Don’t go back over areas you’ve already brushed too much.
This can lift the previous stroke and cause streaks. Keep a wet edge. This means you overlap the part you just finished with the part you are about to brush.
This helps avoid lap marks.
If you see any drips, gently smooth them out immediately. Once the first coat is on, leave it to dry. Check the can for drying times.
This is usually a few hours for water-based and longer for oil-based.
Applying Polyurethane: Quick Tips
Stir, Don’t Shake: Gently stir the can. Avoid vigorous shaking to prevent bubbles.
Thin Coats Are Best: Apply thin, even layers. Several thin coats are better than one thick one.
Work With the Grain: Always brush or wipe in the direction of the wood grain.
Keep a Wet Edge: Overlap your strokes to blend new areas with finished ones smoothly.
Clean Up Brushes: Clean tools immediately after use. Use the recommended cleaner (mineral spirits for oil, water for water-based).
Sanding Between Coats
This step is as important as the first sanding. After the first coat of polyurethane dries, the surface might feel a little rough. This is normal.
Tiny wood fibers can lift. Dust might have settled. This light sanding smooths everything out.
It also helps the next coat of poly bond better.
Use your fine-grit sandpaper again, like 220 or 320 grit. Sand very gently. You are not trying to remove the finish.
You are just knocking down any high spots or dust nibs. The goal is a smooth surface for the next coat.
After sanding, clean the surface thoroughly with a tack cloth. Make sure absolutely no dust remains. This is crucial.
If you skip this, the dust will be sealed into the next coat. This will ruin the smooth finish you’re aiming for.
Repeat this process for each coat of polyurethane. Most projects need at least three coats for good protection. Some high-traffic items, like tabletops or floors, might need four or five.
The more coats, the more durable the finish will be.
I remember one time, I was working on a coffee table. I was eager to finish it. I applied the second coat of poly after only a few hours.
I didn’t do a good job of sanding between coats. The finish looked okay at first. But after a few days, I noticed tiny bumps all over it.
It was dust and rough patches. I had to sand the whole thing down and start over. It was a frustrating lesson in patience!
Applying Subsequent Coats
Once you’ve sanded and cleaned after the first coat, you’re ready for coat number two. Apply it just like the first. Thin, even strokes are key.
Work with the grain. Keep a wet edge.
Let this coat dry completely. Then, sand it lightly again. Clean it again with a tack cloth.
This is the routine for every coat. Each layer builds on the last. This creates a strong, protective shield for your wood.
Pay attention to the drying times. Water-based poly can dry in a few hours. You might be able to apply three coats in one day.
Oil-based poly takes longer. You might only get one or two coats on per day. Always let each coat cure sufficiently before sanding.
The surface should feel smoother with each coat. The sheen should become more uniform. If you notice any streaks or unevenness, you can sometimes fix them with careful sanding.
But it’s best to avoid them by applying each coat evenly.
Polyurethane Coat Layers
Coat 1: Apply a thin, even layer. Let it dry completely. Sand lightly.
Clean dust.
Coat 2: Apply thin and even. Let dry. Sand lightly.
Clean dust.
Coat 3 (and beyond): Repeat the process. Let dry. Sand.
Clean. Aim for at least three coats for most projects. More for heavy-use items.
Common Mistakes to Avoid
Even with the best intentions, mistakes can happen. Knowing what to look out for can save your project. Here are some common pitfalls:
- Rushing the Stain Drying: This is the biggest mistake. Trapped solvents cause adhesion and finish problems. Always wait the full recommended drying time.
- Skipping Surface Prep: Not cleaning or sanding properly means the poly won’t stick well. This leads to peeling or chipping later.
- Shaking the Polyurethane: This introduces air bubbles. Bubbles create a rough, uneven surface. Stir gently instead.
- Applying Thick Coats: Thick coats can look uneven, drip, and take forever to dry. Thin, multiple coats are always best.
- Not Sanding Between Coats: This is essential for a smooth, durable finish. Skipping it leads to a bumpy, unprofessional look.
- Using the Wrong Brush: The wrong brush can leave bristles behind or create too many brush marks. Use appropriate brushes for your finish type.
- Poor Ventilation: Working in a poorly ventilated area is not good for your health. It can also trap dust and fumes.
I learned the hard way about not sanding between coats on a rocking chair I made for my daughter. I was so excited to give it to her. The finish looked decent.
But over time, especially where she sat, the finish started to feel a bit gritty. It was because I hadn’t scuffed up the surface. It made me realize how important that small step is.
What About Different Types of Stain?
We’ve mostly talked about standard oil-based and water-based stains. What about other types? Like gel stains or wiping stains?
Gel Stains: Gel stains sit more on the surface than penetrating stains. They are great for covering up existing finishes or for tricky woods. Because they are thicker and form a bit of a film, they usually dry very hard.
The same rules apply: wait for them to be fully cured before applying poly. Light sanding between coats of poly is still a good idea.
Wiping Stains: These are applied and then excess is wiped off. They don’t penetrate as deeply as some stains. They are similar to regular stains in that they need to dry completely.
Always follow the product instructions. The key is always a fully cured stain.
Pre-Stain Conditioners: Some people use a pre-stain conditioner. This helps the stain penetrate more evenly, especially on soft woods like pine. The conditioner itself needs to dry.
Once it’s dry and you’ve applied your stain, you still need to wait for the stain to fully cure before adding polyurethane. The conditioner just helps the stain apply better.
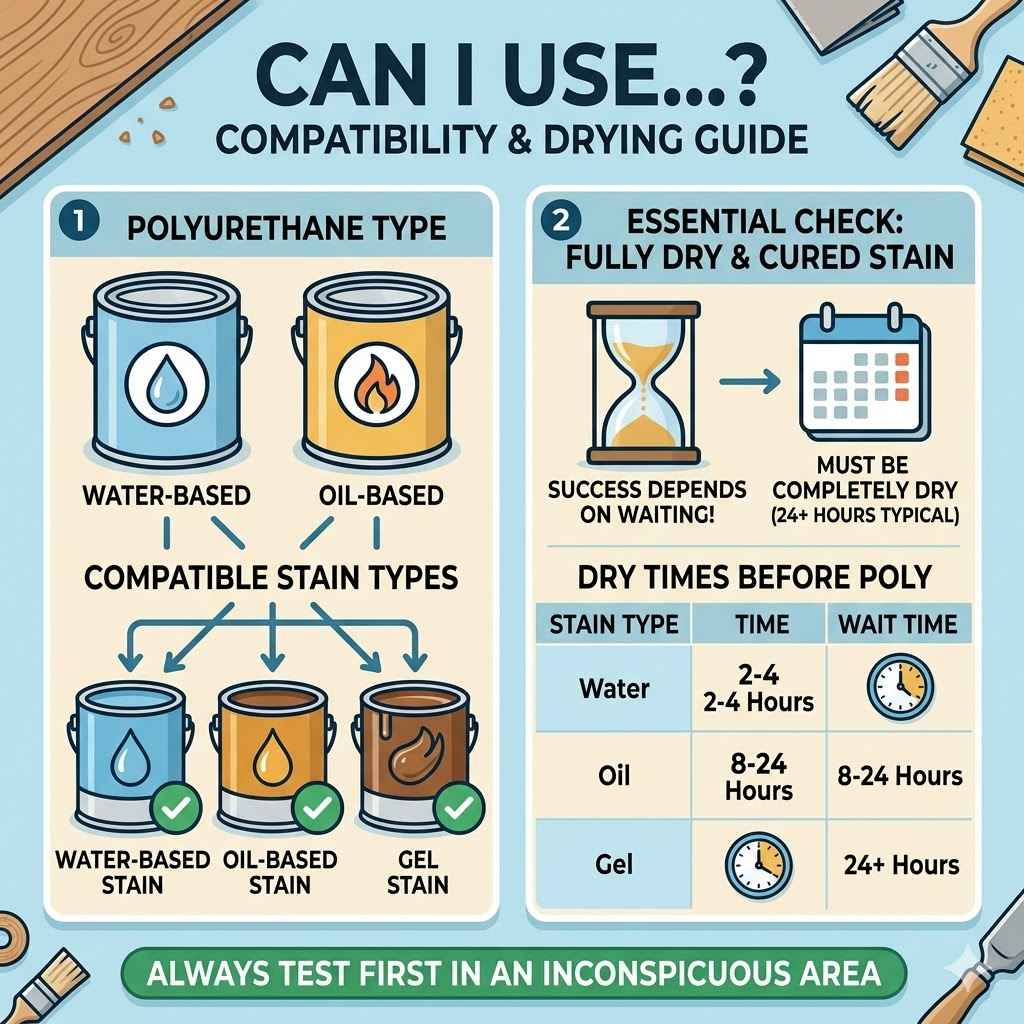
Stain Types & Polyurethane
Penetrating Stains: Need full cure time (24-72 hours+). Standard prep and poly application.
Gel Stains: Sit on top more. Also need full cure time. Prep and poly application are standard.
Wiping Stains: Minimal penetration. Ensure they are completely dry. Follow the same rules for poly.
Pre-Stain Conditioners: Help stain absorption. The stain still needs its full dry time before poly.
When is it NOT a Good Idea to Apply Polyurethane Over Stain?
While you can almost always apply polyurethane over stain, there are rare exceptions or times when you might choose not to. This usually involves the type of product used or the desired look.
Products That Are Already Finishes: Some products that look like stain are actually a stain and topcoat in one. For example, some “all-in-one” furniture paints or “one-step” stains might already contain a protective element. Applying polyurethane over these might be unnecessary or could cause adhesion problems.
Always check the product description.
Oil-Based Stains and Polyurethane: While you can put oil-based poly over oil-based stain, you CANNOT put water-based poly directly over an oil-based stain without proper curing and likely sanding. Some people avoid water-based poly over oil-based stain because of potential compatibility issues, even with proper drying. However, with adequate curing time (days, not hours), it usually works fine.
Oil-based poly over oil-based stain is generally a safer, more robust combination.
Extremely Thick Stain Applications: If you applied stain so heavily that it forms a thick, gummy layer that never fully dries, you might have issues. This is less about stain type and more about incorrect application. Polyurethane won‘t adhere to a sticky surface.
Specific Artistic Effects: In some very niche artistic applications, a woodworker might be trying for a specific “unfinished” look or layering effects where a clear coat is not desired. This is rare for functional items.
For the vast majority of home projects, applying a good quality polyurethane over a fully dried and prepped stain is the standard and best practice for durability and beauty.
Real-World Scenarios and Applications
Let’s look at some common projects and how applying polyurethane over stain works for them.
Kitchen Cabinets
Environment: High moisture, frequent use, grease.
Habits: Daily cooking, cleaning.
Design/Materials: Wood or wood-veneered cabinets.
User Behavior: Touching handles, wiping surfaces.
For kitchen cabinets, you absolutely want a durable finish. Staining them can update their look beautifully. After staining and allowing ample drying time (often 72 hours or more for oil-based stain in a humid kitchen environment), you’d apply multiple coats of polyurethane.
A satin or semi-gloss finish is popular. It’s durable and easier to clean than a matte finish. Proper sanding between coats is vital here to handle constant touching and cleaning.
Dining Tables
Environment: Food spills, heat from plates, scratches from cutlery.
Habits: Eating meals, homework, games.
Design/Materials: Solid wood or engineered wood table tops.
User Behavior: Plates, glasses, kids’ activities.
A dining table takes a beating. Staining it can make it a centerpiece. You need a super tough finish.
This means a good, durable stain that has cured for at least 24-48 hours. Then, you’ll want at least 4-5 coats of a robust polyurethane, possibly a high-solids oil-based one. You’ll sand between each coat to ensure a glass-smooth, waterproof surface that can withstand daily life.
Flooring
Environment: High traffic, dirt, moisture from shoes, furniture movement.
Habits: Walking, pets, furniture rearrangement.
Design/Materials: Hardwood floors.
User Behavior: Constant foot traffic.
Staining hardwood floors is a popular way to change their look. After staining, you must wait for the stain to fully cure—this can take up to 72 hours or even longer for oil-based stains. Then, you apply specialized floor finishes, which are essentially very durable polyurethanes.
Multiple coats are needed, and they are very hard-wearing. It’s crucial that the stain is fully cured, or the floor finish can lift or peel.
Furniture (Dressers, Shelves, Chairs)
Environment: Varies greatly, from living rooms to bedrooms.
Habits: Placing items, occasional cleaning, moving.
Design/Materials: Various wood types.
User Behavior: Normal use of furniture.
For most furniture, the process is fairly standard. Stain the wood, wait for it to fully dry and cure (24-72 hours is a good rule of thumb). Then, apply 3-4 coats of polyurethane, sanding lightly between each coat and cleaning thoroughly.
A satin or semi-gloss finish is usually preferred for furniture, as it offers a good balance of protection and appearance without being overly shiny or prone to showing every scratch like a gloss finish.
What This Means For You: When it’s Normal, When to Worry
Understanding when things are going right, and when there might be an issue, is important.
When it’s Normal:
- Stain looks slightly uneven before poly: Stains can look a little patchy on some woods. Polyurethane often evens out the appearance by creating a uniform clear layer over the color.
- First coat of poly looks streaky: This is common. The first coat is often uneven. Light sanding between coats will smooth it out.
- A slight deepening of the stain color: Especially with oil-based polyurethane, the finish might add a subtle warmth or amber tone. This is expected.
- The surface feels slightly rough after a coat: This is why sanding between coats is done. It’s a sign the finish is building up.
When to Worry:
- Bubbles in the polyurethane: This usually means the poly was shaken or applied too quickly. Or maybe dust got into wet poly.
- Wrinkles or Fisheyes: These are often caused by applying poly over a surface that wasn’t completely dry or clean. Silicone contamination can also cause fisheyes.
- The poly is peeling or chipping: This is a clear sign of poor adhesion. The stain likely wasn’t dry enough, or the surface wasn’t properly prepped.
- The stain color looks muddy or blotchy after poly: This can happen if the stain was applied too thickly, didn’t dry properly, or if incompatible finishes were used.
- Cloudy or milky patches: This can occur if moisture got trapped under the poly. This often happens with rushed drying times.
If you see any of the “worry” signs, it’s often best to let the finish cure completely. Then, you might need to sand it back down. You’ll want to get back to the stained wood or a smooth finish.
Then, you can reapply the polyurethane correctly.
Quick Fixes and Tips for Success
Here are some final pointers to help you get the best results when applying polyurethane over stain.
- Test First: If you’re unsure about how your stain and poly will interact, test on a scrap piece of the same wood. Stain it, let it dry for the recommended time, then apply a coat of poly. See how it looks and feels.
- Work in a Dust-Free Environment: This is incredibly important. Close windows and doors if it’s dusty outside. Consider covering vents. Dust is the enemy of a smooth finish.
- Use Good Lighting: Proper lighting helps you see drips, thin spots, and imperfections as you work.
- Don’t Overwork the Finish: Once you apply a section, try to move on. Constantly going back over wet poly can create streaks and brush marks.
- Patience is Key: Seriously, this is the most valuable tip. Wood finishing takes time. Rushing will almost always lead to a less-than-perfect result.
- Ventilate Adequately: Whether oil-based or water-based, good ventilation is important for your health and helps the finish dry properly.
Success Tips at a Glance
Scrap Wood Test: Always test your stain and poly combo first.
Dust Control: Work in the cleanest area possible. Keep the space tidy.
Good Lighting: Use bright lights to spot mistakes as you make them.
Gentle Application: Apply smoothly and avoid overworking the product.
Wait, Wait, Wait: Allow full drying and curing times. It’s worth it.
Frequently Asked Questions
Can I apply polyurethane the very next day after staining?
It depends on the stain and your environment. Many oil-based stains need 24-72 hours or even longer to fully cure. Water-based stains might be ready in 24 hours.
Always check the product label for specific drying and curing times. Rushing this step is the most common cause of finish failure.
Will polyurethane change the color of my stain?
Oil-based polyurethane can add a slight amber or warm tone, which might deepen your stain color. Water-based polyurethane is generally clear and will change the color much less, if at all. Always test on a scrap piece to see the effect.
How many coats of polyurethane do I need over stain?
For most furniture and decorative items, 3-4 coats are recommended. For high-traffic surfaces like tabletops, floors, or cabinets, 4-5 coats or more might be necessary for durability. Each coat adds protection.
Is it okay to use a different brand of polyurethane than my stain?
Yes, generally. However, it’s best to stick to compatible types (oil-based with oil-based, water-based with water-based) or ensure thorough curing of the stain, especially when switching from oil-based stain to water-based poly. Always test first if you’re unsure.
My polyurethane is lumpy. What did I do wrong?
Lumps are usually caused by dust settling into the wet finish, or by trying to apply too thick of a coat. Shaking the can also introduces bubbles that can look like lumps. Ensure your work area is clean, stir the polyurethane gently, and apply thin coats.
Sanding between coats will also remove small imperfections.
Can I apply polyurethane over a wax finish that was applied after staining?
No, you generally cannot apply polyurethane over wax. Wax is a topical coating that prevents adhesion. Polyurethane will not stick to wax.
If you want a polyurethane finish, the wax must be completely removed first, which can be difficult. It’s best to apply polyurethane directly after the stain has fully cured.
The Finishing Touch: Protect Your Work
You’ve put in the effort to stain your wood beautifully. Now, the right polyurethane finish is key. It seals in that color and protects your hard work.
By following these steps—allowing proper drying time, preparing the surface well, applying thin coats, and sanding between them—you’ll achieve a stunning and lasting result. Enjoy your beautifully finished project!