Does Cedar Stain Well? What To Expect Before You Start
You’ve picked cedar for your project. It’s a beautiful wood. But now you wonder, “Will it take stain nicely?” It’s a common question.
Many people love cedar’s look but aren’t sure about staining it. You want a great finish. You don’t want to waste time and money.
We’ll explore what makes cedar different. We’ll cover how it accepts stain. You’ll learn what to expect and how to get the best results.
Cedar can stain, but it’s not like staining pine or fir. Its natural oils can affect how the stain penetrates and looks. Proper preparation is key. You might need specific primers or stain types for the best outcome on cedar. Always test first.
Understanding Cedar Wood for Staining
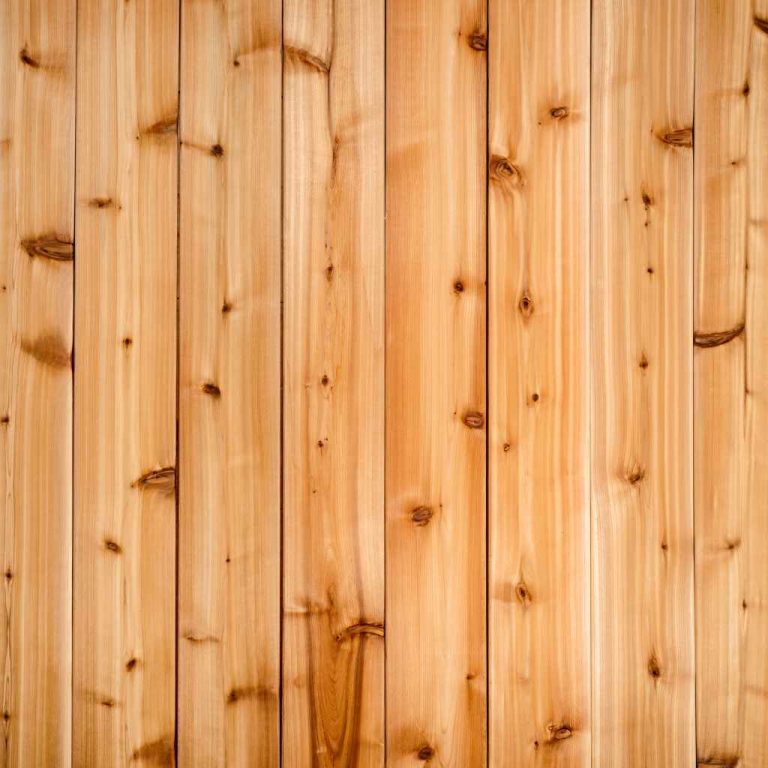
Cedar is a softwood. It comes in different types. Common ones are Western Red Cedar and Eastern White Cedar.
These woods have natural oils. These oils help protect the wood. They make it resist rot and insects.
That’s why we love cedar for decks, fences, and outdoor furniture. But these same oils can be tricky for stains.
The oils in cedar can block stain. This means the stain might not soak in evenly. It can lead to splotchy or uneven color.
Some parts might look dark. Other parts might look too light. This is the main challenge with cedar.
It’s not impossible to stain. But it needs a different approach than other woods.
Cedar also has a distinct grain pattern. It can be beautiful. But it can also absorb stain differently.
Denser parts of the grain might take stain darker. Softer parts might take it lighter. This can create a natural, attractive contrast.
Or it can look uneven if not managed.
The color of unstained cedar is also important. It can range from light yellow to reddish-brown. This natural color will affect the final stained look.
A light stain on red cedar will look different than on yellow cedar. Always consider the wood’s natural tone.
Personal Experience: The Splotchy Cedar Deck Dilemma
I remember working on a friend’s backyard deck. It was made of gorgeous Western Red Cedar. The sun was setting, casting a warm glow.
My friend, Sarah, was so excited. She’d just bought a beautiful semi-transparent cedar-tone stain. She imagined a perfectly uniform, rich color.
We started applying the stain. It seemed to go on okay at first. But then, as it dried, the issues appeared.
Patches were much darker. Some spots looked almost like the original wood. I felt a pang of worry.
Sarah’s face fell. She’d envisioned a smooth, rich finish. This looked like a patchy mess.
We’d both assumed cedar would just take stain like any other wood. That was our mistake. We hadn’t done enough research.
It felt like we had ruined the beautiful cedar.
Understanding Wood Grain Absorption
The Problem: Cedar’s natural oils and varied grain density cause uneven stain absorption. Some areas soak up more stain than others.
The Result: This leads to a splotchy, inconsistent color. It’s a common issue many homeowners face.
The Fix: Proper preparation and the right stain choice are crucial. Always test first.
That day taught me a valuable lesson. Cedar needs special care. It’s not just about slapping on a coat of stain.
It’s about respecting the wood’s nature. We had to go back to the drawing board. We researched and tried a different approach.
The second attempt was much better. The deck ended up looking fantastic. But it took extra effort and knowledge.
Real-World Context: Why Cedar Behaves This Way
Cedar’s unique properties are its strengths outdoors. They are also the source of staining challenges. The wood’s natural resistance to decay is due to extractives.
These are complex organic compounds. They are present throughout the wood. They are especially concentrated in the heartwood.
These extractives act like a barrier. They prevent stains from soaking in evenly. Think of it like trying to dye a waxed surface.
The wax resists the dye.
The grain pattern in cedar is also not uniform. You have dense growth rings. You also have softer, more porous areas.
These differences mean varying absorption rates. When you apply a stain, it sinks into the wood. If one area is more porous, it soaks up more stain.
This creates darker patches. The less porous areas will be lighter. This is a natural variation in the wood itself.
Where does this happen most? It’s common on decks. Decks get a lot of sun and rain.
This exposure can affect the wood. It can raise the grain. It can also break down some surface cells.
This can make some areas more receptive to stain. Other areas might still be protected by oils.
Outdoor furniture made of cedar faces similar issues. Fences too. Any exterior cedar surface can show these variations.
The age of the wood matters. Newer cedar might have more active oils. Older, weathered cedar might have some of these oils leached out.
This can make it stain more evenly. But it might also be more weathered and gray.
The way the wood was milled also plays a role. Rough-sawn cedar might take stain differently than smooth-planed cedar. The rough surface has more texture.
This texture can hold stain differently. It might hide some imperfections. But it can also make even application harder.
Common Cedar Staining Scenarios
- Decks: Often exposed to weather. Can be challenging due to direct sun and rain.
- Fences: Similar to decks, but often vertical. Can show streaks if not applied carefully.
- Siding: Requires careful application to maintain a uniform look over large areas.
- Outdoor Furniture: Can be easier to manage due to smaller surface areas, but still needs prep.
Cedar siding on a house needs to look good. A splotchy finish on a whole house is not ideal. People notice these things.
So, understanding these real-world factors helps you prepare. It helps you choose the right products. It helps you manage your expectations.
What This Means for You: When is Cedar Stain “Good”?
So, does cedar stain well? The honest answer is: it depends. It doesn’t stain as predictably as some other woods.
But that doesn’t mean you can’t get beautiful results. What you can expect is a finish that might be more natural looking. It might have subtle variations in tone.
This can actually be part of cedar’s charm. It highlights the wood’s natural beauty.
When is it “good”? It’s good when you’ve prepared the wood properly. It’s good when you’ve used a stain suited for cedar.
It’s good when you’ve tested first. If you achieve a color that you like. If it looks even enough for your taste.
If it enhances the wood, not hides it. Then, yes, your cedar has stained well.
When should you worry? You should worry if the finish is extremely patchy. If it looks like you have oil spots.
If the color is so uneven it’s distracting. If the stain is peeling or flaking soon after application. These are signs that something went wrong.
Usually, it’s in the preparation or product choice.
Simple checks before you start include:
- Feel the wood: Is it smooth or rough?
- Smell the wood: Can you detect a strong cedar scent?
- Look at the color: Is it uniform, or are there darker/lighter streaks?
Normal vs. Concerning Cedar Stain
Normal:
- Subtle variations in color.
- Slightly darker grain lines.
- A rich, enhanced natural look.
- Uniform color where oils are less present.
Concerning:
- Large, dark, oily-looking spots.
- Very light, un-stained patches.
- Color that looks completely random and messy.
- Stain that won’t dry or remains sticky.
It’s also important to know that not all cedar projects need staining. Many people choose to let cedar weather naturally. It turns a beautiful silver-gray color.
This is a desired look for many. So, staining is a choice. It’s a choice to alter the natural color.
Make sure that’s what you want.
Quick Fixes & Tips for Better Cedar Staining
If you’ve decided to stain your cedar, here are some tips. These can help you achieve a much better result. They are simple steps, but they make a big difference.
1. Clean the Surface Thoroughly:
Before you do anything else, clean your cedar. Use a cleaner made for wood.
This removes dirt, grime, and mildew. It also helps open the wood pores slightly. Rinse it very well.
Make sure no cleaner residue is left behind.
2. Lightly Sand (Optional but Recommended):
For smooth-planed cedar, a light sanding can help. Use 100-150 grit sandpaper.
Don’t sand too aggressively. You don’t want to remove the natural grain. Sanding helps to remove any loose fibers.
It can also help even out the surface slightly. Always sand in the direction of the grain. After sanding, clean off all the dust.
A vacuum or tack cloth works well.
3. Use a Wood Conditioner or Sealer:
This is a crucial step for cedar. A good quality wood conditioner or a specialized pre-stain treatment for oily woods can work wonders.
These products help the stain absorb more evenly. They balance out the absorption in different parts of the wood. Apply it according to the product’s instructions.
Let it dry fully before staining.
4. Choose the Right Stain:
Not all stains are created equal for cedar.
- Oil-based stains: These tend to penetrate better into oily woods like cedar.They often provide good durability.
- Semi-transparent stains: These show more of the natural wood grain. They offer a good balance of color and wood visibility.
- Deck stains: Many deck stains are formulated for exterior use and harsh conditions. Some are specifically designed for woods like cedar.
- Avoid solid stains initially: Solid stains cover the wood like paint.They hide the grain. If you’re trying to enhance cedar, solid stain isn’t the best choice.
5. Test, Test, Test!
This cannot be stressed enough. Before you stain the whole project, test your stain.
Find an inconspicuous area. Or use scrap pieces of the same cedar. Apply the stain.
Let it dry completely. See how it looks. Check for evenness and color.
Adjust your method or stain if needed.
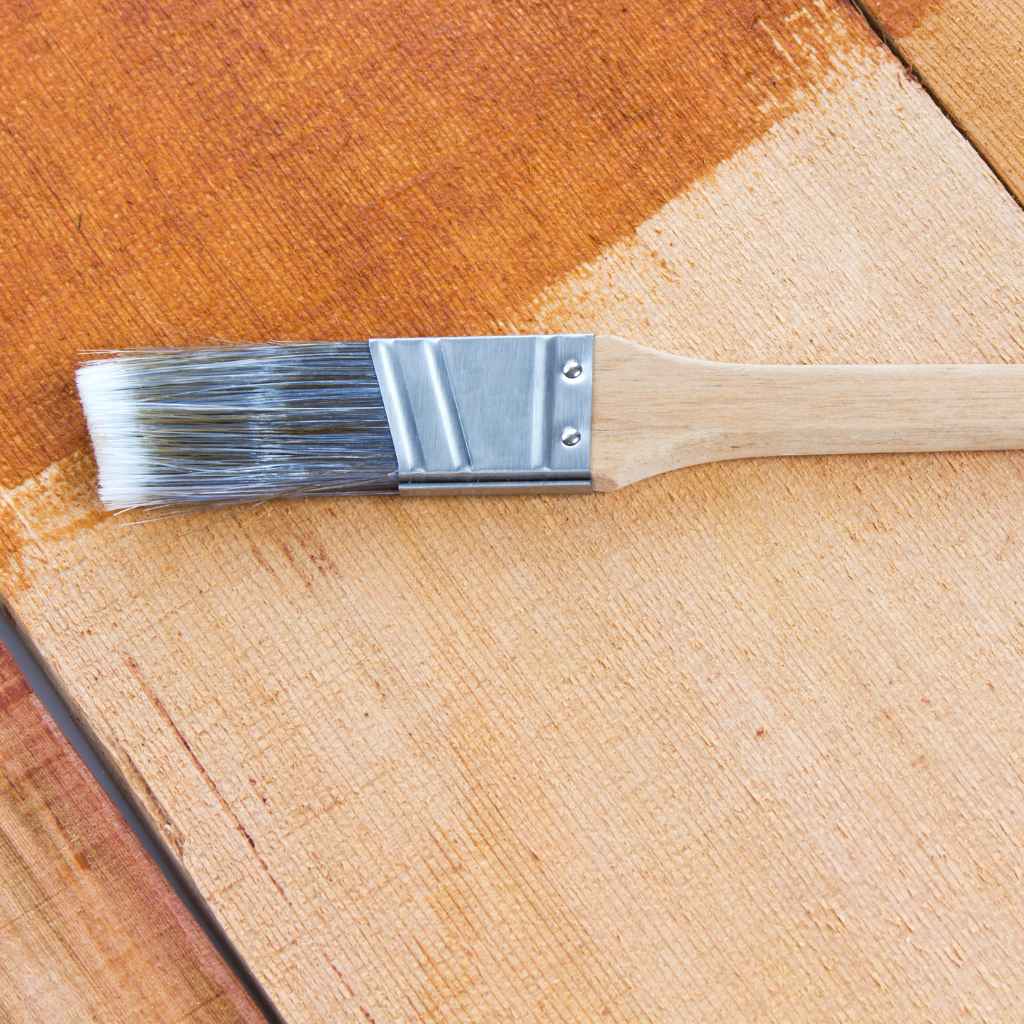
6. Apply Stain in Thin Coats:
Don’t try to get a dark, solid color in one go. Apply the stain in thin, even coats.
Use a brush or a high-quality applicator. Work with the grain. Overlap your strokes slightly.
Wipe off any excess stain that doesn’t soak in after about 15-20 minutes. This is very important. Excess stain sitting on the surface can lead to a sticky finish.
It can also look uneven.
7. Consider a Tinted Sealer Instead:
Sometimes, a tinted sealer is a better option for cedar. A sealer protects the wood.
The tint provides a subtle color. It will look more natural than a heavy stain. This is a good choice if you like the wood’s grain.
You just want to add a hint of color.
8. Patience is Key:
Staining cedar takes time. Rushing the process often leads to mistakes.
Allow adequate drying time between coats. Allow enough time for the stain to cure before heavy use.
Quick Scan: Cedar Staining Essentials
| Step | Why It Matters | What To Do |
|---|---|---|
| Clean | Removes dirt, opens pores. | Use wood cleaner, rinse well. |
| Condition | Evens out stain absorption. | Apply wood conditioner. Let dry. |
| Choose Stain | Works with oily wood. | Oil-based or specific cedar stain. |
| Test | Avoids big mistakes. | Apply to scrap wood first. |
| Apply Thinly | Prevents blotching and stickiness. | Brush or wipe on light coats. Wipe excess. |

Frequent Questions About Staining Cedar
Can I stain cedar that has already been treated with an oil?
Yes, you can stain cedar that has been treated with an oil. However, you must ensure the oil has fully cured and dried. You might also need to clean the surface thoroughly.
Sometimes a light sanding can help. Always test the stain on a small, hidden area first. This is to see how it reacts with the residual oil.
What is the best way to deal with cedar’s natural oils when staining?
The best way is to use a wood conditioner or a pre-stain product designed for oily woods. These products help to balance the absorption. Using an oil-based stain can also be more forgiving.
It’s formulated to work with natural oils. Proper cleaning and light sanding can also help open the wood surface.
How long should I wait to stain new cedar?
For new cedar, it’s often recommended to let it weather for a few weeks to a couple of months. This allows the surface oils to leach out a bit. It also helps the wood dry out.
However, if you want to stain it right away, use a good wood conditioner. This will help mitigate the oil issue. Always check the wood’s moisture content if possible.
Will stain hide knots and grain in cedar?
Semi-transparent stains will highlight the knots and grain. They allow the wood’s natural character to show through. Solid stains will cover the knots and grain, much like paint.
If you want to see the cedar’s natural features, choose a semi-transparent or a clear coat with a tint.
Can I use a water-based stain on cedar?
You can use water-based stains, but they might be more challenging on cedar. Water-based stains can sometimes raise the grain more. They might also have a harder time penetrating the oily wood.
If you choose a water-based stain, a good wood conditioner is essential. Oil-based stains are often preferred for cedar.
What happens if I don’t prepare my cedar properly before staining?
If you don’t prepare your cedar properly, you’re likely to get a splotchy, uneven finish. The stain may not penetrate the oily wood evenly. This can result in dark patches and light spots.
The stain might also not adhere well. This could lead to peeling or flaking later on. Proper preparation is key to a good-looking, lasting finish.
Conclusion
So, does cedar stain well? Yes, it can. But it requires understanding and care.
Its natural oils and grain patterns make it unique. This uniqueness calls for a thoughtful approach. Proper cleaning, conditioning, and stain selection are vital.
Always test first. By following these steps, you can achieve a beautiful finish. You can enhance your cedar project.
Enjoy the rich look you’ve worked hard for.