How To Change A Bit On A Black And Decker Drill Easily
It can feel like a puzzle sometimes, right? You grab your trusty Black and Decker drill, ready to tackle that project, but then you hit a snag. You need a different drill bit. Changing it out seems like it should be simple, but maybe you’ve fumbled with it before. Perhaps it felt stuck, or you weren’t sure you were doing it right. You just want to get back to building, fixing, or creating. Let’s make this super easy.
Changing a bit on a Black and Decker drill is a straightforward process. Most models use a keyless chuck that you twist to open and close. Ensure the drill is unplugged or the battery is removed before you start. Loosen the chuck, insert the new bit, and tighten it securely.
Understanding Your Drill’s Chuck
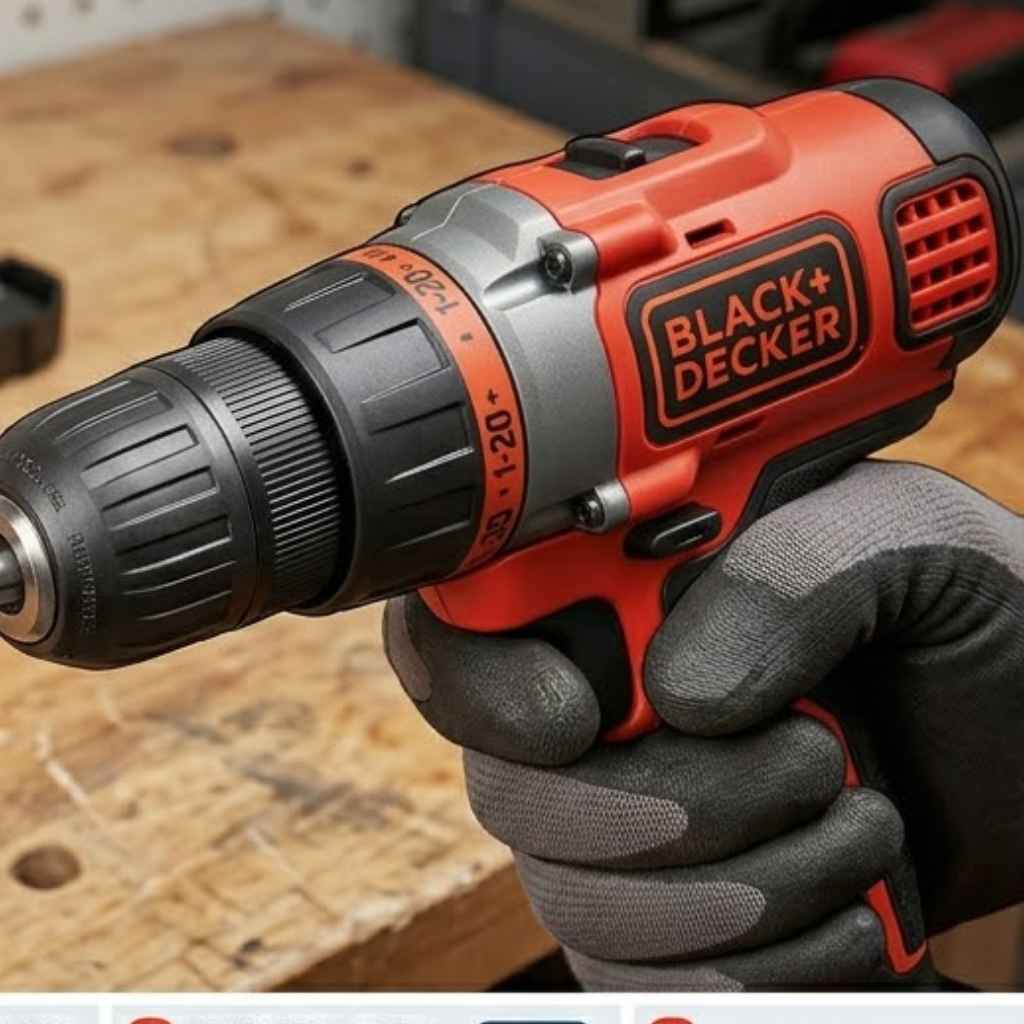
At the front of your drill, you’ll see a part that holds the drill bit. This is called the chuck. It’s the key to changing bits.
Think of it like a hand that grips the bit tightly so it spins correctly. Black and Decker drills often come with a keyless chuck. This means you don’t need a separate tool, like a key, to tighten or loosen it.
The chuck has jaws inside. These jaws squeeze around the drill bit. When you turn the chuck, the jaws move in or out.
This makes the grip stronger or looser. Most chucks on modern drills, including many Black and Decker ones, are designed for quick changes. They let you swap bits in seconds.
This is a big help when you’re working on a project that needs different types of holes or fasteners.
Older drills might have a keyed chuck. You’d use a small metal tool, the chuck key, to turn a gear. This gear opens or closes the jaws.
Keyless chucks are far more common now. They offer speed and convenience. You’ll usually find two rings on the chuck.
One ring often turns the whole chuck. The other might allow you to hold the drill body still while turning the front part. This helps loosen or tighten the grip.
Steps to Change a Drill Bit
Let’s walk through this step by step. It’s really not complicated. We’ll go slow.
First things first, safety is always number one. Before you touch anything, make sure your drill is safe to work on. You don’t want the drill to accidentally turn on.
This could cause injury or damage. It’s a simple step that makes a big difference.
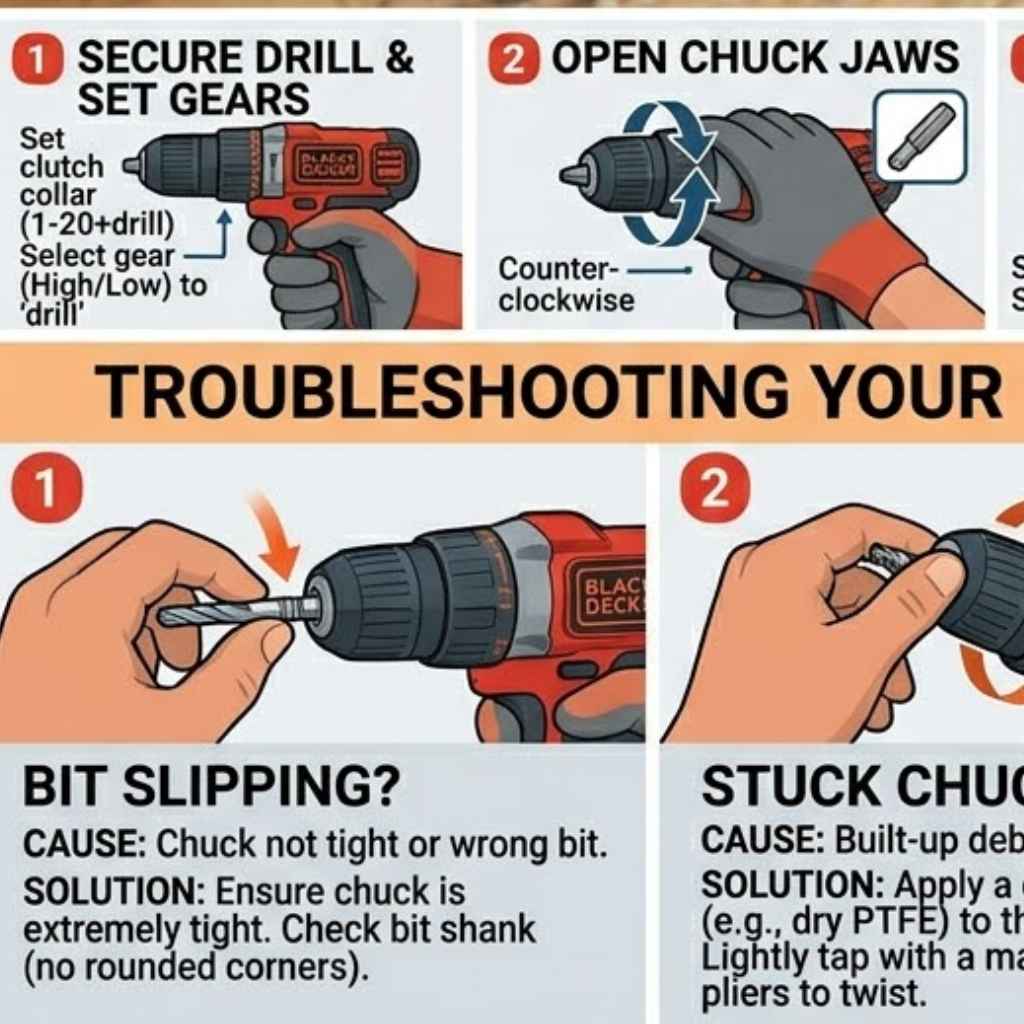
Step 1: Power Off. If you have a corded drill, unplug it from the wall. Always pull the plug, not the cord. For cordless drills, remove the battery pack.
This is super important. It prevents any accidental starts. Keep the battery out until you are ready to use the drill again.
Step 2: Locate the Chuck. Look at the very front of your drill. You’ll see the part that holds the bit. That’s the chuck.
It’s usually made of metal or a strong plastic. It might have grooves or ridges to help you grip it.
Step 3: Loosen the Chuck. This is where you’ll feel the jaws open up. For most Black and Decker keyless chucks, you will twist the front part of the chuck. Usually, you turn it counter-clockwise.
That’s the opposite direction of how you tighten a screw. Some drills might have a small button to press while you turn. Others let you just grip and twist.
You’ll feel it loosen. The jaws will start to spread apart.
You might hear a slight clicking sound. That’s normal. Keep turning until the jaws are open wide enough.
You need space to get the old bit out. Don’t force it. If it feels really stuck, check if you missed removing the battery or unplugging the drill.
Step 4: Remove the Old Bit. Once the jaws are open, the old drill bit will be loose. Gently pull it straight out of the chuck. Sometimes a bit can get a little jammed.
If so, wiggle it slightly. Never yank it out hard. This could damage the chuck or the bit itself.
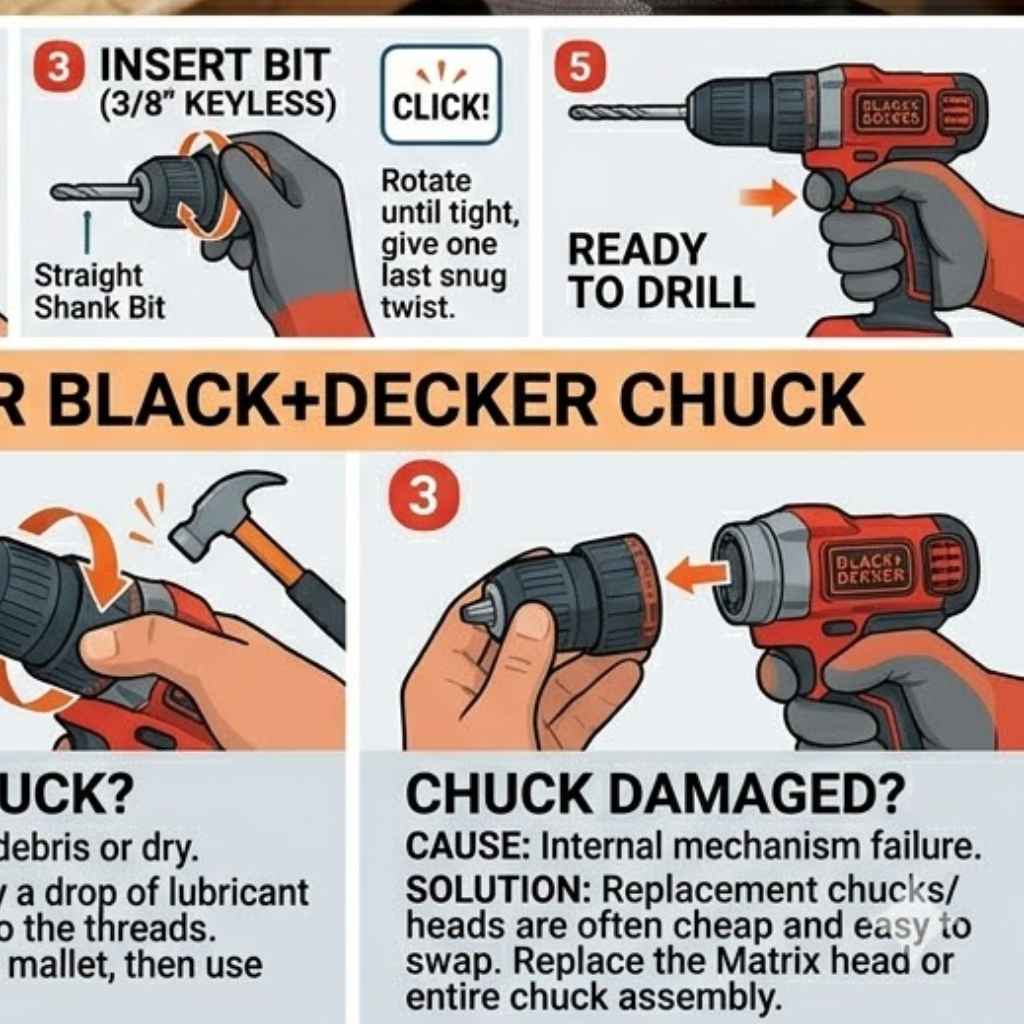
Step 5: Insert the New Bit. Take your new drill bit. Look at the end that goes into the drill. It’s usually a smooth shank.
Place this shank into the center of the open chuck jaws. Push it in until it feels seated. You want it to go in a good amount.
Not just a tiny bit.
Make sure the bit is straight. It should line up with the center of the chuck. If it’s crooked, it won’t drill straight holes.
It can also make the drill vibrate a lot. This is not good for the drill or your work. So, take a moment to make sure it’s centered.
Step 6: Tighten the Chuck. Now, you need to secure the new bit. This is the reverse of loosening. Grip the chuck firmly.
Turn the front part clockwise. That’s the same direction you tighten a screw. You’ll feel the jaws close around the bit.
They will grip it tightly. You want it to be snug. It should not wobble at all.
Some drills have a locking mechanism. You might hear a click when it’s tight enough. Others might have a slight stop point.
You can often give it an extra little twist for good measure. Just don’t overtighten it too much. That can make it hard to loosen next time.
But it needs to be secure enough to do its job.
Step 7: Re-apply Power. Now you can put the battery back in or plug your drill in. Give the drill a quick test spin. Pull the trigger lightly.
Make sure the bit spins true and doesn’t wobble. If it feels loose, repeat steps 3-6. You want it perfectly secure.
Quick Check Before You Start
Safety First: Always unplug or remove the battery. It’s the most crucial step. Never skip it.
Chuck Type: Know if you have a keyless or keyed chuck. Most Black and Decker drills are keyless.
Bit Insertion: Center the bit and push it in well. A loose bit can be dangerous.
Troubleshooting Common Issues
Sometimes things don’t go as smoothly as we hope. You try to change a bit, and it just won’t budge. Or maybe the new bit feels wobbly.
Don’t worry, these are common hiccups. Most of them have simple fixes. It’s usually about understanding what’s going on inside that chuck.
The Chuck Won’t Loosen
This is a frustrating one. You’re trying to turn the chuck, but it feels stuck. First, double-check that the drill is completely powered off.
No battery, no plug. Sometimes, residue from wood or metal dust can get into the chuck mechanism. This can make it seize up a bit.
You might need to clean it.
Try using a dry cloth to wipe around the chuck. If it’s really gritty, a small brush might help get into the grooves. Some people use a tiny bit of penetrating oil.
Apply it sparingly to the outside of the chuck where it meets the drill body. Let it sit for a few minutes. Then try turning it again.
Work it back and forth a little. This can help loosen up any sticky parts.
If you have a particularly stubborn chuck, try gripping the drill body firmly with one hand. Use your other hand to turn the chuck. Sometimes, a bit of extra leverage is all that’s needed.
Remember to turn it the correct way: counter-clockwise to loosen.
The Bit Keeps Slipping
If you tighten the chuck, but the bit still spins or slips when you try to drill, something is wrong. The most common reason is that the chuck jaws aren’t gripping the bit properly. This can happen if the bit shank is dirty or oily.
Clean the bit shank thoroughly with a degreaser or alcohol. Make sure it’s completely dry.
Another possibility is that the chuck itself is worn out. Over time, the internal mechanisms can wear down. This makes them less effective at gripping.
If your drill is old, or if you’ve used it for heavy-duty tasks, the chuck might be the issue. In this case, you might need to replace the chuck. This is a repair that’s often doable for many Black and Decker models.
You can often find replacement parts online.
Also, make sure you are inserting the bit deep enough into the chuck. If it’s only in a little way, the jaws don’t have enough surface area to grip it. Push the bit in as far as it will comfortably go before tightening.
The Drill Vibrates Excessively
A little vibration is normal when drilling. But if your drill is shaking violently, it’s a problem. This often means the bit isn’t centered in the chuck.
Or, the bit itself might be bent. Double-check that the bit is inserted straight. Loosen the chuck, re-center the bit, and tighten it again.
Make sure it’s snug.
If the bit appears bent, it needs to be replaced. A bent bit will always cause vibration. It can also make your holes inaccurate and damage your drill.
If you’ve tried centering the bit multiple times and it still vibrates badly, the chuck itself might be damaged or misaligned.
Myth vs. Reality: Chuck Care
Myth: You need to lubricate your chuck all the time. Reality: Most modern keyless chucks are sealed and self-lubricating. Over-lubrication can attract dust and make things worse.
Myth: The louder the click when tightening, the tighter it is. Reality: Clicks can indicate different things depending on the model. Focus on a firm, secure grip rather than just sound.
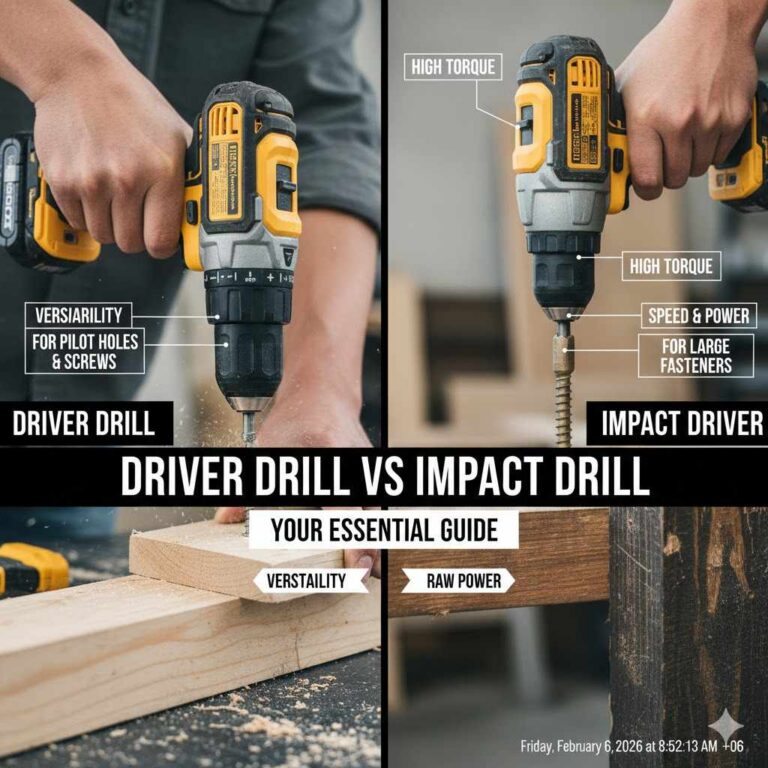
Types of Drill Bits and Their Uses
Knowing how to change a bit is one thing. Knowing which bit to use is another! Black and Decker drills are versatile.
They can use many different types of bits for various jobs. Let’s touch on a few common ones. This will help you pick the right tool for your task.
Twist Drill Bits: These are the most common. They have a spiral shape. They are used for drilling holes in wood, plastic, and metal.
For wood, you’ll want bits with a sharp point. For metal, you’ll need harder bits, often made of high-speed steel (HSS).
Spade Bits (Paddle Bits): These have a flat, wide blade. They are great for drilling larger holes in wood. Think of things like running pipes or wires through studs.
They can be a bit rough, so they are not for fine work.
Auger Bits: These are also for wood. They have a screw-like tip. This helps them pull themselves into the wood.
They drill deep, clean holes. They are often used by woodworkers and in construction.
Masonry Bits: If you need to drill into brick, concrete, or stone, you need these. They have a carbide tip that’s very hard. They work with a hammer drill function for best results.
Screwdriver Bits: These aren’t technically drill bits, but you use them in your drill. They have heads shaped like screws (Phillips, flathead, Torx). They let you drive screws in or out much faster than by hand.
Hole Saws: These are large, cylindrical saws. They cut very large holes. You use them for things like installing doorknobs or creating openings for electrical boxes.
They require an arbor to attach to the drill.
Quick-Scan Bit Guide
- Wood/Plastic/Metal: Twist Drill Bits (HSS for metal)
- Large Wood Holes: Spade Bits or Auger Bits
- Brick/Concrete: Masonry Bits (with hammer drill)
- Driving Screws: Screwdriver Bits
- Very Large Holes: Hole Saws
When to Call It Quits (or Seek Help)
While changing a bit is usually simple, sometimes there are signs that your drill might be having bigger problems. Or maybe the bit you need is just not something your drill can handle. It’s good to know when to stop and reassess.
Your safety and the life of your tool are important.
If the chuck is severely damaged, cracked, or makes grinding noises even when the drill is off, it’s likely time for a replacement chuck. For older drills, or if you’ve put a lot of wear and tear on them, it might be more cost-effective to consider a new drill. Black and Decker offers many affordable options.
Also, if the drill itself overheats very quickly, or if you smell burning plastic, stop using it immediately. These are signs of serious internal motor issues. For very tough jobs, like drilling through thick steel or concrete, you might need a more powerful or specialized drill.
A standard Black and Decker drill is great for DIY tasks around the house, but it has its limits.
Signs Your Drill Needs Attention
- Chuck is physically cracked or broken.
- Chuck makes loud, grinding noises.
- Drill overheats very fast with minimal use.
- Smell of burning plastic or electrical wires.
- Bit continuously slips despite trying different bits.
Personal Experience: That Time I Forgot the Battery
I remember one particularly busy Saturday. I was trying to hang a shelf in my living room. I had my trusty Black and Decker cordless drill.
I grabbed a wood drill bit, thinking it would be a quick job. I had already used the drill earlier that morning for something else, so I figured it was ready to go.
I lined up my shelf, drilled the pilot holes, and then went to insert the screw bit. I started to drive the screw, but nothing was happening. The bit was spinning, but the screw wasn’t going in.
I stopped. What was going on? I checked the drill.
It felt like it had power, but the screw just wouldn’t catch. I tried again, pushing harder. Still nothing.
Frustrated, I looked closer. I wiggled the bit. It felt a little loose, so I went to tighten the chuck.
That’s when I saw it. The battery pack was sitting on my workbench. I had forgotten to put it back in the drill after charging it earlier.
The drill had just enough residual power in the motor to spin the chuck, but not enough to drive a screw. It was a moment of pure, self-inflicted silliness. I laughed at myself.
Then I put the battery in and the shelf went up perfectly. It was a good reminder: always check the power source first!
Real-World Context: Using Your Drill in Different Homes
The way we use drills can change depending on where we live. In the American Southwest, for example, many homes have stucco exteriors and concrete block construction. Drilling into these surfaces requires masonry bits.
The dry climate also means less worry about rust on metal tools if they’re left out briefly.
On the East Coast, you might find more older homes with wooden framing and plaster walls. This means more use for standard twist bits for pilot holes. And if you’re in a damp area like the Pacific Northwest, keeping your drill bits dry becomes even more important to prevent rust.
Understanding your local materials can help you pick the right bits and care for your drill properly.
Even within a single home, different rooms present different challenges. The garage might be for rougher projects, where a slightly older or more powerful drill can be used. The kitchen, however, might involve more delicate tasks, like hanging cabinets or installing drawer pulls, where precision and a steady hand (and the right bit) are key.
Your Black and Decker drill is a tool that can adapt to many of these situations.
What This Means for You
So, what does all this mean for your DIY adventures? It means that changing a drill bit is a skill you can master easily. It’s about basic mechanics and a little bit of common sense.
For most everyday tasks, your Black and Decker drill and its keyless chuck are perfectly suited.
When it’s normal: It’s normal for the chuck to twist to open and close. It’s normal for bits to fit snugly. It’s normal to need to remove the battery first.
It’s normal to use different bits for different materials. These are all signs your drill is working as it should.
When to worry: Worry if the chuck is stuck solid and won’t budge even with gentle force. Worry if the bit feels very loose no matter how much you tighten it. Worry if the drill makes strange noises or smells.
These are red flags that something needs attention.
Simple checks: Before you start, always check for power. Look at the bit to make sure it’s straight. Give the chuck a good tighten.
Make sure the bit is centered. These quick checks prevent many common problems and ensure you’re working safely and effectively.
Quick Fixes and Tips
Here are some easy tips to make changing bits even smoother. These are things I’ve learned over the years that just make life easier.
Keep Bits Organized: Use a bit organizer case. This way, you always know where your bits are. It also protects them from damage and rust.
You won’t waste time searching for the right one.
Clean Your Bits: After using bits, especially in metal or damp wood, wipe them clean. This prevents rust and keeps them from leaving residue in your chuck. A dry cloth is usually enough.
Two-Handed Tightening: For a really secure grip, hold the drill body still with one hand and twist the chuck with the other. This gives you better control and ensures the bit is locked in.
Don’t Force It: If a bit is really hard to remove or insert, don’t just yank or force it. Check for obstructions or dust. Sometimes wiggling gently is all it takes.
Listen to Your Drill: Pay attention to unusual sounds. A smooth hum is good. Grinding or squealing is not.
These sounds can tell you if something is wrong with the chuck or the drill motor.
Store Properly: Keep your drill and bits in a dry place. Avoid extreme temperatures. This helps prevent rust and keeps your tools in good working order for longer.
DIY Drill Bit Quick Tips
- Organization: Use a case for all your bits.
- Cleanliness: Wipe bits after use.
- Secure Grip: Use both hands to tighten.
- Gentle Removal: Wiggle, don’t yank, stuck bits.
- Tool Health: Listen for odd noises.
- Storage: Keep tools dry and cool.
Frequent Questions About Changing Drill Bits
Do I need a special tool to change bits on a Black and Decker drill?
No, most Black and Decker drills come with a keyless chuck. This means you can change bits by hand. You just twist the chuck to loosen and tighten it.
You only need a separate tool if your drill has an older style keyed chuck.
How tight should I make the drill bit?
You want it tight enough so the bit does not slip or wobble when you drill. Give the chuck a good firm twist. You should feel it grip the bit well.
For most keyless chucks, a snug turn is enough. You don’t need to use all your strength, as this can make it hard to loosen later.
My drill bit is stuck and won’t come out. What should I do?
First, make sure the drill is unplugged or the battery is removed. Then, try wiggling the bit gently while turning the chuck counter-clockwise. Sometimes, a small amount of penetrating oil applied to the chuck can help loosen it.
Avoid pulling too hard, as this can damage the chuck.
Can I use any drill bit with my Black and Decker drill?
Generally, yes, as long as the shank (the part that goes into the chuck) fits the size of your chuck opening. Most common drill bits have shanks that fit standard chucks. However, very large bits or specialized bits might have different requirements.
Always check the size of the bit’s shank against your drill’s chuck capacity.
How often should I clean my drill chuck?
You don’t need to clean your chuck very often. Most keyless chucks are designed to be low maintenance. It’s a good idea to wipe it down with a dry cloth occasionally, especially if you notice dust or debris.
If it feels gritty or sticky, a quick wipe should be enough. Avoid using too much lubricant, as it can attract more dirt.
What’s the difference between a drill bit and a screwdriver bit?
A drill bit is designed to make holes. It usually has a pointed tip or cutting edges. A screwdriver bit is designed to turn screws.
It has a tip shaped to match a screw head, like Phillips or flathead. You use both in your drill, but for different purposes.
Conclusion
Changing a bit on your Black and Decker drill is a fundamental skill for any DIYer. By following these simple steps, paying attention to safety, and understanding your tool, you can swap bits with confidence. It’s about making your drill ready for whatever project comes next.
Happy drilling!