How to Contour a Wooden Chair Seat: Hand Tools vs. Angle Grinder
To contour a wooden chair seat, hollow it out with a scorp and travisher by hand, or rough out the hollow fast with an angle-grinder carving disc, then true up the curve with a travisher and scraper before sanding and finishing.
A flat wooden seat is fine for a stool, but a “scooped” or “saddled” seat is what actually holds you comfortably for a two-hour dinner. Windsor chairmakers have been carving this same sit-bone hollow into pine and poplar seat blanks for three centuries, and the tool kit hasn’t changed much: an adze or scorp to remove the bulk of the waste, a travisher to sweep the hollow into a smooth curve, and a scraper to finish it. Modern woodworkers have added a faster option – an angle grinder fitted with a carving disc – that can hog out the same hollow in a fraction of the time, at the cost of more noise, more dust, and a steeper learning curve for control.
This guide covers both routes in real detail: the traditional hand-tool sequence, the power-tool alternative, how deep to cut and where, which woods actually carve well, and the mistakes that turn a comfortable saddle seat into a cracked or lopsided one.
Two Ways to Scoop a Seat: Hand Tools or an Angle Grinder
Fastest Way to Rough Out a Seat Hollow
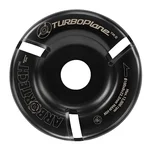 |
Arbortech TURBOPlane Carving Disc – $179.00 Mounts on a standard 4″/4.5″ angle grinder and hogs out a seat hollow in minutes instead of hours of hand-tool work.
|
Both routes end at the same place – a smooth, ergonomic hollow – but they get there differently. Hand tools (adze, scorp, travisher) give you total control and a traditional hand-carved surface, at the cost of an hour or more of physical work per seat. A carbide carving disc on an angle grinder removes the same volume of wood in a few minutes, but it’s much easier to gouge too deep, wander off your layout lines, or leave grinder facets that still need cleaning up with a travisher or scraper anyway. Most chairmakers who own both tools use the grinder only to remove the bulk of the waste, then switch to hand tools for the final shaping – you rarely see someone finish a seat straight off the grinder.
Hand-Tool Method: Adze, Scorp, and Travisher
The traditional sequence follows a “coarse, medium, fine” progression, where each tool removes less material than the last and leaves a cleaner surface behind it.
- Coarse – adze or scorp: A scorp is a hook-shaped, pull-toward-you blade that removes the bulk of the waste fast. Some chairmakers use a hand adze instead for the roughest removal on a new blank, though a scorp alone is enough for most seats.
- Medium – travisher: A travisher is a flat-soled tool with a curved, adjustable blade, pushed in sweeping strokes across the hollow. This is the tool that actually shapes the saddle curve – it blends the rough scorp cuts into one continuous, symmetrical sweep.
- Fine – card scraper: A card scraper removes the last of the travisher’s tool marks and leaves a surface that’s ready for sanding, without tearing out grain the way sandpaper alone would on a curved surface.
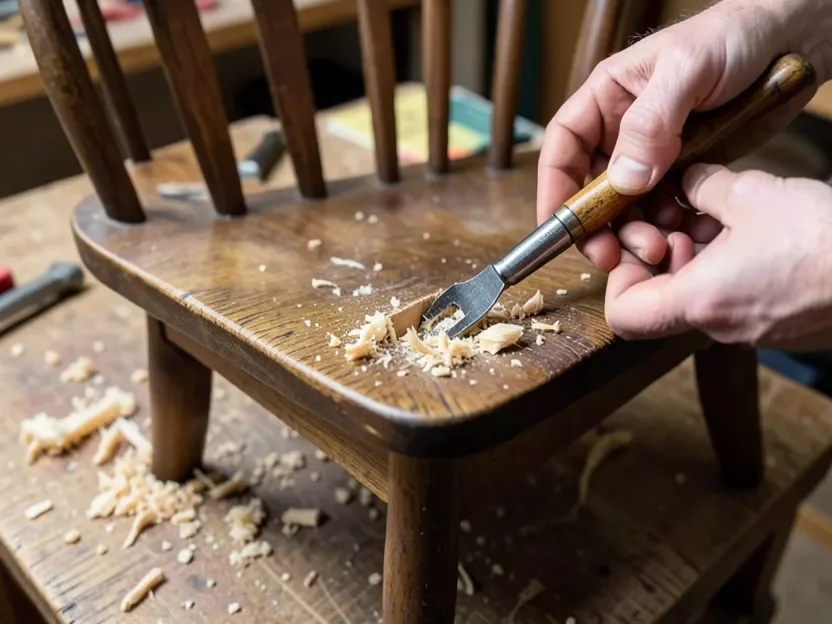
Before picking up the scorp, most Windsor chairmakers bore a series of depth-guide holes across the seat outline with a brace and bit, drilled to the depth they want the finished hollow to reach at each point – shallower near the front edge, deepest under the sit bones. Removing waste down to the bottom of those holes with the scorp keeps the depth consistent across the whole seat, instead of guessing by eye. A quality travisher blade needs to stay sharp to cut cleanly rather than tear – see our guide to sharpening and choosing travisher blades if the tool starts skating instead of cutting.
Power-Tool Method: Angle Grinder with a Carving Disc
A tungsten-carbide carving disc – the Arbortech TURBOPlane above is a common choice – mounts on a standard 4″ or 4.5″ angle grinder and removes wood far faster than any hand tool. Clamp the seat blank solidly in a vise or to the bench before starting; the disc’s aggressive bite means it can grab and pull the workpiece if it isn’t secured. Work the disc in light, sweeping passes rather than plunging straight down, moving from the center of the hollow outward, and stop well short of your final depth lines – it’s far easier to remove a bit more material with a travisher afterward than to fix a gouge that went too deep.
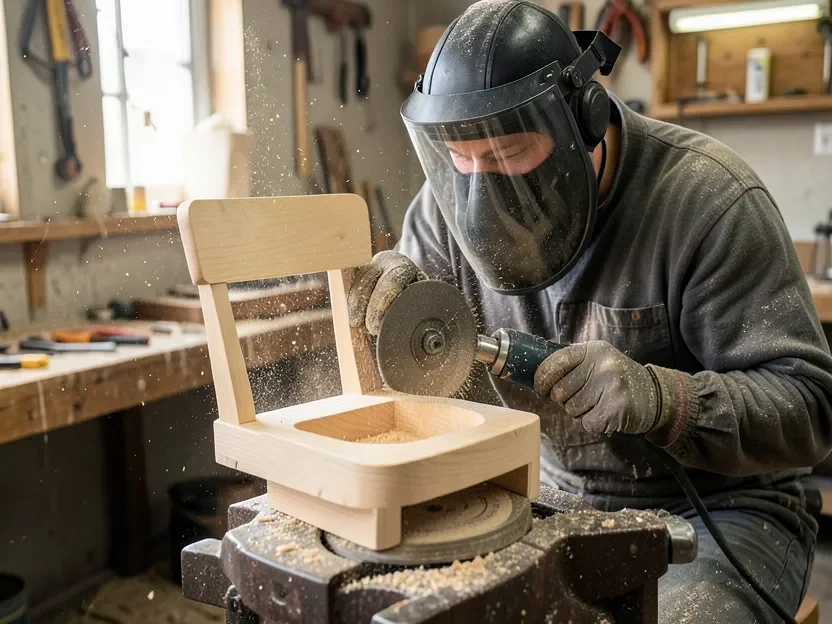
Wear a full face shield (not just safety glasses), a fitted dust mask or respirator, and hearing protection – carving discs are loud and throw a constant spray of fine dust. Keep both hands on the grinder at all times and never work with the blank held against your body. A carving disc leaves visible facets and waves rather than a smooth curve, so plan on a travisher and scraper pass afterward no matter how careful the grinding was – the grinder’s job is bulk removal, not final shaping.
Choosing Wood for a Scooped Seat
Traditional Windsor seats are almost always carved from tulip poplar, basswood, or eastern white pine – all soft, straight-grained woods that carve cleanly with hand tools and hold crisp tool marks without much tear-out. Ring-porous hardwoods like oak carve rougher and dull edge tools faster, which is part of why they were rarely used for saddled seats historically.
Studio furniture makers working in harder woods – walnut, cherry, maple – generally lean on power tools for the rough hollowing rather than hand-carving from scratch. Sam Maloof’s sculpted rocking chairs, still the benchmark for a heavily contoured seat, were shaped with band saws, grinders, and drum sanders precisely because hardwood doesn’t carve as forgivingly as pine. If you want to see how far a scooped seat can be pushed stylistically, our piece on the Maloof dining chair’s carved details breaks down that approach.
Marking and Laying Out the Contour
Start by marking the centerline of the seat front-to-back and side-to-side, then mark the “sit bone zone” – roughly the back third of the seat, a bit wider than hip width – where the hollow will be deepest. A typical scoop runs from nearly flat at the front edge to about 1 to 2 inches deep at its lowest point, tapering back up slightly toward the rear edge so the chair back doesn’t feel like it’s falling away from you.
Keep a minimum of about 3/8 to 1/2 inch of wood thickness at the deepest, thinnest point of the hollow, measured to the underside of the seat – go thinner than that and the seat can flex, crack along the grain, or fail outright under weight. This is the main reason depth-guide holes matter: it’s very easy to misjudge depth by eye on a curved surface, especially once shavings and dust are covering the area you’re cutting.
Smoothing and Finishing the Scoop
Once the travisher (or grinder-plus-travisher) has the curve where you want it, a card scraper removes the last tool marks without the risk of a random-orbit sander flattening out the sculpted shape – power sanders are very good at grinding a crisp saddle curve back down into a shallow, mushy dip if you’re not careful. Hand-sand in stages instead, working from around 100-grit up through 220-grit, and pay attention to grain direction: a scooped seat has grain running in several directions across the curve, so you’ll often need to sand small sections at slightly different angles rather than one long pass across the whole seat.
Rake a work light across the surface at a low angle before calling it finished – shadows will show up any flat spots, ridges, or asymmetry that’s hard to feel by hand. An oil finish (boiled linseed oil or a wipe-on oil/varnish blend) tends to show off a hand-carved contour better than a thick film finish, since it soaks in rather than pooling in the low spots of the hollow.
Common Mistakes to Avoid
- Cutting too deep near the edges: the seat is at its thinnest right where the hollow meets the outer edge – this is the most common place for a crack to start.
- Skipping the depth-guide holes: carving purely by eye almost always produces an asymmetrical hollow that only shows up once you sit in the finished chair.
- Sanding before the shape is right: sandpaper is slow at removing wood and easy to use unevenly – get the curve correct with edge tools first, sand last.
- Grinding against the grain at a steep angle: this is what causes a carving disc to grab and jump rather than cut smoothly – keep the disc moving in light, shallow passes.
- Going straight from grinder to finish: grinder facets read as bumpy under a finish coat – always follow with a travisher or scraper pass.
Frequently Asked Questions
What’s the difference between a scorp and a travisher?
A scorp is a hook-shaped tool pulled toward the carver, used early in the process to remove the bulk of the waste quickly. A travisher is a flat-soled, push-style tool with an adjustable curved blade, used afterward to sweep the rough scorp cuts into one smooth, symmetrical saddle curve. The scorp does the heavy removal; the travisher does the actual shaping.
Can you contour a chair seat with an angle grinder?
Yes – a tungsten-carbide carving disc such as the Arbortech TURBOPlane mounted on a standard 4 to 4.5 inch angle grinder can rough out a seat hollow in a few minutes instead of an hour or more by hand. It still needs to be followed by a travisher or scraper pass to smooth out the grinder facets, and it requires a face shield, dust mask, and hearing protection because of the dust and noise involved.
What wood is easiest to carve a scooped seat in?
Tulip poplar, basswood, and eastern white pine are the traditional choices for Windsor-style seats because they’re soft, straight-grained, and carve cleanly without much tear-out. Harder woods like oak, walnut, or maple carve much more slowly with hand tools, which is why most heavily-contoured hardwood seats are shaped with power tools instead.
How deep should a chair seat be scooped?
Most saddled seats run roughly 1 to 2 inches deep at the sit-bone zone, tapering to nearly flat at the front edge. Whatever depth you choose, keep at least 3/8 to 1/2 inch of wood thickness at the thinnest point of the hollow so the seat stays structurally sound under weight.
Final Thoughts
A scooped seat is one of the few places in woodworking where the traditional hand-tool method and the modern power-tool method genuinely coexist rather than one replacing the other – even chairmakers who grind out the bulk of the hollow still reach for a travisher to finish it. Start with the depth-guide holes, work coarse to fine, and check your progress by actually sitting in the chair partway through – a seat that looks right on the bench doesn’t always feel right until someone’s weight is on it.
Sponsored / affiliate links. As an Amazon Associate I earn from qualifying purchases. I may earn additional commission from eligible campaigns.