Wooden Toy House DIY: Safe Build for Child Play
A plywood-based wooden toy house is the most practical starting point for a durable, child-safe build because sheet goods stay flatter, cut to repeatable sizes, and fit play figures more cleanly than live-edge or irregular stock. Use smooth plywood or hardwood, rounded edges, a finish labeled for child-related use, and openings sized for the figures you choose.
Wooden toy house safety checklist

Build safety into the layout before you cut anything. That means rounded edges, hidden fasteners, stable joints, and no small parts that can loosen under play. A toy house for children also needs finish choices that are safe after full cure, plus enough ventilation during drying.
Edge rounding and sanding targets
Round every exposed edge to at least a small radius that removes the knife edge, then sand until the surface feels even and free of splinters. A common approach is to break sharp corners on plywood with 120-grit, then refine with 180-grit before finish. The goal is a touch-safe edge, not a polished furniture sheen.
Fastener hiding and joint strength
Use glue plus concealed brads or screws where the design allows, then cover any countersunk fastener heads with wood filler or plugs. Avoid exposed nail tips, proud screw heads, and joints that can rack when a child lifts the house by one side. If a panel shifts by hand, it will likely loosen in play.
Small-part sizing and finish safety
Anything detachable should be large enough not to become a choke hazard for the intended age group. For a toy house aimed at peg dolls or small-world play, keep decorative add-ons fixed in place or make them too large to swallow. Use finishes labeled for child-related use, then allow full cure before play begins.
What this build includes
This guide recommends a plywood-based toy house as the best starting design: a simple open-front or two-wall house with a gable roof, sized for one figure scale and built from sheet goods plus a few strip parts. It can work as a gift, a play item, or a display piece with accessories.
A practical starter size is a base around 12 x 12 inches with wall height around 10 inches and a roof peak around 15 inches total, which leaves enough room for small-world figures and furniture without making the house awkward to store. For a larger peg-doll house, scale the floor up first, not the roof pitch.
Target use: peg dolls, small-world play, or display
Choose the use case first, because it changes the opening size and the joinery. Peg dolls need shorter door heights and wider floor clearances; small-world figures need more headroom and deeper rooms; display-only builds can use thinner parts and tighter openings because they do not need repeated hand access.
If the goal is to move 3-inch peg dolls between rooms, a 3 1/2-inch-tall door opening and about 4 1/2 inches of interior clear height at the eaves should feel usable, while a 2-inch door is likely to frustrate play and catch figures at the shoulders.
Measured starting layout and key clearances
Use this layout as a practical starting point: a base around 12 x 12 inches, a front opening about 9 inches wide by 8 inches high, side wall height around 10 inches, a roof peak around 15 inches overall, and shelf or loft depth no deeper than about 4 inches unless a larger footprint is wanted. Keep railings or balcony openings too narrow for a small figure head to pass through.
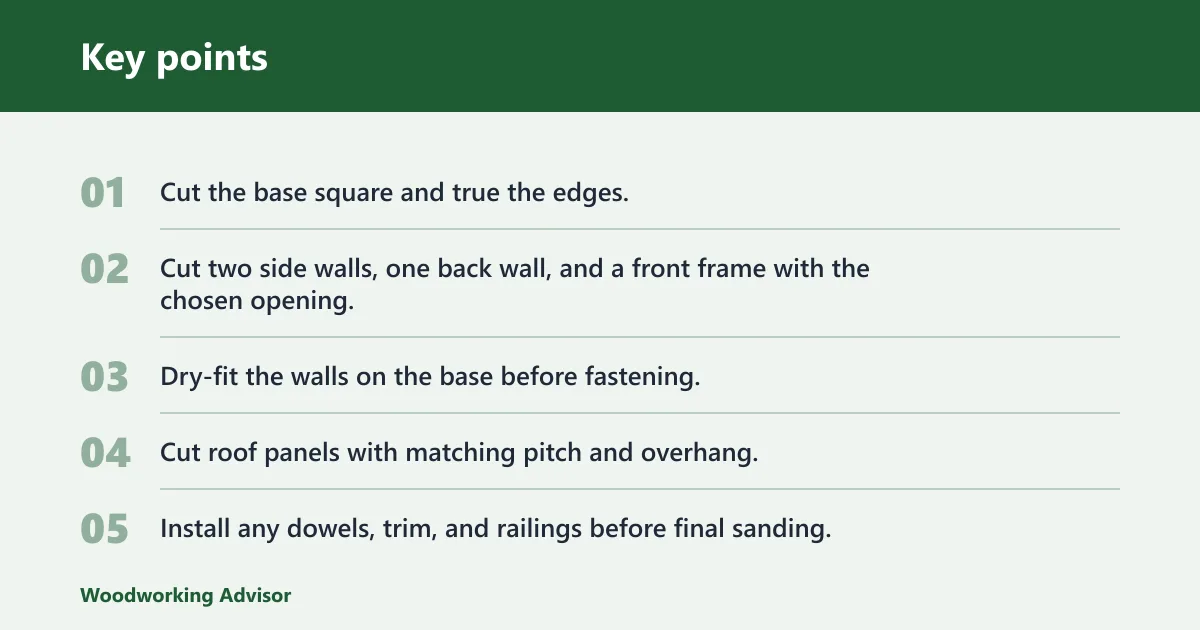
- Cut the base square and true the edges.
- Cut two side walls, one back wall, and a front frame with the chosen opening.
- Dry-fit the walls on the base before fastening.
- Cut roof panels with matching pitch and overhang.
- Install any dowels, trim, and railings before final sanding.
Pros and cons
A plywood-based build gives you a steady starting point, but every material has tradeoffs. The right choice depends on whether you want the cleanest build, the lowest cost, or the easiest scrap conversion.
Pros of a plywood-based build
- Sheets stay flatter than many random offcuts.
- Cut parts repeat cleanly for walls, floors, and roofs.
- It gives a cleaner playroom look than live-edge stock.
- It works well for a simple, square toy-house layout.
Tradeoffs of MDF and solid wood
- MDF cuts smoothly, but edge sealing becomes more important because the edges drink finish and fray easily.
- Solid wood looks good, but movement across the grain can open joints or warp panels if the stock is not selected carefully.
- Both can work, yet both need more attention than plywood for a first child-safe build.
When a simpler open-front design makes sense
If you want fewer parts, make the front fully open and skip internal stairs or moving doors. That reduces pinch points, fasteners, and little pieces that can come loose. A common first-timer mistake is adding too many tiny trim details before the main shell is square and stable.
Who it’s for
This suits beginners who want a first toy build, gift makers who need a small safe project, and woodworkers turning scrap into a child’s play item. It is less suitable if you want a miniature display house with delicate shutters, loose accessories, or a highly detailed interior.
Suppose you have leftover pine offcuts from shelving. You can use them, but only if the stock is thick enough and straight enough for the house to stand without bowing. If a side wall twists after clamping, choose a different board before you spend time on finish work.
What wood should you use?
Plywood is the best all-around choice for the main shell because it comes in sheets, stays stable, and gives you predictable parts for a toy house. MDF is workable for decorative pieces, while solid wood is best when you want visible grain and you can select straight, dry stock. Poplar boards fit well for wall trim and roof pieces where light weight and easy cutting matter.
Plywood versus MDF versus solid wood
Plywood gives you the cleanest base for a child-safe build, especially if you want a playroom-friendly shape instead of live-edge decoration. Birch plywood is a strong option when you want a smooth, layered sheet-goods build with crisp edges and less fuss at assembly. MDF can work for a painted dollhouse, but it needs more edge sealing and care around moisture.
Where poplar boards fit in the plan
Poplar boards work well for wall caps, roof trim, doors, and lightweight decorative framing. They cut cleanly, accept paint well, and help when you need solid material along edges that get touched often. For a simple hybrid build, use plywood for the body and poplar for trim and roof details.
Using pine offcuts without building in warp
Pine offcuts can be a budget-friendly or reclaimed choice from a builders merchant, but the pieces still need enough thickness and stiffness for the house to stand safely. Choose straight offcuts, avoid boards with a visible cup, and reject pieces with knots that split across the grain near the ends.
What tools do you need?
The common tool set for this project includes a table saw, miter saw, jigsaw, cordless drill, clamps, and a brad nailer. You do not need every tool for every design, but you do need reliable cutting, clamping, and fastening tools if you want square walls and a roof that stays seated.
Cutting tools: table saw, miter saw, jigsaw
A table saw helps rip plywood strips and trim wall panels to exact width. A miter saw is useful for roof angles and repeatable trim cuts. A jigsaw fills the gap when you need an arched doorway, window openings, or a profile that does not fit a straight saw cut.
Assembly tools: drill, clamps, brad nailer
Use a cordless drill for pilot holes, countersinks, and any screws that hold the shell together. Clamps keep the base and walls aligned while glue sets. A brad nailer speeds assembly, but the nails should sink cleanly and never split thin stock or leave proud points on the inside of the toy.
Shop setup for sanding and finish prep
Set aside a flat sanding area and a dust-free drying space. Sand before assembly where access is easier, then do a final pass after the shell goes together. Good dust control matters because sanding dust can interfere with paint adhesion and make the final surface rougher than the raw wood suggested.
Toy house build plan

Build the shell in this order: base, walls, roof, then details. That sequence keeps the structure square and makes it easier to check openings before the finish goes on. For a toy house, the main job is not decoration; it is a shell that stays stable under repeated handling.
Base, walls, and roof layout
Start with a 12 x 12-inch base cut from plywood. Add two side walls at 10 inches tall, then a back wall at the same height. For the front, leave a 9-inch-wide opening and shape the top with a simple gable so the roof can sit securely without leaving gaps that snag fingers.
Use the floor line as your reference and mark every opening before cutting. If you want a loft, keep it shallow and fixed in place so it cannot rock loose during play. Avoid thin overhangs that can snap when the house is carried by the roof edge.
Where dowels work as supports and railings
Dowels fit well as stilts, supports, railings, ladder parts, and even tree branches in a treehouse version. Thick dowels work for legs or main supports, while thin dowels can be cut into short lengths for balustrades and short guard sections. Keep rail openings large enough for fingers but too small for a figure to slip through.
For a treehouse style, mount the house body on three or four dowel stilts and tie the design visually together with short horizontal rails. If you use dowels for a ladder, keep the spacing even and the ends fully sealed or capped so no split grain can catch skin.
Step-by-step assembly order
- Cut and sand the base, walls, and roof parts.
- Dry-fit the shell and mark any gaps or misalignments.
- Glue the walls to the base and clamp until square.
- Reinforce joints with brads or screws hidden from play surfaces.
- Install roof panels and check that the peak is centered.
- Add dowels, trim, and fixed details.
- Do the final sanding pass, then paint or stain.
Wooden toy house diy table
| Material | Cost tier | Cutability | Edge sealing needs | Durability | Weight | Child-safety notes |
|---|---|---|---|---|---|---|
| MDF | Low to medium | Very easy for straight cuts | High, especially on exposed edges | Good in dry indoor use, weaker at edges | Heavy for its size | Use only with sealed edges and careful dust cleanup; avoid exposed chips and damp storage. |
| Plywood | Medium | Easy for sheet parts and repeatable layouts | Moderate, mainly on cut edges | Good for a child’s toy house shell | Medium | Best balance for a stable, cleaner-looking build; sand plies smooth and hide fasteners. |
| Solid wood | Medium to high | Good, but more sensitive to grain direction | Moderate to high on end grain and joints | Good if the stock is straight and dry | Medium | Watch for movement, knots, and splitting; best for trim, doors, and selected panels rather than the entire shell. |
How do you size it for play?
Size the house to the figures first, then fit the structure around them. For peg dolls or small-world play, the door opening, ceiling height, and stair or loft clearance matter more than exterior style. A house that looks neat but pinches figures will not play well.
Peg doll and small-world figure clearances
Use the largest figure as your reference and add space for a hand to move it. A useful starting rule is to make the door opening at least about 1 inch taller than the figure and the room height about 1 1/2 inches taller than the figure if easy access is the goal. For small-world play, deeper floor space helps more than extra trim.
Door openings, floor height, and roof space
Keep the floor high enough that figures do not rub the underside of the roof when moved in and out. If you add a second level, leave enough vertical gap so the top of the figure clears the ceiling by a visible margin rather than scraping. Roof space should be structural first and decorative second.
Scale checks before you cut
Make a cardboard mockup of the front opening and test it with the figure set before cutting wood. This simple check prevents a common mistake: building a beautiful front that is too small for the toys. If the figure fits only at an angle, enlarge the opening now rather than later.
How should you finish it safely?
Use non-toxic paint or stain, sand before coating, and allow full drying and cure time before children play with the house. Water-based finishes are common for toys, and some makers prefer natural-ingredient options when they want the wood grain to remain visible. The best finish is the one that matches both the wood and the label directions.
Non-toxic paint or stain choices
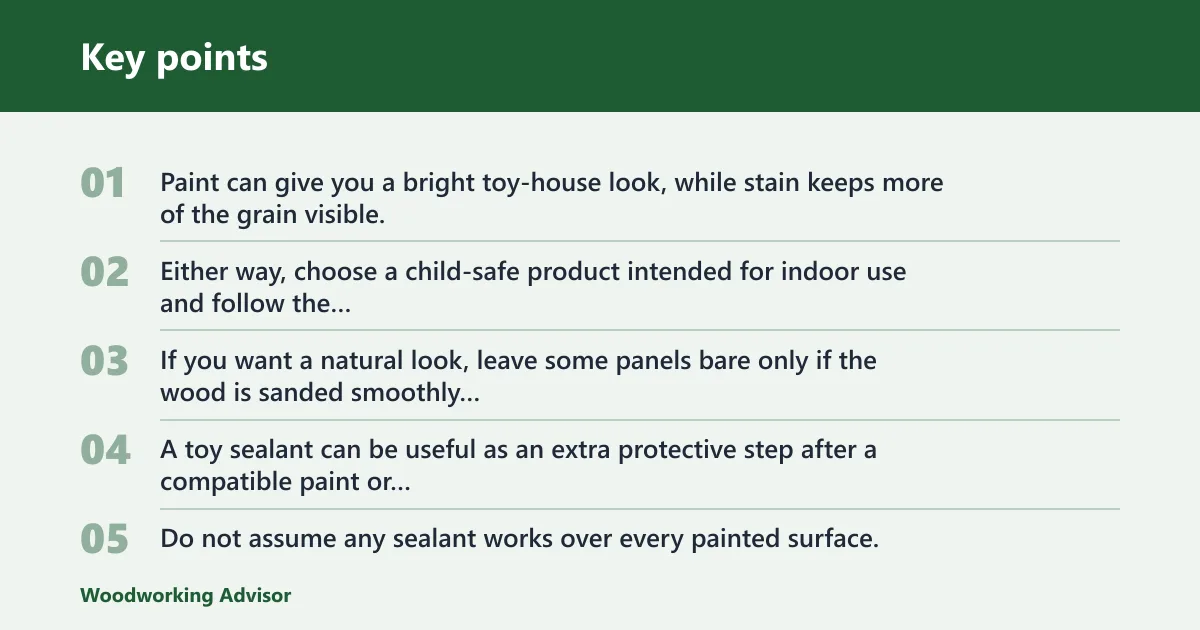
Paint can give you a bright toy-house look, while stain keeps more of the grain visible. Either way, choose a child-safe product intended for indoor use and follow the manufacturer’s application directions. If you want a natural look, leave some panels bare only if the wood is sanded smoothly and the edges are fully broken.
A toy sealant can be useful as an extra protective step after a compatible paint or stain system, but only when the product instructions allow that combination. Do not assume any sealant works over every painted surface. Check compatibility first, because some topcoats cloud the color or weaken adhesion.
Drying and cure time before play
Dry to the touch is not the same as ready for play. Keep the house out of use until the finish has cured according to the label, especially if the toy will be handled often or mouthed by younger children. If the surface still smells strongly of solvent or feels tacky, it is not ready.
When an optional toy sealant fits the system
Use sealant only where the paint or stain system calls for it. That usually means a clear protective layer over a compatible, fully cured finish, not a universal last step on every toy. If you choose to skip sealant, make sure the underlying finish is still durable enough for repeated wipe-downs.
How do you make a wooden toy house for kids?
Start with a simple plywood shell, size the openings for the figures you plan to use, then sand every edge before paint or stain goes on. Keep the layout open and sturdy, hide all fasteners, and choose a finish that is labeled for child-safe indoor use once fully cured.
Then build the shell in a fixed order: base, walls, roof, and detail parts. That keeps the structure square and makes it easier to catch fit problems before the finish stage. If the house is for a birthday gift or educational play, accessories such as furniture, peg dolls, or a small tree can be added later.
What paint is safe for a wooden toy house?
A safe choice is a non-toxic paint made for indoor use and applied according to the label directions. Water-based paints are common for toy projects because they are easier to clean up and usually dry with less lingering odor. If you want the wood grain visible, a child-safe stain can be a better fit than opaque paint.
Can I make a wooden toy house from scrap wood or offcuts?
Yes, scrap wood and offcuts can work well if the pieces are straight, dry, and thick enough for the design. Pine offcuts from a builders merchant are a practical option, but they should not twist, cup, or split when cut. Match the offcut thickness to the scale instead of forcing a thin piece into a structural role.
Wooden toy house DIY projects work best when the material is chosen for stability first and appearance second. A cleaner plywood shell, a few poplar trim parts, and carefully selected dowels will usually beat a random pile of decorative scraps.
Frequently asked questions
What wood is best for a DIY wooden toy house?
Plywood is usually the best starting material because it stays flatter and is easier to cut into repeatable parts. Poplar works well for trim and roof details, while solid wood is best reserved for selected parts if you want grain and can manage movement.
What tools do I need to build a toy house?
A table saw, miter saw, jigsaw, cordless drill, clamps, and a brad nailer cover most toy-house builds. You may not need all of them for a basic open-front house, but you do need accurate cutting and solid clamping to keep the shell square and safe.
How do you finish a wooden toy house safely for children?
Sand first, then use a non-toxic paint or stain intended for indoor use. Allow the finish to dry and cure fully before play, and add a sealant only if the finish system allows it. Avoid any coating that stays tacky or leaves strong odor after the label’s cure time.
How do you size a wooden toy house for peg dolls or small world play?
Size the door opening and room height around the largest figure, then add clearance for a child’s fingers. For small-world play, an opening about 1 inch taller than the figure is a practical starting point, with extra headroom inside so the figure moves without scraping.
Sponsored / affiliate links. As an Amazon Associate I earn from qualifying purchases. I may earn additional commission from eligible campaigns.