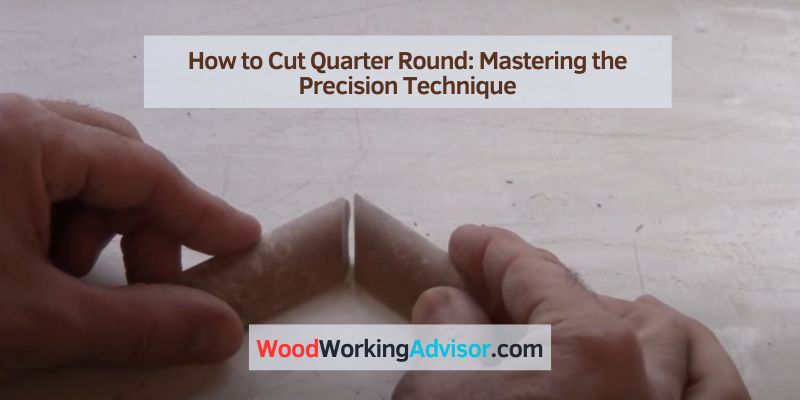
How to Cut Quarter Round: Mastering the Precision Technique
To cut quarter round, measure and mark the required length, then use a miter saw to make the cut. Start by measuring the length needed for the quarter round in the specific area where it will be installed.
Once measured, use a pencil to mark the measurement on the quarter round. After marking, position the quarter round on a miter saw and carefully cut along the marked line to achieve a clean and precise cut. Installing quarter round can add a polished look to your flooring or baseboards.
Whether you are renovating or adding finishing touches to a room, cutting quarter round is a useful skill to have. It’s a straightforward process that can be easily accomplished with the right tools and techniques. In this guide, we will explain how to cut quarter round effectively and efficiently for your next home improvement project.
Mastering Quarter-Round Cuts
Understanding how to cut quarter-round molding is an essential skill for homeowners and professionals looking to achieve a polished finish in their interior spaces. By mastering quarter-round cuts, you can ensure that your baseboards and other molding achieve a seamless and professional look, enhancing the overall aesthetics of your home. In this guide, we will delve into the key aspects of quarter-round cuts, from understanding the molding to its importance in interior finishes.
Understanding Quarter-Round Molding
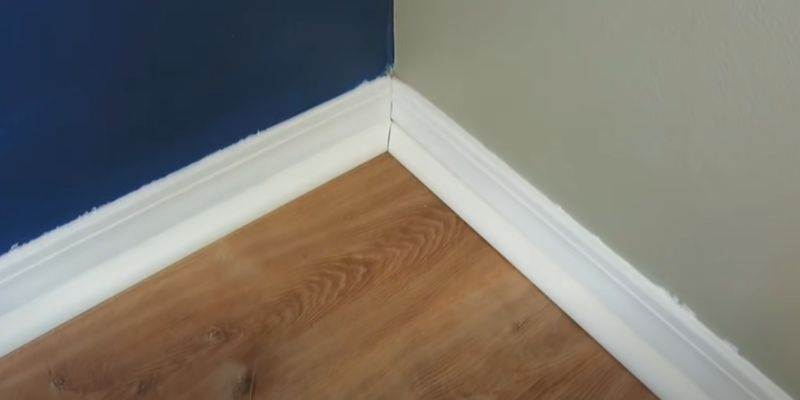
Quarter-round molding, also known as shoe molding, is a trim used to conceal the expansion gap between the baseboards and the flooring. It is often installed at a 45-degree angle to create a smooth transition and cover any imperfections in the joint. Understanding the characteristics and purpose of quarter-round molding is crucial for making accurate and precise cuts that seamlessly integrate with the existing trim.
Importance In Interior Finishes
Quarter-round molding plays a vital role in providing a polished and complete look to interior finishes. When installed correctly, it adds a refined touch to the room, concealing any gaps and irregularities while creating a cohesive and aesthetically pleasing transition between the walls and flooring. Mastering the art of cutting quarter-round molding enables you to achieve a professional finish that enhances the overall appeal of your living space.
Choosing The Right Tools
When it comes to cutting quarter round, having the right tools is essential in ensuring precision and efficiency. With the proper tools, you can achieve clean and accurate cuts, resulting in a professional-looking finish for your project. Here are the key tools you’ll need to successfully cut quarter round molding:
Measuring Tape And Pencil
Before making any cuts, it’s crucial to measure and mark the quarter round accurately to avoid any mistakes. A measuring tape and a pencil are indispensable for this task. When measuring, ensure that you take into account the angles and dimensions of the space where the quarter-round will be installed. Marking the measurements with a pencil will serve as a guide for the cutting process.
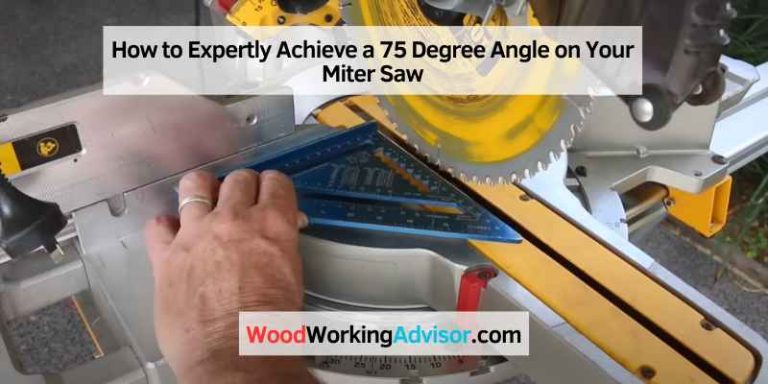
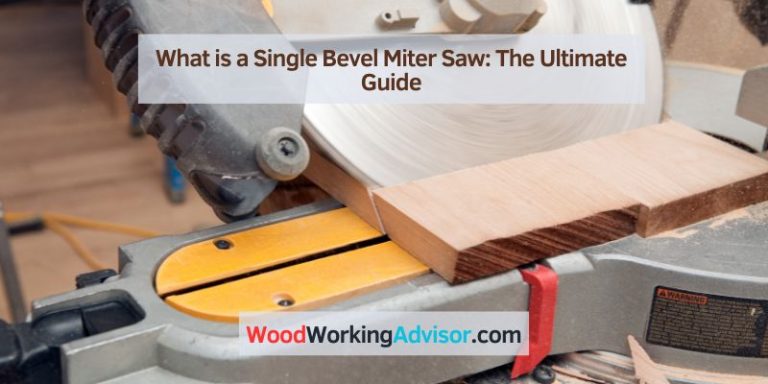
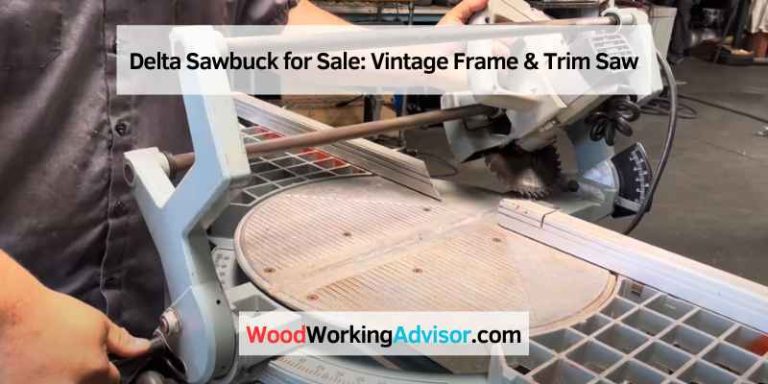
Miter Saw Basics
The most common tool used for cutting quarter round is a miter saw. This versatile saw allows you to make precise angled cuts, essential for creating seamless corner joints. The saw can be adjusted to cut at various angles, such as 45 degrees for standard corners. With the miter saw, you can achieve clean, uniform cuts that will seamlessly fit together during installation.
Safety Gear Essentials
Prioritize your safety by wearing the appropriate safety gear when cutting quarter round. Safety glasses will protect your eyes from any flying debris, while ear protection can shield your ears from the loud noise of power tools. Additionally, it’s important to wear a dust mask to prevent inhalation of sawdust particles. Practicing safety measures ensures that you can focus on the task at hand without risking injury.
How To Cut Quarter Round: The Precision Technique
Cutting quarter round efficiently and precisely can be crucial for the overall finish of your project. The precision technique involves calculating angles before cutting, accurately marking the piece, and implementing a step-by-step cutting process. Mastering these techniques will ensure a professional-looking result for your quarter-round installation.
Calculating Angles Before Cutting
- Use a protractor to measure the angles where the quarter round will be installed, such as where the wall meets the floor or the corners of doorways and windows.
- Carefully record the measurements for accurate transferring onto the quarter-round pieces.
Marking The Piece Accurately
- Transfer the measured angles onto the quarter round accurately using a pencil and a combination square to ensure precise markings.
- Use a miter saw or a coping saw to cut the angles according to the markings on the quarter-round pieces.
Step-by-step Cutting Process
When cutting quarter-round, it is essential to follow a methodical cutting process to maintain precision. After marking, carefully follow these steps:
- Secure the quarter-round piece firmly in place on the saw.
- Align the blade with the pencil marks and ensure a straight cut.
- Slowly and steadily cut through the quarter round using a smooth motion, maintaining a steady pace to prevent errors.
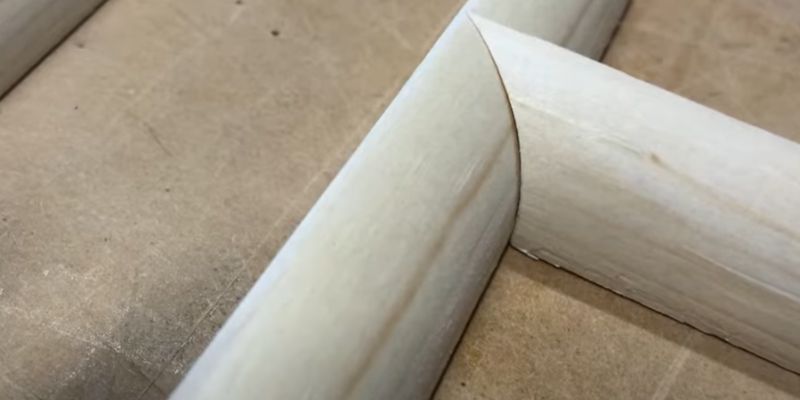
Achieving Seamless Joins
When it comes to installing quarter-round molding, achieving seamless joins is crucial for a professional and polished look. Properly cutting and fitting the quarter round at corners ensures a flawless finish, enhancing the overall aesthetic of the project. This article will discuss various techniques for achieving seamless joins, including coping methods for better fits, tips for smooth inside corners, and perfecting outside corner cuts.
Coping Method For Better Fits
The coping method is an effective technique for achieving precise and seamless joins when cutting quarter round molding. Instead of traditional miter cuts, coping involves cutting one piece of molding to fit the profile of the adjacent piece. This creates a tight and seamless joint, especially in cases where walls are not perfectly square.
Tips For Smooth Inside Corners
- Use a miter saw to make 45-degree cuts on each end of the quarter round where it meets the inside corner.
- Ensure the cuts are clean and precise to achieve a snug fit.
- Test the fit before securing the molding in place.
- Make any necessary adjustments for a seamless and tight joint.
Perfecting Outside Corner Cuts
- Measure and mark the quarter round where it will meet the outside corner.
- Use a miter saw to make precise 45-degree cuts at each end of the molding.
- Check the fit and make any adjustments to ensure a seamless join.
- Secure the molding in place once the fit is perfect.
Finishing Touches For Professional Results
After cutting and installing quarter round molding, it’s crucial to focus on the finishing touches to achieve professional results. Here are the essential steps to take to enhance the final appearance of your quarter round molding installation.
Sanding The Edges
Before applying any finish, it’s important to sand the edges of the quarter round molding to ensure a smooth and polished surface. Use a fine-grit sandpaper to gently sand the edges, removing any rough or uneven areas. This will create a seamless transition from the molding to the wall or floor, resulting in a professional-looking finish.
Caulking And Painting
Once the sanding is complete, the next step is to carefully caulk any gaps or seams between the quarter round molding and the wall or floor. Use a high-quality paintable caulk to create a seamless transition and to prevent any gaps from collecting dust or debris. After caulking, apply a smooth and even coat of paint that matches the color of the molding or the baseboards for a cohesive and professional appearance.
Maintenance And Replacement Tips
After completing the finishing touches, it’s important to maintain the quarter round molding to ensure its longevity and visual appeal. Inspect the molding regularly for any signs of wear or damage, and promptly replace any pieces that are chipped, cracked, or showing excessive wear. Additionally, ensure that the caulk and paint are well-maintained and touch up any areas that may have become worn over time.
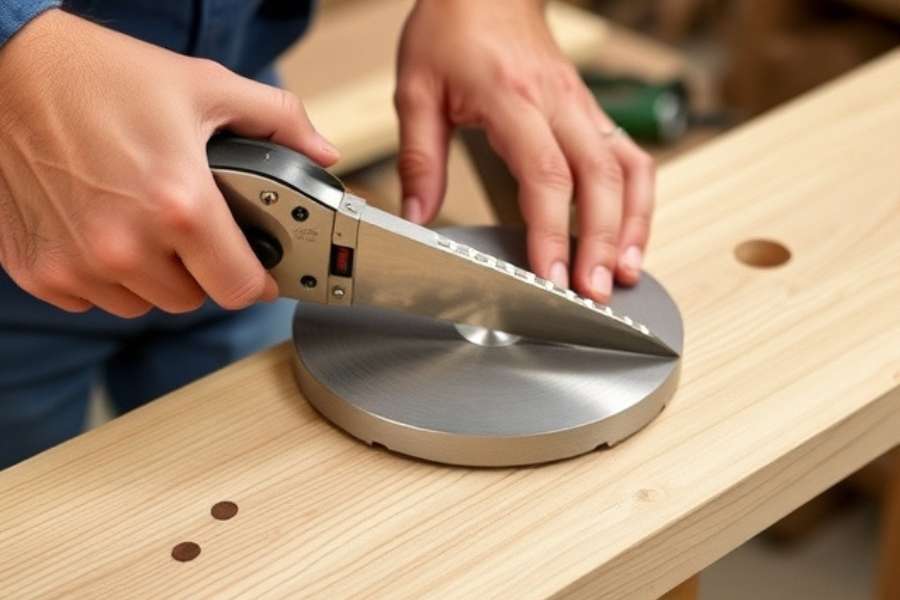
How to Use Miter Scissors to Cut Quarter Round
Miter scissors are handy for cutting small trim pieces, including quarter-round molding. These scissors simplify the process of making angled cuts without needing a miter box or saw, making them ideal for smaller or quick home projects. Here’s a step-by-step guide on how to use miter scissors to cut quarter-round molding accurately.
Tools You’ll Need
- Miter Scissors: These special scissors have adjustable angles to make precise cuts, often with settings at common angles like 45° and 90°.
- Quarter-Round Molding: The type of molding you’re cutting.
- Measuring Tape: For accurate length measurements.
- Pencil: To mark the cut location on the molding.
- Sandpaper or File: Optional for smoothing rough edges.
Step-by-Step Guide to Cutting Quarter Round with Miter Scissors
1. Measure and Mark the Molding
- Start by measuring the length you need for the quarter round. Use a measuring tape to find the precise length required for each section.
- Mark the Cut Point: Mark the exact spot where you’ll cut the quarter-round with a pencil. This will help you position the miter scissors accurately.
2. Set the Angle on the Miter Scissors
- Adjust the Angle: Miter scissors have adjustable blades, typically with settings for 45°, 60°, and 90° cuts. Quarter round requires 45° angles to join pieces cleanly at corners, especially for inside and outside corners.
- Determine the Cut Direction: Ensure you’re cutting in the correct direction based on the position of the quarter round (inside or outside corner). This will keep the pieces aligned during installation.
3. Position the Molding in the Scissors
- Place the quarter-round molding in the open miter scissors, aligning the blade with the pencil mark. Make sure that the molding is flat and positioned snugly against the base of the miter scissors.
- Check Alignment: Double-check that the blade is aligned with your cut mark, and the angle is correctly set. This ensures a smooth and precise cut.
4. Make the Cut
- Apply Steady Pressure: Squeeze the handles of the miter scissors firmly and evenly to make the cut. Miter scissors are generally designed for softer woods and PVC, so take it slow to avoid splintering or rough edges.
- Cut in One Motion: Try to make the cut in a single, smooth motion. Stopping mid-cut can create an uneven edge.
5. Check and Adjust if Needed
- Inspect the Cut: After cutting, examine the edge to ensure it’s clean and accurate. If the cut is slightly rough, use a piece of sandpaper or a small file to smooth it out.
- Test Fit: Place the cut piece where it will be installed to confirm it aligns correctly with adjoining pieces. Make adjustments if necessary before installing.
6. Repeat for Additional Pieces
- Continue measuring, marking, and cutting each piece as needed. For each inside or outside corner, you’ll generally need to make a matching 45° cut on the adjacent quarter-round piece for a tight fit.
Tips for Using Miter Scissors with Quarter Round
- Practice with Scrap Pieces: If you’re new to using miter scissors, practice on a scrap piece of quarter round to get comfortable with the angles and cutting action.
- Use Miter Scissors for Smaller Projects: Miter scissors are best for smaller jobs or softer materials. For larger molding or harder wood, consider a miter saw for more power and precision.
- Keep the Blade Sharp: A sharp blade ensures a cleaner cut. If your miter scissors are dull, they may crush or splinter the molding.
- Mark the Direction of Each Cut: Label the top or front side of each piece with an arrow indicating the direction of the cut. This helps prevent mistakes and ensures all pieces fit properly.
- Avoid Overlapping Corners: When cutting for inside corners, ensure you’re cutting at the correct 45° angle to avoid overlap. Matching angles on two pieces will create a clean joint.
Frequently Asked Questions (FAQs)
Q1. Can I use miter scissors on hardwood quarter-round?
Miter scissors are generally best for softer woods or materials like PVC. They may struggle with harder woods, which can lead to rough cuts or damaged blades. For hardwood, a miter saw might be more effective.
Q2. How do I cut quarter round for an inside corner?
For an inside corner, you’ll need to cut each piece at a 45° angle, so the cuts face inward. This allows the two pieces to meet seamlessly in the corner.
Q3. What’s the best way to get a smooth finish on the cut edges?
After cutting, you can smooth any rough edges using fine-grit sandpaper or a small file. This helps create a clean, professional finish, especially for visible joints.
Q4. Are there alternatives to miter scissors for cutting quarter round?
Yes, a miter saw or hand saw with a miter box are popular alternatives that provide more power and may be better for larger or harder pieces of molding.
Q5. How do I cut quarter round for an outside corner?
For outside corners, make 45° cuts on each piece, facing outward. This allows them to meet at a sharp edge, providing a tight and polished joint.
Q6. Can I use miter scissors to cut other types of molding?
Yes, miter scissors are versatile and can cut various small moldings, including cove molding, shoe molding, and trim pieces, as long as they’re made of soft wood or PVC.
Using miter scissors to cut quarter-round molding is a straightforward way to achieve neat, angled cuts without a lot of hassle. By following these steps, you’ll have clean, professional-looking cuts that fit together beautifully, bringing a polished finish to your project.
Frequently Asked Questions Of How To Cut Quarter Round
What Are The Tools Required For Cutting Quarter Round?
You will need a miter saw, coping saw, measuring tape, and safety goggles to support precision cutting and ensure safety during the process.
How Do I Measure And Mark Quarter Round For Cutting?
Use a measuring tape to determine the required length, mark the measurements on the quarter round, and then use a square to create straight cutting lines.
What Is The Best Technique For Cutting Quarter Round?
The best technique for cutting quarter round is to use a miter saw for straight cuts and a coping saw for coping the inside corners, ensuring precise and professional-looking finishes.
Conclusion
Cutting quarter round doesn’t have to be a daunting task. With the right tools and techniques, you can achieve clean and precise cuts for a professional finish. Remember to measure accurately, use the appropriate saw, and prioritize safety. By following these guidelines, you can confidently tackle your quarter round cutting projects with ease.