Free Miter Saw Workbench Plans: 8-Ft Cut List and Height Math
A free miter saw workbench plan only works if the wings sit exactly level with your saw’s table, so the one measurement that drives every other dimension is the distance from the saw’s feet up to its table surface. This page gives an 8-ft bench cut list worked out from that number and checked against actual lumber sizes, plus a comparison of three free plans we read. If you would rather recess the saw, see our miter saw table build.
This post contains affiliate links. As an Amazon Associate, I earn from qualifying purchases at no extra cost to you.
Build the bench 96 in. long x 23-3/4 in. deep from eight 8-ft 2x4s, one sheet of 3/4-in. plywood and one 1×4. Cut the legs to table height minus saw-foot-to-table distance minus plywood thickness (28-5/8 in. for a 34-in. table and a 4-5/8-in. saw). Raise 36-in. wings on risers until they match the saw table within 1/16 in.
Why You Need a Dedicated Miter Saw Workbench
Best Folding Stand Alternative
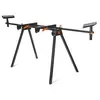 |
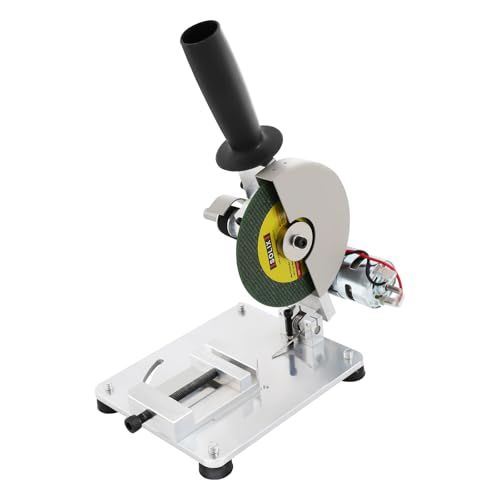
WEN Universal Collapsible Miter Saw Stand, 350-Pound Capacity (MSA200) – $63.58 If a fixed 8-ft bench is more build than your shop needs, this stand does the same support job as the wings in this plan: its arms extend from 36 to 80 inches to hold boards up to 8 feet long.
|
As an Amazon Associate we earn from qualifying purchases.
Cutting 8-ft baseboard or crown on a small stand is a balancing act: the board flexes, the saw shifts, and cuts drift out of square. A workbench gives the saw a fixed footing, supports both ends of long stock, and puts a fence and stop block in line with the saw’s own fence.
Free Miter Saw Workbench Plans: Dimensions and Design
Three numbers set everything: the saw’s foot-to-table distance, your target table height, and the saw’s base width. The first one is the number most plans skip.
The measurement most plans skip: foot-to-table distance
The wings must match the saw’s table, not the bench top the saw sits on. Set the saw on a flat board and measure from the board up to the saw’s table surface; call that S. When Shanty 2 Chic built their station they measured S at 4.625 inches and sized their supports to it, noting that the cutting surface must be even with the supports. Because the saw sits on the bench top, the wings have to be raised by S, which is what the risers in this plan do.
| Your S (saw foot to table) | Riser height (S minus 3/4-in. deck) | Shim under a 2×4 on edge (riser minus 3-1/2 in.) | Leg length for a 34-in. table (34 minus S minus 3/4) |
|---|---|---|---|
| 4-1/4 in. (example) | 3-1/2 in. | 0 | 29 in. |
| 4-5/8 in. (Shanty 2 Chic saw) | 3-7/8 in. | 3/8 in. | 28-5/8 in. |
| 5-1/2 in. (example) | 4-3/4 in. | 1-1/4 in. | 27-3/4 in. |
The 4-5/8-in. row is the only measured value; the other two show how the numbers move. Measure your own saw before cutting a single leg. If the table height you want is different, the leg length is simply target height minus S minus the plywood thickness. Family Handyman’s modular plan works at 38 inches; 34 inches is the number used here.
Bench size
| Dimension | This plan | Why |
|---|---|---|
| Length | 96 in. | One 8-ft 2×4 is 96 in., so the long rails need no joining |
| Depth | 23-3/4 in. | Two strips from a 48-in. plywood sheet: 23-3/4 + 23-3/4 + 1/8 in. saw kerf = 47-5/8 in. |
| Saw bay (between wings) | 24 in. | Fits a saw base up to 20 in. wide with 2 in. clear on each side |
| Each wing | 36 in. | (96 – 24) / 2; widen the bay and each wing shortens by half the difference |
| Table height | 34 in. (your choice) | Leg length = height – S – 3/4 |
The 23-3/4-in. depth suits a chop-style saw. Ana White notes that a sliding miter saw needs 32 inches or more of depth to slide, so for a slider deepen the bay section before you cut plywood.
Free Miter Saw Workbench Cut List and Materials
Dimension lumber is smaller than its name. Per the sizes on our S4S lumber chart, a 2×4 is 1-1/2 x 3-1/2 in. and a 1×4 is 3/4 x 3-1/2 in. That is why the cross rails are 20-3/4 in., not 23-3/4: the 23-3/4-in. depth minus two 1-1/2-in. rails.
| Part | Stock | Cut size | Qty |
|---|---|---|---|
| Long rails | 2×4 x 8 ft | 96 in. | 2 |
| Cross rails (5 in the frame, 2 in the wing risers) | 2×4 x 8 ft | 20-3/4 in. | 7 |
| Legs | 2×4 x 8 ft | 28-5/8 in. (for the example above) | 6 |
| Riser strips | 2×4 x 8 ft, on edge | 36 in. | 4 |
| Riser shims (only if S is over 4-1/4 in.) | Sheet scrap | 36 x 1-1/2 in., thickness = riser minus 3-1/2 in. | 4 |
| Bench top | 3/4-in. plywood | 23-3/4 x 96 in. | 1 |
| Wing decks | 3/4-in. plywood | 23-3/4 x 36 in. | 2 |
| Wing fences | 1×4 x 8 ft | 36 in. | 2 |
| Shopping list | How the count works |
|---|---|
| Eight 8-ft 2x4s | Long rails 2; cross rails 4 + 3 pieces from 2 boards (83-3/8 and 62-1/2 in. with kerfs, both under 96); legs 3 per board from 2 boards (86-1/8 in.); riser strips 2 per board from 2 boards (72-1/8 in.) |
| One 4×8 sheet of 3/4-in. plywood | Top strip 23-3/4 x 96, wing strip cut into two 36-in. decks (72-1/8 in.), offcut about 23-7/8 x 23-3/4 |
| One 8-ft 1×4 | Two 36-in. fences use 72-1/8 in. |
| Fasteners | 3-in. screws for rail-to-leg and rail-to-cross-rail joints; 2-in. screws for plywood to rails; wood glue; saw mounting bolts, washers and nuts sized to your saw’s holes |
Prices vary by region and month, so we do not quote a total; multiply the counts by your local price. Buy full 8-ft boards, because 2×4 studs are often precut shorter than 96 in.
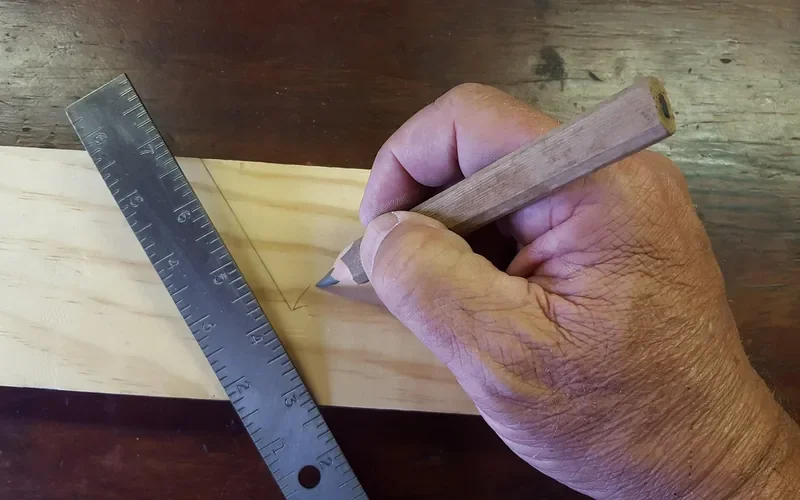
One caution: we have not built this exact bench. The cut list is arithmetic from the numbers above, so dry-fit the frame and recheck S and the leg length before cutting all six legs.
Key Features to Build Into Your Miter Saw Workbench
- Wings level with the saw table. Lay a straightedge across the saw table and both wings; a gap of even 1/16 in. under the straightedge will rock long boards.
- A fence that lines up with the saw’s fence. Screw the 1×4 fences to the wing decks, then shim or plane them until a straightedge touches both the saw fence and each wing fence.
- Dust provision. Leave room behind the saw for a vacuum hose, and see our guide to a home shop dust collector.
- Through-bolt mounting. Bolt the saw down through the bench top; the open frame leaves the nuts reachable from below.
How to Build a Miter Saw Workbench (Step-by-Step Guide)
This 8-step build suits a first-time builder who is comfortable with a circular saw and drill.
Step 1: Plan Your Design
Measure S, pick your table height, and note your saw’s base width. Compute leg length as height minus S minus 3/4 in., riser height as S minus 3/4 in., and wing length as (96 – bay width) / 2.
Step 2: Gather Your Materials
Buy the lumber and plywood from the shopping list. Pick full 8-ft 2x4s rather than precut studs and check the plywood thickness with a tape.
Step 3: Cut the Plywood
Rip the sheet into two 23-3/4-in. strips. Cut one strip into two 36-in. wing decks and keep the other as the 96-in. bench top. Use a table saw or a circular saw with a straightedge guide. Our table saw setup guide helps if you are ripping on a table saw.
Step 4: Cut the Lumber
Cut the long rails, the seven 20-3/4-in. cross rails, the six legs and the four 36-in. riser strips. Label each piece as you cut it.
Step 5: Assemble the Carcass
Screw the five cross rails between the long rails with 3-in. screws and glue, flush at both ends and spaced about 23-5/8 in. apart. Screw a leg to the inside face of each long rail at both ends and mid-length, tops flush with the rails. Check for square, then fasten the bench top with 2-in. screws.

Step 6: Build the Wings and Mount the Saw
Screw two riser strips and a cross piece under each wing deck, adding shims if S needs them. Center the saw in the 24-in. bay, mark its mounting holes, drill through the top, and bolt it down with washers and nuts. Set each wing in place and check it against the saw table with a straightedge.
Step 7: Build and Attach the Fence
Screw each 1×4 fence along the back edge of its wing. Hold a straightedge against the saw’s fence and shim the wing fences until the straightedge touches all three.
Step 8: Test and Tweak
Make a test cut on scrap and check it with a square. Confirm both wings are level with the saw table, then add a stop block and make five cuts to check that they match.
Miter Saw Mounting and Support Safety
A bench changes what can go wrong, so read your own saw manual. These points come from the DeWalt DW716 instruction manual; check that your saw maker says the same.
- Support long or wide workpieces. The manual warns that loss of control of the workpiece can cause injury and says never to use another person as the support.
- Mount the saw firmly to a stable surface. If you mount it on plywood to move it, the manual calls for plywood 1/2 in. thick or more, with screws that do not protrude below the wood.
- A workpiece that was balanced before the cut can become unbalanced after it. The manual says that can tip the saw or the table or workbench it is attached to, so bolt the saw down and support the offcut side too.
- Clamp any workpiece that would put your hand within 6 in. of the blade.
- Wear eye and hearing protection, and a dust mask or NIOSH/OSHA/MSHA-rated respiratory protection when the cut is dusty.
“Always mount your saw firmly to a stable surface to prevent movement.”
Customizing Your Miter Saw Workbench
- Casters change the height. Every inch of caster and mounting plate raises the table, so subtract it from the leg length. Use locking casters and add a lower shelf to keep the weight low.
- Lower shelf. The offcut from the plywood sheet is about 23-7/8 x 23-3/4 in.; it makes a small shelf between the legs for a shop vacuum.
- Add a table saw. For a combined layout see our table saw stand build.
Where to Find Free Miter Saw Workbench Plans Online
We read the three plans below. Numbers are from each page; compare them with this plan before choosing.
| Plan | Size and parts | Saw height method | Notes |
|---|---|---|---|
| This page | 96 x 23-3/4 in.; eight 2x4s, one sheet of plywood, one 1×4 | Raised wings, risers = S minus deck | Cut list here is untested, arithmetic checked |
| Family Handyman modular workbench | 16 ft x 2 ft, 38 in. working height, four bays; $101 to $250 | Saw sits below the top in a 4-1/4-in. recess; shims bring it flush | Beginner, multiple days; drawings and materials list available to download |
| Ana White roll-away workbench | 4 sheets 3/4-in. plywood, 2 sheets 1/4-in., 11 2x4s, 8 casters | Sliding saw needs 32 in. or more of depth | Free plan; metric lists available; rated intermediate |
| Shanty 2 Chic miter saw stand | Base 7 ft x 2 ft; station can be built alone | Measured 4.625 in. from bench top to saw table | Free printable plans |
For a comparison of other layouts, see our roundup of free miter saw table plans. We could not open freeww.com or MyOutdoorPlans when checking, so they are not listed.
Common Mistakes to Avoid
- Matching the wings to the bench top. They must match the saw table, which sits S above the top.
- Assuming a 2×4 is 2 by 4 in. It is 1-1/2 by 3-1/2 in., which changes every leg and riser calculation.
- Skipping the dry fit. Stand the frame, rest the top on it, and check the saw clearance before driving the last screws.
Frequently Asked Questions
What’s the best height for a miter saw workbench?
Whatever puts the wings level with your saw’s table. Measure S, the distance from the saw’s feet to its table, then leg length = table height – S – plywood thickness. Many people build around 34 inches; Family Handyman’s modular plan uses 38.
Can I use a miter saw workbench for other tools?
Yes, with limits. A router table or other tool on the same bench must match its surface height to the bench, and the bench has to stay stable when the saw’s load shifts.
How do I make my miter saw workbench portable?
Add locking casters under the legs and shorten the legs by the caster height so the table height stays the same. The DeWalt manual warns that an unbalanced load can tip the saw or what it is attached to, so keep weight low with a lower shelf.
Do I need advanced woodworking skills to build a workbench?
No. This design uses screwed butt joints and straight cuts. You need a circular saw or table saw to rip plywood, a way to cut 2x4s to length, a drill, and a straightedge. Ana White rates her larger roll-away bench intermediate and Family Handyman rates its modular bench beginner.
How much will materials cost to build a miter saw workbench?
Count eight 8-ft 2x4s, one 4×8 sheet of 3/4-in. plywood and one 8-ft 1×4, then multiply by your local prices. Family Handyman estimates $101 to $250 for its larger 16-ft modular bench. A ready-made stand such as the WEN MSA200 was listed at $63.58 when we checked.
Conclusion
A miter saw workbench is only as accurate as its wings. Measure S, pick your table height, work the leg and riser numbers from your own saw, and dry-fit before cutting. The 8-ft layout above needs one sheet of plywood, eight 2x4s and one 1×4, and every dimension in it checks against the actual sizes of the lumber.
Sponsored / affiliate links. As an Amazon Associate I earn from qualifying purchases. I may earn additional commission from eligible campaigns.