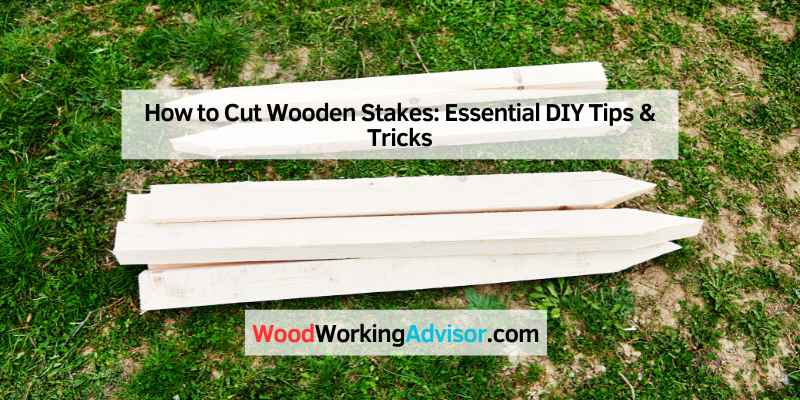
How to Cut Wooden Stakes: Essential DIY Tips & Tricks
To cut wooden stakes, use a saw for precision. Measure the desired length, mark it, and saw along the line.
Cutting wooden stakes is a straightforward task that can enhance your gardening or construction projects. Wooden stakes serve various purposes, from supporting plants to marking boundaries. Properly cutting them ensures they fit your specific needs. Whether you’re a DIY enthusiast or a professional, knowing how to cut stakes accurately saves time and resources.
This guide will walk you through the essential steps and tools required. With just a few materials, you can create sturdy stakes that will stand the test of time. Let’s dive into the details to make your cutting process efficient and effective.
Introduction To DIY Wooden Stakes
Creating your own wooden stakes can be fun and rewarding. Wooden stakes serve various purposes. You can use them in gardening, landscaping, or even as markers. Making your own allows for customization and cost savings. Let’s explore why you should make your own wooden stakes.
Why Make Your Own?
Making wooden stakes at home offers many benefits:
- Cost-effective: Save money by using scrap wood.
- Customizable: Cut stakes to your desired size.
- Quality Control: Choose the best wood for your needs.
- Fun Activity: Enjoy a productive DIY project.
Creating your own stakes allows for personal touches. You can paint or decorate them as you like.
Materials Needed
Gather the following materials before starting:
| Material | Purpose |
|---|---|
| Wood | Base material for stakes. |
| Saw | To cut wood into desired lengths. |
| Sandpaper | To smooth edges and surfaces. |
| Paint or Stain | For decorating and protecting the wood. |
| Measuring Tape | To measure lengths accurately. |
Having the right materials makes the process easier. Prepare everything before you start cutting.

Safety First: Preparing Your Workspace
Before cutting wooden stakes, ensure your workspace is safe. A well-prepared area reduces risks. Focus on two main factors: location and safety gear.
Choosing The Right Location
Pick a clear, flat area for cutting. Avoid crowded spaces. Look for these features:
- Good lighting
- Stable ground
- Distance from children and pets
- Access to tools
Keep the area free of clutter. Remove any distractions. This helps maintain focus during cutting.
Essential Safety Gear
Wear proper safety gear while working. This protects you from accidents. Here’s a list of must-have items:
- Safety glasses: Protects eyes from flying debris.
- Gloves: Prevents cuts and scrapes.
- Ear protection: Reduces noise from power tools.
- Steel-toed boots: Safeguards feet from heavy objects.
Check your gear before starting. Ensure everything fits well and is in good condition. Stay safe while cutting.
Selecting The Right Wood
Choosing the right wood is crucial for cutting wooden stakes. The wood type affects durability, strength, and ease of cutting. Make informed decisions to ensure your stakes serve their purpose well.
Types Of Wood
Different wood types offer unique benefits. Here are some common options:
- Pine: Lightweight and easy to cut. Ideal for temporary stakes.
- Oak: Strong and durable. Best for long-lasting applications.
- Cedar: Naturally resistant to decay. Great for outdoor use.
- Spruce: Affordable and versatile. Works well for various projects.
Factors To Consider
Several factors influence your wood selection. Keep these in mind:
| Factor | Description |
|---|---|
| Purpose: | Determine the stake’s use. Will it be temporary or permanent? |
| Weather Resistance: | Select wood that withstands your local climate. |
| Availability: | Check local suppliers for easy access to your chosen wood. |
| Cost: | Consider your budget. Different woods have varying prices. |
Take time to assess these factors. The right choice makes a big difference.
Tools Of The Trade
Cutting wooden stakes requires the right tools. Having the best tools makes the job easier. It helps achieve clean cuts and precise shapes. Let’s explore the must-have tools and some optional tools for finer work.
Must-have Tools
- Hand Saw: A basic tool for cutting wood. Choose a fine-toothed saw for cleaner cuts.
- Measuring Tape: Essential for measuring the length of stakes. Accurate measurements help avoid mistakes.
- Square: Ensures your cuts are straight. A square helps mark perfect angles.
- Pencil: Use to mark cutting lines. A clear mark helps guide your cuts.
- Clamps: Hold wood steady while cutting. This prevents movement during the process.
Optional Tools For Finer Work
- Chisels: Great for shaping wood. They can refine edges and details.
- Jigsaw: Ideal for curved cuts. A jigsaw offers more versatility than a hand saw.
- Router: Perfect for adding decorative edges. It helps create smooth finishes.
- Sandpaper: Use for smoothing rough edges. This gives a polished look to your stakes.
- Power Drill: Useful for making holes. This allows for easy installation of stakes.
| Tool | Purpose |
|---|---|
| Hand Saw | Basic cutting tool for wood |
| Measuring Tape | Measures the length of wooden stakes |
| Square | Ensures straight cuts and angles |
| Clamps | Holds wood steady during cutting |
| Chisels | Shapes and refines wood edges |
Measuring And Marking
Measuring and marking are crucial steps in cutting wooden stakes. Accurate measurements ensure your stakes are the right length. Proper marking prevents mistakes during cutting. Follow these steps to achieve the best results.
Accuracy Is Key
Accuracy is essential for cutting wooden stakes. Even small errors can lead to uneven lengths. Here are some tips for achieving precision:
- Double-check measurements before cutting.
- Use a reliable measuring tool.
- Always measure from the same end.
Tools For Measuring
Using the right tools makes measuring easier. Here are some tools you might need:
| Tool | Purpose |
|---|---|
| Measuring Tape | For measuring lengths accurately. |
| Square | To ensure right angles. |
| Pencil | For clear marking on wood. |
Marking Techniques
Marking techniques help you create clear cutting lines. Use these methods for effective marking:
- Use a pencil for fine lines.
- Draw straight lines with a square.
- Mark both sides of the stake for visibility.
Using proper marking techniques prevents confusion. Clear marks lead to clean cuts.
The Cutting Process
Cutting wooden stakes requires precision and safety. Follow the right steps to ensure clean cuts. A simple process can yield effective results. Use proper tools to make the job easier.
Step-by-step Guide
- Gather Your Tools
- Measuring tape
- Pencil or marker
- Hand saw or circular saw
- Safety goggles
- Work gloves
- Measure the Stake Length
Decide how long you want each stake. Use a measuring tape. Mark the length with a pencil.
- Secure the Wood
Place the wood on a stable surface. Use clamps to hold it tight.
- Make the Cut
Align your saw with the marked line. Cut slowly and steadily. Keep your fingers away from the blade.
- Sand the Edges
Use sandpaper to smooth rough edges. This makes the stakes safer to handle.
Common Mistakes To Avoid
| Mistake | Description |
|---|---|
| Not Measuring Twice | Double-check measurements to avoid mistakes. |
| Poor Tool Choice | Use appropriate tools for better results. |
| Skipping Safety Gear | Always wear goggles and gloves for protection. |
| Cutting Without Support | Ensure wood is stable to prevent accidents. |
| Ignoring Grain Direction | Cut with the grain for cleaner edges. |
Finishing Touches
After cutting your wooden stakes, finishing touches enhance their durability and appearance. Proper attention to details makes a big difference. Two main areas to focus on are smoothing edges and applying protective coatings.
Smoothing Edges
Smoothing edges is important for safety and aesthetics. Sharp edges can cause injuries or damage other items. Here are some effective methods:
- Sandpaper: Use medium grit (80-120) for rough edges.
- Files: A flat file works well for corners.
- Power Sander: This speeds up the smoothing process.
Follow these steps for best results:
- Start with rough grit sandpaper.
- Gradually move to finer grit (220 or higher).
- Ensure all edges are smooth and safe.
Protective Coatings
Applying protective coatings prolongs the life of wooden stakes. It prevents rot and insect damage. Choose from these options:
| Coating Type | Benefits |
|---|---|
| Wood Sealant | Offers water resistance and durability. |
| Paint | Adds color and extra protection. |
| Varnish | Enhances shine while protecting the wood. |
Follow these steps to apply your chosen coating:
- Clean the wood surface thoroughly.
- Apply the coating with a brush or spray.
- Allow it to dry completely before use.
These finishing touches improve your wooden stakes. They look better and last longer.
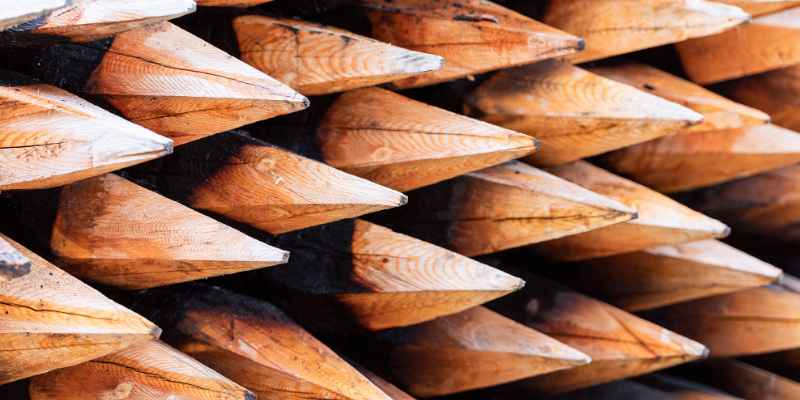
Creative Uses For Wooden Stakes
Wooden stakes are not just for fencing. They have many creative uses. From gardening to crafts, these versatile items can enhance your space.
In The Garden
Wooden stakes serve many purposes in your garden. They can support plants, mark rows, or even create trellises.
- Support for Climbing Plants: Use stakes to help beans and peas grow tall.
- Row Markers: Mark where to plant seeds for organization.
- Trellises: Create a simple trellis for flowers or vegetables.
Craft Projects
Wooden stakes can transform into fun craft projects. They are easy to customize for personal touch.
- Garden Signs: Paint stakes to label plants.
- Picture Frames: Use stakes to create unique frames.
- Decorative Art: Combine stakes to make wall art.
Temporary Structures
Wooden stakes are great for building temporary structures. They are sturdy yet easy to dismantle.
| Structure Type | Description |
|---|---|
| Camping Tents | Support the corners of your tent. |
| Canopies | Hold up fabric for shade. |
| Garden Fences | Mark boundaries without permanent installation. |
Frequently Asked Questions
How Do I Choose The Right Wood For Stakes?
Choosing the right wood for stakes is crucial. Look for durable options like cedar or pressure-treated pine. These woods resist rot and are sturdy. Consider the stakes’ intended use, whether for gardening or fencing. Always ensure the wood is straight and free from defects for best results.
What Tools Are Needed To Cut Wooden Stakes?
To cut wooden stakes, you need a few essential tools. A handsaw or a power saw works well for this task. Additionally, a measuring tape will help ensure accurate lengths. Safety goggles and gloves are also important for protection. These tools make the cutting process efficient and safe.
How Long Should Wooden Stakes Be Cut?
The length of wooden stakes depends on their purpose. For garden plants, stakes are typically 3 to 5 feet long. Fencing stakes may require lengths of 5 to 8 feet. Always consider the height of the plants or the fence when deciding the length.
Measure twice for accuracy before cutting.
Can I Reuse Wooden Stakes?
Yes, you can reuse wooden stakes if they are in good condition. Check for rot, warping, or damage before reusing. Clean them thoroughly to remove dirt and debris. If necessary, sand down rough edges for safety. Reusing stakes is cost-effective and environmentally friendly.
Conclusion
Cutting wooden stakes can be a straightforward task with the right techniques and tools. Following the steps outlined in this guide ensures precision and safety. Remember to measure carefully and use sharp tools for the best results. With practice, you’ll master this skill and complete your projects efficiently.
Happy woodworking!