Wood Burning Arts: Pyrography Guide, Tools & Safety Tips
Wood burning arts, or pyrography, means decorating wood by scorching it with a heated tool — not with electricity or a transformer. That distinction sounds obvious, but it trips up more beginners than any technique in this guide, and it is worth settling before you buy a single tool.
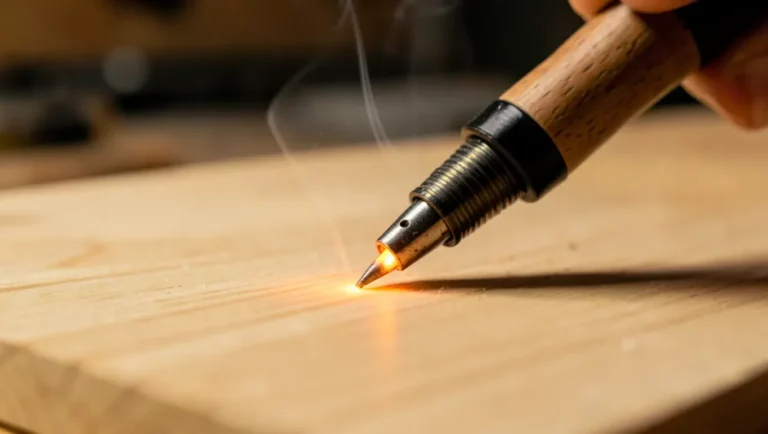
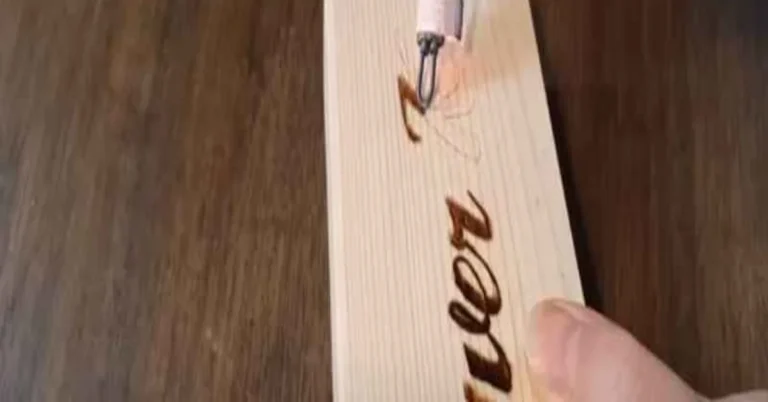
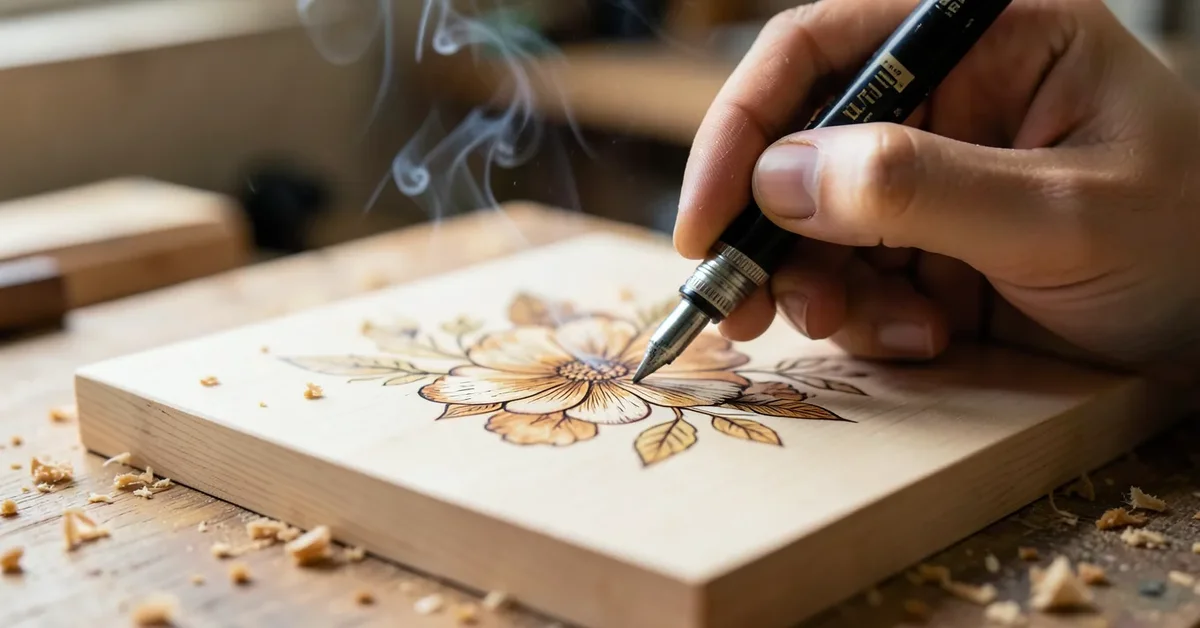
Traditional pyrography uses a temperature-controlled pen, usually running between 200°F and 950°F, to slowly burn lines, shading, and texture into wood. It has roots stretching back to ancient Egypt and traditional African and Oceanic art, and today it is a low-cost, meditative craft that ranges from a simple monogrammed cutting board to gallery-quality portraits. This guide covers the tools, wood choices, techniques, and finishing steps for that traditional method — plus the one safety distinction most wood burning guides skip entirely.
The Essence Of Wood Burning Arts
BEST PYROGRAPHY PEN SET FOR BEGINNERS
 |
TRUArt Wood and Leather Pyrography Pen Set – $54.95 A dual-power pen with 35 interchangeable tips — enough range to go from basic outlining into shading and lettering without buying a second tool.
|
Wood burning arts, also known as pyrography, combines creativity and craftsmanship. It involves using heat to create stunning designs on wood surfaces. This art form captures the beauty of nature and human expression.
Roots In Tradition
Wood burning has deep historical roots. Many cultures have used it for centuries. Here are some key points about its origins:
- Ancient Practices: Early humans used hot tools to mark wood.
- Regional Variations: Different cultures developed unique styles.
- Functional Art: Wood burning served practical purposes as well.
Traditional wood burning often featured symbolic designs. Many artisans focused on storytelling through their work. This connection to heritage makes wood burning special.
Contemporary Resurgence
Today, wood burning arts are experiencing a revival. Modern artists embrace this ancient technique. They incorporate new tools and methods. Here are some trends in contemporary wood burning:
- Personalization: Custom designs for gifts and home decor.
- Mixed Media: Combining wood with paint and other materials.
- Workshops: Increasing interest in learning pyrography.
Social media platforms showcase stunning wood burning pieces. Artists share their techniques and inspire others. This growth strengthens the community around wood burning arts.
Traditional Pyrography Vs. Fractal Wood Burning: The Safety Distinction Most Guides Skip
Search for “wood burning art” online and you will eventually run into videos of glowing, lightning-bolt-shaped patterns branching across a board. That is fractal wood burning (also called Lichtenberg burning), and it is a completely different — and far more dangerous — process than the pyrography covered in this guide.
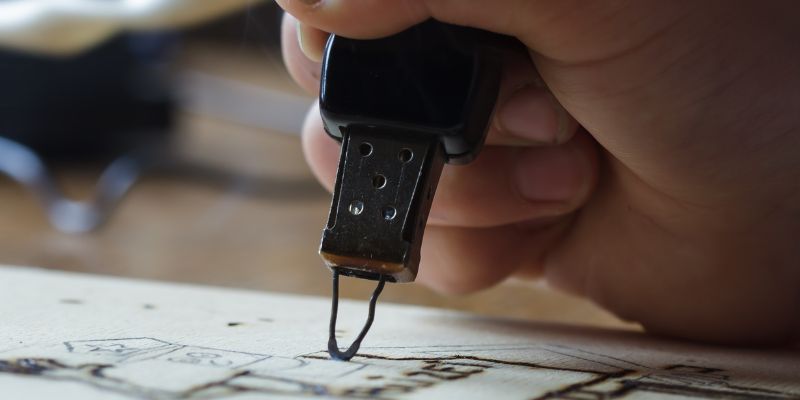
Traditional pyrography, the method this article is about, uses a low-voltage, temperature-controlled pen. You hold it like a pencil and burn the design by hand, one stroke at a time. Fractal wood burning instead runs high-voltage electrical current (often from a modified microwave transformer) through a wood surface soaked in a conductive liquid, letting the electricity itself “draw” the branching pattern. That current has killed people: our own review of incident reports found at least 33 documented deaths since 2017 tied to fractal/Lichtenberg wood burning setups — see our full fractal wood burning injury report and wood burning with a transformer breakdown for the specifics.
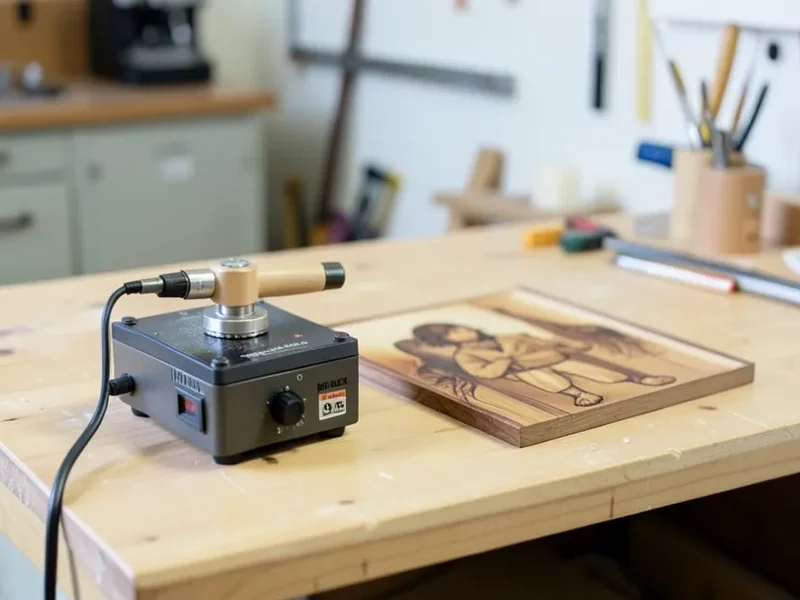
The takeaway for this guide: everything below — kits, wood selection, strokes, shading, finishing — applies to the safe, pen-based craft. If you ever see instructions involving a microwave transformer, jumper cables, or a wood surface soaked in a salt-water or baking-soda solution, that is fractal burning, not pyrography, and it does not belong on a beginner’s project list.
Tools Of The Trade
Wood burning arts require specific tools, and choosing the right kit makes the biggest difference in how fast you improve. (If you want a step-by-step first project instead of a full equipment rundown, see our beginner wood burning art guide.) This section covers the essential tools and accessories for wood burning.
Selecting A Wood Burning Kit
A good wood burning kit is vital for beginners and experts. Look for these features:
- Variable Temperature Control: Allows for precise burning.
- Interchangeable Tips: Different tips create various designs.
- Comfortable Grip: Reduces hand fatigue during long projects.
Consider these popular wood burning kits:
| Brand | Features | Price |
|---|---|---|
| Weller | Adjustable temp, multiple tips | $35 |
| Walnut Hollow | Easy to use, lightweight | $30 |
| Speedball | Professional quality, durable | $60 |
Essential Accessories
Accessories enhance your wood burning experience. Here are some must-have items:
- Wood Surface: Choose high-quality wood, like basswood.
- Pencil: Use it for sketching designs before burning.
- Sandpaper: Smooth the wood surface for better results.
- Safety Gear: Gloves and goggles protect you while working.
Consider investing in a few extra items:
- Stencils: Help create intricate designs easily.
- Graphite Transfer Paper: Transfers designs onto wood.
- Finishing Oils: Enhance the wood’s appearance.
Choosing The Right Canvas
Choosing the right canvas is crucial for wood burning arts. The type of wood impacts the final design. Different woods have unique textures and colors. This affects how the burn looks. A good choice enhances your artwork.
Types Of Wood Suitable For Pyrography
Different woods offer various burning experiences. Here are some popular options:
| Wood Type | Characteristics | Best For |
|---|---|---|
| Basswood | Soft, light-colored, smooth | Beginners, detailed work |
| Birch | Light, even grain, strong | Medium to large pieces |
| Pine | Soft, easy to burn, knots | Quick projects, rustic designs |
| Maple | Hard, fine grain, smooth | Intricate designs, durable items |
| Cedar | Aromatic, unique grain, soft | Outdoor projects, decorative items |
Preparing Wood For Burning
Proper preparation ensures clean burns and better designs. Follow these steps:
- Choose the right wood: Select a suitable type as mentioned above.
- Sand the surface: Use fine sandpaper for a smooth finish.
- Clean the wood: Remove dust with a damp cloth.
- Apply a base coat: Optional for added depth and color.
Always test your pyrography tool on a scrap piece. This helps understand how the wood reacts. Enjoy the process and let your creativity flow.
Designing Your Artwork
Creating art with wood burning requires careful planning. Start with a clear vision. This section covers the steps to design your artwork.
From Concept To Sketch
Begin with an idea. Think about what you want to create.
- Choose a theme: nature, animals, or abstract.
- Decide on the size of your artwork.
- Sketch your concept on paper.
Use simple shapes and lines. Keep your design easy to follow. This will help later when burning the wood.
Refine your sketch. Make sure it fits well on the wood piece.
Transferring Designs Onto Wood
Once your sketch is ready, it’s time to transfer it.
Here are steps to follow:
- Place your sketch on the wood.
- Use carbon paper to trace it.
- Secure the sketch with tape.
After tracing, check the lines. They should be clear and visible.
Now, you are ready to burn! Follow your design carefully.
Mastering Wood Burning Techniques
Wood burning, also known as pyrography, is a beautiful art form. Mastering wood burning techniques unlocks endless creative possibilities. This section explores essential methods for creating stunning designs.
Basic Strokes And Textures
Understanding basic strokes is vital for beginners. These strokes form the foundation of wood burning.
- Straight Lines: Use steady pressure for clean lines.
- Circular Strokes: Practice for smooth curves.
- Crosshatching: Layer lines for texture.
Textures add depth to your artwork. Experiment with various techniques:
- Pointillism: Create dots for a unique texture.
- Waves: Use a back-and-forth motion for flowing designs.
- Scumbling: Lightly drag the tool for a soft effect.
Practice these strokes on scrap wood. This helps in gaining confidence.
Shading And Detailing
Shading enhances the realism of your piece. It brings your artwork to life. Start with light pressure for subtle effects.
- Gradual Shading: Build layers slowly.
- Dark to Light: Start with darker areas first.
Detailing adds intricate elements to your designs. Use fine tips for precision. Here are some tips:
| Technique | Description |
|---|---|
| Fine Lines | Use a pointed tip for detailed patterns. |
| Textures | Combine shading with strokes for depth. |
Practice shading and detailing regularly. This improves your skills quickly.
Finishing Touches
Finishing touches enhance your wood burning art. These steps protect and beautify your work. Proper finishing ensures longevity and vibrancy. Focus on sealing, protecting, and adding color for stunning results.
Sealing And Protecting Your Work
Sealing your wood burning art is essential. It protects against moisture, dirt, and UV light. Follow these steps for effective sealing:
- Choose a suitable sealant like polyurethane or varnish.
- Ensure the wood surface is clean and dry.
- Apply the sealant with a clean brush or spray.
- Let it dry completely before handling.
- Consider applying multiple coats for extra protection.
Using a sealant helps maintain the quality of your artwork. It preserves the details and enhances the overall appearance.
Adding Color To Wood Burnings
Adding color can elevate your wood burning art. Use colored pencils, paints, or markers for vibrant effects. Here are some tips:
- Choose non-toxic materials for safety.
- Test colors on scrap wood first.
- Layer colors for depth and richness.
- Blend colors for a smooth transition.
Color can highlight specific areas of your design. It brings your wood burning to life, making it unique.
Safety First: Best Practices
Wood burning arts can be fun and rewarding. Prioritizing safety ensures a smooth experience. Follow these best practices to enjoy your craft while staying safe.
Ventilation And Workspace Setup
Proper ventilation is crucial for wood burning. It prevents smoke buildup and harmful fumes. Here are some tips for effective ventilation:
- Work in a well-ventilated area.
- Open windows to let fresh air in.
- Use fans to circulate air.
- Avoid enclosed spaces.
Setting up your workspace properly also adds safety:
- Choose a stable, flat surface.
- Keep flammable materials away.
- Organize tools for easy access.
- Ensure good lighting for clear visibility.
Handling Tools And Preventing Injuries
Using tools carefully prevents accidents. Always follow these guidelines:
- Use tools designed for wood burning.
- Keep tools sharp for better control.
- Wear safety gloves to protect your hands.
- Wear safety goggles to protect your eyes.
Follow these steps to avoid injuries:
- Always turn off tools when not in use.
- Store tools in a safe place after use.
- Avoid distractions while working.
- Take breaks to stay focused.
Following these safety tips makes wood burning enjoyable and secure.
Inspirational Projects And Ideas
Wood burning arts offer endless possibilities for creativity. This technique allows you to transform simple wood pieces into stunning masterpieces. Here are some exciting project ideas to inspire your next creation.
Home Decor Applications
Wood burning can enhance your home decor significantly. Consider these ideas:
- Wall Art: Create large, intricate designs. Use quotes or nature themes.
- Serving Trays: Personalize trays for entertaining guests.
- Coasters: Design unique coasters for your coffee table.
- Picture Frames: Add a personal touch to your family photos.
Here’s a quick table of popular wood types for decor:
| Wood Type | Best For |
|---|---|
| Pine | Easy to burn, great for beginners. |
| Birch | Beautiful finish, ideal for detailed work. |
| Oak | Durable, perfect for functional items. |
Personalized Gifts And Keepsakes
Wood burning arts make perfect gifts. Create something special for loved ones:
- Custom Signs: Make personalized home signs.
- Engraved Keepsake Boxes: Store treasured items in style.
- Wooden Ornaments: Design holiday decorations for friends and family.
- Bookmarks: Create unique bookmarks for book lovers.
Consider these tips for personalized gifts:
- Know the recipient’s interests.
- Choose meaningful quotes or dates.
- Keep the design simple yet elegant.
Showcasing And Selling Your Creations
Sharing your wood burning art can be exciting. It connects you with art lovers. You can gain recognition for your unique style. Here are some ways to exhibit and sell your creations.
Exhibiting At Art Shows
Art shows are a great way to display your work. They attract art enthusiasts and potential buyers. Here are tips for a successful exhibition:
- Choose the Right Show: Look for local or regional art events.
- Prepare Your Artwork: Frame or mount pieces for a polished look.
- Engage with Visitors: Share your story and techniques.
- Have Business Cards: Provide your contact information easily.
- Set Up a Payment Method: Accept cash and digital payments.
Online Marketplaces And Social Media
Online platforms offer vast opportunities for artists. Use these channels to reach a wider audience:
| Platform | Description | Tips |
|---|---|---|
| Etsy | Ideal for handmade goods. | Optimize your listings with keywords. |
| Showcase your art visually. | Use hashtags to increase visibility. | |
| Facebook Marketplace | Local selling option. | Join local art groups for promotion. |
Engage with your audience through social media. Post updates about your work. Share behind-the-scenes content. Build a community around your art.
Community And Learning
The world of wood burning arts thrives on community and shared knowledge. Artists connect, learn, and grow together. This vibrant community offers various ways to engage and improve skills.
Joining Wood Burning Forums
Online forums provide a space for wood burning enthusiasts. Here, you can:
- Ask questions
- Share your projects
- Get feedback from others
Popular forums include:
| Forum Name | Focus Area |
|---|---|
| Woodburner’s Forum | General discussions |
| Pyrography Zone | Techniques and tips |
| Burning Passion | Showcase your work |
These forums help build connections. You can find friends who share your passion.
Workshops And Continuous Education
Workshops provide hands-on experience in wood burning. Learn from experienced artists. Many local art centers and online platforms offer these workshops. Benefits include:
- Learning new techniques
- Accessing quality tools
- Networking with other artists
Continuous education is vital. Many resources are available:
- Online courses
- YouTube tutorials
- Books and eBooks
Engage with these resources. Each one helps improve your skills and expand your creativity.
Frequently Asked Questions
What Is Wood Burning Art?
Wood burning art, or pyrography, involves using a heated tool to engrave designs onto wood. This technique allows artists to create intricate patterns, images, and textures. It’s a popular craft that combines creativity and precision, resulting in beautiful, unique pieces of art that can be functional or decorative.
How Do I Start Wood Burning?
To start wood burning, gather essential supplies like a pyrography tool, wood, and safety gear. Begin with simple designs to practice your technique. Choose softwood for easier engraving and gradually move to more complex patterns. Watching tutorials can also help you learn and improve your skills effectively.
What Types Of Wood Are Best For Burning?
The best types of wood for burning are softwoods like pine, basswood, and birch. These woods are easier to engrave and produce clearer lines. Hardwoods can also be used, but they require more effort. Always ensure the wood is untreated for the best results and to avoid toxic fumes.
Can Children Do Wood Burning Arts?
Yes, children can engage in wood burning arts with proper supervision. It’s essential to use child-safe pyrography tools designed for beginners. Teaching them about safety precautions is crucial. Start with simple designs to build their confidence and skills, fostering creativity in a safe and controlled environment.
Is Wood Burning Art The Same As Fractal Wood Burning?
No. Traditional wood burning art (pyrography) uses a low-voltage, temperature-controlled pen held by hand. Fractal wood burning (Lichtenberg burning) instead passes high-voltage electrical current through wood soaked in a conductive liquid, and it has been linked to at least 33 documented deaths since 2017. The techniques look different in person and carry very different risk levels — this guide covers only the safe, pen-based method.
Conclusion
Wood burning arts blend creativity and craftsmanship into one of the more accessible traditional crafts you can pick up: the pen-based method above needs no electrical current beyond a standard low-voltage tool, and a basic kit plus a few basswood scraps is enough to start. Just remember the one line worth repeating — pyrography and fractal/Lichtenberg burning are not the same hobby, and only one of them belongs on a beginner’s project list.
Sponsored / affiliate links. As an Amazon Associate I earn from qualifying purchases. I may earn additional commission from eligible campaigns.