How to Remove Lacquer From Wood (Thinner, Stripper & Sanding)
Lacquer is one of the few wood finishes that gives you a genuine shortcut: it never fully cures the way an oil-based varnish or polyurethane does, so it stays soluble in its own solvent indefinitely — even decades after it was sprayed. That’s why lacquer thinner, not sandpaper, is usually the fastest and cleanest way to strip it off bare wood. A chemical stripper earns its place on thick, aged buildup that thinner alone struggles with, and sanding is the last resort since it removes a thin layer of the wood itself along with the finish. Below are all three methods in the order you should actually try them, plus the respirator most guides skip mentioning.
Safety First: What You Need Before You Start
Lacquer thinner and most chemical strippers give off solvent vapors that a paper dust mask does nothing to stop — a dust mask filters particles, not fumes. If you’re using either product for more than a few minutes, especially indoors, you need a respirator with organic vapor cartridges, not just something rated for dust. Sanding is the opposite problem: old lacquer dust is fine and worth keeping out of your lungs too, but it’s a particulate hazard rather than a vapor one.
- Respirator rated for organic vapors (not a basic dust mask) when working with thinner or stripper
- Chemical-resistant nitrile gloves — latex breaks down fast against solvents
- Safety goggles, not just glasses
- A well-ventilated space: open windows, a box fan pulling air out, or work outdoors
- Plastic drop cloth and painter’s tape to protect the surrounding area
- Plastic scraper or putty knife (metal can gouge softened wood)
- 0000 (extra-fine) steel wool
- Lint-free rags, and a sealed metal container to dispose of solvent-soaked ones
Test whatever method you choose on a small, hidden section first — the underside of a tabletop or the back of a drawer front. It confirms the method actually works on that specific finish before you commit the whole piece to it.
Best Respirator For Solvent Fumes
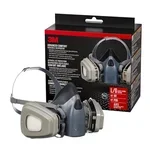 |
3M Half Mask Organic Vapor P95 Respirator – $43.51 Lacquer thinner and chemical strippers give off solvent vapors a dust mask won’t stop — this NIOSH-approved respirator pairs organic vapor cartridges with a P95 particulate filter, so fumes and dust are both covered.
|
Method 1: Lacquer Thinner (Fastest, and the Method Most Guides Skip)
Nitrocellulose and CAB lacquer never chemically cure the way a two-part or oil-based finish does — they dry by solvent evaporation only, which means the film stays soluble in its own solvent forever. Flood it with lacquer thinner and the finish turns back into a liquid you can wipe away, instead of a hard film you have to grind through. This is the single advantage lacquer has over every other common wood finish, and it’s the reason thinner should be your first attempt, not your last resort.
It won’t work on everything, though. Catalyzed conversion varnish and two-part epoxy finishes cure through a chemical reaction, not solvent evaporation, so they don’t redissolve in thinner no matter how long you leave it sitting. If a test patch doesn’t visibly soften within a couple of minutes, you’re dealing with one of those instead, and Method 2 below is the better route.
Working in a ventilated area with your respirator on:
- Flood a small section with lacquer thinner using a natural-bristle brush or a soaked rag.
- Wait 5 to 10 minutes for the finish to soften and start to bubble or wrinkle.
- Scrape the loosened lacquer off with a plastic putty knife and wipe it away with a clean rag — the goal is to actually lift it off the surface, not just smear it around.
- Repeat on the same section if a hazy film is left behind; lacquer thinner works in thin layers, not all at once on heavy buildup.
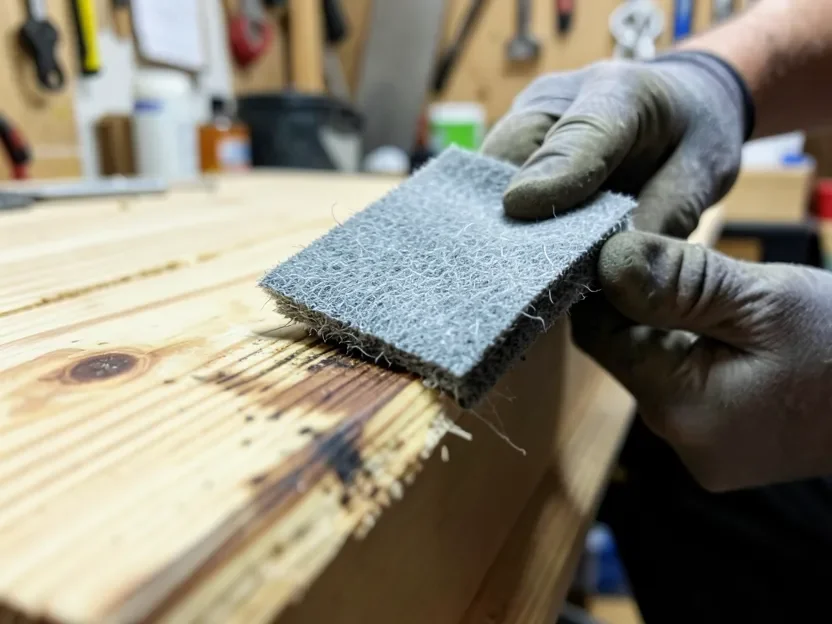
- Finish with a pad of 0000 steel wool soaked in fresh thinner, worked in long strokes with the grain, to clear the last residue out of the wood pores without scratching the surface.
If you’re not sure which steel wool grade to reach for on other parts of the project, our grit-to-steel-wool comparison breaks down how 0000 compares to sandpaper grits.
Lacquer thinner is flammable and the fumes are heavier than air, so keep it away from pilot lights or anything with a spark, and don’t work in a closed garage. Store used rags in a sealed metal container filled with water until you can dispose of them — solvent-soaked rags left balled up in the open are a real spontaneous-combustion risk, not just a theoretical one.
Method 2: Chemical Stripper (Best for Thick or Aged Lacquer)
When a test patch of thinner barely softens the finish, or the piece has decades of buildup from repeated recoats, a dedicated stripper does more work per pass. Gel strippers cling to vertical surfaces and carved detail better than liquid formulas, which is useful on chair legs or moldings where a runny liquid just drips off. Apply a thick, even coat in one direction with a natural-bristle brush — don’t brush it back and forth, which breaks the film that’s supposed to keep it from evaporating before it can work.
Let it sit for the time the manufacturer lists, typically 15 to 30 minutes, until the finish wrinkles or bubbles across the whole treated area. Scrape it off with a plastic putty knife into a disposable container, then go back over stubborn spots with a second, shorter application rather than trying to force the first pass to finish the job. Once the bulk of the lacquer is off, wipe the surface down with mineral spirits or denatured alcohol to neutralize any stripper residue — skipping this step is a common reason a new finish won’t bond properly afterward. Our denatured alcohol vs. mineral spirits guide covers which one to reach for depending on the stripper you used.
Method 3: Sanding (Last Resort)
Sanding is the only method here that removes real wood, not just finish — you’re grinding through a thin surface layer along with the lacquer sitting on top of it. That makes it a poor choice for carved details, moldings, or anything where losing even a fraction of a millimeter of crisp edge matters. It’s a reasonable choice for flat panels and tabletops where that trade-off doesn’t show, or as a follow-up pass to clean up residue that thinner or stripper left behind.
Start with 100-grit to cut through the bulk of the finish, move to 150-grit to smooth the surface, and finish with 220-grit before staining or recoating. Sand with the grain throughout, and keep the sander moving — lingering in one spot is what creates uneven low spots that show up under a new finish. Old lacquer dust is a fine particulate, so keep your respirator on even though you’ve moved past the solvent stage.
After the Lacquer Is Off: Cleanup and Refinishing
Whichever method you used, wipe the bare wood down with a clean rag dampened in mineral spirits to lift the last of the dust and residue out of the grain, then let the piece dry completely before doing anything else to it — our guide to drying wood faster has safe ways to speed that up if you’re on a deadline. Recoating over wood that’s still damp with solvent is one of the most common reasons a new finish goes cloudy or fails to bond. Once it’s dry, you can apply a fresh coat of lacquer, switch to a different finish entirely, or move on to staining if you’re changing the color as well.
Frequently Asked Questions
Does lacquer thinner actually remove lacquer?
Yes, and it’s the most effective method for true nitrocellulose or CAB lacquer, because that finish never fully cures — it stays soluble in its own solvent. Flooding it on turns the finish back into a liquid you can wipe or scrape off, rather than something you have to sand through.
Is lacquer thinner the same thing as paint thinner?
No. Paint thinner is usually just mineral spirits, a much milder solvent that won’t meaningfully soften a lacquer finish. Lacquer thinner is a blended mix of stronger solvents formulated specifically to dissolve lacquer, which is why substituting paint thinner tends to leave you disappointed and out a test patch.
Can I use acetone instead of lacquer thinner?
Acetone will dissolve lacquer too, but it evaporates much faster and is more aggressive, which makes it harder to control and more likely to leave residue trapped in the wood grain. See our guide on whether acetone damages wood before reaching for it as a substitute.
Is a dust mask enough, or do I really need a respirator?
A dust mask stops particles, not solvent vapors — it does nothing against lacquer thinner or stripper fumes. Any time you’re working with either product for more than a few minutes, use a respirator with organic vapor cartridges, and make sure the space is actually ventilated, not just the window cracked.
Final Thoughts
Lacquer thinner is worth trying first on almost every job, because it works with the finish’s own chemistry instead of fighting it. Save the stripper for buildup thinner can’t touch, and save sanding for when you’ve already decided losing a sliver of wood thickness doesn’t matter. Whichever method you land on, the respirator and the ventilation matter as much as the technique — that’s the part that gets skipped most often, and it’s the part that actually keeps the job safe.
Sponsored / affiliate links. As an Amazon Associate I earn from qualifying purchases. I may earn additional commission from eligible campaigns.