How to Build a Wood Pyramid Box: Exact Angles and Cut List
A hollow wood pyramid box is built from four sloped sides and a lid, and the whole project comes down to two bevel angles. For a box that is 8 inches square at the base and about 6 inches tall, the hip edges where neighboring sides meet are cut at 36.04 degrees, not 45, and the top and bottom edges are cut at 33.69 degrees. This guide shows the math behind those numbers, gives a full cut list, and finishes with a lift-off lid over roughly 73 cubic inches of storage.
If you only want a solid pyramid as a decorative block, see our guides to making a solid wooden pyramid and cutting a pyramid out of wood. This page is for the hollow, lidded version, where the wall thickness, the lid seat and the hip miters all matter.
What You Are Building: A Hollow Pyramid With a Lift-Off Lid
Best Angle Gauge Pick
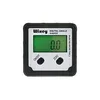 |
Wixey Digital Angle Gauge (magnetic): $33.99 Every bevel in this build is a decimal angle like 36.04 degrees, and a magnetic digital gauge on the blade lets you dial it in instead of trusting the saw’s stamped scale.
|
The design splits a square pyramid at half its height. The lower half is a hollow, flat-topped section made from four trapezoid sides, and the upper half is a small pyramid lid made from four triangles. Because both halves share the same slope, they use the same saw settings, so you tilt the blade once for the long edges and once for the top and bottom edges.
| Dimension | Value |
|---|---|
| Base | 8 in square (outside) |
| Total height | 6 in for the pyramid, plus the two 1/4 in panels |
| Split point | 3 in up the slope, halfway |
| Side stock | 1/2 in thick, about 40 in of 4-1/4 in wide board |
| Panels | 1/4 in plywood or hardwood: 8 in and 4 in squares |
| Interior volume | About 73 cubic inches (roughly 1.2 liters) |
The volume comes from the frustum formula. With 1/2 inch walls the inside measures about 6.80 inches square at the floor and 2.80 inches square at the top of the body, over 3 inches of height, so V = 3/3 x (46.24 + 7.84 + 19.04) = 73.1 cubic inches. The geometry here is computed and cross-checked by hand rather than taken from a build I photographed, so cut a test piece from scrap before committing your good boards.
The Angles: How to Calculate Them
The two things you need are the tilt of a side face and the bevel where two faces meet. Let a be half the base width and H the pyramid height, so the slope ratio is r = H / a. For our box, a = 4 in and H = 6 in, so r = 1.5.
- Face tilt from the base: arctan(r) = arctan(1.5) = 56.31°.
- Slant height of a face: the square root of (H squared + a squared) = the square root of 52 = 7.211 in.
- Hip edge length: the square root of (H squared + 2 x a squared) = the square root of 68 = 8.246 in.
- Angle between the two face normals: arccos(1 / (1 + r squared)) = arccos(1 / 3.25) = 72.08°, so the inside angle between neighboring faces is 180 – 72.08 = 107.92°.
- Hip bevel (blade tilt): half of 72.08 = 36.04°.
- Top and bottom edge bevel: 90 – 56.31 = 33.69°, the cut that leaves those edges flat and horizontal once assembled.
- Face apex angle: 2 x arctan(a / slant) = 2 x arctan(4 / 7.211) = 58.03°, and the two base angles are 60.98° each. The three add up to 180°, a quick check on your layout.
One common misunderstanding is worth correcting. The 56.31 degree number is how steeply the face leans, and it is not a saw setting. The saw setting for the corner is 36.04 degrees. A 45 degree miter is correct only for a box with vertical sides, where the slope ratio r grows without limit and the hip bevel reaches its maximum of 45 degrees. Any pyramid is shallower than that, so a 45 degree cut leaves a visible V-shaped gap along every hip.
The table shows how the settings change with height for the same 8 inch base. The bevel depends only on the slope ratio, so the same numbers apply to a 4 inch or a 16 inch base with the same proportions.
| Height (8 in base) | Face tilt | Hip bevel (blade tilt) | Top and bottom edge bevel | Face apex angle |
|---|---|---|---|---|
| 4 in (r = 1.0) | 45.00° | 30.00° | 45.00° | 70.53° |
| 5.09 in (r = 1.273, Great Pyramid-style slope) | 51.84° | 33.78° | 38.16° | 63.42° |
| 6 in (r = 1.5, this build) | 56.31° | 36.04° | 33.69° | 58.03° |
| 8 in (r = 2.0) | 63.43° | 39.23° | 26.57° | 48.19° |
| 12 in (r = 3.0) | 71.57° | 42.13° | 18.43° | 35.10° |
Two details from the wood itself change the numbers slightly. The outline you draw is on the outside face, and the hip and bottom bevels remove wood from the inside, so the outside face is the widest one along those edges. Also, with 1/2 inch stock the walls are 0.60 inches thick when measured horizontally (0.5 / sin 56.31°), which is where the 6.80 inch and 2.80 inch interior sizes above come from.
Cut List and Materials
| Part | Qty | Outside-face shape | Edge bevels |
|---|---|---|---|
| Body side | 4 | Trapezoid: 8 in bottom, 4 in top, 4.123 in legs, 3.606 in tall | Legs 36.04°, bottom 33.69°, top 33.69° (tilted the other way) |
| Lid side | 4 | Triangle: 4 in base, 4.123 in legs, 3.606 in tall | Legs 36.04°, base 33.69° (tilted the other way) |
| Base panel | 1 | 8 in square, 1/4 in stock | Square edges |
| Lid panel | 1 | 4 in square, 1/4 in stock | Square edges |
| Locator plate | 1 | 2-5/8 in square, 1/4 in stock | Square edges |
The leg length of 4.123 in is half the hip edge (8.246 / 2), and the 3.606 in height is half the slant height (7.211 / 2), so a trapezoid and a triangle line up exactly at the seam. Draw each piece on the outside face with a sharp pencil and a combination square, alternating trapezoids so they nest along one board and save stock.
Besides the wood you need PVA wood glue, painter or packing tape, sandpaper from 120 to 220 grit, and a finish such as wipe-on oil or shellac. A bandsaw with a tilting table is the easiest way to follow the angled lines, and a table saw with a sled works too. Our guide to what bevel cutting is explains the blade tilt if you are new to it.
Cutting the Sides
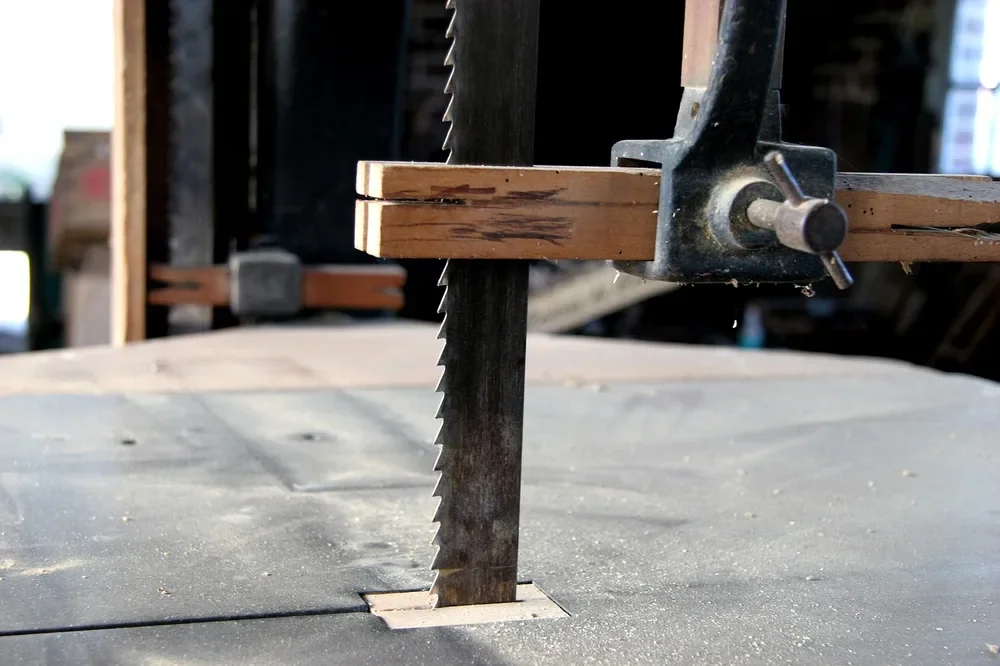
- Set the tilt with a gauge. Zero the gauge on the flat table, then stick it to the blade or table and tilt to 36.0 degrees. A digital gauge helps because a stamped scale is hard to set to a tenth of a degree, and a small error at each of four hips adds up to a visible gap.
- Cut the legs first. With the outside face up, cut both angled legs of every trapezoid and triangle, staying just outside the line so you can sand to it.
- Change the tilt to 33.69 degrees and cut the bottom edge of each body side with the outside face up. The top edge of each body side, and the bottom edge of each lid side, need the bevel tilted the opposite way, so flip the piece or the table.
- Test on scrap. Tape two offcuts together at the hip. They should close without a gap and form the 107.92 degree inside angle. If a gap shows, change the bevel by half a degree and test again.
Assembling the Box
- Tape the body sides in a row. Lay the four trapezoids edge to edge with the outside faces down, and run tape across each seam so they hinge.
- Glue and fold. Spread PVA glue on each beveled leg, fold the row into a ring and pull the last seam closed with tape or a band clamp. The tape holds the hips tight while the glue sets.
- Glue the ring to the base panel. The bottom bevels lie flat on the 8 inch square, so set the ring on it flush with the edges and weight it down.
- Build the lid the same way with four triangles taped, glued and folded, then glue the ring to the 4 inch lid panel.
- Add the locator plate. Center the 2-5/8 inch plate under the lid panel. The body opening is 2.80 inches square, so this leaves roughly 3/32 inch of clearance per side. Sand a hair off the plate if the lid binds.
Fill any hairline gap on the hips with a mix of glue and fine sanding dust from the same wood, and let it cure before sanding. For a simpler angled-cut project, our DIY miter box guide covers how to hold small pieces for accurate cuts.
Sanding and Finishing
Sand the outside with 120 grit, then 180, then 220, working along the grain so you do not round the sharp hips. Ease the lid seam with a light pass of 220 so the lid does not catch. A wipe-on oil or shellac shows the grain and keeps the edges crisp, and it goes on evenly over the sloped faces. Finish the inside of the body too, and let the finish cure fully before you close the lid, since fresh finish in a closed box can stay tacky.
Troubleshooting Gaps and Fit
| Problem | Likely cause | Fix |
|---|---|---|
| V-shaped gap along every hip | Saw set to 45° instead of 36.04° | Recut with the blade tilted to the hip bevel from the table above |
| Small gap along one hip | Bevel a fraction off | Adjust by 0.5° and test on scrap before recutting |
| Ring will not sit flat on the base | Bottom edge bevel is off from 33.69° | Sand the bottoms flat on a sheet of sandpaper laid on a flat surface |
| Lid rocks on the body | Tops of the body sides are uneven | Sand the rim flat on a sheet of sandpaper |
| Sides come out different sizes | Each piece was marked separately | Cut all four from one template piece |
If the four sides come out slightly different, cut every piece from one template of the shape rather than marking each individually. The template keeps the hips symmetrical, which matters more than the absolute accuracy of the outer dimension.
Frequently Asked Questions
What angle do you cut the sides of a pyramid box?
It depends on the slope you choose, not on a single magic number. For the 8 inch base, 6 inch tall design in this guide, each hip edge is beveled at 36.04 degrees and each top or bottom edge at 33.69 degrees. A taller pyramid needs a larger hip bevel (approaching 45 degrees for a vertical-sided box) and a smaller top and bottom bevel.
What is the best wood for a pyramid box?
Any stable, fine-grained wood that cuts cleanly at a bevel works. Poplar, cherry, walnut and maple are common choices for a keepsake box, and cedar suits a scent-lined one. Choose straight-grained stock with no knots on the sides, because the long tilted edges show every gap.
Can I make the pyramid box taller or shorter?
Yes. Keep the base size and change the height, then recompute the angles with the formula in this guide. The hip bevel equals half of arccos(1 / (1 + r squared)), where r is the height divided by half the base width. A taller pyramid has a steeper face and a larger hip bevel.
How do I keep the lid from sliding off?
Glue a small square of thin plywood centered under the lid panel so it drops into the opening of the box body with about 3/32 inch of clearance per side. That locator plate stops the lid from sliding sideways, and the sloped sides do the rest.
Conclusion
A pyramid box looks complicated, but it reduces to one ratio and two saw settings. Pick your base and height, compute r, and use the table or the formula for the hip bevel. For more angled-cut projects, browse our simple woodworking projects, or try our shop calculators for the math.
Sponsored / affiliate links. As an Amazon Associate I earn from qualifying purchases. I may earn additional commission from eligible campaigns.