How to Make a Wooden Card (Thin Basswood, 4 Cutting Methods)
A wooden card is a flat wooden panel, usually 1/16 to 1/8 inch (1.5 to 3 mm) basswood or birch plywood, cut to size, sanded, decorated and joined to a second panel with a flexible spine. Wood does not fold like paper, so the hinge is the part most guides get wrong. This guide covers the wood to buy, four ways to cut it, hinges that work, and how to finish and mail it.
What Wood Should You Use for a Wooden Card?
Best Thin Wood Pick | |
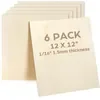 |
LotFancy Basswood Sheets, 6 Pack, 12 x 12 x 1/16 Inch Six smooth 1.5 mm basswood plywood squares, each big enough to yield several card panels.
|
As an Amazon Associate we earn from qualifying purchases. | |
Start with thin plywood or solid basswood sheet rather than lumber. Basswood is soft, has an even, pale grain and burns and engraves cleanly. Birch plywood is a little harder and takes paint and stain well. At 1/16 inch (1.5 mm) a sheet will cut with a craft knife; at 1/8 inch (3 mm) it needs a saw or a laser but stands up on its own.
A 12 x 12 inch sheet is more than you need for one card. A standard US A2 card is 4.25 x 5.5 inches, so a single sheet yields several panels, and the offcuts make gift tags, corner pieces and practice squares.
| Wood | Typical thickness | Best method | Notes |
|---|---|---|---|
| Basswood plywood | 1/16 in (1.5 mm) | Craft knife, laser, wood burner | Cuts with light repeated passes; best first project |
| Birch plywood | 1/8 in (3 mm) | Scroll saw, laser | Stiffer; good for layered or standing designs |
| Solid basswood sheet | 1/16 to 1/8 in | Scroll saw, laser, hand carving | Grain runs one way, so cut with the grain to avoid cracking |
| Pre-cut wood postcard blank | Varies by maker | Wood burning, painting, ink | No cutting needed; fastest option |
| Pine or oak board | Over 1/4 in | Not recommended | Too thick and splits across thin sections |
Look for plywood sold for laser or craft use and check the listing for the stated thickness before you order, since sheets sold as one-sixteenth inch can vary slightly.
What Tools Do You Need?
You can make a card with almost no equipment, or use a machine if you have one. Pick one cutting method from the table below and keep the rest of the kit small.
| Method | Tool | Skill level | Watch out for |
|---|---|---|---|
| Hand cutting | Craft knife, metal ruler, cutting mat | Beginner | Score lightly several times; forcing one deep cut tears the grain |
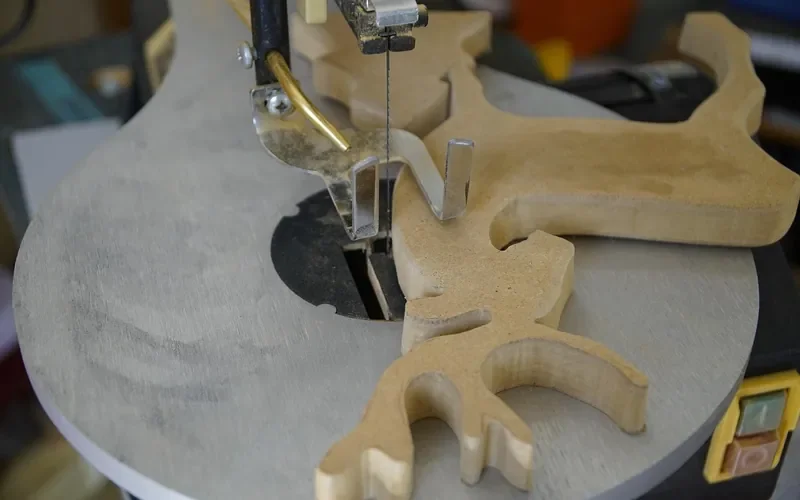
| Scroll saw | Scroll saw with a fine blade, scrap wood | Intermediate | Thin stock chatters, so back it with a sacrificial board |
| Laser cutter | Diode or CO2 laser, exhaust | Intermediate | Plywood glue makes extra smoke; ventilate and never leave it running |
| Wood burning | Pyrography pen on blank card panels | Beginner | Hot tip and fumes; work in a ventilated space on a heat-safe surface |
- Sandpaper in 180 and 220 grit, with a small sanding block
- Pencil, ruler and tracing paper for the design
- Wood glue or a thin-bodied craft glue for layers
- Ribbon, cloth tape, thin leather or two small binder rings for the spine
- Clear spray sealer or paste wax for the finish
- Safety glasses and a dust mask for sanding, and a suitable respirator if laser cutting or burning
How to Make a Wooden Card Step by Step
- Size the panels: Draw two identical rectangles, for example 4.25 x 5.5 inches for a US A2 card or 105 x 148 mm for A6, on the sheet with the grain running along the long edge.
- Design the front: Sketch a simple shape or lettering on tracing paper, keeping any cut-out bridges at least 1/8 inch wide so they do not snap.
- Cut the panels: Use your chosen method from the table above and cut slightly outside the line so you can sand to the final size.
- Sand both faces and edges: Work with the grain from 180 grit to 220 grit, then wipe with a dry cloth to remove dust.
- Decorate before assembly: Burn, paint, ink or engrave the front panel while it is still flat and separate.
- Join the spine: Attach the hinge as described in the next section, then check that the panels open and close without binding.
- Finish and sign: Seal the outside, write your message on the inside panel and let everything dry fully before packing.
How Do You Hinge a Wooden Card?
This is the step that separates a card that opens from a flat plaque. Solid wood and plywood will not bend along a fold line, and a metal butt hinge with screws is overkill: screws in 1/16 inch stock split the wood before they bite. The lighter options below work better.
| Hinge type | Best for | How it attaches |
|---|---|---|
| Ribbon or cloth-tape spine | 1/16 in and 1/8 in cards | Glue a strip across the joined back edges, keeping a 1/16 in gap so the panels can swing |
| Thin leather strip | Premium gift cards | Glue with contact-style craft glue and clamp lightly until set |
| Two small binder rings | Removable, decorative | Drill matching 1/16 in holes near the spine edge, with scrap under the panel to prevent tear-out |
| Paper-backed wood veneer sheet | Very thin foldable look | Sold as veneer rather than plywood; check the maker guidance on bending before you buy |
Whichever you choose, leave a small gap between the two panels and glue the spine to the outside face. Gluing across a tight seam locks the card shut.
How Do You Decorate a Wooden Card?
Decorate the flat front before you assemble the card. Three techniques give the best results on thin basswood and birch.
- Wood burning: A pyrography pen gives fine line work on basswood. Keep the tip moving and practice on an offcut, and work with good ventilation because burning wood and any glue in plywood release fumes. Our guide to wood burning kits covers pen choices.
- Laser engraving: Test power and speed on a scrap of the same sheet first, since plywood glue lines change how it burns. If you are weighing a craft cutter instead, see whether a Cricut can cut wood at this thickness.
- Hand carving and paint: Light relief lines can be made with a small gouge, as in our wood carving basics. Use water-based paint sparingly, because heavy water can make thin plywood curl.
Stain deserves a warning. A wet, soaking stain on 1/16 inch plywood can cause it to curl as it dries, so use a thin coat on both faces, or skip stain and use an oil or a light clear spray instead.
How Do You Finish and Package It?
Once the decoration is dry, seal the outside with two light coats of clear spray, sanding lightly with 220 grit between coats. A thin coat of paste wax also works and keeps a natural feel. Leave the writing surface on the inside bare, or seal it only after you have written the message, so the pen does not smear.
Wrap the finished card in tissue, place it between two sheets of stiff cardboard and slip it into a padded mailer or a small box. The grain of thin wood runs one way, so a card can crack across the grain if it is bent or squeezed in transit.
Common Mistakes That Ruin a Wooden Card
- Using thick lumber: Anything over about 1/4 inch turns the card into a plaque that is heavy and costly to mail.
- Screwing hinges into thin stock: The wood splits, so use a glued fabric or leather spine instead.
- Cutting against the grain: Long thin bridges cut across the grain snap, so orient the grain along the long dimension.
- Decorating after assembly: Burning, painting or engraving a hinged card is awkward and risks scorching the spine, so decorate flat.
- Skipping the test piece: Every sheet burns, cuts and takes ink a little differently, so test on an offcut.
Frequently Asked Questions
What is the best wood for a wooden greeting card?
Basswood or birch plywood between 1/16 inch (1.5 mm) and 1/8 inch (3 mm) thick is the easiest choice. Both cut cleanly by hand or with a laser, sand smooth and take pyrography evenly. Avoid solid pine or oak at this thickness because the grain splits along its length.
Can you fold a wooden card like a paper card?
No. Solid wood and plywood do not fold, so a wooden card is built as two flat panels joined by a flexible spine such as ribbon, cloth tape, thin leather or a pair of small binder rings. Screwed metal hinges are unnecessary and will split 1/16 inch stock.
Can you write on a wooden card?
Yes. A fine-tip permanent marker or a paint pen writes cleanly on sanded basswood or birch. Test the pen on a scrap corner first, since raw wood can bleed, and seal the writing with a light clear spray only after the ink is fully dry.
Is a wooden card safe to mail?
Usually, if it is packed flat. Slide the card between two pieces of stiff cardboard inside a padded or rigid mailer, because thin wood can crack across the grain under pressure. A rigid card may also need extra postage, so check the size and thickness limits with your postal service before mailing.
A wooden card is a small, forgiving project: one sheet of 1/16 inch basswood, a sharp knife, sandpaper and a glued ribbon spine will produce a keepsake that lasts far longer than paper. Once you have made one, the same techniques scale up to layered designs, engraved gift tags and thicker standing cards. For more small projects to try next, see our simple woodworking projects.
Sponsored / affiliate links. As an Amazon Associate I earn from qualifying purchases. I may earn additional commission from eligible campaigns.
 30 Pack Basswood Sheets 12"x12"x1/8", 3mm Basswood for Laser Cutting, Thin Plywood Board Unfinished Wood for Crafts, DIY Architectural Models Making, Wood Engraving, Wood Burning Product.
 30 Pack Basswood Sheets 12"x12"x1/8", 3mm Basswood for Laser Cutting, Thin Plywood Board Unfinished Wood for Crafts, DIY Architectural Models Making, Wooden Engraving, Wood Burning Product.