Hand Carving vs Power Carving: Which Is Better for Beginners?
Hand carving is the better start for most beginners because it costs less, runs quieter, and gives you finer control. Choose Power Carving first only if you need faster stock removal, can handle dust, and can accept a higher risk of overcutting. Bad picks waste money, create a mess, and can ruin blanks before you learn the cut. This guide compares learning speed, control, cost, space, dust, and the first tools each path needs.
| Factor | Hand Carving | Power Carving | Winner |
|---|---|---|---|
| Control for first projects | More control and precision; better for detail and subtle texture. | Faster removal, but easier to overcut if you lose touch. | Hand Carving |
| Learning speed | Slower, but teaches grain reading and tool control early. | Faster shaping, with a steeper skill and safety curve. | Hand Carving |
| Setup burden | Small, portable kit; minimal dust and low noise. | Tool, bits, PPE, and dust control add setup steps. | Hand Carving |
| Project speed on rough stock | Slower on larger forms and harder wood. | Better for rough shaping, hardwoods, and bulk removal. | Power Carving |
| Best fit for delicate detail | Knives, gouges, and V-tools suit crisp lines and textures. | Can detail, but control drops as bit speed rises. | Hand Carving |
Control for first projects
Hand Carving wins this factor because beginners can take off wood one cut at a time and stop before a mistake spreads. That matters on a small spoon bowl, a relief panel, or any form where a few millimeters change the result.
Power Carving can still be precise, but a rotary bit can dig deep fast. If control slips, the repair often takes longer than the cut that caused it.
Learning speed
Hand Carving is slower, but that slower pace teaches grain direction, knife angle, and how wood moves under a sharp edge. Those habits carry over to every other carving method.
Power Carving teaches material removal faster. It also teaches restraint faster, because you learn quickly how little contact time it takes to change a surface.
Setup burden
Hand Carving needs less: a knife or gouge, a stable surface, and good light. It is quiet and portable, which makes it easier to start in a small room or shared space.
Power Carving adds more setup. You need the tool, burrs or sanding attachments, goggles, a respirator, and a plan for dust collection and cleanup.
Project speed on rough stock
Power Carving wins when the blank is large, tough, or badly oversized. It removes material quickly and handles hardwoods well, so you spend less time on the heavy shaping stage.
Hand Carving can do the same job, but it asks for more time and hand effort. That is fine for small forms, less fine for thick stock that needs major reduction.
Best fit for delicate detail
Hand Carving is the stronger choice for crisp lines, fine details, and subtle textures. Knives, chisels, gouges, and V-tools give you direct feedback and easier cleanup around small features.
Power Carving can refine detail too, especially with a micromotor machine, but the margin for error is narrower. At higher speed, a slip can blur a line or burnish a surface in the wrong place.
Hand carving basics
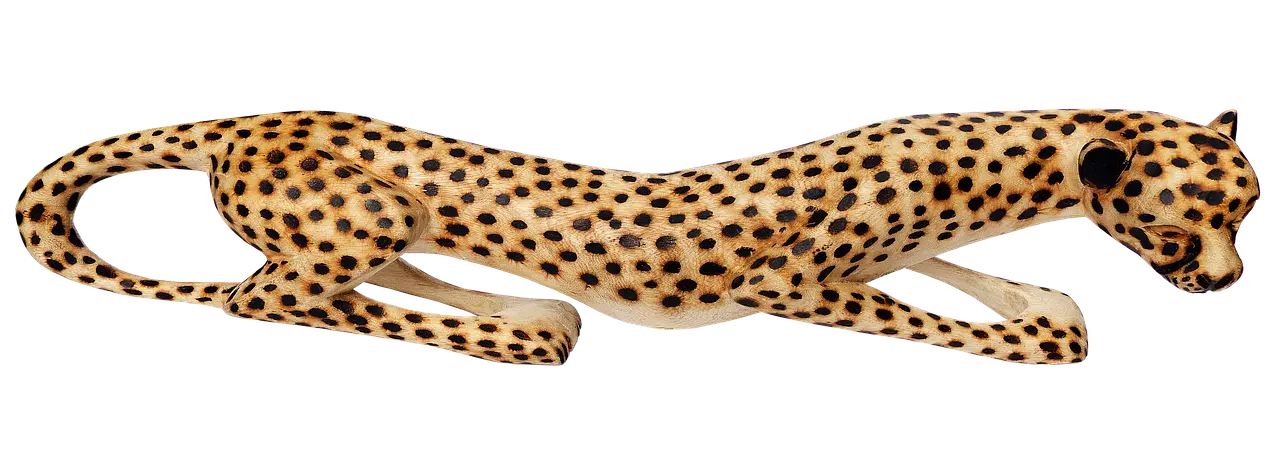
Hand carving uses knives, chisels, gouges, and V-tools to shape wood with direct pressure and short cuts. It is slower than Power Carving, but it gives beginners more control, less noise, and very minimal dust.
What tools you start
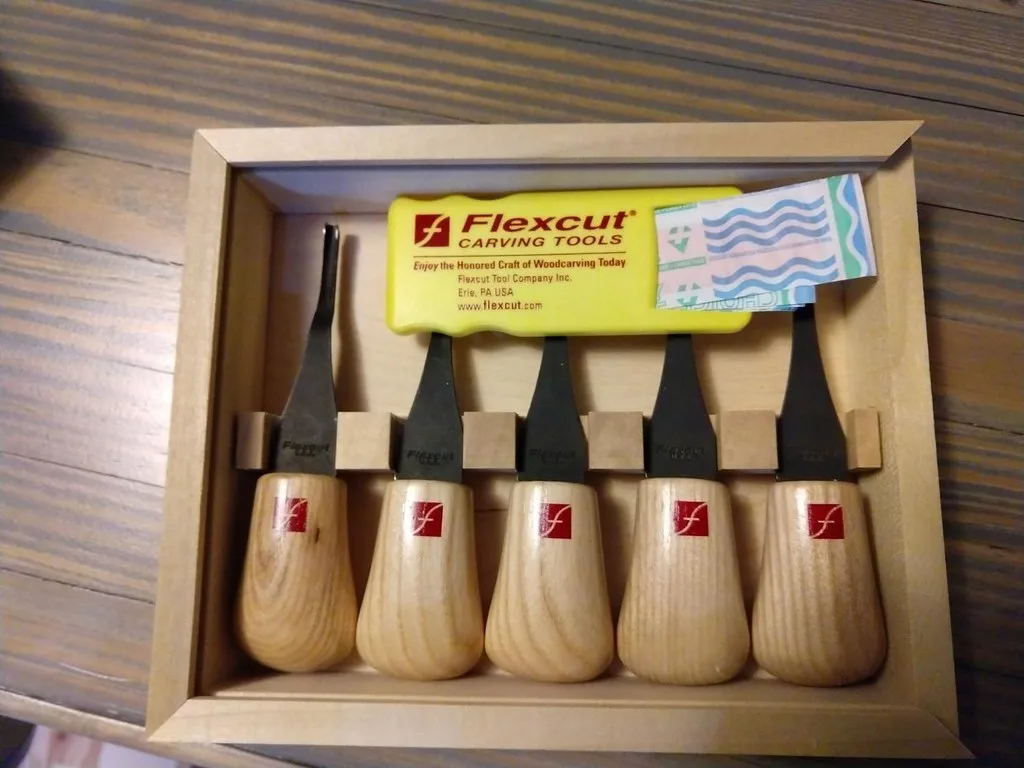
A basic hand setup can stay simple: a carving knife, one or two gouges, a V-tool for grooves, and a way to hold the work securely. Those tools cover small reliefs, spoons, caricature forms, and texture work without demanding a full machine setup.
What slow control buys you
Hand Carving gives you time to read grain and stop before a cut goes too far. That control is useful for beginners because the most common mistakes are small but cumulative: a corner gets rounded, a line drifts, or a texture gets flattened.
Best beginner woods for hand work
Basswood is a common beginner choice because it is soft, has smooth grain, and works well with hand tools. Hardwoods are harder to carve by hand, especially when you are still learning how much pressure a sharp edge needs.
Picture a 4-inch spoon blank in basswood with a shallow bowl. Hand Carving lets you open the bowl in small passes, then refine the rim without racing past the final shape.
Power carving basics
Power Carving uses electric or battery-powered tools with burrs, rotary bits, and sanding attachments to remove wood quickly. It is faster than hand work, but it brings dust, noise, and a higher risk of deep cuts if control slips.
Rotary tools and burrs
A rotary tool is the small-entry power carving path for many beginners. It works with burr bits for rough shaping and detailing, but it can cut deep fast, so the tool needs a light touch and clear sightlines.
A common first-timer mistake is leaning into a rotary bit to “help it cut.” That usually creates a trench, a burnt patch, or an edge that needs extra sanding to fix.
Flexible shaft machines and foot pedals
A flexible shaft machine includes a motor, shaft, handpiece, and often a foot pedal. It has greater torque but less speed, which gives many beginners better control during shaping and makes it a common first power carving machine.
Micromotor machines for detail work
A micromotor machine is the speed-focused option in this group. It can achieve speeds up to 50,000 rpm, which helps with fine work, but the tool can feel unforgiving if you pause too long in one spot.
When power carving helps beginners
Power Carving helps beginners most when the project starts with a lot of waste wood, a hard species, or a surface that needs repeated removal. It is less about replacing skill and more about cutting the time spent on heavy shaping.
Rough shaping large forms
Large bowls, thick spoon blanks, and bulky figures often need major stock removal before the finer stage begins. Power Carving is useful here because it can clear material quickly and save your hands from long sessions of push cuts.
Working harder wood
Hardwood often pushes beginners toward Power Carving because hand tools slow down as density rises. Power Carving handles hardwoods well, especially when the goal is rough shaping rather than final detail.
Speeding up repetitive removal
If you need to flatten a back, hollow a pocket, or knock down repeated bumps, Power Carving can speed the job. That speed matters when the same cut would be repeated many times by hand.
Suppose you start with a hardwood blank for a small bowl and notice the surface resists every knife pass. Power Carving can handle the rough middle stage, while hand tools finish the rim and final texture.
Carving decision table
Use this table when you want a simple match between the project, your budget, and the reality of your workspace. The best choice is the one that fits your first blank without adding avoidable risk or cleanup burden.
| Project type | Budget and tool cost | Workspace, noise, and dust tolerance | Hand strength and mobility | Recommended method score |
|---|---|---|---|---|
| Small detail work, relief, subtle texture | Low budget, simple starter kit | Small room, low noise tolerance, low dust tolerance | Any strength level; precision matters more than force | Hand Carving |
| Spoon, spoon bowl, or first figurine | Low to moderate budget | Shared space or apartment setting | Limited hand strength or arthritis-friendly pace | Hand Carving |
| Large form, rough stock, hardwood blank | Moderate budget for tool and PPE | Dedicated workspace with dust control | Limited endurance or fatigue with long hand cuts | Power Carving |
| Mixed project: rough shape now, detail later | Budget allows one hand set and one small power tool | Can handle some noise and cleanup | Good for short sessions and frequent breaks | Hybrid |
How to read the table
If your first project is small and detail-heavy, Hand Carving fits best because control matters more than speed. If the project is large or the wood is hard enough to stall hand tools, Power Carving earns its place. If you want both control and faster rough shaping, a Hybrid path is the practical middle ground.
Which is safer for beginners?
Hand Carving is often safer for beginners because the tools are generally slower, quieter, and easier to stop. Power Carving can be safe too, but only when you control the bit, wear the right PPE, and manage dust and noise instead of treating them as afterthoughts.
Hand-tool safety
Hand tools still cut skin, so sharp edges, stable holding, and cut direction matter. The advantage is that the tool usually moves slower and gives clearer feedback before a mistake becomes a deep wound.
Power-tool hazards
Power Carving adds rotating bits, vibration, flyaway chips, and deep-cut risk. Dust inhalation is described as the biggest risk for power carvers, which is why goggles, respirators, and dust control matter from the start.
PPE, dust control, and gloves
Safety glasses or goggles are basic for either route, but Power Carving also calls for a dust mask or respirator and often ear protection. A full face shield is sometimes used for more flying debris.
Gloves are not a safe default around rotating tools. Loose fabric can catch, and even snug gloves can reduce feel around a burr bit. Use gloves only when the specific task and tool setup make that choice appropriate.
What tools do I need to start?
To start Hand Carving, you need a small set of sharp hand tools and a way to secure the work. To start Power Carving, you need the tool itself, the right bits, and safety gear before you begin shaping wood.
Starter hand tool list
- Carving knife for cuts, whittling, and general shaping
- One or two gouges for curves and hollow forms
- V-tool for grooves, outlines, and crisp texture
- Bench hook, vise, or other secure hold-down method
- Sanding supplies for final cleanup
Starter power tool list
- Rotary tool for rough shaping and detailing
- Flexible shaft machine if you want greater torque but less speed
- Micromotor machine if fine detail and high speed matter more
- Burr bits or carving bits matched to the tool
- Sanding attachments for smoothing after rough cuts
Safety gear and dust collection
- Safety glasses or goggles
- Dust mask or respirator
- Ear protection for loud tools
- Full face shield when debris risk is higher
- Dust collection system where practical, especially in small shops
A dust collection system can reduce the amount of airborne waste, but it does not usually trap all dust particles. For Power Carving, that means cleanup and respiratory protection still matter even when the shop has extraction in place.
Can you combine both methods?
Yes. A staged path often works best: start with Hand Carving to learn grain, control, and safe cutting, then add Power Carving later for rough shaping or repetitive removal. That approach lowers early risk and still leaves room for speed as your projects grow.
A staged learning path
- Begin with basswood and a small hand tool set.
- Practice straight cuts, curves, and shallow texture first.
- Move to a simple spoon, relief panel, or small figure.
- Add a rotary tool or flexible shaft machine when you need faster rough shaping.
- Keep hand tools for final detail and cleanup.
When to start with hand tools
Start with Hand Carving if your budget is tight, your workspace is small, or your main goal is learning control. It is also the better first step if you have limited hand strength, because you can work in shorter sessions without the noise and setup burden of a machine.
When to add power tools
Add Power Carving after you can read grain and make clean cuts by hand. That is the point where a machine becomes a speed tool instead of a rescue tool, and you are less likely to use it for cuts that are too aggressive.
Choose the method that matches the first blank
Choose Hand Carving if you want the cheapest, quietest, and most controlled start, especially for small detail work, relief, spoons, and basswood. Choose Power Carving if your first project is larger, your stock is harder, or you need faster rough shaping and can manage dust, noise, and PPE.
For most beginners, the best answer is still Hand Carving first, then Power Carving later if the projects call for it. That order keeps the learning curve clear and avoids the most common beginner failures: overcutting, vibration fatigue, dust overload, and a shop full of unfinished blanks.
Verdict: Hand carving or Power carving?
Choose Hand Carving if you are starting with a small spoon bowl, a relief panel, or other small detail work where control, quiet, low dust, and a simple starter kit matter most.
Choose Power Carving if you need to rough shape a large bowl, thick spoon blank, bulky figure, or hardwood blank and want faster stock removal even with more setup, dust control, and overcutting risk.


Frequently asked questions
Is hand carving or power carving better for beginners?
Hand Carving is better for most beginners because it is cheaper, quieter, and easier to control. Power Carving becomes the better first choice only when you need faster stock removal, can manage dust, and are prepared for a steeper safety and control curve.
What are the pros and cons of power carving for beginners?
Power Carving removes wood faster and handles hardwoods well, which helps with rough shaping and larger forms. The tradeoff is more dust, more noise, more setup, and a greater chance of overcutting or deep cuts if the tool slips or the bit runs too fast.
What are the pros and cons of hand carving for beginners?
The same source gives beginners more control and precision, plus lower setup costs and very minimal dust. The downside is speed: larger forms and harder woods take longer, and the work can feel slow if you want fast shaping.
Which is safer: hand carving or power carving?
Hand Carving is usually safer for beginners because the tools move more slowly and the setup is simpler. Power Carving can be safe too, but only with goggles, a respirator, and good dust control, plus careful tool handling around rotating bits.
Does power carving work better on hardwoods?
Yes. Power Carving is often better for hardwoods because it removes wood faster and copes well with tougher stock. Hand Carving can still work on hardwood, but it usually asks for more effort and more time on each cut.
Can beginners combine hand carving and power carving?
Yes. A hybrid path is often the best long-term route: learn control with hand tools first, then add Power Carving for rough shaping later. That split keeps detail work in your control while still giving you a faster option when the blank gets large or hard.
Sponsored / affiliate links. As an Amazon Associate I earn from qualifying purchases. I may earn additional commission from eligible campaigns.