Japanese Wood Joints (Kigumi): 5 Types + How to Cut Them
Japanese wood joints, known as kigumi, lock timber together by shape, but not always without hardware: many use a pin, key or wedge to draw the fit tight. That detail changes how you cut them. This guide covers five joints (kanawa tsugi, kama tsugi, ari tsugi, hozo and chidori), the saws and chisels they need, and the rule for sizing a scarf splice: its length runs 3 to 4 times the stock width.
What Is Kigumi?
Best Dozuki Saw Pick | |
 |
SUIZAN Dozuki Dovetail Saw (7 in), $39.80 Cuts on the pull stroke through a thin kerf with a stiff spine, which is the kind of saw this guide uses for every shoulder and cheek cut on a scarf or dovetail splice.
|
As an Amazon Associate we earn from qualifying purchases. | |
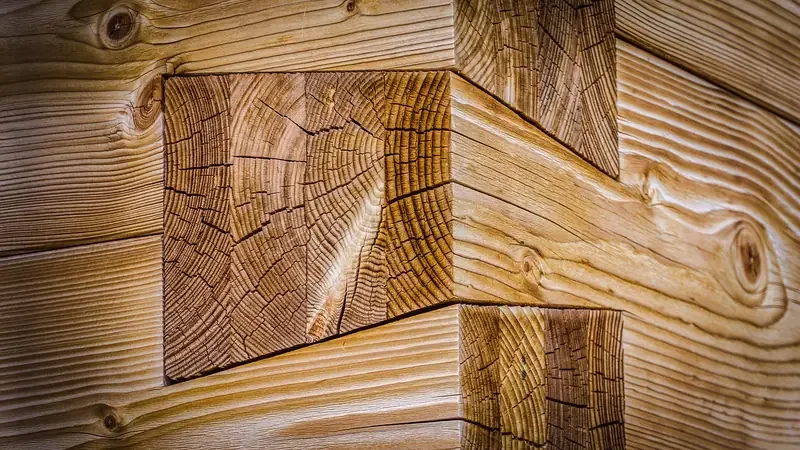
Kigumi (木組, “wood assembly”) is the Japanese system of joining timber with cut shapes instead of nails or screws. A projecting tongue called a hozo (tenon) fits a matching cavity, the hozoana (mortise), and the two pieces lock together. Kigumi joints fall into two families, and the names tell you which you are looking at.
- Tsugite connect members so they run in a straight line, such as two beams spliced end to end. Kanawa tsugi, kama tsugi and ari tsugi are all tsugite.
- Shiguchi connect two members at right angles, such as a beam meeting a post.
One myth is worth correcting before you pick up a saw. “No nails” does not mean “no hardware of any kind.” The joint’s shape does most of the work, but many joints finish with a driven key, wedge or pin that tightens the fit, and the kanawa tsugi is named for a metal ring (kanawa) in some traditional versions. Think of kigumi as joinery that does not depend on fasteners, not as joinery that forbids a wooden peg.
Japanese Wood Joints Compared
Five names come up again and again. This table sorts them by what each one does. The difficulty column is our own judgment for a hand-tool beginner, not a published rating.
| Joint | Family | What it does | What holds it | Our difficulty rating |
|---|---|---|---|---|
| Kanawa tsugi | Tsugite | Splices two timbers end to end; described as a half-blind tenoned, dadoed and rabbeted scarf joint | Stepped shoulders and stub tenons, tightened with a key or wedge | Hard |
| Kama tsugi (gooseneck) | Tsugite | Splices end to end with a neck-and-head shape that resists being pulled apart | The gooseneck shape itself; optional peg | Medium |
| Ari tsugi (dovetail splice) | Tsugite | Splices end to end with a dovetail that resists tension and compression | Dovetail wedging plus a stub tenon against twist | Medium |
| Hozo (mortise and tenon) | Frame joint | Fits a tenon into a mortise, as in a frame | Tight fit, often with a peg | Easy to medium |
| Chidori | Interlocking sticks | Sticks lock together with a quarter-turn twist | Interlocking shapes only | Hard to cut, easy to assemble |
Sources for the table: the kanawa tsugi description and the stub-tenon detail come from Andrew Hunter in Fine Woodworking and Emi Shinmura in Fine Woodworking; the dovetail details come from Big Sand Woodworking’s ari tsugi write-up. Chidori comes from a Hida Takayama toy and is the system behind Kengo Kuma’s twist-together Chidori furniture, which uses no nails or metal fittings.
Tools for Cutting Japanese Joints
You do not need a full set of Japanese tools on day one, and Hunter notes that Western tools and work-holding methods work equally well for the kanawa tsugi. He also prefers cutting it by hand and found no advantage in power tools. If you do buy Japanese tools, these are the ones that matter, per the Wikipedia entry on Japanese saws and the Wikipedia entry on Japanese carpentry.
| Tool | What it is | Use it for |
|---|---|---|
| Dozuki | Stiff-backed saw with a very thin blade | Shoulders, cheeks and tenons |
| Ryoba | Two-edged saw: crosscut teeth on one side, rip teeth on the other (typically 240 to 270 mm) | Longer cuts and general sawing |
| Kataba | Single-edged saw similar to a Western saw | Larger cuts and flush trimming |
| Nomi | Chisel with a hard steel layer forge-welded to softer steel | Paring shoulders flat, cleaning mortises |
| Kebiki | Marking gauge | Scribing repeatable layout lines |
All three saws cut on the pull stroke, which allows a thinner blade and a narrower kerf. One caution applies to your wood choice: Japanese saws were originally made for softer woods such as cypress and pine, and the original tooth form was less suited to hardwoods. Practice joints in pine or cedar first. For the Western equivalents, see our carcass saw vs tenon saw comparison, and for the skill order that makes sense before joinery, read how to learn Japanese woodworking.
How to Cut a Kanawa Tsugi (Scarf Splice)
The kanawa tsugi is the best-known Japanese splice, and the layout rule that governs it is simple: according to Hunter, the joint is typically 3 to 4 times the width of the workpiece in length. Hunter’s worked example uses 3-1/2 inch square stock and a 13 inch joint, which is about 3.7 times the width and sits inside that range.
Layout is where this joint is won or lost. Hunter advises referencing every line from a centerline rather than from square faces, and using a story stick that carries all five layout lines. The story stick in his example is 5/8 inch wide. For smaller stock he scales the dimension down, as the table shows. The length column below is our own arithmetic (width times 3 and times 4), not a figure from the article.
| Stock width (square) | Joint length at 3x to 4x (our arithmetic) | Hunter’s T-notch dimension |
|---|---|---|
| 2 in | 6 to 8 in | 1/2 or 3/8 in |
| 3 in | 9 to 12 in | 1/2 in |
| 3-1/2 in | 10-1/2 to 14 in (Hunter’s example: 13 in) | 5/8 in |
Most guides give the 3 to 4 times rule and stop. The practical consequence is that a splice in 2 inch stock is already a 6 to 8 inch joint, so you need a longer blank than you expect before you start cutting. Mark the full joint length on both pieces and check you have it before you saw anything.
- Mill the stock square: every face needs to be flat and square so the centerlines you mark are true.
- Mark centerlines: scribe a centerline on each face and work every dimension from it, not from the edges.
- Make a story stick: transfer the five layout lines (the stepped shoulders and the T-notches) to a stick so both halves are laid out from the same source.
- Scribe the joint on both pieces: use the story stick and a marking gauge, then deepen the key lines with a knife.
- Saw the shoulders: cut with a dozuki or ryoba on the waste side of each line, stopping at the scribed depth.
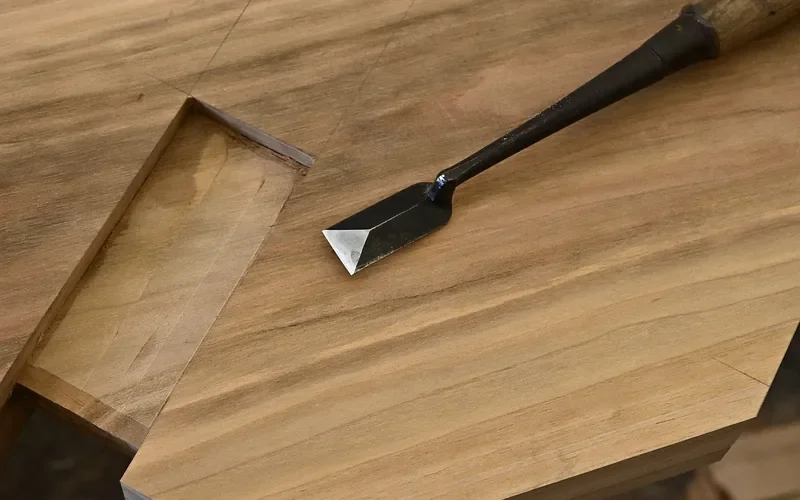
- Pare the steps flat: use a sharp chisel to clean the shoulders and the floor of each step until they are flat and square.
- Cut the stub tenons and their grooves: these end details stop the two halves twisting once the joint is closed.
- Test-fit and adjust: slide the halves together lengthwise, then shave only where the fit binds, a little at a time.
Safety note: clamp the work before chiseling, keep both hands behind the cutting edge, and always chisel away from your body.
A kanawa tsugi is a scarf joint at heart. If you want the Western version for comparison, our guide to joining two pieces of wood covers plain scarf, edge and end joints.
How to Cut a Dovetail Splice (Ari Tsugi)
The ari tsugi is an easier first splice. Big Sand Woodworking’s write-up makes two points worth keeping: the finished dovetail is only half the height of the material, and the aim is no gaps anywhere except one crucial point at the very end of the dovetail, which is what draws the shoulders tight when the joint closes. The stub tenon adds a lot of resistance against twisting.
- Mark the half-height: scribe a line at half the thickness of the stock on both pieces.
- Lay out the dovetail on the end grain: keep the shape the same on both pieces, mirrored.
- Saw the cheeks and shoulders: work to the line, with the dozuki held low and light.
- Pare the waste: take the dovetail faces and shoulders flat with a chisel.
- Fit it: leave the closing gap only at the dovetail end, as Big Sand describes, and shave where it binds.
Do not confuse this with a drawer dovetail. The Western version is cut to join boards at a corner; see how to cut dovetail joints by hand for that technique. For the mortise and tenon that is the Japanese hozo in all but name, our mortise and tenon joint guide has sizing rules.
Which Japanese Joint Should a Beginner Cut First?
Our suggested order, which is a teaching recommendation and not a published standard: a half-lap first, then the ari tsugi, then the kanawa tsugi. A half-lap teaches you to saw to a line and pare a flat shoulder; see our guide to connecting 4×4 wood for one. The dovetail splice adds an angled fit, and the kanawa tsugi layers several interlocking faces together.
If you want a small project to practice on, a kigumi box is a common search for a reason: it is a contained exercise. Our guide to making small wooden boxes covers the basics of the box itself before you add joinery.
Common Mistakes With Japanese Joinery
- Laying out from square faces instead of a centerline. Hunter’s method references the centerline so small errors in the stock do not carry into the joint.
- Skipping the story stick. Marking each piece by measurement instead of from one stick lets small differences between the two halves creep in.
- Using the wrong wood to learn. Japanese saws were made for softer woods like cypress and pine, so start there rather than in dense hardwood.
- Forcing a tight joint together. A binding fit can split the stub tenon. Test-fit, shave a little and test again.
- Assuming it needs no hardware. Many joints are finished with a key, wedge or pin, so plan for one when you lay out.
Frequently Asked Questions
What are Japanese wood joints called?
Japanese wood joints are called kigumi (wood assembly). Joints that splice two pieces in a straight line are tsugite, and joints that meet at an angle, such as a beam into a post, are shiguchi. Common named examples include kanawa tsugi, kama tsugi and ari tsugi.
Do Japanese wood joints use glue or nails?
The kigumi approach is to lock pieces mechanically by shape, often with a pin, key or wedge to draw the fit tight, rather than relying on nails. Whether you add glue is your call: traditional timber work often goes without, while indoor furniture makers commonly glue for extra holding power.
What is the easiest Japanese wood joint to make?
Start with a half-lap, then try a dovetail splice (ari tsugi) before the kanawa tsugi. This is our suggested order, not a standard: each step adds one skill, from sawing to a line, to paring a flat shoulder, to fitting several interlocking faces at once.
What is the difference between tsugite and shiguchi?
Tsugite connect members so they run in a straight line, such as two beams spliced end to end. Shiguchi connect two members at right angles, such as a beam meeting a post. Kanawa tsugi, kama tsugi and ari tsugi are tsugite.
Which saw should I use to cut Japanese joinery?
A dozuki is the usual choice for joint shoulders and cheeks because its stiff back keeps a thin blade straight. A ryoba, which has crosscut teeth on one edge and rip teeth on the other, handles the longer cuts. Both cut on the pull stroke.
Conclusion
Japanese wood joints reward careful layout more than speed. Start with a half-lap, move to the ari tsugi, and bring the kanawa tsugi in once you can saw to a line and pare a flat shoulder. Keep the 3 to 4 times length rule in mind when you buy your stock, and cut a practice joint in pine before you cut the real one.
Sponsored / affiliate links. As an Amazon Associate I earn from qualifying purchases. I may earn additional commission from eligible campaigns.