How to Make a Wooden Recorder: DIY Mastery
To make a wooden recorder, start by choosing a suitable piece of wood and cutting it to the desired length. Next, drill finger holes and create the mouthpiece for sound production.
Creating a wooden recorder combines craftsmanship with musicality. This ancient instrument has roots in various cultures, offering rich tones and a smooth playing experience. Crafting your own recorder not only enhances your woodworking skills but also provides a unique way to connect with music.
This guide will walk you through the essential steps, tools, and techniques needed to create your very own wooden recorder. Whether you’re a seasoned woodworker or a beginner, this project can be both rewarding and enjoyable, allowing you to produce beautiful melodies from your handmade instrument.
Introduction To Crafting Your Own Wooden Recorder
Crafting your own wooden recorder is a fun and rewarding project. Many people love the charm of handmade musical instruments. They offer unique sounds and personal touch.
To get started, gather these essential materials:
| Materials | Purpose |
|---|---|
| Wood (maple or cherry) | Main body of the recorder |
| Drill | To create finger holes |
| Sandpaper | Smooth the wood surfaces |
| Wood finish | Protect and enhance the wood |
| Measuring tape | Ensure accurate dimensions |
These items will help you create a beautiful wooden recorder. Enjoy the process and make music!
Selecting The Right Wood
Choosing the right wood is essential for a good recorder. Common types include maple, rosewood, and boxwood. Each type offers unique sound qualities.
When selecting wood, look for these important properties:
| Property | Description |
|---|---|
| Density | Denser wood gives a richer sound. |
| Grain | A straight grain ensures better tuning. |
| Moisture Content | Low moisture prevents warping. |
| Durability | Hardwoods are often more durable. |
Choosing the right wood can greatly enhance your recorder’s sound.
Tools Of The Trade
Woodworking requires a few essential tools. Beginners need a good saw, chisel, and hammer. A measuring tape and square help ensure accuracy. A sandpaper or sander makes surfaces smooth.
Specialized tools for making instruments include a tuning fork and a drill. A router shapes wood edges nicely. Use a wood lathe for round pieces. A file can refine details on the recorder.
| Essential Tools | Specialized Tools |
|---|---|
| Saw | Tuning Fork |
| Chisel | Drill |
| Hammer | Router |
| Measuring Tape | Wood Lathe |
| Square | File |
| Sandpaper |
Designing Your Recorder
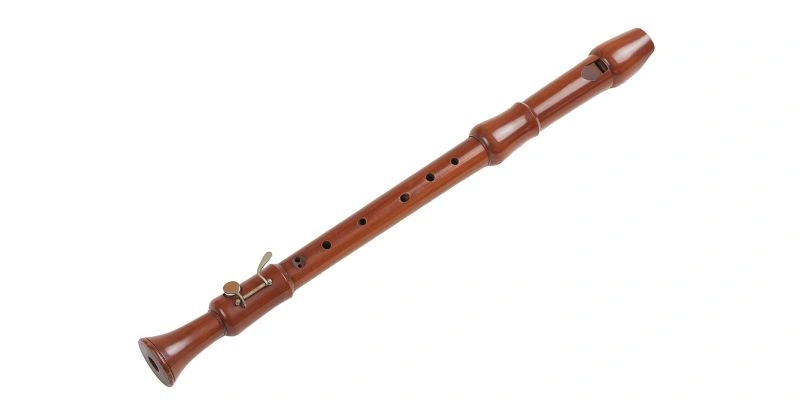
Understanding the anatomy of a recorder is key to making one. A recorder has several important parts. These include the mouthpiece, body, and foot. Each part has a specific function in sound production.
The mouthpiece is where you blow air. It controls how the sound starts. The body contains the finger holes. They change the pitch when you cover them. The foot affects the overall tone of the instrument.
Drawing your design helps visualize your recorder. Start with simple shapes. Sketch the mouthpiece at the top. Then, draw the body with holes. Finally, add the foot at the bottom. This will guide your building process.
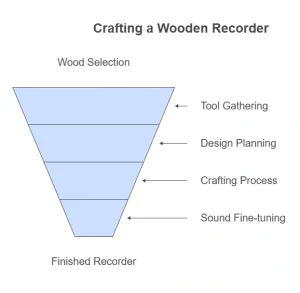
The Crafting Process
Crafting a wooden recorder requires careful selection of materials and precise measurements. Begin by shaping the wood into a desired form and drilling holes for sound. Sanding and finishing complete the process, ensuring a smooth and playable instrument. Embrace creativity as you bring your wooden recorder to life.
| Carving the body | Drilling the finger holes |
| Shape the wood with precision to form the basic structure. | Make precise holes for accurate sound production. |
| Smooth the surface to ensure a polished finish. | Check alignment and spacing for optimal playability. |
Fine-tuning For Sound Quality
To adjust the bore and finger holes of your wooden recorder, start by measuring. Use a caliper for accurate measurements. A larger bore can create a deeper sound, while a smaller bore produces a brighter tone.
Next, modify the finger holes. Make them slightly larger to lower the pitch or smaller to raise it. Test the sound after each adjustment. This helps find the perfect balance for your recorder.
After adjustments, play a few notes. Listen carefully to the quality of the sound. If it feels off, tweak the holes or bore again. Fine-tuning takes patience, but the results are worth it!
Finishing Touches
Begin sanding the wooden recorder to create a smooth surface. Use fine-grit sandpaper to avoid scratches. Focus on the edges and curves for a nice finish.
After sanding, it’s time for applying finishes. Choose an oil or lacquer suitable for wood. These will protect the wood and enhance its appearance.
Sealants help protect the recorder from moisture. Apply a thin layer and let it dry completely. This step is essential for maintaining the wood’s integrity.
Finally, inspect the recorder for any rough spots. Smooth out any areas that feel uneven. A well-finished recorder will sound better and last longer.
Playing Your Handmade Recorder
Playing your handmade recorder is exciting and fun. Start with simple notes like C, D, and E. Practice blowing gently to create clear sounds. Use your fingers to cover the holes properly. This will help you produce better music.
To care for your wooden recorder, clean it after each use. Use a soft cloth to wipe the outside. Make sure to remove any moisture from the inside. Store it in a cool, dry place. Avoid direct sunlight and extreme temperatures.
| Care Tips | Importance |
|---|---|
| Clean after use | Prevents damage and keeps it fresh |
| Use a soft cloth | Protects the wood surface |
| Store properly | Extends the recorder’s life |
Frequently Asked Questions
How Can I Make A Wooden Recorder?
To make a wooden recorder, start by selecting the right type of wood, like maple or cherry. Cut the wood into the desired shape and size. Use a drill for the finger holes, ensuring correct placement for sound quality. Finally, sand the surface for a smooth finish and apply a sealant.
What Tools Do I Need For Making A Recorder?
Essential tools include a saw, drill, and chisels. A measuring tape ensures accurate dimensions. Sandpaper is vital for smoothing the wood. A finish, like oil or lacquer, protects the recorder. Having these tools will make your woodworking process much easier and more efficient.
How Long Does It Take To Make A Recorder?
The time to make a wooden recorder varies by skill level. Beginners may take several hours to a few days. Experienced woodworkers can complete one in a few hours. Factors like drying time for finishes also affect total time. Plan accordingly to ensure a quality product.
What Wood Is Best For Making A Recorder?
Hardwoods like maple, cherry, or rosewood are ideal. They provide durability and enhance sound quality. Each type of wood offers unique tonal properties. Choose based on your desired sound and aesthetic preferences. Proper wood selection is crucial for a successful wooden recorder.
Conclusion
Creating your own wooden recorder can be a rewarding experience. It combines craftsmanship with musical enjoyment. Following the steps outlined in this guide ensures you build a quality instrument. With practice, you’ll master playing techniques. Embrace this project and enjoy the music you create with your handmade recorder.
Happy crafting!