How to Make Acrylic Router Templates That Won’t Melt or Crack
Acrylic makes a better router template than MDF or hardboard because it’s rigid enough to hold a bearing-guided bit steady, yet clear enough to let you see the workpiece underneath while you cut. Most of the acrylic-template guides online repeat the same vague advice — “cut it, sand it, done” — without addressing the two things that actually ruin a homemade template: melted, gummy edges from the wrong feed speed, and hairline cracks around mounting holes drilled the way you’d drill wood.
This guide covers the acrylic-specific parts that matter: which thickness actually stays flat under repeated use, how to cut it without melting the kerf back together, how to drill mounting holes without stress-cracking the sheet, and why flame-polishing — a common tip for acrylic edges in general — is the wrong move for a template that has to stay perfectly flat against a guide bushing.
Why Acrylic Beats MDF and Hardboard for Templates
MDF and hardboard are the default template materials for a reason — they’re cheap and easy to cut. But both absorb moisture over a shop season, which means a template you cut dead-on in July can be 1/32″ out of true by winter. Acrylic doesn’t move with humidity the way wood-based sheet goods do, so a template you cut once stays accurate for as many production runs as you need it for. The transparency is the other real advantage: you can center the acrylic over a knot, a glue line, or a layout mark on the workpiece and see exactly where the cut will land before you commit the router to it — something you can’t do with an opaque template.
Bit We’d Pair With This Template
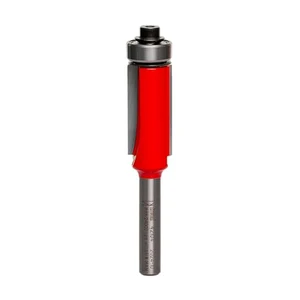 |
Freud 42-104 Bearing Flush Trim Bit – $14.25 Once your acrylic template is cut and mounted, this is the bit that actually runs the bearing against its edge to trim the workpiece flush.
|
Choosing the Right Acrylic Sheet
Two decisions matter here: cast versus extruded, and thickness. Cast acrylic (sold under names like Acrylite or Plexiglas) is cooled slowly during manufacturing, which leaves it more dimensionally stable and less prone to crazing around drilled holes. Extruded acrylic is cheaper and cuts a hair easier, but it’s more likely to develop stress cracks at mounting holes and screw points — exactly the spots a template gets stressed repeatedly. For anything you’ll reuse more than a handful of times, pay the small premium for cast.
On thickness, skip 1/8″ (3mm) for anything but a one-off pattern — it flexes enough under bushing pressure to throw off your offset mid-cut. 1/4″ (6mm) is the workhorse thickness for most hand-router templates: rigid enough to stay flat against a guide bushing or bearing, thin enough to cut cleanly with a standard bit. Go to 3/8″ only for large templates (24″ or longer) that need extra stiffness to resist flexing across the span.
Tools You’ll Actually Need
Beyond the acrylic sheet itself, you need a router with a straight or spiral bit for the initial cut, a bearing-guided flush trim bit for truing the edge, clamps to hold the sheet still, and a way to cool the cut — either a shop vac positioned right at the bit or a light mist of water, since acrylic dust that isn’t cleared away just gets re-melted by the bit. For drilling, a standard twist bit works if you control speed and pressure (details below); you don’t need a specialty acrylic bit unless you’re doing this often enough to justify one.
| Tool | Purpose |
|---|---|
| Router (handheld or table) | Cuts the template shape and later trims the workpiece flush |
| Straight or spiral bit | Rough-cuts the acrylic to your pattern line |
| Bearing-guided flush trim bit | Trues the template edge and later trims the workpiece to match it |
| Clamps | Hold the acrylic and the pattern still during cutting |
| Wet/dry sandpaper (220-1000 grit) | Refines the cut edge without heat |
Designing and Transferring Your Pattern
Draw or print your shape at full size, then attach it to the acrylic with a light coat of repositionable spray adhesive rather than tape — tape edges lift during cutting and let the paper shift right when you need it most. If you’re working from a shape you already cut in another material (a first prototype in MDF, for example), skip drawing entirely: clamp the two sheets together and use a flush trim bit to copy the existing shape directly onto the acrylic. That copy method is more accurate than tracing, since you’re not relying on your own line-following.
Cutting Acrylic Without Melting or Chipping It
A lot of acrylic guides tell you to “increase router speed” and leave it at that, which is only half the story and gets the mechanism backward. Running the bit fast while feeding slowly is exactly what melts acrylic: the bit dwells in the cut long enough for friction heat to soften the plastic, and instead of a clean shaving, you get a gummy ridge that re-fuses to the edge behind the bit. The fix isn’t more speed on its own — it’s matching a sharp, single- or two-flute bit made for plastics with a steady, confident feed rate so the bit is always advancing into new material instead of sitting in one spot.
Leave the paper backing on the acrylic during the cut if it has one — it reduces surface chipping on the top face. Keep dust cleared continuously (shop vac right at the bit) so re-melted chips don’t get dragged back into the kerf. If you hear the pitch of the cut change or see smoke instead of fine chips, you’re feeding too slowly for that bit speed — back off and speed up the feed, don’t slow down further.
Drilling and Mounting Holes
Acrylic cracks around drilled holes far more easily than wood, mainly from two mistakes: standard wood-ground drill bits that grab and tear rather than shear, and drilling straight through at full pressure without clearing chips. Use a bit with a modified point — a shallower point angle than a standard wood bit, or a bit specifically ground for plastics — and back a piece of scrap wood underneath the acrylic so the bit has support as it exits. Drill in short pecks: advance a little, back out to clear the chip and let the bit cool, advance again. Trying to drill straight through in one pass is the single most common cause of a spider-crack radiating out from a mounting hole.
If you’re using a guide bushing rather than a bearing-guided bit to follow the template, the hole size isn’t arbitrary — it has to account for the offset between the bushing’s outer diameter and the bit’s diameter, or your cut will land off the line by that exact gap. We cover the offset formula and a bearing-guided shortcut that skips the math entirely in our guide to DIY router templates and bushing offset.
Attaching the Template to Your Workpiece
Double-sided tape rated for at least a light-duty bond works for most templates and won’t leave residue on either surface if you pull it off slowly rather than snapping it. For a template you’ll reposition several times in one session, hot-melt glue in small dots holds firmly and pops off with a putty knife without denting the workpiece. Screws through pre-drilled mounting holes are the most secure option for larger templates, but only worthwhile if you’re using the same template across many workpieces, since drilling those extra holes is exactly where the cracking risk from the section above comes in.
Testing and Fine-Tuning the Template
Run a test pass on scrap before committing a real workpiece. Check three things: whether the cut is fully flush with no step where the bearing rode over a rough spot, whether the corners came out sharp or slightly rounded from bearing radius, and whether the template shifted during the cut. A step in the cut almost always traces back to a rough or under-polished spot on the template edge itself — the bearing follows every imperfection, so any flaw in the template becomes a flaw in every workpiece you cut with it.
Finishing the Edges Safely
Flame polishing — passing a torch quickly along the edge to melt it glass-clear — is common advice for acrylic in general, but it’s the wrong technique for a router template specifically. The flat, true edge is what the bearing or bushing rides against; even a slight, uneven softening from heat can round or warp that reference edge just enough to throw off accuracy, and it’s an open flame next to a bench covered in acrylic dust and shavings. Skip it here.
Instead, work through wet/dry sandpaper in stages — 220, then 400, then 600, then 1000 grit — sanding wet to keep dust down and heat off the edge. Finish with a buffing wheel and plastic polishing compound if you want it glass-clear, or stop at 1000 grit for a smooth satin edge that’s perfectly functional for template use. Either way, the edge stays flat and true, which is what actually matters for repeat accuracy.
Maintenance and Storage
Clean acrylic templates with mild soap and water and a soft cloth — never ammonia-based glass cleaner, which can craze the surface over time. Store templates flat rather than leaning them against a wall; acrylic will slowly bow under its own weight if left propped at an angle for months. Keep them out of direct sunlight near a window, since UV exposure is the main cause of yellowing in clear acrylic over a few years.
Troubleshooting Common Problems
Melted or gummy edges: your feed rate was too slow for the bit speed. Speed up the feed and make sure you’re using a bit designed for plastics, not a general-purpose wood bit.
Cracks radiating from a mounting hole: the bit grabbed on entry or exit, usually from drilling straight through without backing material or without clearing chips. Redrill with scrap backing underneath and peck-drill in short passes.
Chipped top surface along the cut line: the paper backing was removed before cutting, or the bit was dull. Leave protective backing on until the cut is done and swap in a fresh bit if chipping continues.
Frequently Asked Questions
What thickness of acrylic is best for router templates?
1/4″ (6mm) cast acrylic is the best all-around thickness for hand-router templates — rigid enough to stay flat against a bearing or bushing, thin enough to cut cleanly. Reserve 3/8″ for templates longer than about 24″ that need extra stiffness across the span, and avoid 1/8″ for anything you’ll reuse, since it flexes enough to throw off accuracy.
Why does my acrylic template melt instead of cutting cleanly?
Melting happens when the bit dwells in one spot too long relative to its speed, usually from feeding too slowly. Use a bit made for plastics and feed at a steady, confident pace so the bit is always advancing into fresh material instead of sitting still and building up friction heat.
Should I flame-polish the edges of a router template?
No. Flame polishing can warp or round the flat edge that a bearing or guide bushing rides against, which throws off the template’s accuracy. Use wet/dry sandpaper up through 1000 grit and, if needed, a buffing wheel with plastic polish instead.
How do I drill mounting holes in acrylic without cracking it?
Back the acrylic with scrap wood for support, use a bit ground for plastics rather than a standard wood bit, and drill in short pecks — advancing a little, backing out to clear the chip, then continuing — instead of drilling straight through in one pass.
Conclusion
An acrylic router template earns its keep over MDF or hardboard when you get the acrylic-specific steps right: cast over extruded, 1/4″ as your default thickness, a plastics-rated bit run with a confident feed rate, peck-drilled mounting holes backed with scrap, and sandpaper instead of a flame for the final edge. Get those five things right and the template will hold its accuracy for as many workpieces as you need to cut.
Sponsored / affiliate links. As an Amazon Associate I earn from qualifying purchases. I may earn additional commission from eligible campaigns.