Wooden Sleigh Tree Stand
A wooden sleigh tree stand is commonly used as a decorative shell: size the sleigh opening about 2 to 4 inches wider than the tree base or hidden stand, and keep it non-load-bearing unless a rated internal support is added. Too small, and the tree won’t seat; too shallow or weak, and the display can tip, split, or crush a real stand. This guide shows how to size the shell, stabilize it, and decide when it suits a faux tree, a hidden real stand, or no support duty at all.
This guide is part of our Christmas Woodworking Projects: Ornaments, Gifts and Decor series.
Scope, materials, and when to keep it decorative
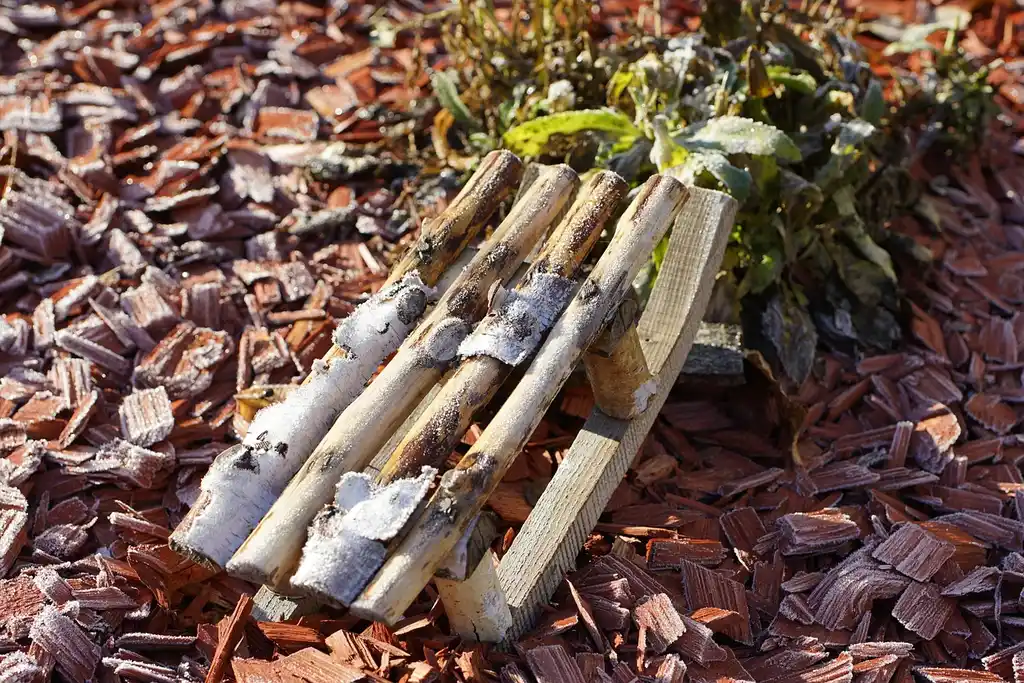
This project is an intermediate decorative build, not a structural tree support. The common small plan is a cute mini sleigh stand for decorative use only, while a larger sleigh shell can hide a separate tree base if you leave room for the actual stand and keep the shell independent of the tree’s weight.
What this project
Use the sleigh as a display shell around a faux tree base, a prop for a tabletop tree, or a cover for a real tree stand only when the real stand still carries the load. Softwood timber is the usual material choice because it cuts cleanly, sands well, and takes paint or oil on curved parts and straight rails.
When it should stay decorative only
The smaller plan is explicitly for decorative use only. That means it should not carry a live tree, a heavy water basin, or a top-heavy display on its own. If you want a live tree, treat the wooden shell as a cover and let the certified tree stand handle load and water.
What you’ll need
- Softwood timber: 2” x 1” softwood timber, 3 meters
- Softwood timber: 3” x 1” softwood timber, 1 meter
- 15mm timber dowel
- 4mm x 30mm wood screws, approximately 14
- 4mm x 50mm wood screw, approximately 4
- Wood glue, optional but recommended at joints
- 120g sandpaper
- Danish oil or paint
- Jigsaw for curved feet
- Sander for rounding ends and smoothing curves
- Circular saw or miter saw for the larger plan
- Clamps, pencil, square, tape measure
Stock choices and cut sizes
For the smaller plan, the cut list starts with five 2” x 1” planks at 40cm long, two 2” x 1” planks at 30cm long, and two 3” x 1” planks at 50cm long. Those shorter parts keep the build compact and easy to store after the holidays.
For a larger decorative shell, common substitutions include 1×4, 1×6, 1×12, and 2×3 stock. A finished larger sleigh measures 43 in long x 22 in wide x 16 in tall. That size works better for a floor display, but it still needs the hidden tree stand to carry the actual load.

How do I make a wooden sleigh tree stand?
Build it as a shell first, then decide whether it surrounds a faux tree base or a separate real stand. Start by laying out the runners, cut list, and hidden opening, then assemble the frame with screws and glue so the shell stays square while the actual tree support remains separate.
- Mark the side runners and the opening that will fit around the base.
- Cut the straight members to length with a saw.
- Trace both curved runners from the same template so the sides match.
- Cut the curves with a jigsaw, then sand them smooth.
- Dry-fit the frame and check that the opening clears the hidden stand.
- Drive 4mm x 30mm screws at the small joints and 4mm x 50mm screws where the frame needs more bite.
- Add wood glue at the joints before final tightening.
- Sand the whole build with 120g paper and apply finish after the surface is clean.
If your hidden stand is about 14 inches across, size the shell opening at about 16 to 18 inches across so there is still room for the basin, the cords, or the center post without forcing the tree against the sleigh sides.
How do you size the stand?
Choose the tree type first, because the footprint and clearance change a lot between a tabletop faux tree, a full-size faux display, and a real tree hideaway. Then size the outer shell 2 to 4 inches wider than the hidden base and leave enough depth so the center of gravity stays inside the footprint.
Wooden sleigh tree stand checklist
| Intended tree type | Recommended outer footprint | Minimum clearance around hidden stand | Suggested lumber dimensions | Safety note |
|---|---|---|---|---|
| Faux tabletop tree | About 18 in to 24 in long | 2 in on each side | 2” x 1” softwood timber with 15mm dowel | Best for display only; keep the tree lightweight and center it fully. |
| Faux full-size tree | About 36 in to 43 in long | 3 in to 4 in on each side | 1×4, 1×6, 1×12, and 2×3 stock | Use the shell as a skirt or frame, not as the load-bearing base. |
| Real tree hideaway | At least 2 in wider and deeper than the actual stand | 3 in to 4 in plus space for water access | 2×3 and wider stock with screwed corner blocks | Keep the live tree on its rated stand; protect the shell from water and do not trap the basin. |
How much width is enough?
A practical starting point is 2 inches extra on each side for a faux tabletop display and 3 to 4 inches extra on each side for a larger hidden stand. If the tree leans or the top is dense, widen the footprint before you add finish or decorative trim. A narrow base is the fastest route to a tip.
How do you cut curved sleigh runners?
Trace a smooth radius on both sides from the same pattern, then cut and sand them until the curves match. Matching runners matter because one uneven side changes how the sleigh sits and can leave the frame rocking on a flat floor.
Trace and cut the curves
Draw one runner full size on hardboard or scrap plywood, then flip the template for the opposite side. Cut with a jigsaw and stay just outside the line. A slow cut gives you more room for sanding than trying to force the blade through a tight radius.
Sand both runners to match
Use a sander and 120g sandpaper to blend the saw marks, especially at the toe and heel of the runner. Then lay the runners together, edge to edge, and compare them. If one side stands proud, sand the high spots until both sit the same.
Say your right runner has a flatter curve than the left. The sleigh will track unevenly, and the whole shell can twist when you tighten the cross members. Matching both sides before assembly prevents that problem.
How do I keep a wooden Christmas tree stand stable?
Stability comes from footprint width, square joints, and a center of gravity that stays inside the base. Add screws and glue at the joints, keep the sleigh low, and do not let a real tree or water basin rely on the wooden shell for support unless the internal stand is specifically rated for that load.
Build the frame square
Clamp the frame, measure both diagonals, and adjust until the numbers match. That tells you the rectangle is square. Then tighten the screws. If the frame is out of square, the runners can toe in or splay out, which makes the display easier to tip.
Add strength where it matters
Use wood glue with the screws at the joints, because the glue helps the assembly bond while the screws hold alignment. Exterior screws in 2 1/2 inch and 2 inch sizes are reasonable choices for larger outdoor-adjacent holiday displays, but keep moisture exposure low if a live tree or water basin is nearby.
If that didn’t work, widen the footprint before you add height. A 2-inch wider base on each side is usually more effective than adding decorative trim. If the shell still feels loose, add internal blocks at the corners and recheck the diagonals.
How do I finish and protect it?
Sand the whole build to 120g, then choose Danish oil or paint. Danish oil keeps the wood grain visible, while paint hides color variation and gives you more control over the final holiday look. Near a live tree, keep finish away from the basin and let the wood dry fully before assembly.
Sanding and finish order
Round sharp edges, smooth the curves, and remove glue squeeze-out before finish goes on. If you plan to use Danish oil, apply it in thin coats and wipe off excess. If you prefer paint, prime first so the softwood does not soak up the first coat unevenly.
Moisture limits near a real tree
Do not count on finish alone to protect a decorative shell from standing water. If the sleigh hides a live tree stand, leave access for the basin and keep the wood separated from drips. A sealed finish slows moisture uptake, but it does not turn the shell into a waterproof support.
Common mistakes
The usual problems are a footprint that is too small, joints that depend on screws alone, and runner curves that do not match. All three can make the sleigh look fine at first and then wobble, rack, or tip once the tree is installed.
- Making the opening too tight: leave 2 to 4 inches of extra room so the tree base or hidden stand fits without forcing the frame.
- Skipping glue at the joints: screws hold parts together, but glue helps the structure resist movement over time.
- Ignoring hidden stand clearance: leave space for the basin, cords, and center post if the display holds a real tree.
- Using mismatched runners: trace both sides from the same template and compare them before assembly.
- Relying on the shell for load: the smaller plan is decorative only, and the live tree stand should carry the weight.
A common first-timer mistake is building a sleigh around the tree before checking the base diameter. If the stand is 15 inches across and the shell is only 15 inches across inside, the tree will bind, the finish can scuff, and the final display will sit too high or lean.
Frequently asked questions
How much does a homemade wooden tree stand cost?
Cost depends on local lumber prices, screw counts, glue, and finish. A small version uses 2” x 1” stock, a dowel, and a few screws, so material cost is usually modest if you already own the tools. Larger builds need more stock and hardware.
What tools do I need for a DIY wooden tree stand?
Use a jigsaw for the curved feet, a sander for smoothing the runners and ends, and a circular saw or miter saw for straight cuts on the larger plan. Add a drill or driver, clamps, a tape measure, and a square so the frame stays true.
What wood size do I need for a wooden sleigh tree stand?
The smaller plan uses 2” x 1” softwood timber and 3” x 1” softwood timber with a 15mm dowel. For a larger display shell, common stock sizes are 1×4, 1×6, 1×12, and 2×3. Choose thicker stock when the footprint gets wider.
Can a wooden sleigh tree stand be decorative only?
Yes, and that is the safest use for the smaller plan. Decorative-only means the shell adds holiday style without carrying the tree. If you want a live tree, the wood should hide the actual stand rather than replace it.
Where can I find wooden tree stand plans?
Look for plans that state the intended use, list the cut lengths, and separate the decorative shell from the actual tree base. Plans are most useful when they include footprint dimensions, runner templates, hardware sizes, and a note on whether the build is load-bearing or decorative only.
Sponsored / affiliate links. As an Amazon Associate I earn from qualifying purchases. I may earn additional commission from eligible campaigns.