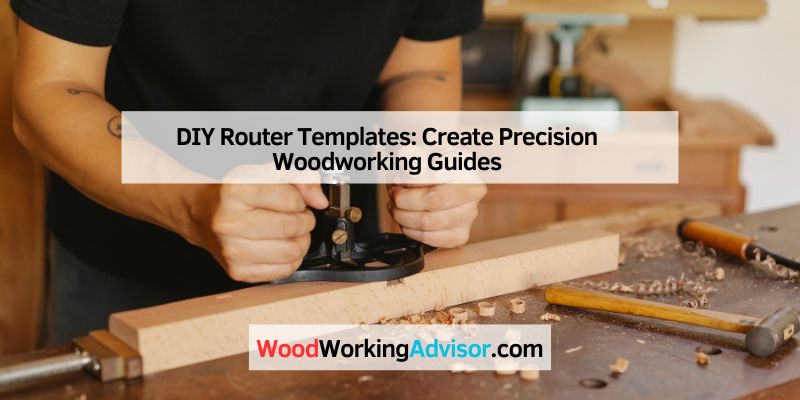
DIY Router Templates: How to Get the Bushing Offset Right
DIY router templates cut accurately only when you account for guide bushing offset — the gap between the bushing’s outer radius and the bit’s radius. Skip that math and a ¾-inch OD bushing paired with a ½-inch bit throws your cut ⅛ inch off, ruining a workpiece. This guide covers material choice (MDF, plywood, or acrylic), the offset formula, and the bearing-guided bit shortcut that skips the math entirely.
Introduction To Router Templates
Best Router Template Guide Bushing Pick

POWERTEC Router Guide Bushing Set, 10-Piece
Ten graduated brass bushing sizes with storage case, sized to fit Porter-Cable-style router sub-bases.
- Best for: Beginners who want a full size range to match almost any bit/offset combo
- Why we picked it: 10 graduated sizes cover the offset math in this guide without buying bushings one at a time
- Main drawback: Fits Porter-Cable-style sub-bases only — check your router’s base pattern first
Compare more router template options
 Option 1 WEN Solid Brass Guide Bushing Set, 11-Piece
|
 Option 2 SpeTool Top-Bearing Flush Trim Bit
|
 Option 3 Clear Polycarbonate Sheet, 1/4″ (24″x48″)
|
As an Amazon Associate we earn from qualifying purchases.
A router template is a rigid pattern — usually MDF, plywood, hardboard, or acrylic — that guides a router bit or guide bushing along a fixed path. It lets you repeat the exact same cut across multiple workpieces without measuring or marking each one by hand.
Templates are worth building whenever you need more than one identical part: signs, cabinet hardware cutouts, inlays, or matching furniture legs. The router follows the template’s edge instead of a hand-drawn line, so every copy comes out the same.
To get started you need a router, a guide bushing or bearing-guided bit, the template material, clamps or double-sided tape to hold the template in place, and standard shop safety gear — goggles and hearing protection.
Choosing The Right Material
Solid wood is cheap and easy to cut but wears down after repeated use and can warp with humidity changes. MDF is the most common choice: it is dense, stable, and holds a crisp edge, though it produces fine dust that calls for a dust mask. Acrylic (cast, not extruded) is clear enough to see your workpiece through the template and holds up to dozens of uses, but it costs more and chips more easily if a bit is dull — see our acrylic router template guide for the full cutting and finishing process.
📊 Template thickness should stay between ¼ inch and ⅜ inch — thick enough for the guide bushing or bearing to ride against without flexing, but not so thick it eats into the router bit’s usable cutting length. — Source: Woodpeck router template guide
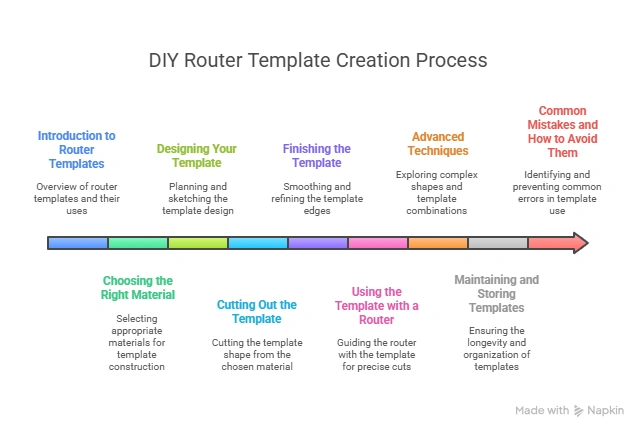
Designing Your Template
Sketch the shape on paper first and check that every dimension matches your project before cutting anything. Tape the paper pattern to your template material and trace the outline with a pencil, then remove the paper — the design is now on the material and ready to cut.
Cutting Out The Template
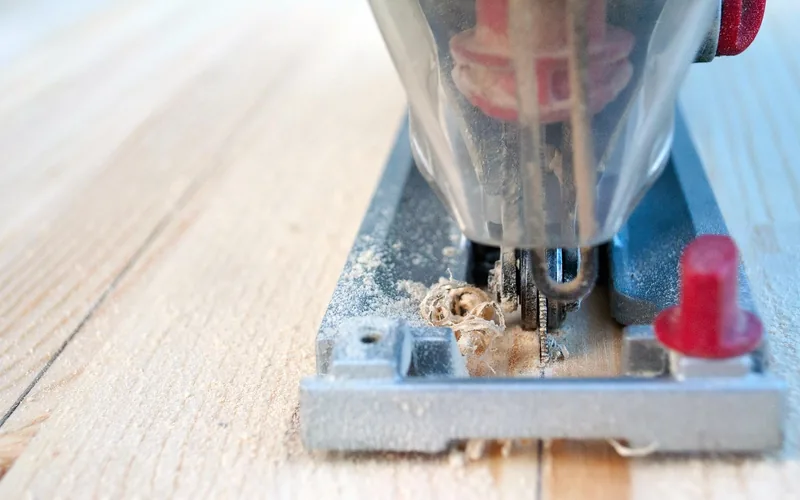
A jigsaw handles curves well: clamp the material to a stable table, cut just outside your line, and keep the blade sharp so it doesn’t wander. A bandsaw or scroll saw gives a straighter cut on thicker stock, and a CNC router (if you have access to one) will cut the outline directly from a digital file with no hand-sanding needed afterward. Whatever tool you use, sand the cut edge smooth — every bump in the template transfers directly into your finished workpiece.
Finishing The Template
Sand the edges starting with a coarse grit and working up to fine grit for a smooth, snag-free profile. A coat of varnish, shellac, or paint seals the surface so the template resists moisture and holds its shape through repeated use.
Using The Template With A Router
Position the template on the workpiece and secure it with clamps or double-sided tape so it cannot shift mid-cut. Mount either a guide bushing in the router’s sub-base or a bearing-guided bit in the collet, then guide the router along the template’s edge at a steady pace — which of those two setups you choose determines whether you need to size the template differently than the finished cut.
Router Template Guide Bushings: How To Calculate The Offset
A guide bushing sits around the router bit and rides against the template edge, which means the bit itself never touches the template — it cuts at a distance equal to the offset: the bushing’s outer radius minus the bit’s radius. Get this wrong and every part comes out the wrong size.
Guide bushing offset is a fixed distance that must be added to or subtracted from your template’s dimensions to compensate for the guide bushing riding outside the bit’s actual cutting circle. For an outside cut you make the template smaller than the finished part by the offset amount; for an inside cut (a mortise or recess) you make the template larger by the same amount.
Illustrative example: with a ¾-inch outer-diameter (OD) guide bushing and a ½-inch-diameter straight bit, the offset works out to (¾″ − ½″) ÷ 2 = ⅛″. Undersize an outside-cut template by ⅛ inch all around, or oversize an inside-cut template by the same ⅛ inch. Always confirm the exact offset for your own bushing-and-bit combination before cutting good stock — bushing and bit sizes vary by brand.
- Measure your bit diameter: Check the router bit’s cutting diameter, not the shank size.
- Measure your bushing’s outer diameter: Read the OD stamped on the guide bushing or listed on its spec sheet.
- Subtract and halve: Offset = (bushing OD − bit diameter) ÷ 2.
- Adjust the template: Undersize an outside-cut template by the offset, or oversize an inside-cut (mortise) template by the same amount.
- Test on scrap: Run a pass on an offcut before cutting the finished workpiece.
A bearing-guided bit — a flush trim or pattern bit with a bearing mounted at the same diameter as the cutting edge — removes the offset calculation entirely. The bearing rides directly on the template edge, so the template is cut to the exact finished size with no math required. The trade-off: bearing-guided bits typically need a bit change between roughing and finishing passes, while a guide bushing works with any straight bit already in the router.
In Our Shop
We always cut a test pass on a scrap offcut before routing the good stock whenever we switch to a new guide bushing and bit pairing — a missed ⅛ inch offset is enough to ruin an otherwise finished workpiece, and scrap costs a lot less than your project stock.
| Setup | Offset Math Needed? | Best For |
|---|---|---|
| Guide bushing + straight bit | Yes — bushing OD minus bit radius | Plunge cuts, mortises, inlays, any bit already on hand |
| Bearing-guided flush trim/pattern bit | No — template is cut to exact finished size | Outside profiling, sign-making, repeat production runs |
Advanced Techniques
These techniques build on the basics once you’re comfortable cutting standard templates.
Creating Complex Shapes
Break a complex outline into simpler sections and cut the big shapes first, then switch to a smaller-diameter bit for fine detail. Take your time on tight curves — a general woodworking template made from a simple pattern is a good way to practice the technique before attempting an intricate design.
Combining Multiple Templates
Layering two or more templates lets you rout overlapping patterns from a single setup. Trace each template in sequence, clamping it steady before every pass, and switch templates only after the router is lifted clear of the workpiece.
Maintaining And Storing Templates
Wipe dust and debris off with a soft brush after every use, and clean stubborn residue with a barely damp cloth — standing water can warp MDF or hardboard templates. Store templates flat in a dry, labeled container so they don’t bend or absorb moisture between projects.
Common Mistakes And How To Avoid Them
The single most common beginner mistake is ignoring guide bushing offset entirely — cutting the template to the exact finished dimensions and wondering why the routed part comes out too small or too large. Always work out the offset (or switch to a bearing-guided bit) before you cut the template, not after.
A loose template shifts mid-cut and ruins the workpiece — clamp it down and double-check it hasn’t moved before every pass. Dull bits tear the wood instead of slicing it cleanly, so keep bits sharp, move the router at a steady pace, and cut with the grain wherever the template shape allows it.
Frequently Asked Questions
What Is The Best Material To Make Router Templates Out Of?
MDF is the most common choice because it is stable, holds a crisp edge, and costs less than acrylic. Plywood and cast acrylic both work well too — acrylic adds the benefit of seeing through the template to line up your workpiece.
How To Make A Template For A Router?
Draw your design on paper, transfer it to MDF, plywood, or acrylic, and cut it out with a jigsaw or bandsaw. Sand the edges smooth, then guide the router along the template using either a guide bushing or a bearing-guided pattern bit.
What Is The Best Thickness For A Router Template?
Between ¼ inch and ⅜ inch. That range gives the guide bushing or bearing enough surface to ride against without unnecessarily shortening the router bit’s usable cutting length.
What Router Bit To Use For Templates?
A flush trim or pattern bit with a bearing matched to the cutting diameter, if you want to skip offset math entirely. If you’re using a straight bit with a guide bushing instead, choose the largest bit your bushing and design allow.
Do I Need To Calculate Offset If I Use A Bearing-Guided Bit?
No. A bearing-guided bit rides directly on the template edge at the same diameter as the cut, so the template is made to the exact finished size. Offset math only applies when you’re using a guide bushing with a straight bit.
What Is Guide Bushing Offset In Router Templates?
Guide bushing offset is the distance between the guide bushing’s outer edge and the router bit’s cutting edge — calculated as the bushing’s outer radius minus the bit’s radius. You size the template larger or smaller than the finished part by that amount, depending on whether you’re cutting an inside or outside edge.
Conclusion
A well-made router template saves time on any project that needs more than one identical part — but only if you account for guide bushing offset or switch to a bearing-guided bit that skips the math. Start with an inexpensive material like MDF, confirm your offset on scrap first, and the templates you build will keep paying off across every future woodworking project that reuses them.
Sponsored / affiliate links. As an Amazon Associate I earn from qualifying purchases. I may earn additional commission from eligible campaigns.