Painted Wood Floor Designs That Transform Any Room Fast
You’re looking to refresh your home. Maybe you’ve got an older house with tired wood floors. Or perhaps you’re just ready for a change.
You see those amazing floor makeovers online. You wonder if you can do that too. It feels like a big, expensive project.
But what if I told you there’s a way to totally change your floor’s look without a huge cost? And what if it could be faster than you think? This guide is all about painted wood floor designs.
We’ll dive deep into how they can transform your space. We’ll cover everything from picking the right paint to making it last. Get ready to see your floors in a whole new light!
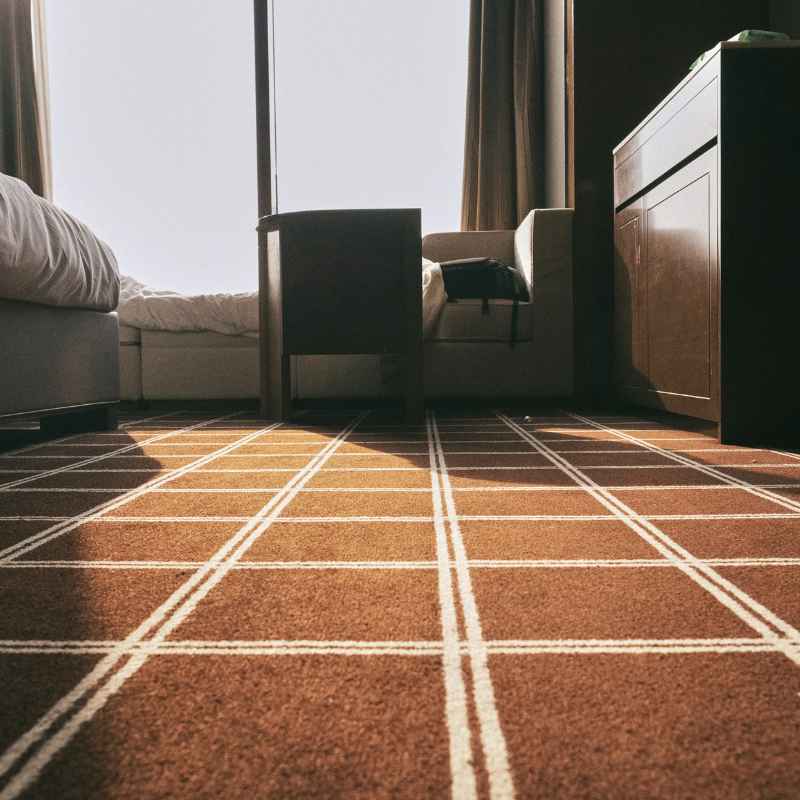
Painted wood floors offer a creative and budget-friendly way to update a room. They allow for endless design possibilities, from simple solid colors to intricate patterns, transforming old or worn floors into a stunning focal point. With the right preparation and materials, painted floors can be both beautiful and durable.
Understanding Painted Wood Floors
Painted wood floors are exactly what they sound like. You paint directly onto a wood floor. This is a great option for many reasons.
It can cover up old, damaged, or unfashionable wood. It’s also much cheaper than replacing the whole floor. Think about it.
New hardwood can cost a lot per square foot. Plus, installation adds more to the price. Painting lets you get a brand new look for a fraction of that cost.
This method is also very versatile. You can choose almost any color. You can go for a simple, solid look.
Or you can get fancy with stencils. You could even create a checkerboard pattern. The design possibilities are almost endless.
It’s a way to show off your personal style in a big way. Your floors become a canvas. They can really set the mood for your whole room.
The biggest question people have is about durability. Will the paint chip? Will it wear away fast?
The answer depends on a few things. It depends on the type of paint you use. It also depends on how well you prep the floor.
And how you seal it afterward is key. With the right steps, painted floors can last for many years. They can hold up to daily life in your home.
My Own Floor Painting Adventure
I remember one project vividly. My client had a small guest bedroom. The original oak floor was okay, but it was scratched up.
It also had a dated orange tone that just felt… blah. She didn’t have a big budget. She loved a modern farmhouse look.
We talked about options. New flooring was out. Refinishing was an option, but still pricey.
Then I suggested painting it. She was a little hesitant. She worried it would look cheap or peel.
We decided to go for a simple two-tone design. The main color was a soft, creamy white. We used a dark charcoal gray for a border.
I spent a weekend prepping the room. Sanding was key. I filled any holes.
I cleaned it all. Then I started with the white base coat. Seeing the room transform with just that first coat was amazing.
The scratches vanished. The orange tone disappeared. The room already felt brighter.
Then came the charcoal gray border. I carefully taped it out. Painting the border gave it such a finished look.
It framed the room. Finally, I applied a good, durable topcoat. It took time.
It involved a lot of patience. But when I saw her face when she walked in… that was worth everything. The room felt brand new.
The floors were the star. She was so happy she took the leap.
Choosing Your Paint
Paint Type Matters: You can’t just grab any old can of paint. You need special floor paint. Or a very durable interior paint.
Look for paints designed for high traffic areas. Many brands offer paints made for wood floors.
Water-Based vs. Oil-Based: Water-based paints are easier to clean up. They dry faster.
Oil-based paints can be very durable. But they smell strong and take longer to dry. For most DIYers, water-based is the way to go.
Primer is Your Friend: Always use a good quality primer. It helps the paint stick better. It also covers up old colors or stains.
A good primer is a must for a long-lasting finish.
Preparing Your Floor: The Most Crucial Step
This is where many DIYers stumble. They rush through this part. They want to get to the fun painting.
But skipping prep work is a recipe for disaster. It means your paint won’t stick. It means it will chip and peel way too soon.
So, let’s talk about how to get it right.
First, you need to clean the floor really well. We’re talking deep clean. Sweep and vacuum first.
Then use a good degreaser. Wood floors can hold onto grease and grime. You need to get all of that off.
If you’re painting over an existing finish, you might need a special cleaner. Read the paint can’s instructions. They often suggest a cleaner.
Next is sanding. Even if you’re painting, you often need to lightly sand. This is called scuff sanding.
It creates a surface for the primer to grab onto. You don’t need to take off the old finish. Just a light pass with medium-grit sandpaper.
Maybe 100 or 120 grit. Use a pole sander for floors. It makes the job much easier.
Make sure to wear a mask and safety glasses.
After sanding, you have to clean up all the dust. Vacuum thoroughly. Then use a tack cloth.
A tack cloth is sticky. It picks up fine dust particles. You can’t see them, but they’re there.
Getting all the dust off is vital. Dust under the paint means a weak bond.
Next, fill any holes or cracks. Use a wood filler that can be painted. Let it dry completely.
Then sand it smooth. Make sure it’s level with the floor. If there are deep gouges, you might need to fill them too.
Again, let it dry and sand smooth.
Finally, do a last clean-up. Vacuum again. Use a tack cloth again.
You want a perfectly clean surface before you even think about primer.
Quick Prep Checklist
- Clean: Vacuum, then use a degreaser.
- Scuff Sand: Lightly sand with 100-120 grit.
- Dust Off: Vacuum and use a tack cloth.
- Fill Holes: Use paintable wood filler. Sand smooth.
- Final Clean: Vacuum and tack cloth again.
Painting Techniques for Beautiful Floors
Once your floor is prepped, it’s time to paint. This is the fun part! But there are some techniques to make it look professional.
Start with the primer. Apply one or two coats. Let each coat dry fully.
Follow the paint can’s directions for drying times. Good ventilation is important here. Open windows.
Use fans if needed.
Now for the color coats. Most floor paints need at least two coats. Apply the paint evenly.
Don’t try to put it on too thick. Thin, even coats dry better. They also last longer.
Use a good quality roller for this. A good nap roller will give you a smooth finish. For edges and corners, use a good quality brush.
Be careful not to leave brush strokes.
If you’re doing a solid color, this is mostly it. But if you want designs, this is where it gets interesting.
Solid Color Magic
A solid color can be incredibly striking. A deep navy blue can make a bedroom feel cozy. A crisp white can make a small space feel huge.
A soft gray is always elegant. The key is a flawless application. Take your time with each coat.
Ensure no streaks or missed spots.
Stencil Designs: Adding Personality
Stencils are a fantastic way to add detail. You can buy pre-made stencils. Or you can cut your own.
Think about patterns. Geometric shapes look great. Moroccan-inspired designs are popular.
Even a simple floral stencil can add charm.
When using a stencil, don’t overload your brush or roller. You want to avoid paint bleeding under the stencil. Use a stencil brush or a small foam roller.
Dab or roll lightly. Work in small sections. Carefully lift the stencil.
Let the paint dry a bit before moving the stencil. Patience is key here.
You can use one stencil all over. Or you can create a pattern. You could even combine different stencils.
Imagine a main color with a scattered stencil motif.
Checkerboard and Geometric Patterns
Checkerboard floors are classic. They give a bold, graphic look. You can achieve this with tape.
Plan out your squares carefully. Use painter’s tape to mask off the squares you want to paint the second color. Make sure the tape is pressed down firmly.
Then paint. When the paint is dry, remove the tape. This takes precision.
Measure twice, cut once applies here!
Other geometric patterns can be made with tape too. Think stripes. Think diamonds.
Think chevrons. The more complex the pattern, the more time and tape you’ll need. But the result can be stunning.
Creating a Two-Tone Look
A simple two-tone look can also be very effective. This is what I did in the guest bedroom story. You can paint the majority of the floor one color.
Then add a border in a contrasting color. This frames the room nicely. It adds definition.
It’s a bit easier than full-on patterns but still adds visual interest.
Painting Tips for a Smooth Finish
- Use the Right Tools: Good quality rollers and brushes make a huge difference.
- Thin Coats are Best: Avoid thick, gloppy paint.
- Work in Sections: Don’t try to paint the whole floor at once.
- Let it Dry: Respect the drying times between coats.
- Ventilate Well: Keep the air moving.
Sealing Your Painted Floor: The Protective Layer
This is the second most important step after prep. Sealing protects your paint. It makes it washable.
It makes it more durable. Without a good topcoat, your beautiful painted floor won’t last long. It will scratch easily.
It will get dirty fast.
You need a clear protective sealer. Look for a water-based polyurethane. Make sure it’s suitable for floors.
Some are for walls only. You want one that can handle foot traffic.
There are different finishes. You can choose matte, satin, or gloss. Matte finishes hide imperfections best.
Satin offers a slight sheen. Gloss is very shiny. For a more natural wood look, matte or satin is usually best.
Gloss can show every scratch and dust bunny.
Apply the sealer in thin, even coats. Just like with the paint, don’t apply it too thick. Use a good quality brush or roller made for polyurethanes.
Follow the product’s instructions for drying times. You’ll likely need at least two or three coats.
Let the sealer cure fully before putting furniture back. Curing is different from drying. Drying means it’s dry to the touch.
Curing means it has reached its maximum hardness. This can take several days, even up to a week. Check the product label.
Rushing this step can damage your new floor.
Sealer vs. Wax
Polyurethane: This is the most common and durable option for painted floors. It creates a hard, protective layer.
Wax: Some people use wax, especially over oil-based paints or for a very specific look. However, wax is less durable than polyurethane. It needs frequent reapplication and can be slippery.
Recommendation: For most painted wood floors, a good quality water-based polyurethane is recommended for longevity and ease of care.
Popular Painted Wood Floor Design Ideas
Let’s explore some of the looks people are loving right now. These designs can transform the feel of any room.
The Classic Solid Color
Sometimes, simple is best. A uniform color can be very sophisticated. Think about a soft, warm white for a beach house vibe.
Or a deep, moody gray for a modern den. Black can be dramatic and chic. Light, airy blues or greens can create a calming atmosphere in a bedroom or nursery.
The key is choosing a color that complements your existing decor and the room’s natural light.
Modern Geometric Patterns
Geometric designs are huge. Think bold lines, sharp angles, and repeating shapes. You can create a floor that looks like a modern art piece.
Hexagons, triangles, and squares can be combined in endless ways. This works particularly well in entryways or dining rooms where the floor can be a statement.
Rustic Farmhouse Style
This is a very popular look. Think distressed finishes, muted colors, and a slightly worn appearance. You can achieve a farmhouse look by using a lighter base color, like white or light gray.
Then, you can lightly distress it with sandpaper in areas where wear would naturally occur. Or you can use a glaze to give it an aged feel.
Checkerboard Charm
The checkerboard pattern is timeless. It’s been around for ages. It works in kitchens, bathrooms, and even living areas.
You can go for the traditional black and white. Or you can try colors like navy and white, gray and white, or even a muted pastel pair. It adds instant personality and a vintage feel.
Stenciled Wonders
Stencils offer so much freedom. You can mimic expensive tile patterns. You can add intricate floral designs.
You can create borders that look like custom millwork. The possibilities are truly vast. It’s a great way to add detail without the cost of actual tile or complex woodworking.
Faux Finishes
Want a marble look? Or a concrete look? You can actually achieve these with paint and some clever techniques.
This requires more advanced painting skills. But the results can be incredibly realistic and unique. Think of the impact of a painted marble entryway.
Design Idea Snapshot
- Color Palette: Neutrals (whites, grays, beiges) are safest. Bold colors (blues, greens, blacks) make a statement. Pastels add softness.
- Pattern Style: Geometric, floral, tribal, or classic (like checkerboard).
- Finish Type: Matte hides imperfections. Satin adds a soft sheen. Gloss is bold but shows wear.
Real-World Context and Scenarios
Painted wood floors fit into many homes. They are a practical choice for several reasons. Let’s look at where and why they work.
Kitchens: Durability is Key
Kitchens see a lot of action. Spills, dropped food, constant foot traffic. This is why prep and sealing are so vital here.
A well-sealed painted floor can hold up. Opt for a durable, matte or satin polyurethane. Avoid glossy finishes that show every spot.
Colors like a medium gray or a muted blue can hide minor dirt well.
Bathrooms: Moisture Concerns
Bathrooms have humidity and water splashes. You need to be extra careful here. Ensure excellent ventilation.
Use a high-quality, moisture-resistant primer and paint. And seal it with multiple coats of durable polyurethane. A high-gloss finish might seem good for water, but it can be very slippery when wet.
Matte or satin is safer.
Living Rooms and Dining Rooms: Style Statements
These rooms are often more about looks. You can be a bit more adventurous with designs. A bold geometric pattern or a beautiful stencil can elevate the entire room.
Since traffic might be less intense than a kitchen, you might have more design freedom. Consider a more intricate pattern here.
Bedrooms: Creating a Calm Oasis
Bedrooms are for relaxing. Soft, muted colors work best. Whites, creams, light grays, or gentle pastels can create a serene atmosphere.
A simple solid color can make the room feel larger and more peaceful. The focus can then be on bedding and decor.
Hallways and Entryways: High-Traffic Zones
These are the first areas guests see. They also get the most wear and tear. Durability is paramount.
A solid, darker color can hide scuffs and dirt better. Or a well-sealed geometric pattern can handle the traffic. Again, multiple coats of a tough sealer are essential.
Factors to Consider
- Traffic Level: How many people walk on the floor daily?
- Moisture: Is the room prone to humidity or spills?
- Light: How much natural light does the room get? Light colors reflect light.
- Your Style: What look are you going for?
What This Means for Your Home
So, what’s the takeaway? Painted wood floors aren’t just a trendy fix. They’re a practical, stylish, and budget-friendly solution for many homeowners.
They offer a way to completely change the look and feel of a room. They can hide flaws in old wood floors. They can be a blank canvas for your creativity.
When is it a good idea? If you have a floor that’s damaged beyond simple repair but still structurally sound. If you’re on a tight budget but want a significant aesthetic upgrade.
If you love unique designs and want your home to reflect your personality.
When might it not be the best idea? If your floor is in perfect condition and you love the natural wood. If you’re looking for a floor that requires absolutely zero maintenance.
Even painted floors need some care. If you’re not willing to do the proper prep work, you’ll likely be disappointed with the results.
A simple check is to look at the wood itself. Is it structurally sound? Are there major rot issues?
If so, painting won’t fix those. But for cosmetic issues, it’s a fantastic option. The key is to manage expectations.
It’s a DIY project that requires patience and attention to detail. But the reward is a beautiful, custom floor.
Quick Tips for Longevity
Once your painted floor is done and cured, how do you keep it looking good?
Gentle Cleaning: Avoid harsh chemical cleaners. Use a damp mop with a pH-neutral cleaner. Never use too much water.
Water is the enemy of wood floors, even painted ones.
Protect Furniture: Use felt pads under all furniture legs. This prevents scratches. Lift furniture when moving it.
Don’t drag heavy items.
Wipe Spills Quickly: Don’t let liquids sit on the floor. Mop them up right away.
Entry Mats: Place mats at all entrances. This catches dirt and grit before it gets tracked onto your floors. A mat inside and outside the door is ideal.
Avoid High Heels: Stiletto heels can dent and scratch even the most durable finish. If you wear them indoors, consider a different pair.
Regular Inspections: Every few months, look for any areas that might be starting to show wear. A quick touch-up with sealer might be needed in high-traffic spots.
Maintenance Dos and Don’ts
- DO: Use soft-bristled brooms and vacuums with the brush attachment off.
- DO: Damp mop regularly.
- DO: Reapply a protective topcoat every 3-5 years, depending on traffic.
- DON’T: Use abrasive cleaners or steel wool.
- DON’T: Let spills sit.
- DON’T: Use steam mops, as excessive heat and moisture can damage the finish.
Frequently Asked Questions About Painted Wood Floors
Can I paint over a vinyl floor? No, this article is about painted wood floors.
This guide focuses specifically on painting existing wood floors. Vinyl floors have different preparation and painting requirements.
How long does painted wood flooring last?
With proper preparation, good quality paint, and at least two coats of durable polyurethane sealer, a painted wood floor can last 5-10 years or even longer. High-traffic areas might show wear sooner and may require a touch-up of the sealer every 3-5 years.
Is painting a wood floor a good idea for pets?
Yes, painted wood floors can be a good option for homes with pets, provided they are properly prepped and sealed. Use a durable, water-based polyurethane topcoat. Regular cleaning to wipe up accidents quickly is important.
Some owners find that matte finishes hide pet hair and claw marks better than glossier options.
Do I need to sand my wood floors before painting?
Yes, light sanding, often called “scuff sanding,” is usually necessary. This creates a slightly rough surface that helps the primer and paint adhere better. You do not typically need to strip off all the old finish unless it’s in very bad condition.
Always clean thoroughly after sanding to remove all dust.
What kind of paint should I use on wood floors?
You should use a paint specifically designed for floors or a high-quality interior paint formulated for high-traffic areas. Many brands offer durable floor paints in latex (water-based) or oil-based formulas. Always use a good primer designed for wood surfaces first, and always seal the painted floor with a durable polyurethane topcoat.
Can I use a roller for painting floors?
Yes, a roller is ideal for painting the main areas of your wood floor. Use a high-density foam roller or a good quality short-nap roller for a smooth finish. For edges and corners, a good quality angled paintbrush is best.
Ensure you apply paint in thin, even coats.
Conclusion
Transforming your home with painted wood floors is entirely within reach. It’s a journey that rewards patience and careful steps. From picking the perfect color to the final protective coat, each stage matters.
Embrace the process. You’ll end up with a floor that’s not only beautiful but also a true reflection of your home and your style.