How to Add Center Support to a Bed Frame (Leg vs. Rail)
Center support keeps the middle of a queen or king bed frame from sagging under the combined weight of the mattress and sleepers – and on any frame wider than a full/double, it usually isn’t optional. Kingsdown, Simmons, King Koil, and Dorel Home all state in their own warranty documents that a queen or king frame needs a rigid center support with a leg resting on the floor, or a broken frame/slat isn’t covered.
This guide covers the two real ways to add it: a standalone adjustable support leg you can install in about 20 minutes, or a full wood center rail with a leg attached, which is more work but handles heavier setups better. Pick whichever fits your frame, then follow the steps below. For the rest of the frame’s joints, pair this with our guide to reinforcing a bed frame.
Why Queen and King Frames Need Center Support
A full/double frame is narrow enough that the two side rails alone can carry a mattress without much flex. Once a frame gets wider than about 60 inches – queen, king, and California king – those same side rails start to bow under the center of the mattress, where a sleeper’s weight concentrates. It’s rarely a sudden collapse. It’s cumulative: the rails flex a little more each night, the slats sitting on them start to crack or pop out of their brackets, and eventually the mattress develops a permanent dip even after you fix the frame.
That’s why it shows up in the fine print of most mattress warranties, not just as advice. A few real examples pulled directly from manufacturer support pages:
- Kingsdown: requires a frame with a center support and a center leg resting firmly on the floor, or five rigid cross slats with a center leg – an unsupported frame voids the warranty.
- Simmons: for any queen or king frame without a metal center support, requires at least five hardwood or metal slats (1″x4″) with legs added under the three center slats.
- King Koil: specifies a proper bed frame with a center support beam as a requirement on queen and king sets.
- Dorel Home: calls for a rigid center support with at least five legs and three cross slats on queen and king mattresses.
The exact numbers vary by brand, which is the real point: check your own frame and mattress manufacturer’s instructions rather than assuming “it’s held up fine so far” is proof it’s built correctly – the damage from a missing center support is gradual, and it usually shows up as a mattress problem long after the frame is the actual cause.
Best Adjustable Center Support Leg
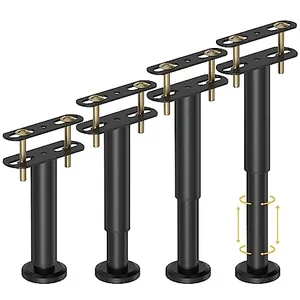 |
Adjustable Bed Frame Center Support Legs (4-Pack) – $28.99 Height-adjustable steel legs let you add code-required center support to almost any frame without measuring and cutting a custom rail.
|
Center Leg vs. Full Center Rail: Which One Fits Your Frame
There are two legitimate ways to solve this, and which one makes sense depends on what your frame already has.
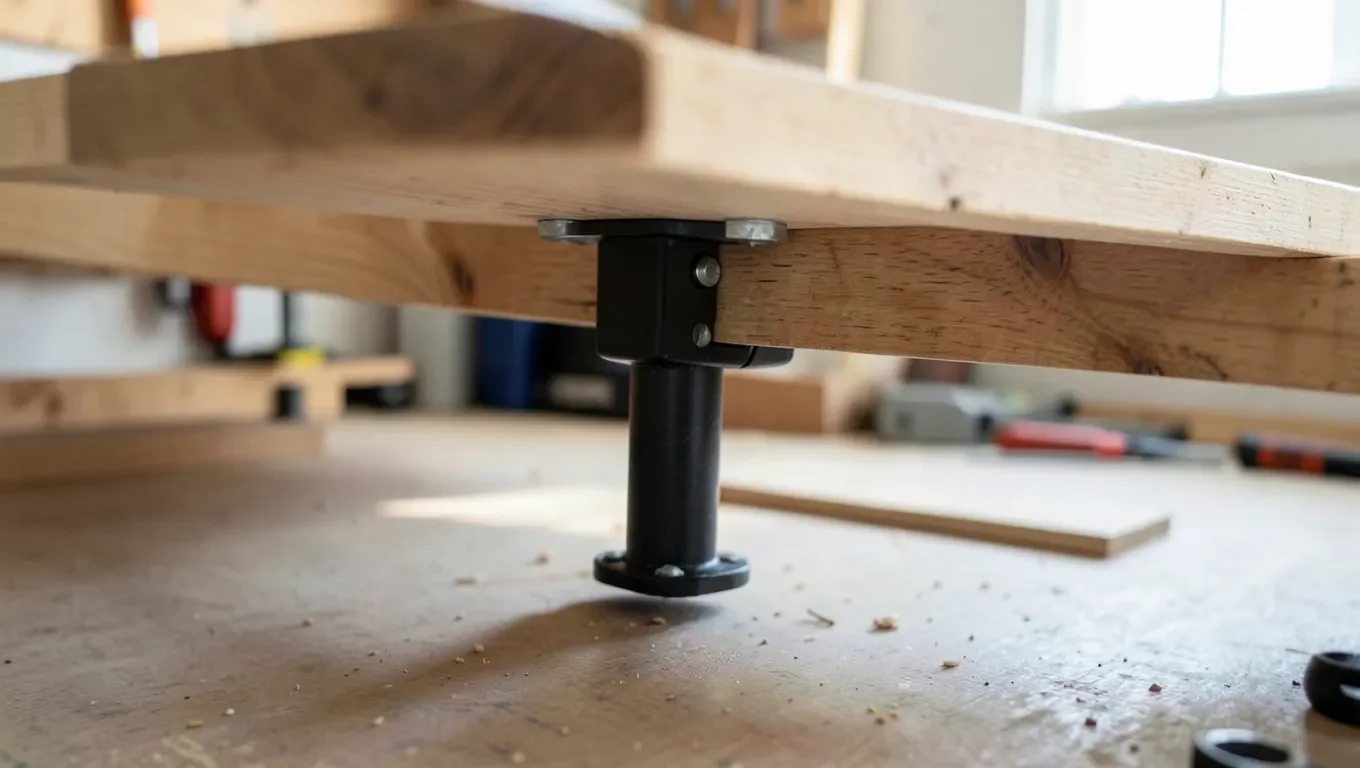
A single adjustable support leg (or a set of them, one under each center slat) bolts or clamps directly to an existing center slat or crossbar. It’s the faster fix, works well if your frame already has a center slat that just needs a leg under it, and an adjustable model lets you match the exact height of your side rails without cutting anything. The tradeoff: it’s only as strong as the slat or bar you’re attaching it to.
A full center rail – a single length of lumber running the entire head-to-foot length of the frame, with one or more legs attached along it – spreads the load across the whole rail instead of one slat. It’s the more robust option for heavier setups (a thick memory-foam or hybrid mattress plus two adults), and it’s what most manufacturer diagrams show for king-size frames specifically. It takes longer to build because you’re cutting lumber to length, but it doesn’t depend on the strength of your existing slats.
If your frame has no center slat or crossbar at all, build the rail. If it already has one crossbar down the middle and just needs a leg, the adjustable leg is the quicker, equally valid fix.
Tools and Materials You’ll Need
Both approaches use mostly the same tools. For the wood rail, you’ll also need lumber.
- Drill/driver with bits sized for your screws
- Tape measure and pencil
- Level
- For a wood rail: a 2×4 or 2×6, cut to run the full length of the frame – a hardwood like oak or maple resists sag better than pine over years of use, though pine is fine for lighter mattresses
- Wood screws (for a wood frame) or bolts and nuts (for a metal frame)
- One or more adjustable or fixed support legs
- Wood glue, if building a rail from solid lumber
How to Build a Wood Center Rail with a Support Leg
- Measure the full head-to-foot length inside the frame. Cut your 2×4 or 2×6 to that length, minus about 1/4 inch so it isn’t wedged too tight to install.
- Rest the rail on the frame’s headboard and footboard cleats (or wherever the existing slats terminate) so it runs perpendicular to the slats, down the center.
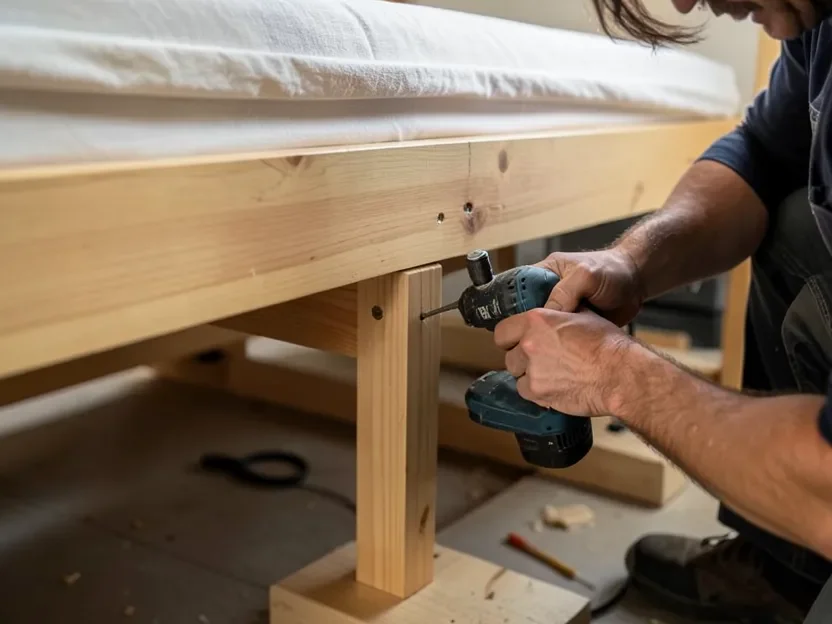
- Attach the leg (or legs – see the spacing guidance below) to the underside of the rail with screws through the leg’s mounting plate. If you’re using an adjustable leg, do this loosely first so you can fine-tune the height once it’s under load.
- Set the rail in place and adjust the leg height until it just touches the floor with the rail level – use your level across the rail to confirm, and check it against the height of the side rails too.
- Drill pilot holes and screw (or bolt, on a metal frame) the rail to the frame’s end cleats so it can’t shift side to side.
- Push down firmly on the center of the rail to test it. It should not flex more than the side rails do.
How to Install a Standalone Adjustable Support Leg
If your frame already has a center slat or crossbar and just needs a leg under it, this is a 15-20 minute job.
- Find the true center point of the frame, both lengthwise and side-to-side.
- Hold the leg’s mounting bracket against the underside of the center slat or crossbar at that point.
- Mark and drill pilot holes, then bolt or screw the bracket in place – most adjustable legs include both a drill-mount plate and a no-drill clamp option.
- Extend the leg until it contacts the floor, then keep turning until you feel resistance – you want it bearing weight, not just touching.
- Check with a level that the frame hasn’t been pushed out of level by an over-tightened leg, and back it off slightly if so.
How Many Legs and Where They Go
This is where a lot of DIY installs fall short – one leg dead center is the minimum, not necessarily the correct number. Manufacturer specs like Simmons’ and Dorel Home’s five-leg standard (the four corner legs already on most frames plus one center leg) assume the load is spread across a rail or multiple cross slats, not a single point.
| Bed Size | Minimum Center Legs | Typical Spacing |
|---|---|---|
| Full/Double | Usually none required | – |
| Queen | 1 (2 for heavier mattresses) | Centered, or split evenly if using 2 |
| King / Cal King | 2-3 | Spaced evenly along the rail’s length |
This is a general starting point, not a universal rule – a heavier hybrid or memory-foam mattress, a heavier sleeper, or a frame with thinner slats all push toward more support, not less. When in doubt, check the actual instructions for your specific bed frame model rather than assuming one leg is enough because it “seems sturdy.”
Testing Your Support and Common Mistakes
Once everything is installed, sit on the center of the bed (not just push on the rail with your hand) and feel for flex compared to sitting near the edges. A properly supported center shouldn’t feel noticeably softer than the sides. A few mistakes that undo the fix:
- Leg not actually touching the floor. An adjustable leg that’s a hair short isn’t providing support at all until the rail sags enough to reach it – by then the frame has already started to bend.
- Rail attached only at the ends, unsupported in the middle before the leg goes on. Install the leg before you fully load the bed, not after you notice sagging.
- Screwing into end grain only. Pilot holes into the narrow end of a board split more easily than holes into the face – use screws long enough to bite into solid wood, and glue helps on a wood-to-wood joint.
Maintenance: Check It Every Few Months
A center support isn’t a one-time install and forget. Adjustable legs can work loose from vibration over months of use, and wood joints can shrink slightly as the lumber dries out further. Every 3-6 months, get under the bed and check that the leg is still snug against the floor, the rail’s screws haven’t backed out, and there’s no new squeaking when someone shifts weight on the mattress. Tighten as needed – it’s a five-minute check against a problem that’s expensive to fix once the frame or slats actually crack.
Frequently Asked Questions
Do I actually need center support, or is it optional?
If your bed frame is a queen, king, or California king (anything wider than a full/double), most mattress manufacturers require center support to keep the warranty valid, and it’s a real structural need, not just a suggestion. Check your specific frame and mattress instructions, since the exact leg/slat count required varies by brand.
Should I build a wood rail or just add a support leg?
If your frame already has a center slat or crossbar that just needs a leg under it, an adjustable support leg is faster and works well. If there’s no center crossbar at all, or you have a heavier mattress and frame, build a full-length wood rail with a leg attached – it spreads the load instead of relying on one slat.
How much weight can a center support hold?
It depends entirely on the specific leg or rail, not a single number that applies to every setup – for reference, one commonly sold adjustable steel bed support leg is rated for around 620 pounds per leg, but a thin wood leg or an undersized rail will hold far less. Check the load rating of the specific hardware you buy, and remember the total load is the mattress plus every sleeper on it, not just the mattress alone.
Can I use a standalone leg without any rail at all?
Only if the leg attaches to something rigid, like an existing center crossbar or a thick center slat – a leg pressed against a thin slat with no crossbar behind it can still let that slat flex or crack. If your frame has nothing solid running down the center, build the rail first, then add the leg to it.
Sponsored / affiliate links. As an Amazon Associate I earn from qualifying purchases. I may earn additional commission from eligible campaigns.