How to Mount a Mirror in a Wood Frame (3 Reliable Methods)
To mount a mirror in a wood frame, pick one attachment method up front – mirror clips, a bead of silicone adhesive, or a plywood backing board – based on the mirror’s weight, then hang the finished frame with a D-ring and picture wire (light mirrors) or a French cleat and wall anchors into studs (mirrors over 15 lbs).
Most tutorials only show one of those three attachment methods and skip the part that actually causes failures: matching the method to the mirror’s weight and the frame’s rebate depth. A quarter-inch mirror clipped into a 3/8″ deep rebate with nothing behind it will rattle loose within a year. This guide covers all three attachment methods side by side, including the plywood-backing approach that most home-improvement sites leave out entirely, plus the exact wire and anchor spacing for hanging the finished piece safely.
What You’ll Need Before You Start
Best Mirror Mounting Clips For This Project
 |
16-Pc Stainless Steel Mirror Holder Clips – $9.99 The fastest, most forgiving way to seat a mirror in a wood frame – no cure time, no risk of a bad adhesive attacking the mirror’s silver backing.
|
Gather everything before you start so you’re not stopping mid-project to search for a stud finder. Beyond the frame and mirror themselves, you’ll want:
| Item | Why It Matters |
|---|---|
| Mirror clips or 100% silicone/mirror mastic | Your chosen attachment method – pick one, not both, per mirror edge |
| 1/4″ plywood (cut 1/2″ smaller than the frame opening) | Optional backing that spreads the mirror’s weight across the whole frame instead of just the edges |
| Painter’s tape | Holds a mitered frame square while glue or clips go in |
| Level | Confirms the mirror sits flat before anything cures or gets screwed down |
| Stud finder | Locates studs for anything over roughly 15 lbs – drywall anchors alone aren’t rated for it |
| D-ring hangers or a French cleat | The actual wall-mounting hardware, chosen by weight (see the hanging section below) |
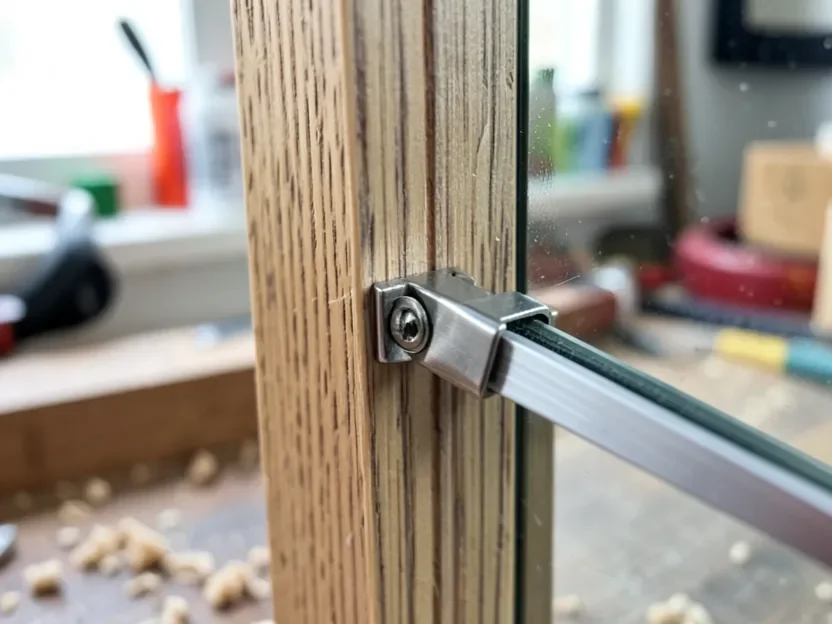
Method 1: Mirror Clips (Fastest, No Cure Time)
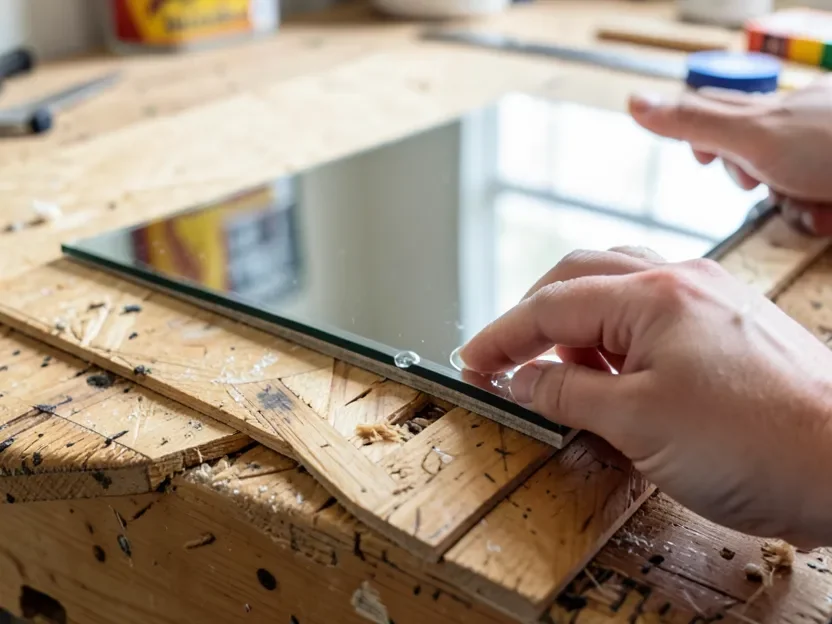
Clips are the right call when you want the mirror in and ready to hang the same day. Center the mirror in the frame opening first – measure the gap on all four sides before you drive a single screw, because a mirror that’s even 1/8″ off-center will be obvious once the frame is on the wall.
Space clips evenly: two per side is the minimum for anything under 16″x20″, three per side above that. Drive each clip’s screw until it’s snug against the mirror’s face, not tight – over-tightening a J-clip is the single most common way people crack the corner of a mirror during this step. If a clip has a rubber pad, make sure it’s seated between the metal and the glass on every clip, not just some of them; bare metal against glass will chip the edge the first time the frame gets bumped.
Method 2: Silicone Adhesive (Cleanest Look)
Adhesive hides completely once it cures, which is why it’s the go-to for a frame you want to look seamless from the front. The material matters more than the technique here: use 100% silicone sealant or a purpose-made mirror mastic only. Liquid Nails, cyanoacrylate super glue, and anything labeled “construction adhesive” contain solvents that attack a mirror’s silver backing from behind, and the damage – a cloudy, spreading patch – doesn’t show up for weeks, by which point the frame is already on the wall.
Run beads of adhesive every 3 to 4 inches around the inside of the frame’s rebate, keeping each bead flush with the back so it doesn’t squeeze out the front when you set the mirror in. Press the mirror in evenly, wipe any squeeze-out immediately with a dry cloth, then let it sit flat for a full 12 to 24 hours before moving or hanging the frame – silicone skins over in under an hour but doesn’t reach real handling strength until it’s cured through, and a frame that gets tilted or hung too early can let the mirror slide before the bond sets. For a closer look at which specific adhesive products are safe versus which ones will damage the mirror’s backing, see our guide to choosing the right mirror adhesive glue.
Method 3: Plywood Backing (Best For Larger Or Heavier Mirrors)
This is the method most guides skip, and it’s the one that actually keeps a larger mirror from sagging or cracking over time. Instead of relying on clips or adhesive to carry the mirror’s full weight against the frame alone, you glue the mirror to a rigid plywood panel first, then the panel – not the glass – bears the load against the frame.
Cut a piece of 1/4″ plywood about 1/2″ smaller than the frame opening on every side, so the plywood edge stays hidden behind the frame’s lip instead of peeking out. Run a few small dabs (not a full bead) of the same 100% silicone in the center of the plywood, set the mirror onto it, and weight it evenly while it cures. Once cured, that plywood-backed mirror drops into the frame and gets secured with clips or a few small screws driven through the frame’s back edge into the plywood – now the frame’s whole backing plane is doing the structural work, not four small clip points.
Hanging The Frame On The Wall
How you hang the frame depends almost entirely on weight, not on which attachment method you used inside it. For a light frame under about 15 lbs, install a screw eye into each side stile roughly 3 inches down from the top rail, thread a 36-inch length of picture-hanging wire through both eyes, wrap it around itself two or three times to lock it off, and hang it from a single wall hook rated for the mirror’s weight.
For anything heavier – and a plywood-backed mirror in a solid wood frame adds up faster than people expect – skip wire entirely. Use a stud finder to locate at least one stud, and mount either a pair of D-ring hangers screwed into studs or a French cleat (one half on the frame, one half screwed level into the wall). A French cleat is the more forgiving option for anything over 25 lbs, since it distributes weight along a full horizontal bracket instead of two small points. If you can’t hit a stud where you need the mirror centered, use toggle bolts rated for at least double the frame’s actual weight – a standard plastic drywall anchor is not rated for a framed mirror.
Maintenance And Long-Term Care
Clean the glass with a soft microfiber cloth and a mild glass cleaner sprayed onto the cloth, never directly onto the mirror – overspray that runs down behind the frame is exactly what eats into a silicone bond or a clip’s rubber pad over time. Wipe the wood frame dry with a separate cloth and keep the whole piece out of high-humidity rooms unless the frame has a sealed or painted finish; unsealed wood next to a humid bathroom will warp slightly at the miters long before the mirror itself fails.
Check the back every six months or so on anything hung with clips – a clip screw can work loose from vibration (a door slamming nearby, foot traffic on the floor above) well before it’s visually obvious from the front.
Frequently Asked Questions
Should I use clips, adhesive, or a plywood backing to mount my mirror?
Use clips for a fast, no-cure-time install on a smaller mirror where visible clips aren’t a problem. Use silicone adhesive when you want a clean, seamless look and can wait 12 to 24 hours for it to cure. Use a plywood backing for anything larger or heavier, since it’s the only method that spreads the mirror’s weight across the full frame instead of a handful of edge points.
What adhesive is safe to use directly on a mirror?
Only 100% silicone sealant or a purpose-made mirror mastic. Liquid Nails, cyanoacrylate super glue, and general construction adhesives contain solvents that attack the mirror’s silver backing from behind and cause cloudy patches that can take weeks to appear.
How do I hang a heavy wood-framed mirror safely?
For anything over about 15 lbs, skip picture wire and use D-ring hangers or a French cleat mounted into at least one wall stud. A French cleat is the better choice above roughly 25 lbs because it spreads the load along a full bracket. If you can’t hit a stud, use toggle bolts rated for at least double the frame’s actual weight.
Why did my mirror clips come loose after a few months?
Clip screws can back out slowly from ordinary household vibration, like a nearby door closing or foot traffic overhead. It’s rarely visible from the front until the mirror shifts, so check the back of any clip-mounted mirror every six months and snug any screws that have loosened.
Conclusion
The method you pick – clips, adhesive, or a plywood backing – should come from the mirror’s weight and how much cure time you’re willing to wait on, not just whichever one a tutorial happened to show first. Match the wall hardware to that same weight, hit a stud whenever the mirror is heavier than a picture-wire hook can handle, and check clip-mounted mirrors periodically for a screw that’s worked loose. Do that and the frame goes up once and stays up.
Sponsored / affiliate links. As an Amazon Associate I earn from qualifying purchases. I may earn additional commission from eligible campaigns.