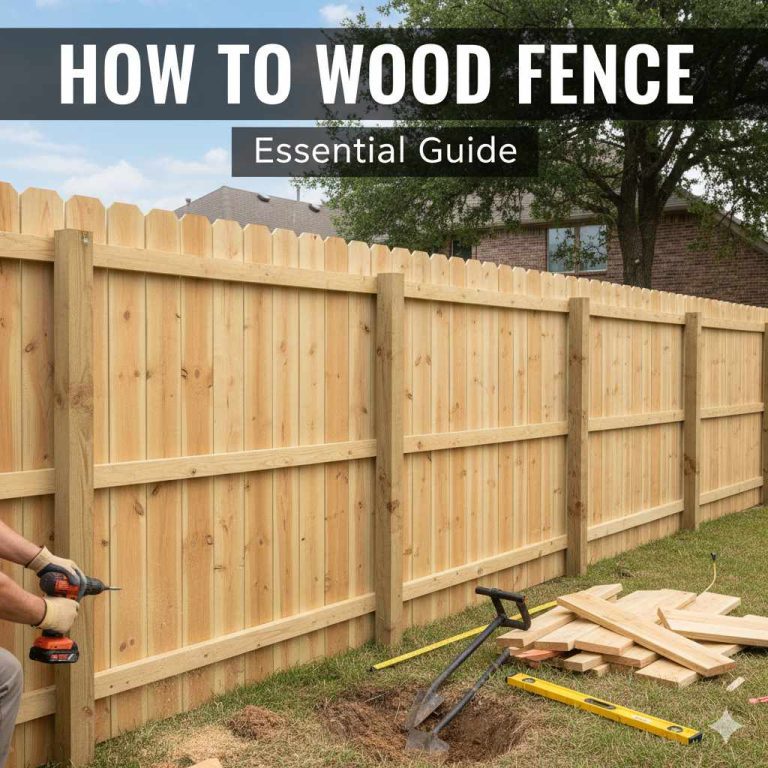
How to Make a Wooden Urn for Ashes: A Step-by-Step Guide
Cut a box from 3/4″ hardwood with interior volume of at least 200 cubic inches (1 cu in per pound of body weight). Glue and nail the sides, attach a screw-off bottom panel, sand to 220-grit, and finish with 2-3 coats of clear polyurethane. Total build time: 4-8 hours for a beginner.
A homemade wooden urn costs $15-$60 in materials — versus $150-$600 for a retail urn. Every cut you make carries meaning. This guide covers the complete process: lumber selection, a free cut list, assembly sequence, lid options, and finishing — everything you need to build a dignified, lasting tribute.
Introduction To Crafting A Wooden Urn
Making a wooden urn can be a beautiful tribute. It allows for a personal touch that honors a loved one. Choosing the right wood adds character and warmth. Each urn tells a unique story.
Gather materials like wood, wood glue, and sandpaper. Use tools such as a saw, drill, and chisel. Having the right tools makes the process easier and more enjoyable.
| Materials | Tools |
|---|---|
| Wood (Oak, Pine, etc.) | Saw |
| Wood Glue | Drill |
| Sandpaper | Chisel |
| Finish (Varnish, Oil) | Screwdriver |
Designing Your Urn
Choosing the right wood is vital for your urn. Hardwoods like oak and maple are durable. Softwoods like pine can be easier to work with. Select wood that resonates with you.
Sketch your design on paper. This helps visualize your urn. Consider the shape and style you prefer. Think about decorative elements to include.
Dimensions are important for capacity. Measure the volume of ashes you need to hold. A standard urn is about 200 cubic inches. Adjust size based on your needs.
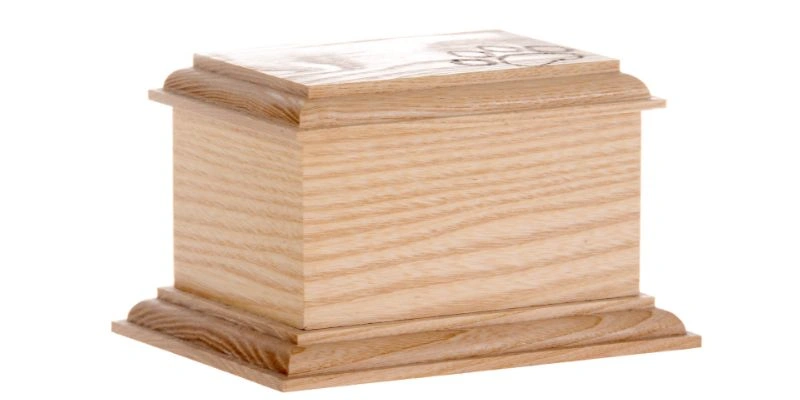
Wooden Urn Box Plans: Dimensions and Cut List
The simplest DIY urn style is a rectangular box — no lathe, no router required. Use these measurements as your free wooden urn plans:
| Piece | Dimensions (finished) | Qty | Notes |
|---|---|---|---|
| Front / Back | 10″ x 6.5″ x 3/4″ | 2 | Long grain faces out |
| Left / Right sides | 7″ x 6.5″ x 3/4″ | 2 | Grain runs vertical |
| Top (lid) | 11.5″ x 8.5″ x 3/4″ | 1 | Overhangs 3/8″ all sides |
| Bottom (removable) | 10″ x 7″ x 1/2″ | 1 | 4x #6 screws from below |
📊 Capacity check: Interior = 8.5″ x 5.5″ x 5.5″ = 257 cubic inches — comfortably holds remains up to 250 lbs. Rule of thumb: 1 cubic inch per pound of body weight (CANA standard). For a companion urn, build to 400+ cubic inches.
Lumber Needed (Single Adult Urn)
One 1×8 board, 6 feet long covers all four sides and the lid. Add a half-sheet of 1/2″ plywood for the removable bottom. Estimated cost: $18-$35 depending on species.
- Walnut — richest appearance, most durable; ~$12-$18/bd ft
- Cherry — warm reddish-brown patina; ~$8-$14/bd ft
- Maple — tight grain, engraves cleanly; ~$6-$10/bd ft
- Poplar — budget pick, takes stain well; ~$3-$5/bd ft
Free detailed plans with measured drawings: woodgears.ca/urn and Green Meadow Memorials.
RECOMMENDED WOOD
Walnut Hardwood Board — 1×8, 6 ft (Kiln-Dried)
American black walnut — the top choice for cremation urns. Dense, stable, takes polyurethane beautifully. One board covers all four sides and the lid for a standard adult urn.
Preparing The Wood
Start by measuring the pieces of wood you need. Use a saw to cut the wood accurately. Make sure to follow the measurements carefully. Safety glasses will protect your eyes during this process.
Next, use sandpaper to smooth the edges of the wood. Begin with a rougher grit and then switch to a finer one. This will help remove any splinters. Sanding makes the surface feel nice to the touch.
Ensure all pieces are smooth before assembling. This step is important for both appearance and safety. A well-prepared piece of wood will look much better.
Assembling The Urn
Start by joining the sides of the urn. Use wood glue and clamps for a strong bond. Ensure all edges fit tightly together. This will create a sturdy structure.
Next, focus on securing the base. Cut a piece of wood to match the urn’s dimensions. Attach it firmly using screws and glue. This step adds extra support.
Finally, attach the lid mechanism. Choose a simple hinge or latch system. This allows easy access to the urn’s interior. Make sure it operates smoothly for convenience.
Finishing Touches
Staining and sealing a wooden urn is important for beauty and protection. Start by choosing a wood stain that complements the wood. Apply the stain with a cloth, moving in the direction of the grain. Allow it to dry completely. Then, use a clear sealant to protect the wood from moisture. This keeps the urn looking good for years.
Personalized engravings add a special touch. Consider including names, dates, or meaningful symbols. Use a laser engraver for precision. Hand engraving offers a personal feel. Choose a font that reflects the urn’s style. Engraving creates a lasting memory for loved ones.
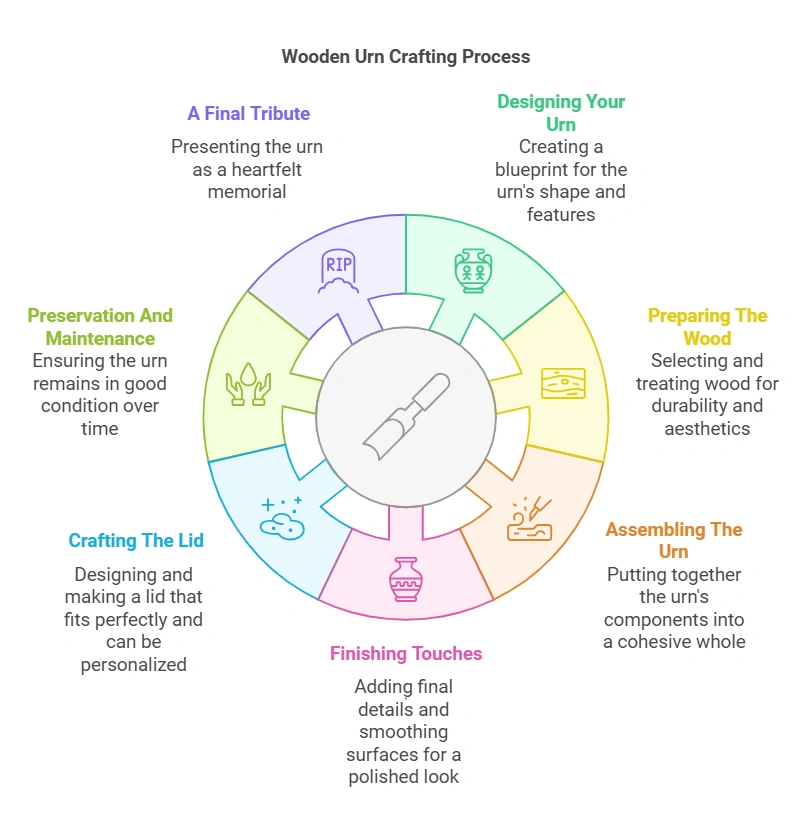
The Lid: Crafting And Personalization
Designing the lid of a wooden urn offers many creative options. You can choose simple shapes or intricate carvings. Consider using personalized engravings for a special touch. Adding symbols or names makes it unique.
Creating a secure fit for the lid is important. Use a hinge to allow easy opening. A sliding mechanism can also work well. Ensure the lid sits snugly on the urn to protect the ashes.
| Design Options | Features |
|---|---|
| Simple Shapes | Easy to create and elegant |
| Intricate Carvings | Detailed and artistic |
| Personalized Engravings | Special messages or names |
Preservation And Maintenance
To ensure the best protection for your wooden urn, use a quality finish. A good finish helps to seal the wood and prevent damage. Varnish, lacquer, or oil are great options. Apply these products in a well-ventilated area. Follow the manufacturer’s instructions for the best results.
Regular cleaning is important for long-term care. Use a soft, dry cloth to remove dust. Avoid using water or harsh chemicals, as they can harm the wood. Check the urn periodically for any signs of wear or damage.
If the wood looks dull, consider applying more finish. This will help maintain its beauty and durability. Keeping the urn in a stable environment also helps. Avoid extreme temperatures and direct sunlight.
A Final Tribute
Craftsmanship plays a vital role in creating a beautiful wooden urn. Each urn is a unique piece that reflects the love and memory of a cherished person. Careful attention to detail ensures durability and beauty.
Using high-quality materials is essential. Choosing the right wood enhances the urn’s appearance and longevity. Common choices include oak, cherry, and walnut. Each type of wood has its own distinct character and charm.
The process of making an urn allows for personal touches. Adding engravings or special designs makes it even more meaningful. This personalization transforms a simple urn into a cherished keepsake.
Creating a wooden urn requires patience and skill. Each step should be done with care. This dedication honors the memory of a loved one in a truly special way.
What Size Should a Wooden Urn Be for Human Ashes?
A standard adult cremation urn needs at least 200 cubic inches of interior volume. The general rule is 1 cubic inch per pound of body weight. Temporary containers from funeral homes measure about 8.5″ x 6.5″ x 4.5″ — many woodworkers size their box to fit this container inside.
Can a Beginner Build a Wooden Urn at Home?
Yes. A rectangular box urn needs only straight cuts and a screwdriver. No lathe, no router, no dovetail jig. If you can make square cuts and drive screws, you can build a dignified urn in an afternoon using the cut list above.
Frequently Asked Questions
How Do I Choose Wood For An Urn?
Selecting the right wood is essential for durability and aesthetics. Popular choices include oak, cherry, and walnut due to their strength and natural beauty. Consider the wood’s grain and color to match your preferences. Always ensure the wood is untreated and safe for holding ashes.
What Tools Do I Need To Make A Wooden Urn?
You will need basic woodworking tools like a saw, drill, and sandpaper. A router can help create smooth edges and decorative designs. Measuring tools are crucial for accuracy. Safety equipment, such as goggles and gloves, should also be included in your toolkit for protection.
Can I Personalize The Wooden Urn?
Absolutely! Personalization adds a special touch. You can engrave names, dates, or meaningful quotes on the urn. Painting or staining the wood can enhance its appearance. Consider adding decorative elements that reflect the personality or interests of the deceased for a more unique tribute.
How Long Does It Take To Make A Wooden Urn?
The time required varies based on complexity and skill level. A simple wooden urn may take a few hours to complete. More intricate designs or finishes might take several days. Patience is key; allowing time for drying and finishing can enhance the final product’s quality.
Conclusion
Creating a wooden urn for ashes can be a meaningful and personal project. It allows you to honor a loved one in a unique way. With the right materials and techniques, anyone can craft a beautiful urn. Embrace your creativity and cherish the memories while you work on this heartfelt tribute.