How to Nail Hardwood Flooring: Expert Tips for Perfect Results
Are you ready to transform your space with beautiful hardwood floors? Nailing hardwood flooring might sound tricky, but with the right steps, you can do it yourself and save money.
Imagine the warmth and style that perfectly installed hardwood brings to your home. In this guide, you’ll discover simple tips and expert tricks that make the process smooth and satisfying. Keep reading to learn how to nail hardwood flooring like a pro and enjoy floors that last for years.
Your dream floors are just a few steps away!
Choosing The Right Hardwood
Choosing the right hardwood is the first step to beautiful floors. The wood you pick affects the look, feel, and life of your flooring. Each type offers different strengths and styles. Knowing these can help you make the best choice for your home.
Types Of Hardwood
Hardwood comes in many types. Oak is strong and popular. Maple has a smooth, light look. Cherry offers rich, warm tones. Hickory is very tough and has a unique pattern. Each wood type lasts differently and fits various budgets.
Selecting Quality Wood
Look for wood that is solid and free of cracks. Avoid pieces with too many knots or stains. Good quality wood will last longer and resist damage. Check the wood’s moisture content. Dry wood reduces the chance of warping after installation.
Considering Wood Grain And Color
Wood grain affects the floor’s texture and style. Straight grains look simple and clean. Wavy or curly grains add character and depth. Color varies from light blonde to deep brown. Choose a color that matches your room’s design and lighting.
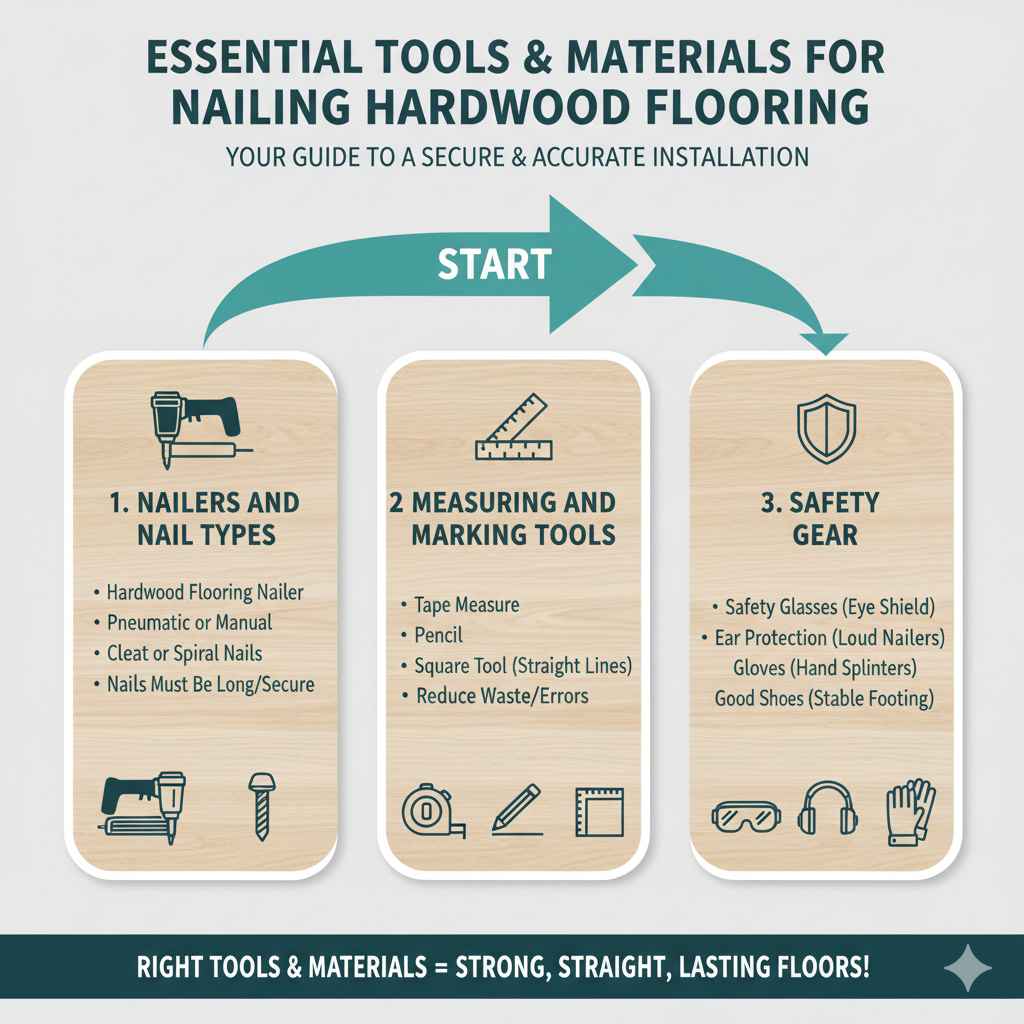
Essential Tools And Materials
Installing hardwood flooring requires the right tools and materials. These help you work faster and get better results. Using proper tools keeps the floor strong and neat. This section covers the basic tools you need for nailing hardwood floors.
Nailers And Nail Types
A hardwood flooring nailer drives nails at the correct angle. It fits tight spaces between boards. Choose a pneumatic or manual flooring nailer. Use cleat or spiral nails for strong hold. Nails should be long enough to secure planks firmly.
Measuring And Marking Tools
Accurate measurements make sure planks fit perfectly. Use a tape measure to check lengths. Mark cuts and nail spots with a pencil. A square tool helps keep lines straight. These tools reduce waste and errors.
Safety Gear
Protect yourself during installation. Wear safety glasses to shield your eyes from dust. Use ear protection if you work with loud nailers. Gloves keep your hands safe from splinters. Good shoes provide stable footing on hard floors.
Preparing The Subfloor
Preparing the subfloor is the first step to a strong hardwood floor. It makes sure the wood fits well and lasts long. This stage stops problems like creaks or warps later.
Start with a clean, flat base. Check for moisture to avoid damage. Add underlayment for a smooth, safe surface.
Cleaning And Leveling
Clear all dirt, dust, and nails from the subfloor. Sweep or vacuum it well. Remove any old glue or paint spots.
Use a level tool to find bumps or dips. Sand high spots down. Fill low areas with a floor patch. This creates a flat surface for nailing.
Moisture Testing
Test the subfloor for moisture using a moisture meter. High moisture can cause wood to warp or rot. Ideal moisture is below 12% for hardwood.
Check concrete floors carefully. Use a plastic sheet test for extra proof. Leave the sheet for 24 hours and look for water marks.
Installing Underlayment
Lay underlayment to add cushioning and reduce noise. Choose the right type for your floor and subfloor. Roll it out smoothly without wrinkles or gaps.
Secure the underlayment with staples or tape as needed. This step protects the wood and helps it last longer.
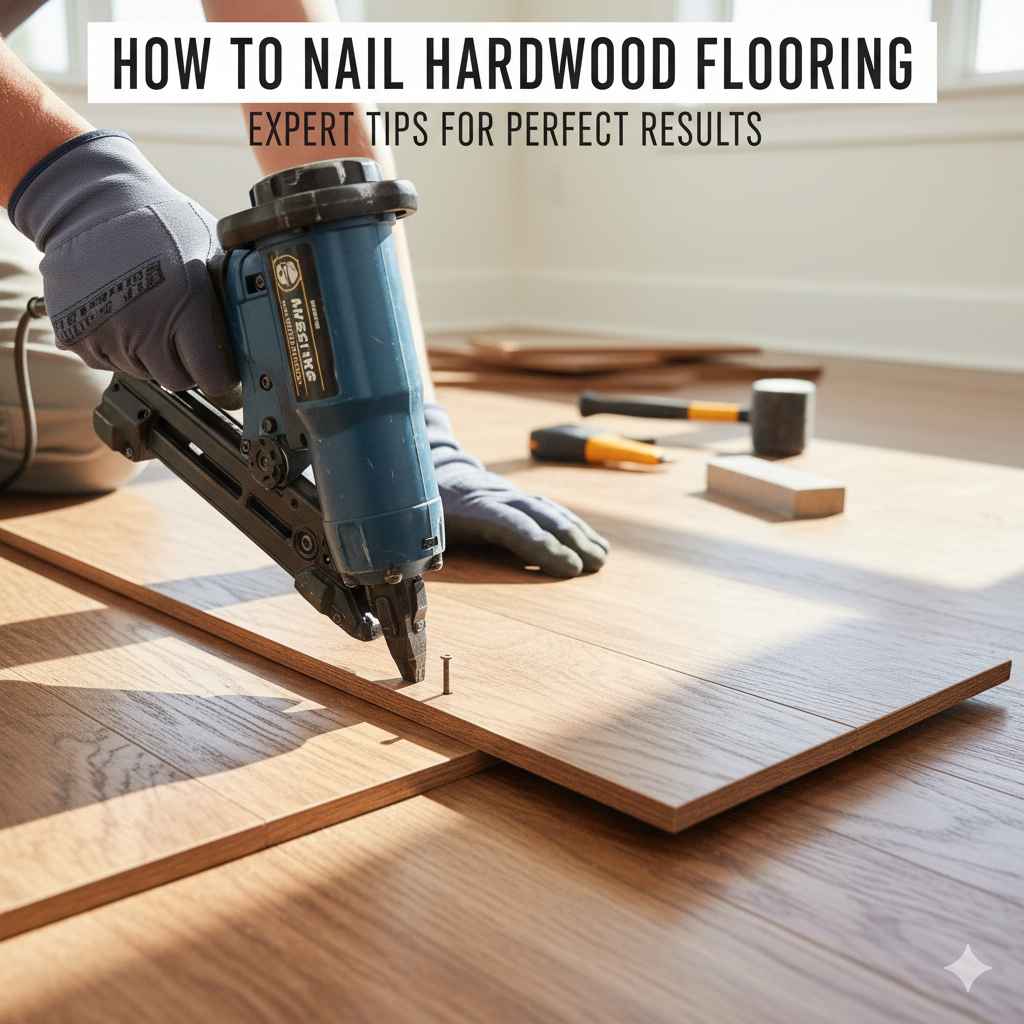
Nailing Techniques
Nailing hardwood flooring is a key step to secure the planks firmly. Proper nailing ensures the floor stays flat and lasts long. Using the right techniques helps avoid damage and gaps. Understanding how to start, place nails, and handle tough spots makes the job easier.
Starting The First Row
Begin by placing the first row along the longest wall. Keep the boards straight and tight to the wall. Nail each plank firmly at an angle through the tongue. Use a block to protect the wood from hammer marks. This row sets the base for the rest of the floor.
Proper Nail Placement
Place nails about 1 inch from the board edges. Nail through the tongue, not the face, to hide nails. Space nails 6 to 8 inches apart for strong hold. Avoid nailing too close to ends to prevent splitting. Use a flooring nailer for consistent and secure nailing.
Dealing With Difficult Areas
For corners and tight spaces, use a finish nailer or hand nails carefully. Pre-drill holes in hard wood to avoid cracks. Cut boards precisely to fit around door frames and vents. Use fewer nails in narrow strips to avoid damage. Take time and work slowly for clean results.
Finishing Touches
Finishing touches make your hardwood floor look complete and polished. These final steps hide imperfections and protect the wood. Taking time here improves the floor’s life and beauty. Follow these simple methods to get a clean, smooth finish that lasts.
Filling Nail Holes
Start by filling all nail holes with wood filler. Choose a filler that matches your floor color. Use a putty knife to press filler into each hole. Remove extra filler with the knife’s edge. Let the filler dry fully before moving on. This step hides nails and creates a flat surface.
Sanding And Staining
Lightly sand the floor to smooth the surface. Use fine-grit sandpaper for a gentle finish. Sand along the wood grain to avoid scratches. Wipe away dust with a damp cloth. Apply wood stain evenly for a richer color. Test stain on a small area first. Allow stain to dry completely before sealing.
Sealing And Maintenance
Seal the floor with a clear protective finish. Polyurethane is a popular choice for durability. Apply thin coats with a brush or roller. Let each coat dry before adding the next. This seals the wood and stain from damage. Clean floors regularly with a soft broom or mop. Avoid harsh cleaners to protect the finish.
Common Mistakes To Avoid
Nailing hardwood flooring seems simple. Yet, many make mistakes that cause problems later. These errors can damage the floor or make it less stable. Avoiding these common mistakes helps your floor last longer and look better.
Incorrect Nail Depth
Driving nails too deep can split the wood. Nails that sit above the surface create bumps. Both spoil the floor’s look and strength. Nails should be flush with the wood or slightly below. Use a nail set to fix nails at the right depth.
Ignoring Expansion Gaps
Wood expands and contracts with humidity. Without space to move, the floor may warp or buckle. Always leave expansion gaps around walls and fixed objects. These gaps let the wood adjust naturally. Cover gaps later with baseboards or molding.
Skipping Subfloor Preparation
A rough or dirty subfloor causes uneven flooring. Dirt, nails, or bumps can damage the hardwood. Clean the subfloor thoroughly before nailing. Check for loose boards and fix them. A smooth, stable base ensures the hardwood stays secure.

Frequently Asked Questions
How Do You Prepare Subfloor For Hardwood Flooring?
Preparing the subfloor ensures a smooth, durable hardwood installation. Clean and level the subfloor, removing debris and nails. Check for moisture and fix uneven areas. Proper preparation prevents squeaks and extends flooring life.
What Tools Are Needed To Nail Hardwood Flooring?
Essential tools include a pneumatic flooring nailer, hammer, tape measure, chalk line, pry bar, and saw. These tools help secure boards tightly and accurately, ensuring a professional finish and long-lasting hardwood floor.
How Far Apart Should Hardwood Nails Be Spaced?
Nails should be spaced about 6 to 8 inches apart along each plank. This spacing secures the wood without damaging it, providing stability and preventing movement or warping over time.
Can Hardwood Flooring Be Nailed Over Existing Floors?
Yes, hardwood can be nailed over solid, flat, and clean existing floors like plywood or wood subfloors. Avoid nailing over carpet or cushioned surfaces to ensure proper adhesion and stability.
Conclusion
Nailing hardwood flooring takes care and patience. Follow each step carefully for best results. Choose the right tools and materials to avoid problems. Measure and plan before starting the project. Keep safety in mind at all times. With practice, your floors will look neat and strong.
Enjoy the warmth and beauty hardwood brings to your home. Small efforts make a big difference in the final look. Keep learning and improving your skills with each project. Hardwood floors add value and comfort to any space.