What Is a Reducer Strip for Wood Flooring?
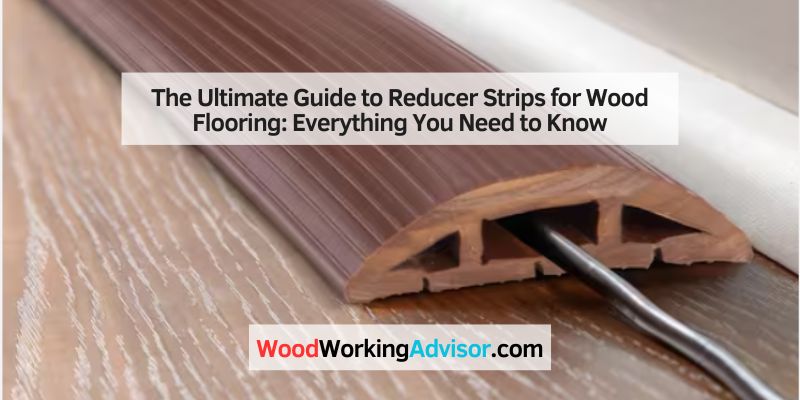
A reducer strip is a sloped wood, metal, or vinyl molding that bridges the height difference between two adjoining floors — typically required once the gap reaches 1/4 inch or more. Skip it below that threshold and the seam looks unfinished; skip it above and you create a trip hazard. This guide covers the height rule, flush vs. overlap profiles, real material costs, and the exact steps to install one.
Reducer strip is the general term for any sloped transition molding that steps a floor down to a lower adjoining surface — hardwood to tile, hardwood to vinyl, or hardwood to carpet are the three most common pairings. It differs from T-molding, which only works when both floors sit at the same height.
Do You Need a Reducer Strip? The 1/4-Inch Height Rule
Best Reducer Strip Pick
Randall Mfg. 3/4″ Solid Oak Overlap Reducer, 3 Ft.
Unfinished red oak overlap reducer built for a full 3/4-inch height difference — the most common hardwood-to-tile pairing.
- Best for: hardwood at standard 3/4″ thickness meeting tile or vinyl
- Why we picked it: unfinished oak takes stain to match almost any hardwood species, and the overlap lip is sized for the most common height gap
- Main drawback: no pre-drilled holes, so you’ll need to drill or glue it yourself
Compare more reducer strip options
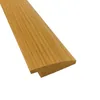 Option 1 Randall Mfg. Oak Overlap, 1/4″ Lip
|
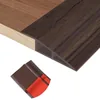 Option 2 Self-Adhesive Vinyl Transition Strip
|
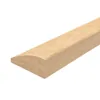 Option 3 Red Oak Butt Edging/Reducer, Pre-Drilled
|
As an Amazon Associate we earn from qualifying purchases.
Measure the height difference between the two floors with a tape measure or a scrap of each flooring material stacked edge to edge. That single number decides which transition molding you need — not the flooring material, not the room, and not personal preference.
📊 A reducer strip is required once adjoining floors differ by 1/4 inch (6.35mm) or more. Below that, a flush T-molding (or no transition at all) is usually sufficient. — Source: Versatrim floor reducer installation specifications
The height difference also decides the reducer profile, not just whether you need one:
| Height Difference | Reducer Type | Best For |
|---|---|---|
| Under 1/4″ | None needed (or T-molding) | Two same-height hardwood rooms |
| 1/4″ to 3/4″ | Overlap reducer | Floating laminate or engineered floors |
| 1/4″ to 3/4″ | Flush reducer | Solid hardwood glued or nailed to the subfloor |
| Over 3/4″ | Custom-milled or stair-nose profile | Hardwood meeting raised tile or a stair edge |
An overlap reducer has a lip that sits on top of the higher floorboard, leaving room underneath for a floating floor to expand and contract. A flush reducer butts directly against a fixed, glued-down floor with no gap. Using a flush reducer on a floating floor is one of the most common installation mistakes — it locks the floor down and causes buckling as it expands.
Why Reducer Strips Matter for Wood Flooring
A hardwood floor that meets a lower surface without a transition piece is both a safety issue and a durability issue. Reducer strips solve three problems at once.
- Trip prevention: a smooth, sloped ramp instead of an abrupt ledge, which matters most for kids, older adults, or anyone carrying something through a doorway.
- Edge protection: exposed hardwood edges chip and splinter under foot traffic and pet nails; the reducer caps that edge.
- A finished transition: an unfinished seam is one of the first things a buyer or inspector notices during a flooring walkthrough.
Types of Reducer Strips for Wood Flooring
Reducer strips aren’t the only transition molding — they’re one of five common types, each solving a different height or gap problem:
| Type | Purpose | Best For |
|---|---|---|
| Reducer Strip | Transitions between floors of different heights | Hardwood to tile, carpet, or vinyl |
| T-Molding | Joins two floors of the same height | Hardwood to hardwood or similar surfaces |
| Overlap Reducer | Overlaps the higher floor to hide the expansion gap | Floating floors like laminate or engineered wood |
| Threshold | Covers gaps at doorways or room entrances | Doorways between rooms |
| End Cap | Finishes an edge that doesn’t meet another floor | Edges at fireplaces or exterior doors |
Reducer strip is the workhorse of the five — it’s the correct choice any time hardwood meets a thinner surface, which is why it shows up in more homes than any other transition type. Measure the height difference before shopping so you buy the right profile the first time.
Materials for Reducer Strips: Which One to Choose?
Four materials cover almost every reducer strip on the market. Match the material to the room’s traffic and moisture level, not just the color.
- Solid wood (usually oak): the standard choice next to hardwood floors because it can be stained to match the exact species and finish. Least forgiving of moisture — avoid it in bathrooms and laundry rooms unless it’s sealed well.
- Metal (aluminum or brass): a clean, modern look for hardwood-to-tile transitions. More expensive but essentially maintenance-free.
- Vinyl: budget-friendly and water-resistant, which makes it the practical pick for kitchens, bathrooms, and laundry rooms.
- MDF (medium-density fiberboard): the cheapest option and easy to paint or stain, but it swells if it gets wet and holds up worse than solid wood under heavy foot traffic.
For high-traffic living areas, solid wood or metal earns back its higher price in longevity. For a rental unit or a low-traffic room on a budget, vinyl or MDF is a reasonable trade-off.
Reducer Strip vs. T-Molding vs. Threshold: Which Transition Do You Need?
All three sit in the same aisle at a flooring store, and the wrong one is the single most common transition-molding mistake. Here’s how to tell them apart at a glance:
| Transition Type | Height Difference | Best For |
|---|---|---|
| Reducer Strip | 1/4″ or more | Hardwood meeting a lower floor (tile, vinyl, carpet) |
| T-Molding | None (flush) | Two floors at the same height |
| Threshold | Flush to 1/4″ | Doorways between rooms or flooring materials |
If your project spans more transition types than just reducers — stair nosing, end caps, or a full room-to-room plan — our complete guide to hardwood floor transitions between rooms walks through all five transition types and when each one applies.
How to Choose the Right Reducer Strip for Your Project
Five factors determine the right reducer strip, in order of importance:
- Measure the height difference with a tape measure at the actual transition point — not an estimate. A 3/4-inch hardwood floor meeting 1/4-inch tile leaves a 1/2-inch gap, which needs a reducer sized for that exact difference.
- Match the finish to your flooring’s color and sheen. Bring a scrap piece of your flooring to the store, or buy unfinished oak and stain it yourself for an exact match.
- Account for moisture. Skip wood reducers in kitchens and bathrooms unless they’re fully sealed; vinyl or metal holds up better there.
- Check the wear rating for the room’s foot traffic — solid wood or metal for high-traffic rooms, vinyl or MDF for low-traffic spaces on a budget.
- Confirm the installation method matches your subfloor: snap-in track systems are easiest for a DIY install, while glue-down or nail-down solid wood reducers need more prep.
For a broader look at flooring types, subfloor prep, and installation order before you get to the transition pieces, see our wood flooring guide.
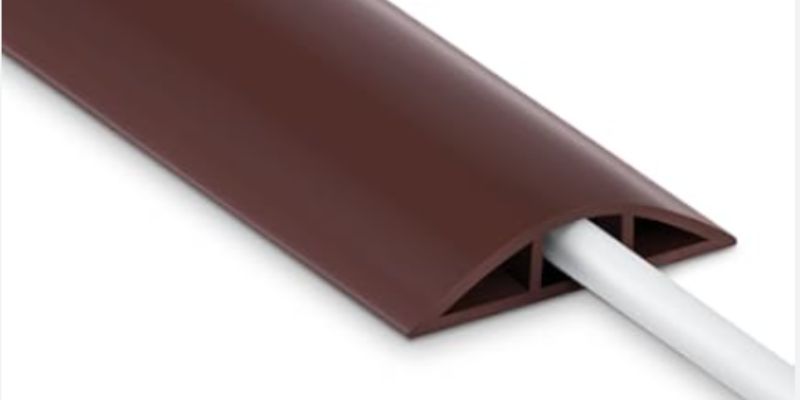
How to Install a Reducer Strip for Wood Flooring
Installing a reducer strip is a manageable weekend DIY project with basic tools. Follow these six steps:
- Gather your tools: tape measure, saw (miter or hand saw), adhesive or nails, a hammer or drill, a level, a pencil, and safety glasses.
- Measure and cut: measure the length of the transition area, mark the reducer strip with a pencil, and cut it to size using a miter saw for clean edges.
- Prepare the area: clean the floor where the reducer will go with a vacuum and a damp cloth to remove dust and debris.
- Test the fit: place the reducer strip in position to confirm it sits snugly, trimming as needed for an uneven subfloor.
- Install the reducer: for snap-in reducers, attach the track to the subfloor with adhesive or screws, then snap the strip into place. For solid wood reducers, use construction adhesive or nails, and check it’s level as you go.
- Finish up: sand or stain unfinished wood to match your floor, then seal with polyurethane for protection.
Check the subfloor for level before you start — an uneven subfloor is the most common cause of a reducer that wobbles or rocks underfoot after installation. Shim it first if needed.
Common Mistakes to Avoid When Using Reducer Strips
- Skipping the height measurement: buying a reducer without measuring the gap first is the single most common return reason at flooring stores — always measure before you shop.
- Mismatched color or finish: check the reducer against your floor in natural daylight, not just under store lighting.
- Rushed installation: a reducer installed without checking for level or letting adhesive cure properly loosens up faster.
- Skipping maintenance: unsealed wood reducers absorb moisture and warp, especially in bathrooms and entryways.
- Using the wrong transition type: installing a T-molding where the floors actually differ in height leaves a trip hazard — recheck the height-difference table above before buying.
“Leave a full expansion gap under an overlap reducer’s lip — not a snug fit. Floating floors need room to move with humidity, and a reducer nailed down tight against the board edge is the most common reason we see these transitions buckle within the first year.”
Where to Buy Reducer Strips for Wood Flooring
Reducer strips are sold through four main channels, each with a different trade-off between selection and matching accuracy:
- Home improvement stores (Home Depot, Lowe’s) carry the widest in-stock selection of wood, vinyl, and metal reducers — convenient if you can bring a flooring sample to match in-store.
- Flooring specialty stores often stock custom or hard-to-find profiles that big-box stores don’t carry.
- Online retailers (including Amazon) offer the widest range of widths and overlap heights, which matters once you know your exact measurement from the height-rule table above.
- Manufacturer websites are worth checking if your flooring is a specific branded product — matching reducers are sometimes only sold direct.
Prices vary by material and length: solid oak reducers typically run $18–$47 for a 3-foot piece depending on width and overlap height, while self-adhesive vinyl strips are usually under $16. Compare a few listings and always confirm the overlap height matches the gap you measured.
Tips for Maintaining Reducer Strips
- Clean regularly: sweep or vacuum weekly to keep grit from grinding into the finish; a damp cloth handles stubborn spots.
- Reseal wood reducers with polyurethane every couple of years to protect against moisture and scuffs.
- Avoid harsh chemicals — strong cleaners dull most wood and vinyl finishes. Mild soap and water is enough.
- Inspect annually for wear in high-traffic areas and replace a reducer once it’s visibly chipped or loose.
- Use felt pads under furniture legs near the transition to prevent gouges.
The same care routine applies to the rest of the floor — see our guide on how to care for hardwood floors for the full maintenance schedule.
Reducer Strips and Aesthetics: Making Your Floors Pop
A well-chosen reducer does more than function — it adds style. A darker walnut reducer against light oak flooring creates deliberate contrast at the transition instead of an awkward seam. A metal reducer with clean lines suits a modern space, while a distressed wood profile fits a rustic look. Whatever the style, prioritize a durable finish that can take foot traffic over a look that won’t hold up.
Reducer Strips for Different Flooring Types
- Hardwood to tile: the most common kitchen transition — a wood reducer with a slight bevel bridges the typical 1/2-inch height difference.
- Hardwood to carpet: use a reducer that tucks under the carpet edge for a smooth, snag-free transition.
- Hardwood to vinyl: vinyl flooring is usually thinner than hardwood, so a reducer is almost always required; a vinyl reducer resists moisture best here.
- Hardwood to laminate: if the laminate is a floating floor, use an overlap reducer so the floor can still expand and contract.
If you’re installing a floating floor like bamboo or laminate for the first time, our bamboo flooring installation guide covers subfloor prep and expansion gaps in more detail before you get to the transition pieces.
Conclusion
A reducer strip is a small piece of molding with an outsized job: it keeps a height difference between two floors safe to walk on and protects the exposed edge from damage. Measure the gap first, match the profile — flush for fixed floors, overlap for floating floors — to that measurement, and pick a material rated for the room’s traffic and moisture. Get those three decisions right and the installation itself is a straightforward weekend project.
Frequently Asked Questions
What’s the Difference Between a Reducer Strip and T-Molding?
A reducer strip bridges floors of different heights, like hardwood meeting tile. T-molding is for floors at the same height, like hardwood continuing into an adjoining room. Measure the height gap first: any real difference calls for a reducer, not a T-molding.
How Much Height Difference Requires a Reducer Strip?
A reducer strip is generally required once the height difference between two floors reaches 1/4 inch or more. Below that threshold, a flush T-molding or no transition piece at all is typically sufficient.
Can I Install a Reducer Strip Myself?
Yes. It’s a DIY-friendly project with basic tools — a saw, adhesive or nails, and a level. Measure the height difference and transition length first, then follow the six installation steps above; most reducers install in under an hour per doorway.
How Do I Match a Reducer Strip to My Wood Floor?
Bring a sample of your flooring to the store, or buy an unfinished wood reducer and stain it to match. Always check the color match in natural daylight rather than under store lighting, since finishes can look different under fluorescent bulbs.
Are Reducer Strips Necessary?
They’re not legally required, but skipping one where floors differ in height leaves a trip hazard and an exposed, unprotected floor edge that chips faster under foot traffic. If the height difference is under 1/4 inch, a reducer usually isn’t needed.
How Long Do Reducer Strips Last?
With proper care, solid wood reducers can last decades — as long as the floor itself. Vinyl and MDF reducers typically need replacing sooner, especially in high-moisture or high-traffic areas. Reseal wood reducers every couple of years to extend their life.
Can I Paint or Stain a Reducer Strip?
Yes. Unfinished wood reducers, especially oak, take stain well and can be matched to almost any hardwood finish. Use a durable topcoat like polyurethane afterward so the finish holds up to foot traffic at the transition point.
Sponsored / affiliate links. As an Amazon Associate I earn from qualifying purchases. I may earn additional commission from eligible campaigns.