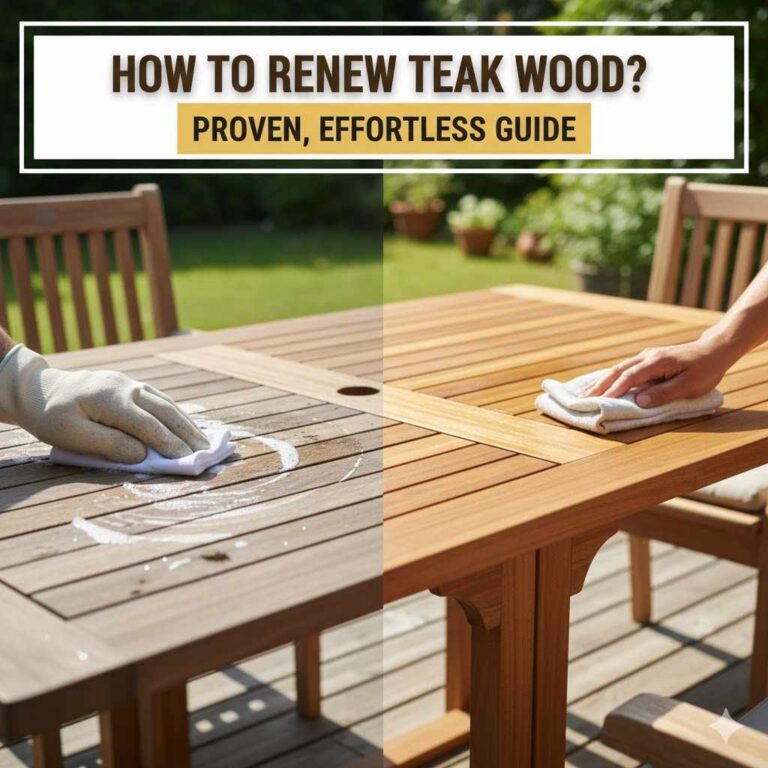
How to Preserve Teak Wood: Proven Effortless Tips
Preserving teak wood effortlessly involves regular cleaning, applying protective finishes like oil or sealers, and shielding it from harsh elements. Follow simple, proven tips to keep your teak furniture and features looking beautiful for years.
Teak wood is a marvel. Its natural oils make it incredibly durable, water-resistant, and beautiful, especially for outdoor furniture. But even teak needs a little love to stay its best. Over time, exposure to sun, rain, and daily use can dull its luster, causing it to turn a silvery gray or even develop stains. Many homeowners feel frustrated, thinking their beautiful teak is beyond repair or that bringing it back to life requires complex skills. Don’t worry! Preserving your teak wood doesn’t have to be a chore. With just a few easy steps and the right approach, you can easily maintain its rich, golden-brown hue and protect it for decades to come. Let’s dive into some simple, proven methods to keep your teak looking gorgeous, effortlessly.
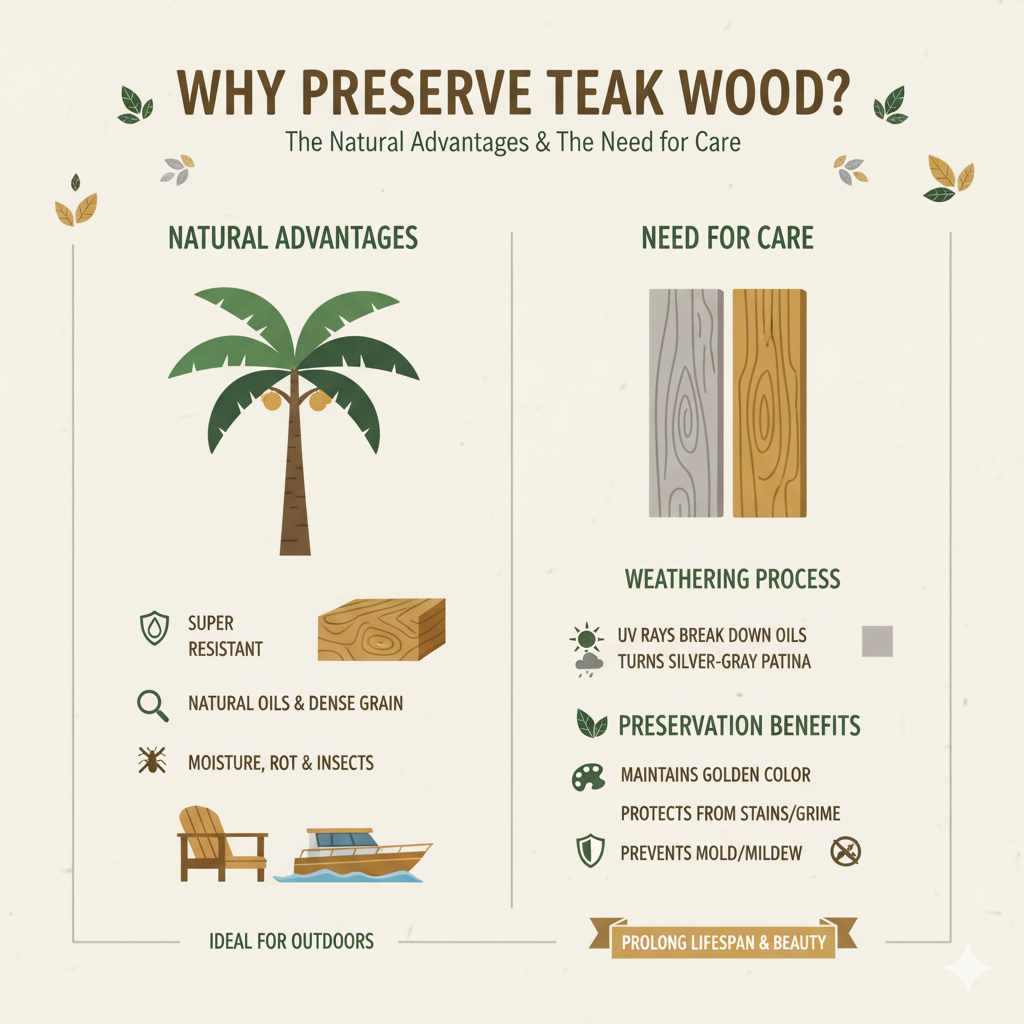
Why Preserve Teak Wood? The Natural Advantages & The Need for Care
Teak is famous worldwide for its natural resilience. This tropical hardwood, often sourced from Southeast Asia, is packed with natural oils and has dense grains. These features are its superpowers: they make it highly resistant to moisture, rot, and insects. This is why teak is the top choice for outdoor furniture, boat decks, and anything else that faces the elements. Unlike many other woods, teak can withstand rain, sun, and humidity without quickly deteriorating. It’s a fantastic investment for your home or garden.
However, even this robust wood isn’t invincible. While teak naturally weathers to a distinguished silvery-gray patina, this change happens because the natural oils and pigments in the wood’s surface are broken down by UV rays and weather. If you prefer to keep the original warm, golden-brown color of your teak, or if you want to protect its surface from stains and deep-set grime, preservation is key. Unprotected teak can also become more susceptible to surface mold and mildew in damp conditions. Caring for it ensures it not only looks good but also maintains its structural integrity for longer.
Think of it like caring for any treasured item. A little regular attention prevents bigger problems down the line and keeps your teak looking its absolute best. It’s about enhancing its natural beauty and prolonging its lifespan, making it an even more worthwhile material for your home. Let’s explore how we can achieve this with straightforward, beginner-friendly techniques.
Effortless Teak Wood Preservation: Your Step-by-Step Guide
Keeping your teak wood in top shape is easier than you might think. It primarily involves understanding what teak needs and implementing a simple routine. We’ll cover everything from gentle cleaning to applying protective finishes.
Step 1: Gentle Cleaning – The Foundation of Preservation
Before you do anything else, a good clean is essential. This removes dirt, grime, and any potential mold or mildew that could damage the wood or prevent finishes from adhering properly.
What You’ll Need:
- Soft cloths or sponges
- Warm water
- Mild soap (like dish soap) or a specialized teak cleaner
- Soft-bristled brush or an old toothbrush for crevices
- Bucket
- Fresh water for rinsing
- Protective gloves (optional, but recommended with cleaners)
The Cleaning Process:
- Mix Your Solution: In a bucket, mix warm water with a small amount of mild soap or your chosen teak cleaner. Follow the instructions on the cleaner’s label if you’re using a commercial product. Avoid harsh detergents or abrasive scrubbers, as these can damage the wood’s surface.
- Test in an Inconspicuous Area: Always test your cleaning solution on a small, hidden spot first to ensure it doesn’t cause any discoloration or damage.
- Wash Gently: Dip a soft cloth or sponge into the soapy water, wring it out slightly, and gently wipe down the teak surface. Work with the grain of the wood. For stubborn dirt or in tight spots like joints and carvings, use the soft-bristled brush or toothbrush.
- Rinse Thoroughly: Once you’ve cleaned the entire surface, rinse it thoroughly with fresh, clean water. Ensure no soap residue is left behind, as this can attract dirt or affect how a finish absorbs. A hose on a gentle setting or clean cloths can be used for rinsing.
- Allow to Dry Completely: Let the teak wood air dry completely. This can take several hours, depending on humidity and temperature. Ensure it’s thoroughly dry before moving to the next step, especially if you plan to apply a finish; moisture trapped under a finish can cause problems.
Step 2: Addressing Stains and Mildew (If Necessary)
Sometimes, cleaning alone isn’t enough, especially if you have tough stains or noticeable patches of mildew.
For Stubborn Stains:
You might need a bit more power. A common and effective method for restoring the color of weathered teak is to use a wood brightener or a mild acid solution.
- Commercial Teak Brighteners: These are specifically formulated to lift stains and restore the wood’s natural color without damaging the grain. Follow the product’s instructions carefully.
- Homemade Solution (Use with Caution): A popular DIY method involves mixing oxalic acid crystals with water. Oxalic acid is a natural compound found in many plants. It’s excellent at removing rust stains and general graying. You can often find oxalic acid at hardware stores or online. Always wear gloves and eye protection when working with oxalic acid. Mix according to package directions, apply to the stained areas, let it sit for a short period (usually 10-15 minutes), and then rinse thoroughly. Ensure you rinse exceptionally well to remove all traces of the acid. For more details on safety and usage of wood acids, consult resources from woodworking organizations or government safety sites, such as the Occupational Safety and Health Administration (OSHA) for chemical handling guidelines.
For Mildew:
Mildew often appears as black or dark spots. After cleaning, if you still see spots:
- Vinegar Solution: A 1:1 mixture of white vinegar and water can be effective against mild mildew. Apply with a cloth, let it sit for about 15-20 minutes, then scrub gently with a soft brush and rinse thoroughly.
- Bleach Solution (Use Sparingly and with Caution): For tougher mildew, a diluted bleach solution (1 part bleach to 10 parts water) can be used, but with extreme caution. Bleach can lighten the wood and is harsh. Apply only to affected spots, scrub gently, and rinse immediately and thoroughly. Always ensure good ventilation and wear protective gear.
After tackling stains or mildew and rinsing, allow the wood to dry completely, just as you did after the initial cleaning.
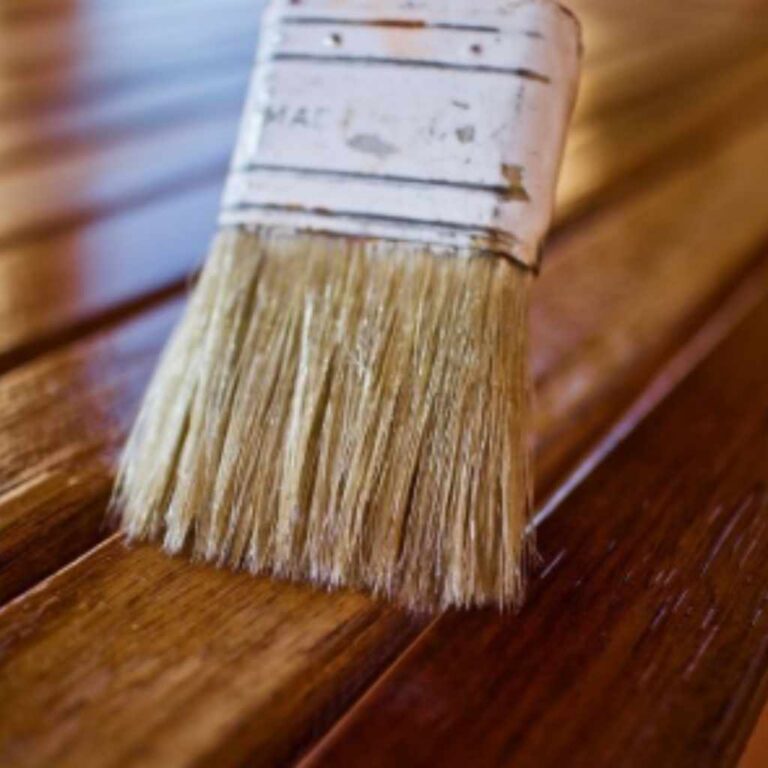
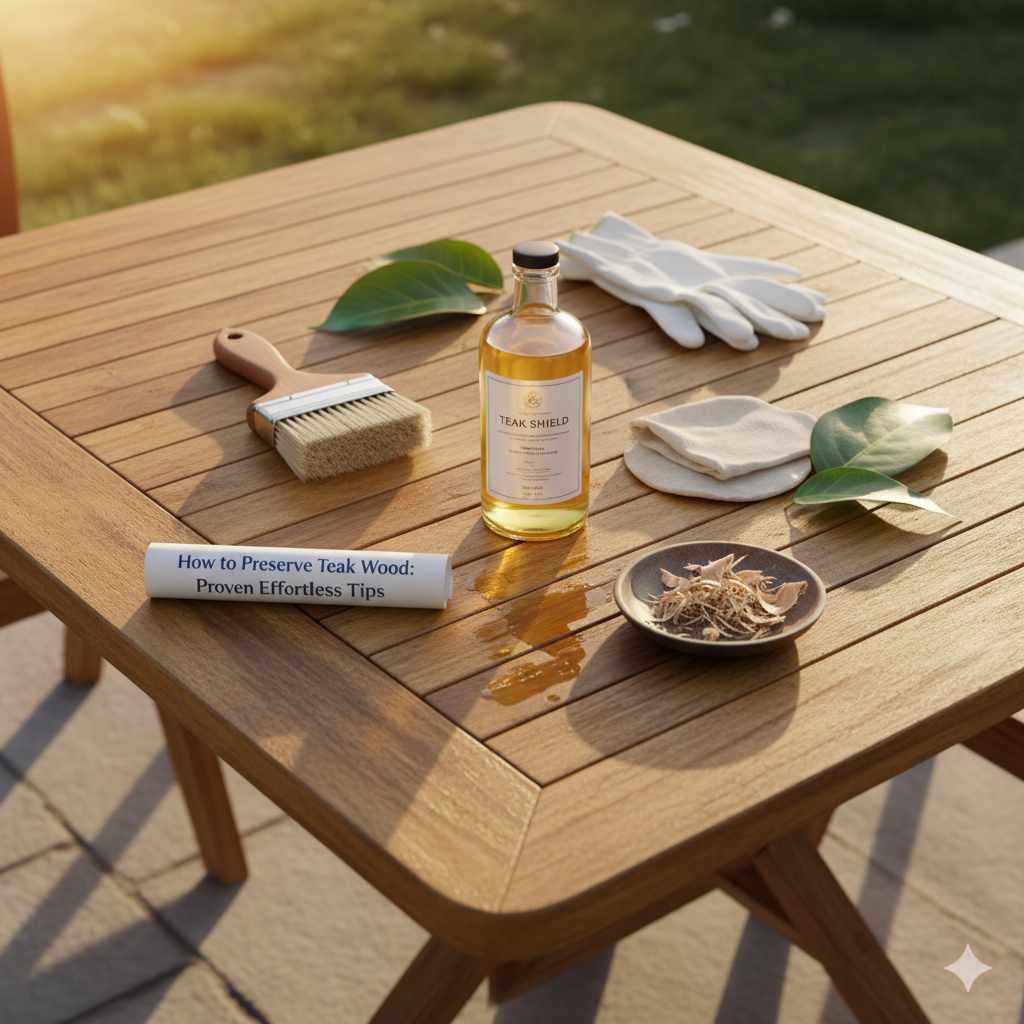
Step 3: Applying a Protective Finish (Optional but Recommended)
This is where you choose how you want your teak to look and how much protection you want to add. Many people love teak’s natural weathering, but if you want to maintain its golden hue or add extra protection, applying a finish is the way to go. For beginners, oil finishes are generally the easiest to apply and maintain.
Teak Oil: The Popular Choice
Teak oil isn’t typically made from teak wood itself. Instead, it’s a blend of oils (like linseed or tung oil) and varnishes designed to penetrate and protect wood. It enhances the wood’s natural color, provides water resistance, and helps prevent drying and cracking.
What You’ll Need:
- Teak oil (specifically formulated for outdoor furniture)
- Clean, lint-free cloths or applicators
- Fine-grit sandpaper (e.g., 220-grit) for light sanding, if needed
- Gloves
Application Steps:
- Ensure Wood is Clean and Dry: This is critical. Any dirt or moisture trapped will be sealed in.
- Light Sanding (Optional): If the wood surface is rough or has minor imperfections after cleaning, you can optionally give it a very light sanding with fine-grit sandpaper (220-grit). Sand only with the grain. Wipe away all dust with a clean cloth.
- Apply the Oil: Pour a small amount of teak oil onto a clean, lint-free cloth or applicator. Apply it evenly to the teak surface, working with the grain. Don’t over-apply; a thin, even coat is best.
- Allow to Penetrate: Let the oil soak into the wood for about 15-30 minutes. You’ll see the wood absorb the oil, darkening slightly.
- Wipe Off Excess: Use a clean, dry cloth to wipe away any excess oil that hasn’t penetrated the wood. Leaving excess oil on the surface can lead to a sticky finish.
- Apply Second Coat (Optional): For deeper protection and a richer color, you can apply a second coat after the first has penetrated and excess is wiped off, or after a few hours.
- Curing: Allow the finish to cure fully according to the product’s instructions before exposing the furniture to heavy use or the elements.
Teak Sealers/Varnishes: An Alternative
Teak sealers or varnishes can offer a more durable, film-building finish. They provide excellent protection against UV and water. However, they can sometimes create a more “plasticky” look if not applied carefully, and recoating can involve more sanding than with oil.
- UV Protection: Many modern sealers contain UV inhibitors that help maintain the wood’s color longer.
- Application: Typically applied with brushes or sprayers. Multiple thin coats are usually required, with sanding between coats.
- Considerations: If the film finish cracks or peels (often due to improper application or age), it can be more work to repair than an oil finish, which simply wears away gracefully.
Step 4: Regular Maintenance for Long-Term Preservation
Consistent, simple care makes preserving teak wood effortless in the long run.
Routine Cleaning:
- Wipe down your teak items regularly with a damp cloth to remove dust and light debris.
- Address spills immediately to prevent staining.
Seasonal Care:
- Spring/Start of Season: Give your teak a good cleaning (as detailed in Step 1). If it has weathered to gray and you prefer the original color, perform a brighter treatment or light sanding. Apply a fresh coat of teak oil or sealer.
- Fall/End of Season: Before storing outdoor furniture for winter, clean it thoroughly. Ensure it’s completely dry. You can apply a final coat of oil for extra protection during storage.
Step 5: Protecting Teak from Harsh Elements
While teak is durable, extra protection can go a long way, especially in extreme climates.
Covering Furniture:
- Invest in high-quality, breathable furniture covers. These protect against rain, snow, UV rays, and airborne debris. Ensure they are breathable to prevent moisture buildup underneath, which can lead to mold.
Storage:
- If possible, store teak furniture indoors or in a sheltered area (like a shed or garage) during harsh winter months or prolonged periods of severe weather.
- Ensure the storage area is dry and well-ventilated.
Placement:
- Try to avoid placing teak furniture in constant direct sunlight if you’re keen on maintaining its original color. Some shade from trees or umbrellas can help.
- Position pieces away from sprinklers if possible, as constant moisture can encourage fungal growth.
Teak Finish Options: A Quick Comparison
Choosing the right finish depends on the look you want and the effort you’re willing to put in. Here’s a simple breakdown:
| Finish Type | Pros | Cons | Ease of Application (Beginner) |
|---|---|---|---|
| No Finish (Natural Weathering) | Effortless, beautiful silvery-gray patina, no maintenance required to achieve look. | Loses original golden color, can be susceptible to surface mold/mildew if not cleaned. | Extremely Easy |
| Teak Oil | Enhances natural color, easy to apply and reapply, penetrates wood, provides water resistance. | Requires regular reapplication (e.g., annually), can darken wood over time, not a hard protective layer. | Easy |
| Teak Sealers / Varnishes (UV Protected) | Provides a protective film, excellent UV and water resistance, can last longer between applications than oil. | Can be tricky to apply without streaks, recoating may involve more sanding, can chip or peel if not applied correctly. | Moderate |
Dealing with Grayed Teak: Reviving the Color
If your teak has turned that classic silvery-gray and you miss its golden-brown hue, don’t despair! Reviving it is a common and achievable process.
Step-by-Step: Bringing Back the Golden Glow
- Clean Thoroughly: As always, start with a good wash using mild soap and water to remove surface dirt. Rinse well and let it dry.
- Use a Teak Cleaner/Brightener: This is the key step for revival. Apply a dedicated teak cleaner or brightener according to the product’s instructions. These products are designed to lift off the grayed surface layer and expose the original wood color beneath. For larger items, you might use these products with a garden sprayer (diluted as directed) or apply with a sponge.
- Scrub and Rinse: After the cleaner has had time to work (usually 15-20 minutes), you might need to gently scrub the wood with a soft brush or sponge to help lift the grayed layer. Rinse the teak very thoroughly with clean water. You should see the original color starting to emerge.
- Allow to Dry Completely: This is crucial. The wood needs to be bone dry before you apply any finishing oils. This can take a full day or more depending on conditions.
- Apply Teak Oil: Once completely dry, apply your chosen teak oil (as described in “Step 3: Applying a Protective Finish”). This will deepen the revived color and provide protection. You might need two coats to achieve the desired richness. As a reference for wood restoration techniques, resources from organizations like the Woodworking Network often provide practical tips and best practices for working with various wood types.
This process effectively strips away the weathered surface, revealing the beautiful, rich color of the teak wood underneath. It’s a rewarding transformation that can make old furniture look brand new.

Frequently Asked Questions (FAQ)
Q1: How often should I oil my teak furniture?
A1: For best results and to maintain that warm color, plan to reapply teak oil about once a year, usually at the beginning of the outdoor season. If your teak is in a very harsh environment with intense sun and rain, you might consider doing it twice a year.
Q2: Can I use regular furniture polish on my teak outdoor furniture?
A2: No, it’s best to avoid standard furniture polish. These are often wax-based or contain silicones that can build up on teak, create a sticky surface, and interfere with proper oil or sealer application. Stick to products specifically designed for outdoor wood.
Q3: What’s the difference between teak oil and tung oil?
A3: Teak oil is usually a blend that includes penetrating oils like linseed or tung oil, often with added UV protectors and other agents to enhance water resistance. Pure tung oil is a natural, durable finish that provides good water resistance but may not offer the same UV protection or specific “teak” color enhancement as a dedicated teak oil blend.
Q4: Will leaving my teak furniture unfinished ruin it?
A4: Not necessarily! Teak is incredibly durable and can withstand the elements for many years without any finish, naturally weathering to a beautiful silver-gray. However, leaving it unfinished means you won’t protect its original golden hue, and it might become more prone to surface mold or minor staining over time compared to finished teak.
Q5: How do I know if I need a teak cleaner or a teak brightener?
A5: A teak cleaner is for general dirt and grime removal. A teak brightener is specifically designed to tackle the grayed or weathered surface of teak, lifting off the oxidized layer to reveal the original wood color. If your teak is gray and you want to restore its color, you need a brightener.