How to Put on Drawer Fronts: A Step-by-Step Guide
To put on drawer fronts, align them with the cabinet boxes and secure them using screws. Adjust the positioning to ensure they open and close smoothly.
Installing drawer fronts can significantly enhance your kitchen or bathroom’s aesthetics. This process requires precision and patience to achieve a professional finish. Properly fitted drawer fronts not only improve functionality but also add value to your home. Understanding how to measure, position, and secure them is essential for a seamless installation.
Whether upgrading existing drawers or starting from scratch, the right techniques can make all the difference. This guide will walk you through the steps needed to successfully install your drawer fronts, ensuring a polished look that complements your overall interior design.
Introduction To Drawer Front Installation
Installing drawer fronts requires precision and the right tools. This ensures a neat and professional look. Proper alignment is crucial for easy use and lasting durability.
Using the right tools helps make the job easier. Gather the following materials:
| Tools | Materials |
|---|---|
| Drill | Drawer fronts |
| Screwdriver | Screws |
| Level | Measuring tape |
| Clamps | Wood glue |
Measuring For Success
Gathering accurate dimensions is key for perfect drawer fronts. Start by measuring the drawer opening width and height. Use a tape measure for precise results.
Mark the center of the drawer opening. This helps in aligning the drawer front. Ensure the front is level and straight.
For the best fit, consider the thickness of the drawer front. Measure from the back to the front edge. Double-check all measurements before cutting.
Using a pencil, lightly mark the position on the drawer front. This will guide you during installation. Remember, accuracy leads to a professional look.
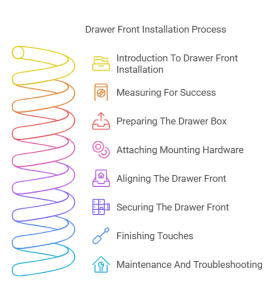
Preparing The Drawer Box
Start by sanding the drawer box. Use medium-grit sandpaper for the best results. This removes old finishes and rough spots. Clean the surface with a damp cloth to remove dust.
Next, ensure the drawer box is completely dry. Apply a primer or paint if desired. This step helps the drawer fronts stick better.
For applying the initial fixtures, gather all required tools and materials. Use a drill to attach the hinges or slides. Be careful to align everything properly for smooth operation.
Double-check all fixtures before proceeding. Make sure everything is secure and functions well. This will save time and effort later on.
Attaching Mounting Hardware
Choosing the right hardware is important for strong drawer fronts. Common options include screws, brackets, and clips. Each type has its own benefits and uses. Make sure to check the weight of your drawer fronts before selecting hardware.
Securing hardware to the drawer involves a few simple steps. Start by marking where the hardware will go. Use a drill to create holes for screws. Align the hardware carefully and tighten the screws firmly. Always double-check that everything is straight and secure.
Aligning The Drawer Front
To align the drawer front, start with a temporary attachment. Use painter’s tape to hold it in place. This allows for easy adjustments while checking alignment.
Next, use a level to ensure the front is straight. Adjust the tape until the drawer front is perfectly aligned.
Checking for even gaps is crucial. Look at the space between the drawer front and the cabinet. The gaps should be the same on all sides.
Make small adjustments if needed. Tighten screws once everything looks good. This will give a professional finish to your drawer fronts.
Securing The Drawer Front
To secure the drawer front, start by drilling pilot holes. This helps prevent wood from splitting. Use a drill bit that matches the screw size.
Next, position the drawer front correctly. Ensure it is centered and straight. Then, insert screws into the pilot holes.
Make sure to tighten the screws gently. Over-tightening can damage the wood. Check the alignment after fastening.
Repeat this process for all drawer fronts. Proper installation will ensure they look great and function well.
Finishing Touches
Installing handles or knobs is a simple task. Start by choosing the right hardware for your drawers. Use a drill to make holes in the front of each drawer. Align the handles or knobs with the holes. Secure them tightly to ensure they stay in place.
Final adjustments are important for a polished look. Check that all drawers align perfectly. Adjust any uneven drawers by loosening the screws slightly. Move the drawer front until it sits evenly. Tighten the screws once everything looks right.
Maintenance And Troubleshooting
Regular care helps maintain drawer fronts for a long time. Clean them often with a soft cloth. Avoid harsh chemicals that can damage the surface.
Check for loose screws or hinges. Tighten any loose parts to prevent further issues. If you notice scratches, use a wood filler to fix them.
For sticky drawers, apply a little wax or silicone spray. This will help them open smoothly. Address any problems quickly to avoid bigger repairs later.

Frequently Asked Questions
How Do I Install Drawer Fronts?
To install drawer fronts, start by measuring the drawer box and the front panel. Use wood glue or screws to attach the front securely. Ensure it aligns properly with adjacent drawers. Finally, check for even gaps around the edges and make any necessary adjustments.
What Tools Do I Need For Drawer Front Installation?
You’ll need a drill, screwdriver, measuring tape, and clamps for drawer front installation. A level will help ensure alignment. Additionally, wood glue can be useful for a stronger bond. Having these tools ready will make the installation process smoother and more efficient.
Can I Replace Old Drawer Fronts Easily?
Yes, replacing old drawer fronts is relatively easy. Start by removing the existing fronts using a screwdriver. Measure the new fronts to ensure a proper fit. Once you have the new fronts, attach them securely using screws or glue, and adjust for alignment as needed.
How Do I Align Drawer Fronts Perfectly?
To align drawer fronts perfectly, start by measuring each drawer box. Use a level to ensure they are straight. Adjust the hinges or mounting brackets as needed for even spacing. Tighten all screws once aligned to maintain the position, and double-check alignment before finishing.
Conclusion
Successfully installing drawer fronts can transform your cabinetry. Following the right steps ensures a professional finish. Always measure carefully and double-check alignment for the best results. With a little patience and practice, you can achieve a polished look. Enjoy your newly updated space and the satisfaction of a job well done!