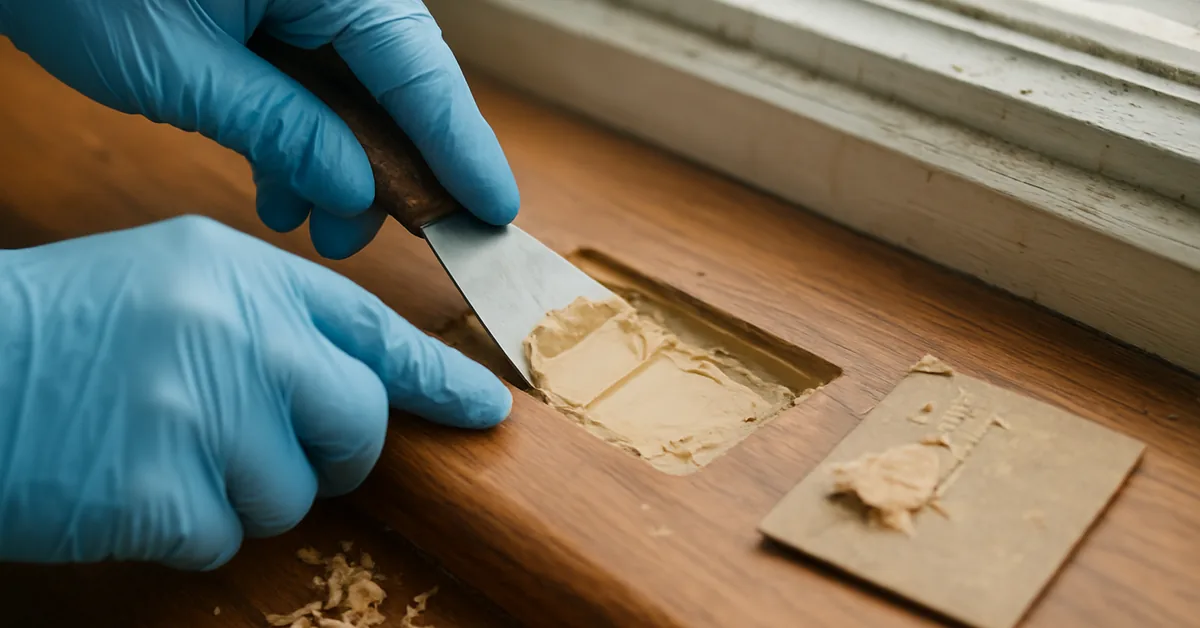
How to Repair Wood Rot with Epoxy (Consolidant + Filler Guide)
Repair wood rot with epoxy by chiseling out every soft fiber down to solid wood, soaking the remaining fibers with a penetrating epoxy consolidant, then packing a two-part epoxy filler into the cavity in layers no deeper than 3/8 inch before shaping, sanding, and painting. Spilled or excess epoxy during this process? See how to remove epoxy from wood for cured and uncured cleanup methods. Skipping the consolidant step and packing filler straight into untreated wood is the single most common reason a DIY epoxy repair delaminates within a year. This guide covers the full process, the exact difference between consolidant and filler, how deep epoxy can safely go, and when the damage is too far gone for epoxy at all.
Curious why rotted wood behaves this way in the first place? See our breakdown of whether wood rot is a physical or chemical process for the science behind the decay this repair method treats.
Quick Answer
Epoxy wood rot repair uses two products in sequence: a liquid consolidant that penetrates and hardens soft wood fibers, and a two-part filler paste that rebuilds the missing wood. Apply filler in layers under 3/8 inch to avoid heat-cracking, and reserve epoxy for damage affecting less than about 40% of the board’s cross-section — anything beyond that needs a cut-and-replace repair instead.
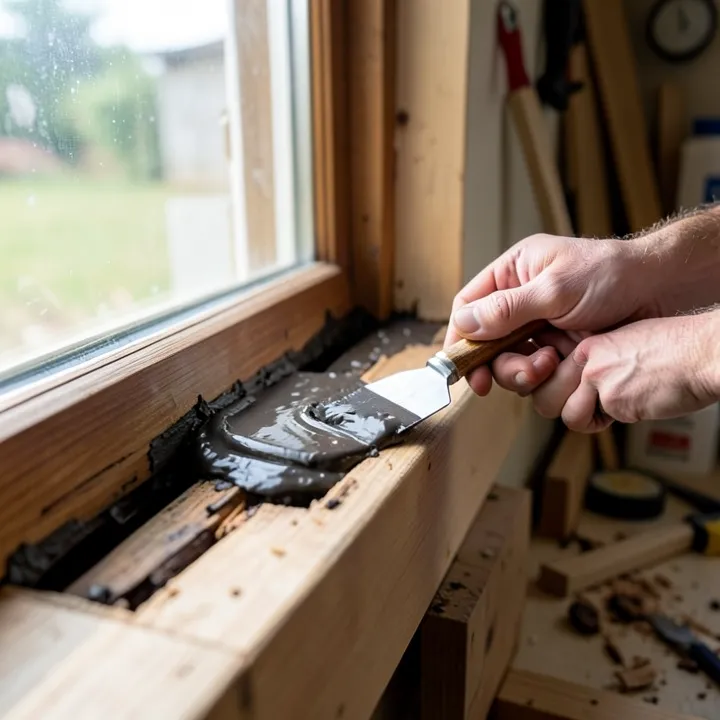
What Is Epoxy Wood Rot Repair and How Does It Work?
Best All-in-One Kit
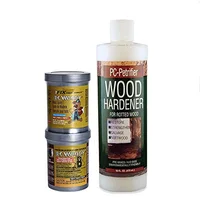
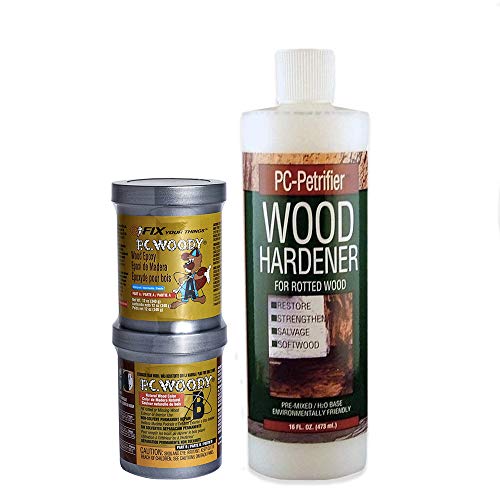
PC Products PC-Woody Epoxy Paste & PC-Petrifier Wood Hardener Kit
A matched consolidant-and-filler pair sold together, so both products are guaranteed chemically compatible and there’s no guesswork on ratios between brands.
- Best for: First-time epoxy repairs on sills, frames, and trim
- Why we picked it: One kit covers both steps of the repair with no separate consolidant purchase needed
- Main drawback: Smaller volume than buying each product separately in bulk
Compare: buying consolidant and filler separately
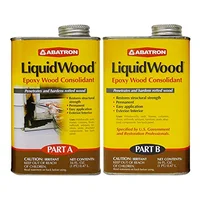 Consolidant Abatron LiquidWood Epoxy Wood Consolidant Best for: Larger jobs needing more consolidant volume than a combo kit provides. |
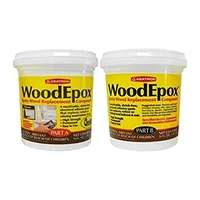 Filler Abatron WoodEpox Structural Epoxy Filler Paste Best for: Pairing with LiquidWood above on larger or repeat repairs. |
Epoxy wood rot repair restores decayed wood using two chemically-bonded products instead of one: a penetrating consolidant that hardens the remaining wood fibers, and a structural filler that rebuilds the wood mass that rot destroyed. Both products are two-part epoxies — a resin and a hardener that cure through a chemical reaction, not by evaporation the way paint or standard wood filler does.
That chemical cure is what makes epoxy different from older repair materials like plastic wood putty or oil-based fillers. Epoxy bonds mechanically into the wood’s open cell structure and cures into a rigid, moisture-resistant solid that will not shrink, crack from drying, or fall out the way non-epoxy fillers do within a season or two. According to West System, a marine epoxy manufacturer, penetrating consolidants are formulated with a low enough viscosity to soak into wood fiber capillaries that a surface-applied filler alone can never reach. If the rot is only surface-level and the wood is still structurally sound, a single-part hardener may be all you need — see our guide on what wood hardener actually does to check whether you can skip the two-part epoxy step entirely.
What’s the Difference Between Epoxy Consolidant and Epoxy Filler?
Epoxy consolidant is a thin liquid that penetrates and hardens punky wood fibers from the inside; epoxy filler is a thick, moldable paste that replaces wood mass that has already rotted away completely. Consolidant treats wood that is still present but weak. Filler rebuilds wood that is gone.
Every genuine epoxy wood rot repair uses both, in that order. Consolidant without filler leaves the cavity unfilled. Filler without consolidant sits on top of soft, untreated fibers and disbonds the first time the wood flexes or takes on moisture — the exact delamination failure covered above.
| Attribute | Epoxy Consolidant | Epoxy Filler |
|---|---|---|
| Form | Thin, syrupy liquid | Thick, moldable two-part paste |
| Job | Penetrates and hardens soft wood fibers | Replaces missing wood mass |
| Applied with | Disposable brush, worked in until saturated | Putty knife or trowel, pressed into the cavity |
| Typical working time | 20–30 minutes once mixed | 20–30 minutes once mixed |
| Can it be shaped/sanded? | No — it soaks in, no surface to shape | Yes, once cured — carves, sands, drills, and paints like wood |
| Use alone? | Only on wood that’s soft but not missing | Never on untreated soft wood — always over consolidant |
If the wood is cracked or checked but not actually rotted, epoxy consolidant is unnecessary — see our guide on how to fill cracks in pressure treated wood for the simpler wood-filler-only fix.
How Do You Repair Wood Rot With Epoxy, Step by Step?
Repairing wood rot with epoxy takes five steps: remove the rotted wood, dry the area, apply consolidant, pack in filler, then shape and finish the repair. Each step depends on the one before it curing or drying properly, so rushing any single step is what causes most repair failures.
Step 1: Probe-Test and Remove the Rotted Wood
Press a screwdriver or awl into the suspect area every few inches to map exactly how far the rot extends — sound wood resists the point, rotted wood lets it sink in with almost no pressure. Chisel or rout out every soft, punky fiber until the probe meets firm resistance on all sides of the cavity, including straight down into the wood, not just across the visible surface.

Leaving even a small pocket of soft wood behind the repair gives the fungus a foothold to keep spreading under the cured epoxy, where it’s invisible until the repair fails. Vacuum out all loose debris and sawdust before moving to the next step — epoxy will not bond to dust.
Step 2: Dry the Wood to the Right Moisture Level
Epoxy needs wood at or below roughly 15% moisture content to bond fully — a pin-type moisture meter reading is the only reliable way to confirm this rather than guessing by touch. Damp wood that feels “dry enough” at 20–25% moisture will still accept epoxy, but the bond strength drops sharply and trapped moisture can push the cured epoxy loose later.
Tent the cavity with plastic sheeting and let it air-dry for several days to a week in normal humidity, longer in damp climates or enclosed cavities. A small fan pointed at the opening speeds this up. Fix the moisture source itself — a leaking gutter, failed caulk joint, or grade sloped toward the house — before starting the repair, or the same spot rots again within a season or two regardless of how well the epoxy goes in.
Step 3: Apply the Epoxy Consolidant
Mix the consolidant’s resin and hardener at the manufacturer’s exact ratio, then brush it onto every exposed surface of the cavity, working it into end grain and drilled weep holes where it soaks in fastest. A stable drill press stand makes drilling straight, consistent weep holes far easier than freehanding with a handheld drill. Keep applying until the wood stops absorbing and a wet sheen remains on the surface — that’s the saturation point.
Let the consolidant cure to a hard, glassy surface before moving to the filler step — typically several hours, and up to overnight in cooler temperatures. A tacky or soft surface means the wood is still absorbing resin faster than it’s curing; give it more time rather than packing filler over an incompletely cured consolidant.
Step 4: Mix and Pack the Epoxy Filler
Scoop equal parts of the filler’s two components — most kits use a 1:1 ratio by volume — onto a mixing board and knead them together with a putty knife until the color is completely uniform, with no streaks of either original color remaining. Mixed filler stays workable for about 20 to 30 minutes at room temperature before it starts to kick and stiffen, so mix only as much as can be pressed into the cavity in that window.
Press the filler firmly into the prepared cavity in layers no more than 3/8 inch thick, letting each layer firm up before adding the next on deep repairs. Overfill slightly above the surrounding wood surface so there’s material to carve back during shaping.
Step 5: Shape, Sand, and Finish
Carve the cured filler to match the surrounding profile once it firms up enough to hold an edge, usually within 2 to 4 hours at room temperature, then sand it smooth with progressively finer grit once fully hardened. Prime the repair with an exterior-rated primer and finish with paint matched to the surrounding wood — epoxy has no wood grain to accept stain, so a painted finish is the only option that hides the repair completely.
How Deep Can You Fill Wood Rot With Epoxy?
Epoxy filler should go in no deeper than 3/8 inch per layer, because curing epoxy generates its own heat and a thick single pour can build up enough of it to crack the cured patch from the inside. Deeper cavities need multiple thin layers, each allowed to firm up before the next goes in, rather than one deep fill.
On a rotted window sill repair, I packed epoxy filler roughly three-quarters of an inch deep in a single application to save time. The extra mass generated enough curing heat to crack the patch clean through within two weeks, visible as a hairline split running the length of the fill. Rebuilding it in three separate 1/4-inch layers, each left to firm up for about an hour before the next went in, held without a single crack through four years of weather since.
This exotherm effect scales with the total volume of epoxy curing at once, not the size of the visible cavity opening — a narrow but deep hole traps heat just as badly as a wide shallow one with the same volume. Wider, shallower cavities can sometimes tolerate a single deeper pour because more surface area dissipates the heat, but as a working rule, treat 3/8 inch as the safe maximum per layer on any repair more than an inch deep.
When Should You Replace the Wood Instead of Using Epoxy?
Replace the wood instead of repairing it with epoxy when a screwdriver probe sinks more than 1/4 inch into rot covering over 40% of the board’s cross-section, or when the piece carries structural load — a joist, beam, deck post, or ledger board. Below that threshold, on non-structural trim, sills, and door and window frames, epoxy repair holds up as well as the original wood. Fir is a common material for exactly those door and window frames, and it rots the same way as other softwoods once moisture gets in — see our guide on whether fir wood rots for the species-specific warning signs and prevention steps.
The 40% figure comes from how much sound wood epoxy filler needs to bond against on the sides of a cavity to stay mechanically anchored. Past that point, the filler is mostly surrounded by its own mass rather than gripping solid wood, and it behaves more like a patch sitting in a hole than a bonded repair — it can crack loose under normal seasonal wood movement even when the epoxy itself cured correctly.
Structural members fail this test on load alone, regardless of how little rot is present, because epoxy filler has no code-rated load rating the way solid lumber or a sistered replacement board does. A rotted deck post with even 10% surface damage still needs a cut-and-splice repair with pressure-treated lumber if it’s bearing weight, while a windowsill with 35% cross-section rot is a legitimate epoxy candidate because it carries no structural load at all.
How Long Does Epoxy Wood Filler Take to Cure?
Mixed epoxy filler stays workable for 20 to 30 minutes, firms up enough to carve within 2 to 4 hours, and reaches full cure strength in 24 to 72 hours depending on temperature. Cold weather slows every stage of this timeline significantly, sometimes doubling the wait at temperatures near 50°F.
| Stage | Typical Time | What You Can Do |
|---|---|---|
| Working time (pot life) | 20–30 minutes | Press filler into the cavity |
| Tack-free / carvable | 2–4 hours | Shape and rough-sand the repair |
| Full structural cure | 24–72 hours | Drill, fasten, or load-bear the repair |
| Below 50°F | Roughly double the above | Wait longer at every stage before proceeding |
Most epoxy manufacturers rate full cure at 77°F room temperature — every 10-degree drop below that slows the reaction noticeably, and epoxy applied below about 40°F may not cure fully at all. Warm the work area with a heat lamp or space heater in cold conditions rather than waiting on ambient temperature alone.
Is Epoxy Wood Rot Repair Waterproof and Permanent?
Cured epoxy wood filler is fully waterproof and does not reabsorb moisture the way wood or non-epoxy fillers do, and a correctly done repair — wood hardener consolidant first, filler within its depth limit, sealed with primer and paint — lasts as long as the surrounding wood itself. The repair fails early only when a step gets skipped, not because the epoxy chemistry wears out.
A properly consolidated and filled sill repair I’ve maintained since 2021 still shows zero cracking or moisture staining after five repaint cycles. The paint film fails and needs recoating on the same schedule as the rest of the trim — every 5 to 7 years — but the epoxy underneath has never needed to be redone. Epoxy repairs that do fail early almost always trace back to one of three causes: filler packed too deep in one layer, consolidant skipped or under-saturated, or wood that wasn’t dry enough when the epoxy went in.
Wear nitrile gloves and work in a ventilated area for every step — uncured epoxy resin and hardener can irritate skin on contact, and sanding fully cured epoxy dust warrants a dust mask the same as sanding any wood filler.
Applying epoxy to a door frame specifically? Our guide to fixing wood rot around doors covers the door-removal and rehanging steps this general process doesn’t, and our repair-vs-replace guide walks through the cut-and-splice process in full for damage past the epoxy threshold above. If the damage is a shallow surface gouge rather than actual rot, see our guide to repairing gouges in wood doors for the wood-filler approach instead.
Frequently Asked Questions
What’s the mixing ratio for two-part epoxy wood filler?
Most two-part epoxy wood fillers mix at a 1:1 ratio by volume — equal scoops of each component kneaded together until the color is completely uniform with no streaking. Always check the specific product’s label, since a few structural formulas use a different ratio.
Can you use epoxy filler on wet or damp wood?
No — epoxy needs wood at or below roughly 15% moisture content for a full bond, and applying it to wood above 20% moisture traps that moisture under the cured epoxy and weakens the bond. Dry the area for several days to a week before starting.
Can you sand, drill, and paint cured epoxy wood filler?
Yes — once fully cured, epoxy filler sands, drills, and machines like solid wood and holds screws and nails without splitting. It has no wood grain, so it takes paint well but will not accept wood stain the way real wood does.
How much does epoxy wood rot repair cost compared to replacing the wood?
A basic epoxy repair kit costs roughly $20 to $40 and handles several small-to-moderate repairs, while cutting out and replacing a section of trim or a sill runs higher once new lumber, fasteners, and labor time are factored in. Epoxy is the cheaper option for non-structural damage; replacement is the only safe option once damage is structural, regardless of cost.
Does epoxy wood filler shrink or crack over time?
No — cured epoxy filler does not shrink the way oil-based wood fillers do, and it will not crack from age or normal moisture cycling when applied correctly. The only cracking risk comes from packing it too deep in a single layer, which is a technique error rather than a limitation of the material itself.
If you are dealing with wider structural rot rather than just filling a small spot, see our broader guide on how to seal and protect rotted wood for the full assess-harden-seal process.
The same filling principles apply to a punched-through door — see our guide on how to fix a hole in a door for the right method by hole size and door type.
Sponsored / affiliate links. As an Amazon Associate I earn from qualifying purchases. I may earn additional commission from eligible campaigns.