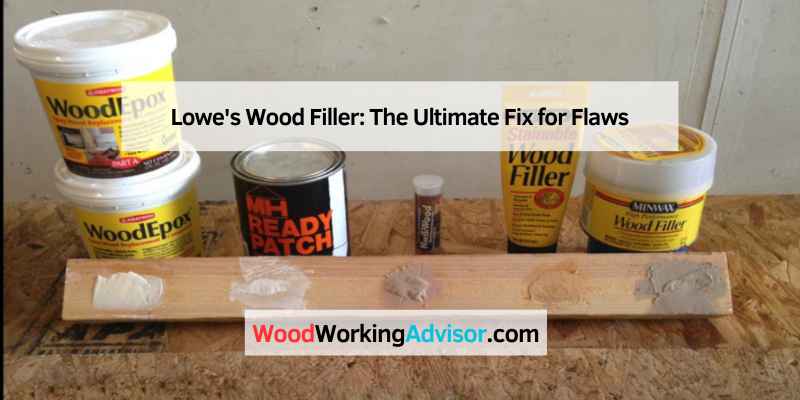
How to Use Wood Filler for Wood Repairs: 7-Step Guide
Wood filler from Lowe’s fills cracks, nail holes, and gouges in unfinished wood permanently — but only if you apply it in layers no deeper than 1/4 inch and overfill by 1/16 inch to compensate for shrinkage. Using the wrong type or skipping prep steps are the two mistakes that cause repairs to crack or show a shadow through paint. This guide covers how to choose between DAP Plastic Wood and Minwax Stainable, how to apply wood filler in 7 steps, and how to stain or paint over the repair so it disappears.
Quick Answer
Apply Lowe’s wood filler with a putty knife, overfilling by 1/16 inch to account for 5-15% shrinkage as it dries. Let water-based filler dry 2 hours for shallow fills; fill deep gaps in 1/4-inch layers with 2-6 hours between each. Sand flush once fully cured, then paint or stain.
What Is Wood Filler and When Should You Use It?
Best Wood Filler Pick for Repairs
Minwax Stainable Wood Filler 16oz
Water-based formula that accepts all Minwax penetrating stains — both oil-based and water-based. Fills nail holes, gouges, and cracks on unfinished interior or exterior wood.
- Best for: Stainable repairs on oak, walnut, and hardwood furniture
- Why we picked it: Most consistent stain absorption across multiple wood species in real-world tests
- Main drawback: Does not accept stain as uniformly on pine as on hardwood
Compare more wood filler options
 Option 1 DAP Plastic Wood-X DryDex 5.5oz
|
 Option 2 Minwax Stainable Wood Filler 6oz
|
 Option 3 DAP Plastic Wood-X 16oz
|
As an Amazon Associate we earn from qualifying purchases.
Wood filler is a water-based or solvent-based compound that dries rock-hard and can be sanded, painted, or stained. It is designed for unfinished or raw wood surfaces where a structural, permanent repair is needed — nail holes, gouges, knot holes, cracks, and missing chunks on furniture, trim, and floors.
It is not the same as wood putty. Wood putty stays flexible after drying and is designed for finished (already sealed) wood surfaces, such as pressing into a nail hole on a pre-painted baseboard. If you use putty on raw wood before staining, the putty will not accept the stain and the repair will show as a light spot. For raw, unfinished wood at any stage before the topcoat, wood filler is the correct product.

DAP Plastic Wood vs Minwax Stainable: Which to Buy at Lowe’s
Lowe’s carries both major brands in multiple sizes. The choice depends on whether you need stainability or strength — they are optimized for different goals.
| Product | Base | Stainable? | Best For |
|---|---|---|---|
| Minwax Stainable Wood Filler | Water | Yes — accepts oil and water stains | Furniture, trim, oak and hardwood projects |
| DAP Plastic Wood-X (DryDex) | Water | Yes — goes on pink, turns natural when dry | Pine, high nail-hole volume, quick fixes |
| DAP Plastic Wood (solvent-based) | Solvent | Limited | Outdoor repairs, structural fills, dries 3x harder than pine |
| Minwax High Performance Wood Filler | Two-part epoxy | Paint only (not stain) | Missing chunks, rot, structural repairs over 1/2 inch deep |
For most interior furniture and trim repairs where stain color-matching matters, Minwax Stainable is the better performer — independent tests consistently show it takes stain more uniformly on oak than DAP alternatives. For pine trim, baseboard nail holes, and projects where you are painting (not staining), DAP Plastic Wood-X is faster and cheaper per ounce.
How to Apply Wood Filler: 7-Step Guide
These steps apply to both DAP and Minwax water-based fillers sold at Lowe’s. The process is the same whether you are fixing furniture, trim, or floor boards.
- Clean the area: Remove all dust, grease, wax, and loose particles from the repair site. Sand the surrounding wood lightly to open the grain — this is what allows the filler to bond, not just sit on top.
- Open and stir the filler: If the filler has been stored, stir it thoroughly before use. Separation is normal and does not mean the product has gone bad.
- Load the putty knife: Scoop a small amount onto a stiff putty knife — a flexible knife for shallow fills, a rigid knife for deep ones. Do not work directly from the can if the repair is near the lid edge.
- Fill and overfill by 1/16 inch: Press the filler firmly into the gap with the knife at a 30-degree angle, forcing it to the bottom of the hole. Finish with a light drag to leave the surface slightly proud of the surrounding wood — most fillers shrink 5 to 15% as they cure, so starting flush means ending depressed.
- Layer deep fills (1/4 inch at a time): For holes or gaps deeper than 1/4 inch, do not fill all at once. Apply a 1/4-inch layer, allow it to dry completely (2 to 6 hours), then apply the next layer. Filling too deep in one pass traps moisture, causes cracking, and creates a soft center that will not sand smooth.
- Allow full drying before sanding: Shallow fills (under 1/4 inch) dry in 15 to 30 minutes for water-based filler at room temperature (45-85 degrees F, 50% humidity). Deeper fills need 2 to 24 hours depending on depth. The DAP Plastic Wood-X DryDex starts pink and turns natural when it is ready to sand — do not sand while any pink remains.
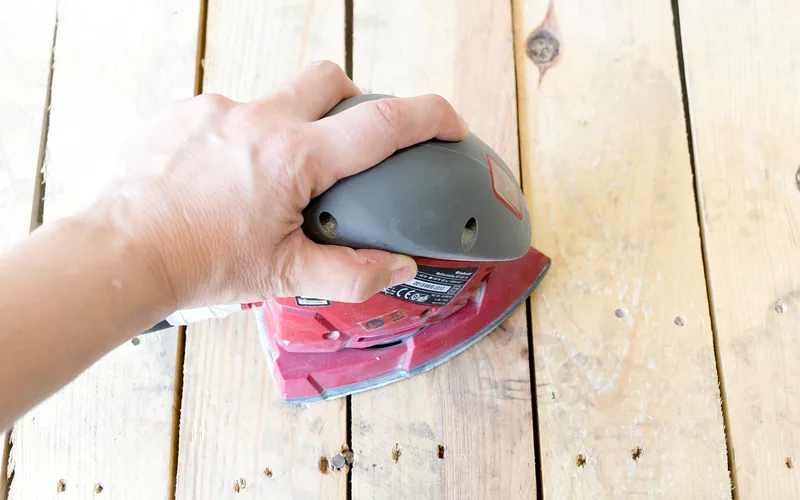
- Sand flush and wipe clean: Sand with 120-grit to level, then 180 or 220 to match the surrounding surface. Always sand in the direction of the grain. Remove all sanding dust with a tack cloth before applying any finish — dust trapped under stain or paint causes texture bumps.
Common Mistakes That Cause Repairs to Fail
Most failed wood filler repairs come down to four issues that the product label does not spell out clearly enough.
- Filling flush instead of slightly proud: Filler shrinks as it dries. Filling exactly level with the surface guarantees a visible depression after curing. Always leave the repair 1/16 inch above the surrounding wood to compensate.
- Filling too deep in one pass: The maximum single application depth for water-based fillers is 1/4 inch. A deeper single fill traps moisture inside, which causes cracking, soft spots, and poor adhesion to the next coat. Use multiple thin layers.
- Sanding too early: Sanding before full cure drags the soft filler across the grain rather than cutting it, creating smear marks and a rough texture under the finish. Wait until the filler is visibly dry and hard to the touch — or until the DryDex indicator has turned natural.
- Using filler on finished wood: If the wood is already sealed, stained, or painted, filler will not bond — it will pop out or remain as a raised lump. Strip or sand back to raw wood first.
Painting and Staining Over Wood Filler
Painting over filler is straightforward — prime first, then paint. The filler is porous and can cause uneven sheen without primer, but any latex or oil-based primer works.
Staining over filler is harder. Filler does not have the same grain structure as wood, so it absorbs stain differently — often lighter than the surrounding wood with penetrating (oil-based) stains. Three techniques that reduce the visibility:
- Use a gel stain: Gel stains sit on top of the surface rather than soaking in. Because they do not rely on absorption, they color filler and surrounding wood more uniformly. This is the single most effective technique for hiding filled repairs under stain.
- Pre-tint the filler: Mix a few drops of matching liquid stain directly into the wet filler before application. This does not eliminate the absorption difference, but it shifts the filler’s base color closer to the finished wood tone.
- Use a stain-and-seal product: One-coat stain-and-seal formulas are less demanding on absorption matching and can reduce the visible difference between filler and wood on close-grained species like maple or birch.
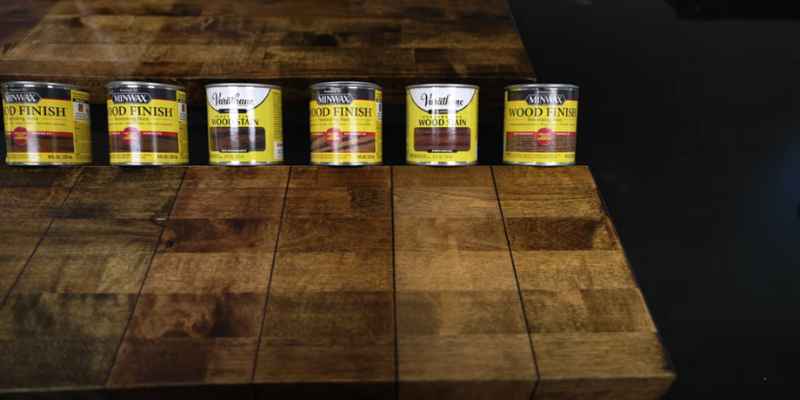
“On oak and other open-grain hardwoods, I have had consistently better results pre-tinting Minwax Stainable with two or three drops of matching oil stain before filling. The filler never matches perfectly — no filler does — but the tinting gets it close enough that the repair disappears at normal viewing distance after the topcoat goes on.”
How to Store Wood Filler to Extend Its Shelf Life
An opened container of water-based wood filler lasts 1 to 2 years if stored correctly. An unopened container lasts 3 to 5 years. To prevent early drying and skin formation:
- Store in a dry location between 45 and 85 degrees F — do not allow the filler to freeze or sit in a hot garage.
- Press a piece of plastic wrap directly onto the surface of the filler before replacing the lid. This eliminates the air gap that causes skin formation.
- If a dry skin forms on top, remove it with a putty knife and check if the filler below is still workable. A skin does not always mean the whole container is lost.
- Add a few drops of water to a dried-out water-based filler and stir thoroughly — it can often be revived if it has not fully hardened.
Frequently Asked Questions
Is wood filler the same as wood putty?
No. Wood filler dries hard, is meant for unfinished (raw) wood, and can be sanded and stained. Wood putty stays pliable and is designed for finished wood where the topcoat is already applied. Using putty on raw wood before staining causes light spots because putty does not accept stain the way sanded bare wood does.
How long does wood filler take to dry before sanding?
Water-based fillers like Minwax Stainable and DAP Plastic Wood-X are ready to sand in 15 to 30 minutes for shallow fills under 1/4 inch deep, under good ventilation at 77 degrees F and 50% humidity. Deeper fills need 2 to 6 hours per layer. Cold temperatures, high humidity, or thick application all extend dry time. The DAP DryDex product changes from pink to natural when it is ready to sand.
Can you stain over wood filler?
Yes, but the result depends on the filler type and stain type. Minwax Stainable Wood Filler is specifically formulated to accept Minwax stains, both oil-based and water-based. Even so, filler will absorb stain differently than the surrounding wood because it lacks wood grain. Using a gel stain instead of a penetrating stain produces the most uniform result over filled areas.
Does wood filler dry as hard as real wood?
No, standard latex wood filler does not dry as hard as wood and should not be used for structural repairs where screws or nails will be driven into the filled area. Solvent-based DAP Plastic Wood is significantly harder (dries three times as hard as standard pine according to DAP’s product data) but is still not a structural material. For large missing chunks or rot replacement, a two-part epoxy filler like Minwax High Performance Wood Filler is the correct choice.
Is wood filler waterproof?
Most water-based wood fillers including Minwax Stainable are water-resistant but not fully waterproof once dry. They can handle brief moisture exposure but will absorb water and eventually soften if left unsealed outdoors. For exterior repairs, use a solvent-based filler like DAP Plastic Wood or an exterior paintable wood filler, and always seal the repair with an exterior topcoat.
For more wood maintenance and repair guides, start with interior furniture repair on pieces that need staining, removing excess dried stain before applying wood filler ensures a clean, oil-free surface the filler can bond to properly. If you are working with MDF cabinet doors that have swelled or delaminated, a different repair approach applies — see our guide on MDF cabinet door warping.
Conclusion
Applying wood filler correctly comes down to three discipline points: overfill by 1/16 inch to account for shrinkage, layer fills deeper than 1/4 inch, and let each layer dry completely before sanding. For stainable repairs, Minwax Stainable Wood Filler is the most reliable choice at Lowe’s, and pre-tinting with a few drops of matching stain closes most of the color gap. For projects where you are painting, DAP Plastic Wood-X gives you the fastest feedback on dry time via the pink-to-natural indicator. Both products are available at Lowe’s in multiple sizes from small touch-up tubes to 32-ounce cans for larger jobs.
Sponsored / affiliate links. As an Amazon Associate I earn from qualifying purchases. I may earn additional commission from eligible campaigns.