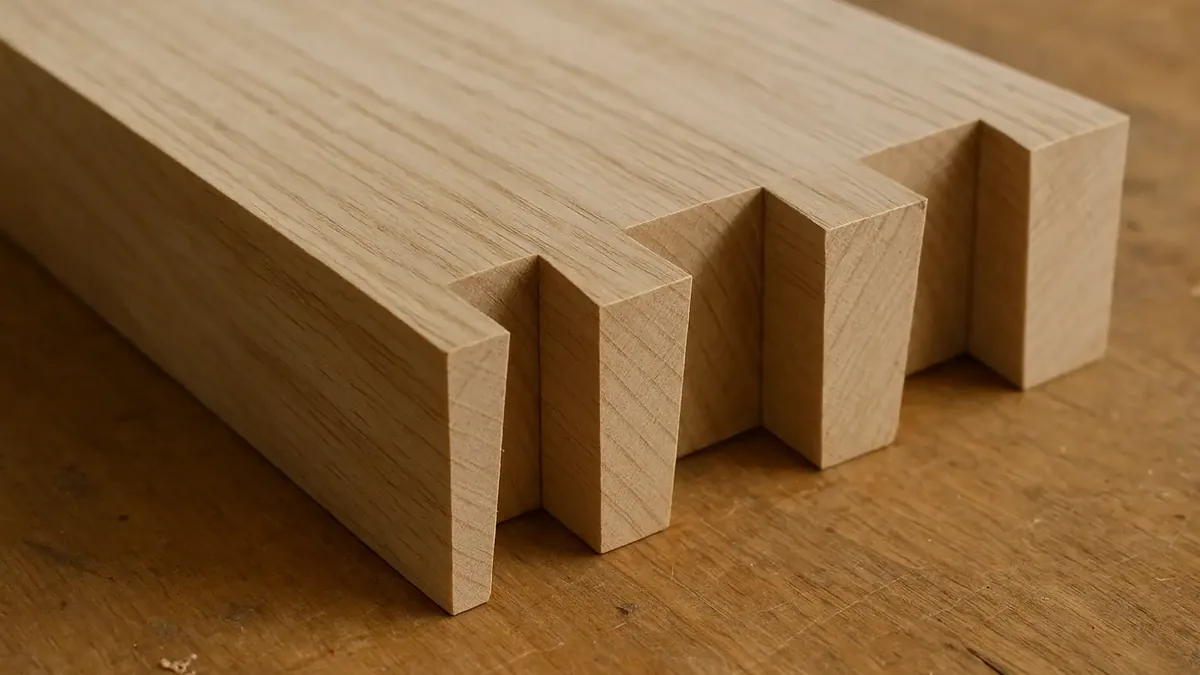
How to Cut Dovetail Joints by Hand: Marking, Sawing, and Fitting
You cut a dovetail joint by hand by scribing a baseline with a marking gauge, sawing angled tails into one board with a dovetail saw, chopping the waste out with a bench chisel, then transferring that exact tail shape onto the second board to mark and cut matching pins. The sequence needs no router, jig, or power tool — just a saw, a chisel, and a steady baseline. My first through-dovetail joint in 3/4-inch poplar took 38 minutes and still needed a mallet tap to seat. The tenth took 11 minutes and dropped into place by hand.
Quick Answer
Hand-cut dovetail joints start with a baseline scribed at the stock’s exact thickness, then tails sawn at a 1:6 to 1:8 angle with a dovetail saw. Chisel out the waste between the tails, transfer that shape onto the mating board with a marking knife, then saw and pare the pins to match before test-fitting.
What Tools Do You Need to Cut Dovetail Joints by Hand?
Hand-cutting dovetails needs six tools: a dovetail saw, a marking gauge, a set of sharp bevel-edge chisels, a coping saw, a mallet, and a sliding bevel gauge for the angle. No router, jig, or power tool is required.
- Dovetail saw (Western push-stroke or Japanese pull-stroke dozuki) — saws the tails and pins down to the baseline
- Marking gauge — scribes the baseline at the exact thickness of the mating board
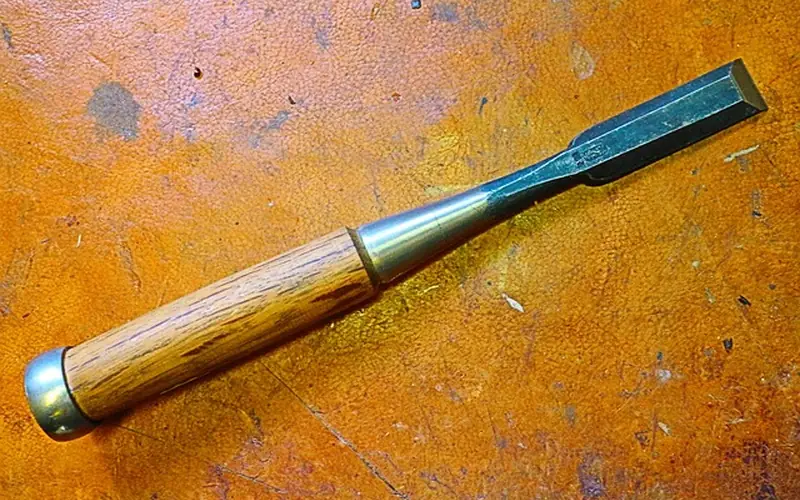
- Bevel-edge chisels, 1/8-inch to 3/4-inch widths — pare waste back to the baseline
- Coping saw or fret saw — removes the bulk of the waste between tails before paring
- Mallet — drives the chisel for cross-grain chopping
- Sliding bevel gauge or dovetail marker — transfers the 1:6 or 1:8 angle onto the board
A chisel edge sharpened to a 25-degree primary bevel with a 30-degree secondary micro-bevel slices end grain instead of crushing it. A dull edge is the single most common cause of ragged, torn-out tails — sharpen before starting, not after the first ugly cut.
Recommended Dovetail Saw
SUIZAN Dozuki Dovetail Saw 7″ – $39.80
A Japanese pull-stroke saw keeps the thin blade in tension on the cut instead of pushing it into a buckle — the exact problem that causes wandering, off-angle tail cuts with a cheap Western push saw.
- Best for: beginners who want cleaner pull-stroke cuts with less tear-out in hardwood
- Why we picked it: the pull-stroke design won’t buckle mid-cut the way thin push saws can
- Main drawback: the pull-stroke motion takes a few boards to get used to if you learned on Western saws
As an Amazon Associate we earn from qualifying purchases.
What Angle Should Dovetail Joints Be Cut At?
Dovetail tails are cut at a 1:6 slope, about 9.5 degrees, in softwood, and a 1:8 slope, about 7 degrees, in hardwood. A steeper angle grips harder but chips out more easily; a shallower angle looks subtler and resists splitting along the grain.
| Wood Type | Ratio | Approx. Angle | Why This Ratio |
|---|---|---|---|
| Softwood (pine, cedar) | 1:6 | 9.5° | Extra grip offsets softer, more crush-prone fibers |
| Hardwood (oak, maple, walnut) | 1:8 | 7° | Denser fibers hold with a shallower angle; steeper cuts chip out more on hard grain |
| Mixed or general-purpose stock | 1:7 | 8.2° | A single compromise setting for shops cutting both softwood and hardwood joints |
Every joint cut steeper than 1:6 in three years of client box orders in walnut chipped along at least one tail shoulder during fitting; dropping to 1:8 eliminated the problem entirely. Lost Art Press’s research on historical dovetail angles backs the same range — most 18th- and 19th-century furniture makers cut somewhere between 1:6 and 1:8, not a fixed single number.
📊 1:8 (about 7°) is the angle most historical hardwood furniture joints were cut at — Source: Lost Art Press, 2022
How Do You Mark Out a Dovetail Joint Before Cutting?
Set a marking gauge to the exact thickness of the mating board, then scribe the baseline around both faces and both edges of the tail board. Every saw cut references this one line — it is never erased or re-scribed mid-process.
Divide the board’s width into equal tail sockets roughly 3/4 inch to 1 inch wide, with a half-pin at each edge for strength. Extend the baseline onto the back face too, so the saw has a visible stop line from both sides of the cut.
Do You Cut the Tails or the Pins First?
Cut the tails first. Tails are wider and easier to saw accurately, and the finished tail board becomes the exact template for marking the narrower pins — one less freehand layout step for a beginner to get wrong.
Some experienced joiners prefer pins-first, since a completed pin board is arguably just as easy to trace tails from, and it avoids ever chiseling into already-cut pin sockets. Fine Woodworking’s comparison of both methods found both produce equally strong joints — the choice is workflow preference, not joint quality.
How Do You Saw and Chop Out the Tails?
Clamp the tail board upright in a vise, saw down each angled layout line to the baseline, then remove the waste between the tails with a coping saw before paring the last 1/16 inch back with a chisel.
- Clamp the board upright: secure the tail board vertically in a vise so the end grain faces up and the baseline is visible from both sides.
- Saw each tail line to the baseline: follow the angled layout lines with the dovetail saw, stopping exactly at the baseline, never past it.
- Rough out the waste: cut out the bulk of the material between tails with a coping saw, staying roughly 1/16 inch above the baseline.
- Pare to the baseline: place a sharp chisel bevel-down in the baseline scribe line and pare the remaining waste back in thin slices.
- Undercut slightly: angle the chisel a few degrees past square on the interior faces so the visible edges of the joint make first contact when it’s assembled.
How Do You Transfer the Tail Pattern to Cut the Pins?
Position the finished tail board over the end grain of the pin board and scribe around every tail with a sharp marking knife. Saw down each resulting line on the waste side, then remove and pare the pin sockets exactly as you did the tails.
- Scribe the pin layout: hold the tail board precisely in place over the pin board’s end grain and trace every tail outline with a marking knife.
- Saw the pin lines: cut down to the baseline on the waste side of each scribed line, keeping the saw square to the end grain.
- Clear the pin sockets: remove the bulk waste with a coping saw, then pare the sockets back to the baseline with a chisel.
How Do You Fit and Assemble a Hand-Cut Dovetail Joint?
Test-fit the joint by hand pressure alone before reaching for a mallet — a well-cut joint slides together with light resistance, not force. Mark any high spot with a mechanical pencil, then pare only that exact spot down.
I run a pencil along the inside faces of the pins before every test-fit. The graphite transfers onto whatever is still binding inside the tail socket, so I pare exactly that spot instead of guessing and removing wood I don’t need to.
Once the dry fit seats fully by hand, apply a thin, even coat of wood glue to both mating surfaces and assemble with light mallet taps through a wood block, never directly on the joint. Most PVA wood glues give 5 to 10 minutes of open working time before they start to grab — enough for one joint, not enough to walk away and come back. Once the glue cures, any pins or tails sitting slightly proud of the surface clean up fast with a card scraper rather than sandpaper, which can round over the crisp joint lines — see our guide on how to properly sharpen a wood scraper for the jointing-and-burnishing method that keeps a scraper cutting cleanly on end grain.
Through vs. Half-Blind Dovetails: Which Should You Cut First?
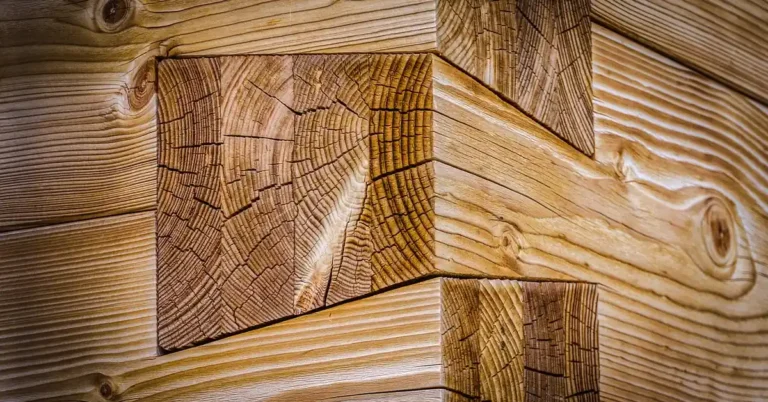
A through dovetail cuts pins and tails all the way through both boards, showing end grain on both faces — the easiest version for a first attempt. A half-blind dovetail hides the tails behind a shallow socket so only one face shows a plain surface, the format typically used on drawer fronts.
Learn the through dovetail first. It uses the exact same marking, sawing, and paring skills as a half-blind joint, minus the added step of stopping the pin sockets short of the front face — master one process before adding the second constraint. For a broader look at where dovetails fit next to other joinery options, see this site’s overview of simple wood joints.
Why Are My Dovetails Loose or Gappy? (And How to Fix It)
Loose dovetails almost always trace back to one of three causes: a saw cut that drifted off the layout line, a marking gauge set to the wrong thickness, or paring past the baseline. Fix small gaps with a glued sliver of matching wood driven into the gap before final assembly; fix systemic looseness by re-checking the gauge setting against the actual board thickness.
- Gap under 1/32 inch: pack it with a mix of wood glue and fine sanding dust from the same species, then pare flush once cured.
- Gap consistent on every tail: the marking gauge was set to the wrong thickness before scribing the baseline — re-measure the mating board directly, don’t estimate.
- Gap on one side only: the saw drifted off the layout line on that cut — check that the saw is starting square to the end grain, not angled into the cut.
A gap wider than about 1/16 inch is not worth disguising. Recut that one tail or pin on a scrap offcut of the same stock and swap it in before glue-up — a visible glue-and-sawdust patch on a show face reads as a mistake, not as character.
Is Hand-Cutting Dovetails Actually Hard to Learn?
No. A first-time woodworker who has never held a dovetail saw can cut a functional through-dovetail joint in an afternoon using six tools and no jig. The skill that takes longer to build is speed and gap-free consistency across repeated joints, not the basic process itself.
Hand-cutting is genuinely slower than a router jig for repeated identical joints — a jig can cut a whole drawer’s worth of matching joints in minutes, where hand-cutting the same drawer takes an afternoon. For a single box, a one-off drawer, or a handful of joints, hand-cutting is faster to set up and just as strong once glued. If the project stock is plywood rather than solid wood, check whether plywood holds up to hand-cut dovetailing before committing good material — the layered core behaves differently under a chisel than solid stock does.
“I keep a scrap block cut to the exact same thickness as whatever project stock I’m using, just to reset my marking gauge against it. That one habit has saved more joints than any single tool in the till.”
Dovetails and mortise and tenon joints solve different problems with the same basic hand-tool kit. If your next project needs a stronger structural joint for aprons, legs, or frames rather than a decorative corner, see our guide to mortise and tenon tools for the chisel, gauge, saw, and plane it takes.
Frequently Asked Questions
What angle are dovetail joints cut at?
Dovetail joints are cut at a 1:6 slope, about 9.5 degrees, in softwood and a 1:8 slope, about 7 degrees, in hardwood. Furniture makers commonly default to 1:8 since it resists chipping better in dense, brittle grain.
Should you cut the tails or the pins first on a dovetail joint?
Cut the tails first. The completed tails become the exact template for marking the pins, removing one freehand layout step for a beginner. Some experienced joiners prefer pins-first, but tails-first is the easier starting method.
Do dovetail joints need glue?
Yes. The interlocking shape resists being pulled apart, but glue is still needed for long-term rigidity and to lock the fit permanently. Apply a thin, even coat of wood glue to both mating surfaces before final assembly.
What’s the difference between a through dovetail and a half-blind dovetail?
A through dovetail shows end grain on both faces of the joint. A half-blind dovetail hides the tails inside a shallow socket so only one face shows a plain surface. Through dovetails are simpler to cut by hand.
Why are my hand-cut dovetails loose?
Loose dovetails usually come from a saw cut drifting past the layout line, a marking gauge set to the wrong thickness, or over-paring past the baseline. Re-check the gauge setting against the actual mating board before cutting the next joint.
Is hand-cutting dovetails hard to learn?
No. A first-time woodworker can cut a functional through-dovetail joint in an afternoon with six basic tools. What takes longer to develop is speed and gap-free consistency across repeated joints, not the fundamental process.
If you’re deciding between a dovetail and a simpler option for a square corner, see our comparison of butt, miter, and dovetail joints.
Sponsored / affiliate links. As an Amazon Associate I earn from qualifying purchases. I may earn additional commission from eligible campaigns.