How to Remove a Painted Popcorn Ceiling (Without Damaging Drywall)
Painted popcorn ceilings don’t respond to water alone — the paint seals the texture and blocks moisture from penetrating, making dry-scrape the required first step before wetting. Skip this sequence and you’ll gouge the drywall. This guide covers the two-step scraping method, how to test for asbestos in pre-1978 homes, and when skim coating is a better option than removal.
Quick Answer
Removing a painted popcorn ceiling requires a two-step approach: dry-scrape first to break the paint seal, then wet the surface with a water-vinegar solution and let it soak 10 minutes before the final scrape. Always test for asbestos in homes built before 1978 before starting any removal work.
Painted vs. Unpainted Popcorn Ceiling: Why Painted Is Harder
A painted popcorn ceiling is a textured acoustic finish that has been sealed under one or more layers of paint, creating a barrier that blocks water from penetrating the texture during removal. Unpainted popcorn ceilings absorb water within 2–3 minutes and scrape clean with minimal pressure. Painted surfaces require 10 or more minutes of soaking time and a mandatory dry-scrape pass before any water is applied.
The paint acts as a seal over the texture. If you spray water on a painted popcorn ceiling and scrape immediately, you force chunks of wet drywall paper off with the texture — leaving gouges that need extensive patching. The dry scrape breaks the paint film first, allowing water to reach the texture underneath on the second pass.
| Factor | Unpainted Popcorn | Painted Popcorn |
|---|---|---|
| Water soak time | 2–3 minutes | 10+ minutes |
| Dry scrape needed first? | No | Yes — breaks paint seal |
| Drywall damage risk | Low | High without correct sequence |
| DIY difficulty | Moderate | Challenging |
| Professional cost | $1.00–$1.82/sqft | $1.82–$3.41/sqft |
Oil-based painted ceilings are the most difficult to remove. Water and vinegar solutions do not break down oil-based paint effectively. For these, a chemical paint stripper applied 15–20 minutes before scraping is the most reliable approach. A quick acetone test confirms the paint type: dampen a cloth and rub a small spot — if paint transfers, it is water-based; if not, it is oil-based.
Assessing The Ceiling Condition
First, look at the ceiling closely. Is it smooth or bumpy? Textured ceilings may have patterns. Some patterns are called popcorn or stucco — these types are usually thicker and rough. Painted ceilings might hide the texture. Use a flashlight to see the surface better. Painted textures can be tricky to remove. Check for any cracks or damage too. This helps in planning the removal process.
Safety is very important. Some ceilings contain asbestos — a harmful material commonly found in homes built before 1978 when the U.S. Consumer Product Safety Commission banned its use in ceiling products. Use an asbestos test kit to check before touching any texture. DIY kits include a collection bag and prepaid lab submission with results in 3–5 business days. If asbestos is found, call a licensed abatement professional. Never start removal work without testing first.
★ Recommended product
DIY Asbestos Test Kit
Before touching any popcorn ceiling in a home built before 1978, test for asbestos. DIY kits include a collection bag and prepaid lab submission — results in 3–5 business days. Far cheaper than $250–$850 for professional testing.
Check price on Amazon →As an Amazon Associate we earn from qualifying purchases.
Gathering Necessary Tools And Materials
You’ll need a few important tools for this task. A wide drywall scraper (6–12 inches) is essential — wider blades cover more area and reduce drywall gouging compared to narrow putty knives. A putty knife helps with tight corners. An electric sander smooths the surface after scraping. A pump sprayer delivers a consistent fine mist across large ceiling areas far better than a hand spray bottle. Drop cloths protect your floor and a stable ladder lets you reach the ceiling safely.
Wear a dust mask or respirator to protect your lungs from fine ceiling texture particles. Safety goggles shield your eyes from falling debris. Gloves keep your hands safe from rough tools and chemical strippers if needed. Ensure adequate ventilation — open windows and set up fans to keep air moving throughout the work area.
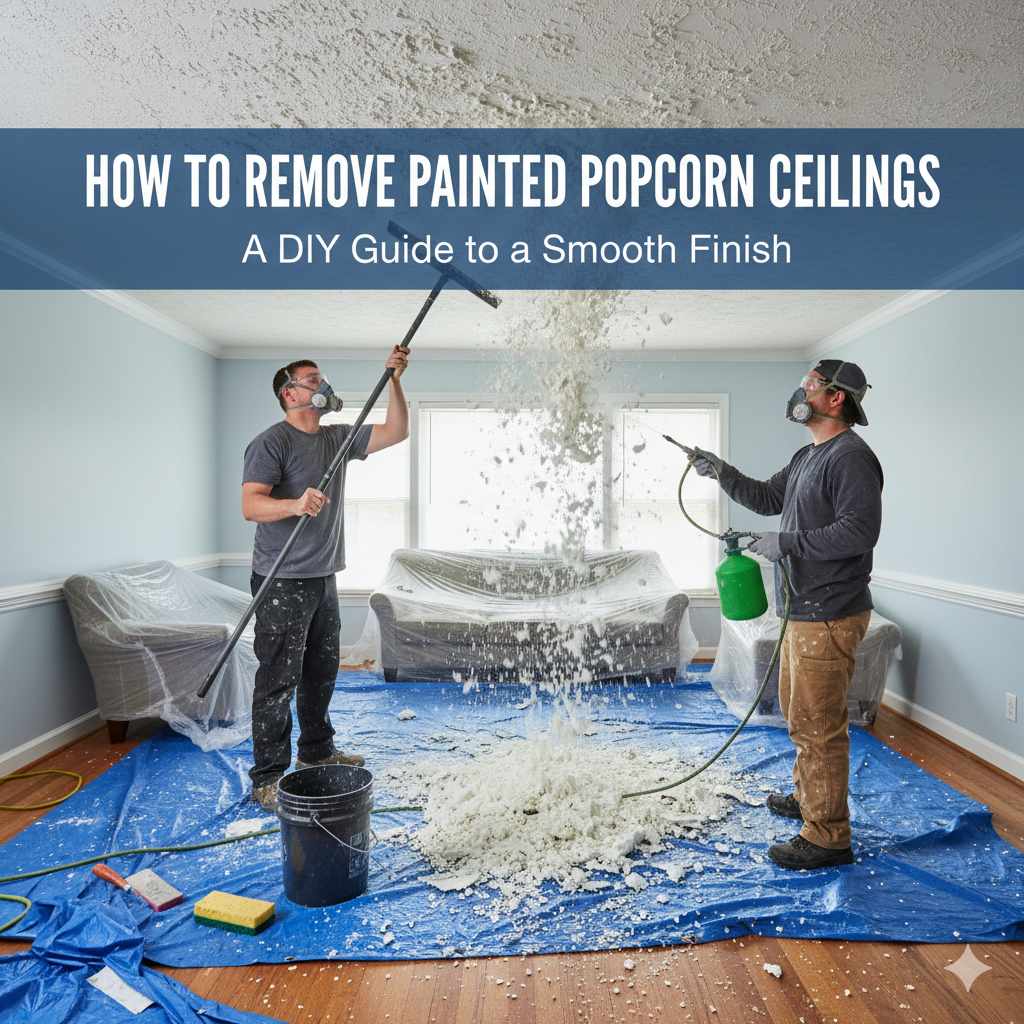
Preparing The Room
Protecting floors and remaining furniture is essential before starting. Use plastic sheets to cover all furniture and tape them securely to prevent slipping. Lay old sheets or tarps on the floor to catch debris — extend them 12 inches up the side of the walls and attach with painter’s tape. Move smaller furniture out of the room for easier access. Remove or cover all light fixtures: shut off the breaker first, since you will be spraying water near the ceiling.

Softening The Paint
Chemical strippers are useful for stubborn painted popcorn ceilings that don’t respond to water alone. They break down the paint layer, making it easier to scrape without damaging the drywall below. Always wear protective gear — eye goggles and gloves are required. Ventilate the room well to avoid strong fumes. Apply the stripper with a brush and let it sit for the time specified in the product instructions. After the paint softens, gently scrape it away with a plastic or wide metal scraper. Clean the area after scraping with a damp cloth.
For water-based painted ceilings, a vinegar solution works well before chemical strippers are needed: mix 1 part white vinegar with 10 parts warm water in a pump sprayer. Apply generously to the ceiling, let it soak for 10+ minutes, then test a small section. The acid in vinegar helps break down the paint bond with the texture. Steamers are a non-chemical alternative — hold close to the ceiling and move slowly. Both methods require the same protective gear and patience.
★ Recommended product
Garden Pump Sprayer (1–2 gallon)
A pump sprayer delivers a consistent fine mist across large ceiling areas far more efficiently than a hand spray bottle. Fill with warm water and dish soap, or a 1:10 vinegar-to-water solution for painted surfaces.
Check price on Amazon →As an Amazon Associate we earn from qualifying purchases.
Scraping Off The Textured Ceiling
Use a wide, sturdy scraper (6–12 inches) to remove the ceiling texture. Hold the scraper at a low angle — approximately 30 degrees — to prevent gouging the drywall below. For painted popcorn ceiling, the sequence is critical: first dry-scrape to break the paint seal, then mist with the vinegar solution, wait 10 minutes, and do the final wet scrape. Apply consistent, moderate pressure. Avoid excessive force — let the softened texture release naturally.
Apply only light pressure on the scraper to avoid harming the drywall. Use a sharp blade for clean cuts — dull blades drag and cause scratches. Take breaks to check your work. Look for signs of drywall paper damage: if the brown paper underneath is tearing, stop, re-wet, and wait longer before continuing. Work in small sections — 2×2 foot areas — for better control. Move the scraper in one direction only. Back-and-forth motion tears the drywall surface.

★ Recommended product
Wide Drywall Scraper (10–12 inch)
A wide, flexible scraper covers more surface area per pass and reduces the chance of gouging drywall compared to narrow putty knives. Look for a blade at least 10 inches wide with a flexible stainless steel blade.
Check price on Amazon →As an Amazon Associate we earn from qualifying purchases.
Cleaning And Repairing The Ceiling
Use a wet cloth to wipe the ceiling gently after all texture is removed. This softens any leftover material and removes dust. Let the ceiling dry completely before patching. A scraper tool can remove stubborn remaining bits — work in small sections and keep a waste bag close for easy cleanup.
Fill any holes or gouges with spackle or joint compound. Use a putty knife for smooth application. Let the patches dry fully before sanding. Sand the patched areas until smooth using fine-grit sandpaper (120–150 grit). Wipe away dust with a damp cloth. Make sure the ceiling is clean and even before moving to the finishing step.
How Much Does Painted Popcorn Ceiling Removal Cost?
Professional removal of a painted popcorn ceiling costs $1.82 to $3.41 per square foot — roughly 50–70% more than an unpainted ceiling — because the paint seal requires additional prep time and multiple scraping passes. According to Angi’s 2026 cost data, a typical 500 square foot living room runs $933 to $3,076 for professional removal and basic finishing.
DIY material costs run $100–$500 for a standard room: drop cloths, a pump sprayer, 6–12 inch drywall scrapers, joint compound, primer, and safety gear. Labor time is 1–5 days depending on room size and paint thickness. If asbestos is found, professional abatement adds $3–$7 per square foot before any removal can begin — making professional testing essential in homes built before 1978.
An alternative to removal for painted popcorn is skim coating: applying a thin layer of joint compound over the existing texture to create a smooth surface. Skim coating costs roughly the same as removal but eliminates drywall damage risk — the better option when the ceiling is in poor condition or contains asbestos.
Finishing Touches
Removing a painted textured ceiling involves careful scraping and sanding. Start by preparing the area with drop cloths and protective gear. Use a wide putty knife to gently scrape off the texture, then sand the surface smooth for a fresh finish.
Priming The Ceiling
Start with a clean, dust-free surface. Apply a layer of primer to the ceiling — this is essential after popcorn removal because the exposed drywall absorbs paint unevenly without it. Use a roller for large areas and a brush for corners. Let the primer dry fully according to the label. Check for any missed spots before painting. A proper primer coat ensures even paint coverage and prevents lap marks.
Applying New Paint Or Texture
Choose your paint or texture suitable for ceilings. Use a roller or spray for even coverage. Take breaks to avoid mistakes. Let each coat dry before adding more. Inspect for smoothness and even color. Two coats of flat ceiling paint are standard for a clean, modern smooth finish.

Expert Tips For Successful Removal
Removing a painted popcorn ceiling takes planning. The most common mistake is skipping the dry scrape and going straight to wetting — paint seals the texture and water simply runs off without penetrating. Always dry-scrape first to break the paint film, then apply the vinegar-water solution and wait a full 10 minutes.
- Test for asbestos before touching any ceiling in a pre-1978 home
- Use a pump sprayer for even, controlled misting across large areas
- Hold the scraper at 30 degrees — never perpendicular to the ceiling
- Work in 2×2 foot sections to maintain control and catch drywall damage early
- If drywall paper starts tearing, stop and re-wet — do not force through it
- Score the painted surface with a utility knife before wetting on heavily painted ceilings
Frequently Asked Questions
Can You Remove A Popcorn Ceiling If It’s Been Painted?
Yes, you can remove a painted popcorn ceiling. The key is a two-step approach: dry-scrape first to break the paint seal, then wet the surface with a water-vinegar solution (1 part vinegar to 10 parts water) and let it soak 10+ minutes before the final scrape. Use a 6–12 inch wide flexible drywall scraper held at a low angle to avoid gouging the drywall. For oil-based painted ceilings, a chemical stripper may be needed. Consider hiring professionals for best results.
Does Removing Textured Ceilings Increase Home Value?
Removing textured ceilings can enhance a home’s appeal and modernize its look, potentially increasing its value. Buyers often prefer smooth ceilings, which can make the property more attractive in the market. Consider the cost and time for removal to ensure it aligns with your renovation goals.
Is It Safe To Remove A Textured Ceiling?
Removing a textured ceiling can be safe if no asbestos is present. Test for asbestos first, especially in homes built before 1978 when the CPSC banned asbestos in ceiling products. Wear a dust mask or respirator, safety goggles, and gloves. Ensure proper ventilation and use drop cloths for cleanup. If asbestos is found, hire a licensed abatement professional — DIY removal is not safe.
Does A Textured Ceiling Have Asbestos In It?
Textured ceilings installed before 1978 may contain asbestos. The U.S. Consumer Product Safety Commission banned asbestos in ceiling products in 1977–1978, but homes built or renovated before that date are at risk. Testing is essential before any removal work. Always hire professionals for asbestos testing and removal to ensure safety.
How Long Does It Take to Remove a Painted Popcorn Ceiling?
Removing a painted popcorn ceiling takes 1 to 5 days for a typical room. A 200 square foot bedroom takes an experienced DIYer approximately 6–8 hours including prep, scraping, and cleanup. Rooms with multiple paint coats or oil-based paint take significantly longer and may require a chemical stripper step between passes.
Can You Skim Coat Over Painted Popcorn Ceiling Instead of Removing It?
Yes — skim coating is a valid alternative to removing painted popcorn ceiling. Apply a thin layer of joint compound directly over the texture using a wide drywall knife, feather it smooth, let it dry, sand lightly, and prime before painting. Skim coating costs roughly the same as removal and eliminates the risk of drywall damage during scraping. It is the preferred method when the ceiling contains asbestos or when the drywall is in fragile condition.
Conclusion
Removing a painted popcorn ceiling requires patience and the correct sequence: dry scrape first, then wet-scrape with a vinegar solution after 10 minutes of soaking. Always test for asbestos in pre-1978 homes before touching the ceiling. With the right tools — a wide drywall scraper, pump sprayer, proper safety gear — and realistic time expectations of 1–5 days per room, the result is a smooth, modern ceiling that adds genuine value to the home.