Can A Garage Door Be Painted? Tips For A Flawless Finish
Painting a garage door is possible and can significantly improve your home’s look and protect the door. Proper preparation, the right paint, and careful application are key to a durable and attractive finish that lasts for years.
Got paint on your skin? See how to remove paint from hands without paint thinner.
What You Need to Know About Painting a Garage Door
Your garage door is a big part of your home’s exterior. It’s often the first thing people see. When it looks good, it makes your whole house look better.
But garage doors go through a lot. They face sun, rain, snow, and sometimes even hail. They open and close many times a day.
All this can wear down the paint or the material itself. That’s why thinking about painting it is a smart move.
The material of your garage door makes a big difference. Most garage doors are made of steel, aluminum, wood, or composite materials like vinyl or fiberglass. Each type needs a slightly different approach.
For example, steel doors can rust if not prepped well. Wood doors need to be sealed properly to prevent rot. Aluminum can be tricky because paint doesn’t always stick to it easily.
No matter the material, the goal is always the same: a smooth, even surface that the new paint can adhere to securely. This means cleaning off dirt, grime, and any old, loose paint. You’ll also need to deal with any rust spots or mold.
Then, you’ll apply primers and paints that are meant for exterior use and are compatible with your door’s material. This might sound like a lot, but breaking it down makes it manageable.
My Garage Door Painting Mishap (and What I Learned)
I remember one summer when I decided to tackle painting our old, beige garage door. It had seen better days, with faded spots and a general dullness that made our house look a bit sad. I thought, “How hard can it be?” I grabbed some exterior paint, a roller, and went to town.
I skipped a lot of the prep work, thinking it would save time. Big mistake. I didn’t wash it thoroughly.
I didn’t really sand it much either, just a quick wipe down.
The result was… okay, at first. The color was brighter. But within a few months, I started noticing issues.
There were small bubbles forming in spots. Then, in the corners, the paint began to peel away. It was so frustrating!
I had spent a whole weekend on it, and it already looked worse than when I started. It taught me a valuable lesson: prep work is everything. You cannot skip those steps.
They are the foundation for a paint job that actually lasts.
That experience pushed me to really dig into how to do it the right way. I learned about specific cleaners, primers for different surfaces, and the importance of a good top coat. It’s not just about slapping paint on.
It’s about creating a bond between the paint and the door that can withstand the elements. It took a bit more effort the second time around, but the difference was night and day. The new paint job stayed looking good for years.
Garage Door Material Matters
Steel Doors: Prone to rust. Needs thorough rust treatment and a rust-inhibiting primer. Ensure all scratches are filled and primed.
Aluminum Doors: Can be slippery for paint. Requires a good degreaser and a bonding primer. Light sanding can help paint adhere.
Wood Doors: Needs to be clean, dry, and free of rot. Use a good quality exterior wood primer and paint. Watch for moisture issues.
Vinyl/Fiberglass Doors: Choose paint specifically designed for these materials. Often requires a special bonding primer. Avoid dark colors in very hot climates as they can warp the material.
Preparing Your Garage Door for Paint: The Non-Negotiable Steps
This is where most DIY painters stumble. They want to get to the fun part – painting. But the success of your entire project hangs on how well you prepare the surface.
Think of it like building a house. You wouldn’t build on a shaky foundation, right? The same goes for painting.
First, you need to clean the door. Really clean it. Dirt, grease, mildew, and old, flaking paint will all prevent new paint from sticking.
You can use a hose with a good nozzle and a mild detergent. A scrub brush will help get into the nooks and crannies. For stubborn spots, like mildew, a solution of one part bleach to three parts water can work wonders.
Just be sure to rinse everything off thoroughly. Let the door dry completely. This can take a day or two, depending on the weather.
Next, you need to inspect for damage. Look for any rust spots, especially on steel doors. If you find rust, you need to get rid of it.
A wire brush or sandpaper is your friend here. Once the rust is gone, you’ll need to treat the area. A rust converter or a rust-inhibiting primer is essential.
Also, check for any dents or holes. You can fill these with an exterior-grade filler or putty. Let it dry, then sand it smooth.
Then comes sanding. Even if your door looks smooth, a light sanding is usually necessary. It creates a surface that the primer and paint can grip.
Use fine-grit sandpaper, around 150-220 grit. You don’t need to remove the old paint, just scuff it up. After sanding, wipe the door down again with a damp cloth or a tack cloth to remove all the dust.
This step is crucial for a smooth finish.
Finally, it’s time for masking. You don’t want paint getting on your trim, siding, or the opener mechanism. Use painter’s tape to carefully cover any areas you don’t want painted.
Be precise. Good masking makes cleanup a breeze and ensures a clean, professional look. Drop cloths are also a good idea to protect the ground below.
Quick Prep Checklist:
- Wash thoroughly with mild soap and water.
- Scrub away dirt, grime, and mildew.
- Rinse well and let dry completely.
- Address any rust spots by sanding them away.
- Fill dents or holes with exterior filler.
- Lightly sand the entire surface.
- Wipe away all sanding dust.
- Tape off any areas not to be painted.
Choosing the Right Paint and Primer
This is another area where shortcuts can lead to trouble. Not all paints are created equal, especially when it comes to exterior surfaces that face constant wear and tear. You need paint that is designed for the job.
For most garage doors, you’ll want to use an exterior-grade acrylic latex paint. These paints are flexible, durable, and hold up well against changing temperatures and moisture. They also clean up easily with water.
Oil-based paints can be an option for some surfaces, but they tend to be less flexible and can become brittle over time. Always check the paint can label to ensure it’s suitable for exterior use and for the material of your garage door.
The color choice is also important. While you might love a dark color, it can absorb more heat. On a sunny day, a dark garage door can get very hot.
This can cause the material to expand and contract more, potentially leading to warping or paint peeling, especially on vinyl or composite doors. Lighter colors reflect more heat and are generally a safer bet for longevity. If you do opt for a dark color, make sure the paint is specifically designed for high-heat absorption or for the material you have.
Now, let’s talk about primer. Primer is not optional. It’s the crucial layer that helps the paint stick better, covers stains, and provides a uniform surface.
For metal doors, especially steel, you need a rust-inhibiting primer. For wood, a good exterior wood primer is a must. For tricky surfaces like aluminum or vinyl, a bonding primer might be necessary.
Always choose a primer that is compatible with both your door’s material and the top coat of paint you plan to use. A good primer will make your top coat go on more smoothly and last much longer.
Paint Primer Pairings:
Metal (Steel/Aluminum): Use a high-quality rust-inhibiting or metal primer. Look for ones that specifically mention good adhesion to metal.
Wood: An exterior wood primer is best. It seals the wood and prevents tannins from bleeding through the paint.
Vinyl/Fiberglass: A dedicated bonding primer for plastics is often required. Check the paint manufacturer’s recommendations.
Previously Painted Surfaces: If the old paint is in good condition, a quality exterior latex primer is usually sufficient.
Applying the Paint for a Professional Look
You’ve prepped, you’ve primed. Now for the paint itself. The method you choose – brush, roller, or sprayer – will impact the finish.
For most DIYers, a combination of brushing and rolling is common and effective.
If you’re using a roller, start with a high-quality roller cover. A nap of 3/8 inch is usually good for smooth surfaces like metal or vinyl. For slightly textured doors, a 1/2 inch nap might be better.
Work in sections. Apply the paint in even, overlapping strokes. Don’t press too hard, as this can cause drips or uneven coverage.
Roll from the bottom up, then back down to catch any drips. This helps create a smooth, uniform finish.
A brush is essential for getting into the corners, edges, and any raised panels or details on your garage door. Use a good quality angled brush. Cut in along the edges and around hardware first.
Then, paint the flat areas. For doors with panels, paint each panel individually, working from top to bottom within each section.
If you decide to use a paint sprayer, you can achieve a very smooth finish, but it requires more practice and careful masking. You’ll need to thin the paint according to the manufacturer’s instructions and ensure you maintain a consistent distance and speed. Protect everything around the door from overspray.
Regardless of the tool, apply thin, even coats. It’s much better to apply two thin coats than one thick one. Thick coats are more prone to drips, sagging, and taking a long time to dry.
Allow each coat to dry completely according to the paint manufacturer’s instructions before applying the next. This usually means several hours, or even overnight, between coats. Patience here is key.
Don’t forget the edges and the top of the door where it meets the garage. These areas are exposed to the elements and need good protection. Once you’re done painting, remove the painter’s tape while the last coat is still slightly wet.
This helps prevent the paint from peeling up with the tape. If you wait too long, the paint can dry on the tape, and pulling it off can tear the new paint job.
Application Tips for a Smooth Finish:
- Use a good quality roller and brush.
- Work in manageable sections.
- Apply thin, even coats.
- Avoid overloading your brush or roller.
- Paint from top to bottom within sections.
- Allow proper drying time between coats.
- Remove painter’s tape while paint is slightly wet.
Real-World Scenarios: When Your Garage Door Needs a Makeover
Let’s look at some common situations where painting your garage door becomes a good idea. It’s not just about aesthetics; sometimes, it’s about saving the door itself.
The Fading Fiasco: You’ve lived in your home for several years. The sun, especially in warmer climates, has beaten down on your garage door. The original color has lost its vibrancy.
You might notice chalkiness when you run your hand over it. This fading indicates that the paint is breaking down. It’s a sign that the protective layer is weakening.
Painting it now will not only restore the color but also add a fresh layer of protection against UV rays.
The Peeling Problem: This is a classic sign of paint failure. If you see chips or flakes of paint coming off, it means the paint isn’t adhering well anymore. This could be due to poor prep work on the original paint job, moisture getting underneath, or just the paint reaching the end of its lifespan.
You absolutely need to address this by removing all loose paint, sanding, priming, and then repainting. Ignoring it will lead to more paint failing and potential corrosion.
The Weathered Warrior: You live in an area with harsh winters or lots of rain. Over time, the elements take their toll. You might see a dull, chalky surface, maybe even some streaks or water stains that won’t wash off.
The paint’s ability to repel water and protect the underlying material is diminished. A new paint job provides a robust barrier against moisture and temperature fluctuations, prolonging the life of your garage door.
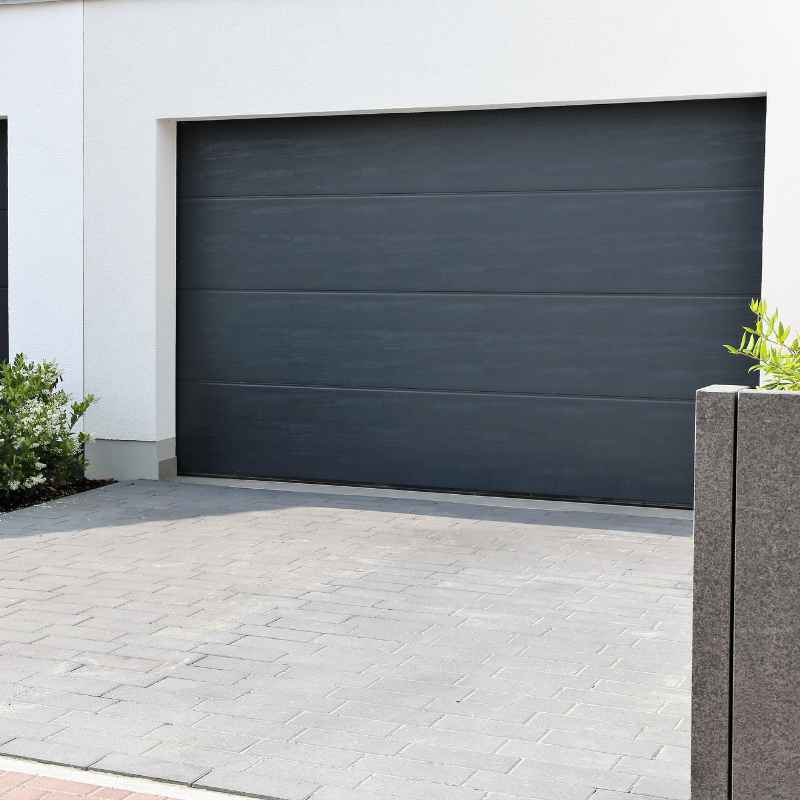
The Style Upgrade: Sometimes, the door isn’t failing; your taste has just changed. The color of your garage door might clash with new siding, a new front door, or landscaping. Or perhaps it’s a dated color that makes your whole house look old-fashioned.
Painting is a relatively inexpensive way to update your home’s curb appeal and make it feel fresh and modern. It’s amazing what a difference a color change can make!
When to Consider Painting:
Fading: Color has become dull or chalky from sun exposure.
Peeling: Old paint is chipping or flaking off.
Water Damage: Streaks or stains that won’t clean off, indicating compromised protection.
Aesthetic Update: Desire to change the color to match new home updates or improve curb appeal.
Preparation for Sale: Boosting home value with a fresh, inviting exterior.
What This Means for You: When is it Okay, and When Should You Worry?
Knowing when painting is a good DIY project versus when you might need professional help is important. Let’s break down what’s normal and what might signal a bigger issue.
It’s Normal: It’s perfectly normal for garage door paint to eventually fade, chalk, or even peel slightly after many years. Paint is designed to protect, but it’s not immortal. Expect to potentially repaint a garage door every 5 to 10 years, depending on the climate and the quality of the original paint job.
Small scratches or scuffs are also normal wear and tear.
When to Worry: If you see extensive rust on a steel door that’s eating through the metal, that’s a big concern. If your wood door has soft spots or visible rot, it might be beyond simple painting. For vinyl doors, significant warping or cracking means the material itself is failing.
Also, if the paint is peeling in large, widespread sections, it suggests a deep-seated adhesion problem that might be difficult to fix perfectly with a DIY job.
Simple Checks You Can Do:
- The Fingernail Test: Try to scrape a small, inconspicuous area with your fingernail. If paint comes off easily, it’s loose and needs to be removed.
- The Water Bead Test: Sprinkle some water on the door. If it beads up, the paint is still repelling water. If it soaks in or streaks, the paint is compromised.
- The Rust Check: Run your hand over any metal areas. Feel for rough, gritty spots that indicate rust. Look closely at seams and edges for any signs of orange or brown discoloration.
If your door is in generally good shape with only surface issues like fading or minor peeling, painting is likely a great DIY project. However, if you’re dealing with structural rust, rot, or severe material damage, it might be time to consult a garage door professional. They can assess the damage and recommend replacement or more extensive repairs.
Quick Tips for a Better Garage Door Paint Job
Here are some extra pointers that can make a big difference in how your painted garage door looks and how long it lasts. These are the little things that can elevate your project from “okay” to “wow!”
Timing is Everything: Always paint on a mild, dry day. Avoid painting when it’s too hot (over 90°F), too humid, or when rain is expected. Extreme temperatures can affect how the paint dries and cures, leading to problems.
Check the weather forecast for a few days. You need clear skies and moderate temperatures.
Paint in the Shade if Possible: If your garage door faces direct sun all day, try to paint it in sections that are in the shade. Painting a hot surface can cause the paint to dry too quickly, leading to lap marks and an uneven finish. If you can’t paint in the shade, do it early in the morning or late in the afternoon.
Don’t Forget the Edges: When you paint the main part of the door, make sure to get the edges where the door meets the frame and the top where it seals. These areas are exposed to weather and need good protection too. If they are left unpainted, they can be weak spots for moisture to get in.
Use the Right Tools: Invest in good quality brushes, rollers, and trays. Cheap tools can leave bristles or lint on your door, and they don’t apply paint as evenly. A good quality angled brush will help you get clean lines.
A microfiber roller cover is excellent for a smooth finish.
Two Thin Coats are Better Than One Thick One: This bears repeating. Thick coats drip, sag, and don’t cure properly. Two thin, even coats will provide better coverage, a smoother finish, and a more durable result.
Allow the first coat to dry fully before applying the second.
Clean Up Your Tools Immediately: If you used latex paint, clean your brushes and rollers with soap and water right after you’re done. If you used oil-based paint, you’ll need mineral spirits. Clean tools last longer and are ready for your next project.
Pro Tips for a Better Finish:
- Weather Watch: Paint on a mild, dry day with moderate temperatures.
- Shade Painting: If possible, paint in shaded areas to avoid fast drying.
- Edge Protection: Don’t neglect the door’s edges and top seal.
- Quality Tools: Invest in good brushes and rollers for a smoother finish.
- Thin Coats Rule: Two thin coats are superior to one thick coat.

Frequently Asked Questions About Painting Garage Doors
Can I paint over an existing painted garage door?
Yes, absolutely. If the old paint is in good condition (not peeling or severely faded), you can usually paint over it. The key is proper preparation: clean the door thoroughly, lightly sand it to create a good surface for the new paint to adhere to, and then apply a compatible primer before your top coat.
What is the best type of paint for a metal garage door?
For metal garage doors, especially steel, an exterior-grade acrylic latex paint is generally recommended. It’s flexible and durable. Crucially, you must use a rust-inhibiting primer designed for metal surfaces.
This primer will prevent any existing rust from spreading and protect against future corrosion. Ensure your top coat is also compatible with the metal primer.
How long does it take to paint a garage door?
The actual painting time might only take a few hours, but the entire process, including preparation and drying time, can take a full weekend. You’ll need time for thorough cleaning, drying, sanding, priming, and applying two coats of paint, with drying time between each step. Always check the paint can for specific drying and recoating times.
Should I use a sprayer or a roller/brush for my garage door?
A paint sprayer can give you the smoothest finish, but it requires more skill, careful masking, and can be messy. For most DIYers, a combination of a high-quality roller for the flat areas and a brush for the details and edges offers excellent results and is more manageable. Whichever method you choose, work in thin, even coats.
Can I paint a vinyl garage door a darker color?
You can, but you need to be cautious. Darker colors absorb more heat. If your vinyl garage door is exposed to intense sunlight, a very dark color could cause it to warp or the paint to fail prematurely due to excessive heat expansion.
If you opt for a dark color, ensure you use a paint specifically designed for vinyl and consider lighter shades within your desired color family if possible.
How do I deal with a rusty steel garage door before painting?
First, remove as much loose rust as possible using a wire brush or sandpaper. Then, clean the area well. Apply a rust-inhibiting primer or a rust converter to the treated spots.
Once the primer is dry, you can then prime the entire door with a good quality exterior metal primer before applying your top coats of paint. The goal is to create a barrier against moisture.
Bringing It All Together: A Fresh Start for Your Home
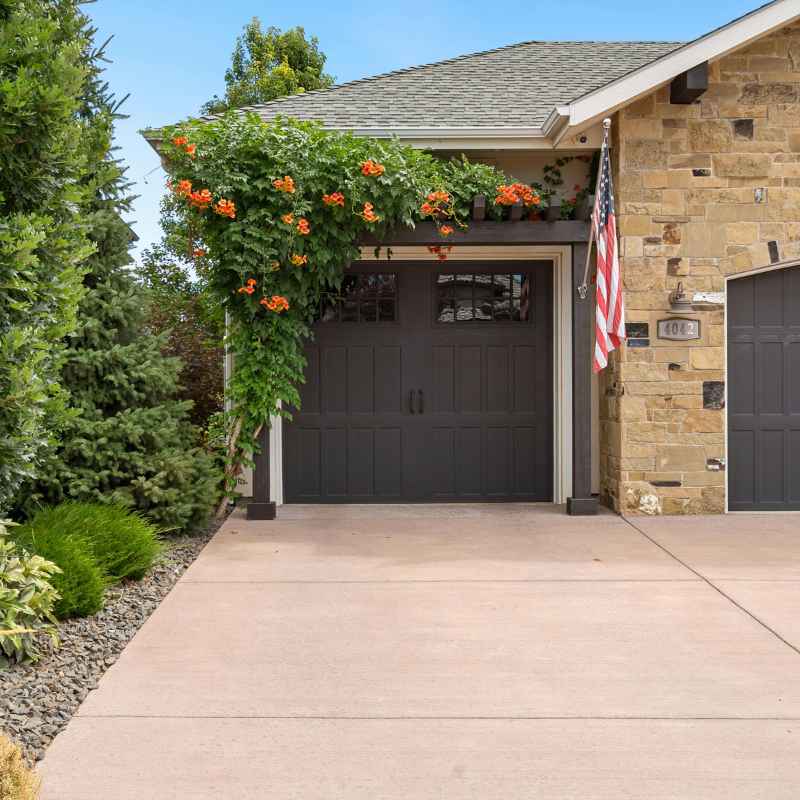
Painting your garage door is a rewarding project. It’s a chance to boost your home’s curb appeal and protect a significant part of your exterior. Remember, success comes from patience and proper technique.
Don’t skip the prep work, choose the right materials, and apply your paint with care. With a little effort, your garage door can look beautiful and last for years to come, making a great first impression for your home.