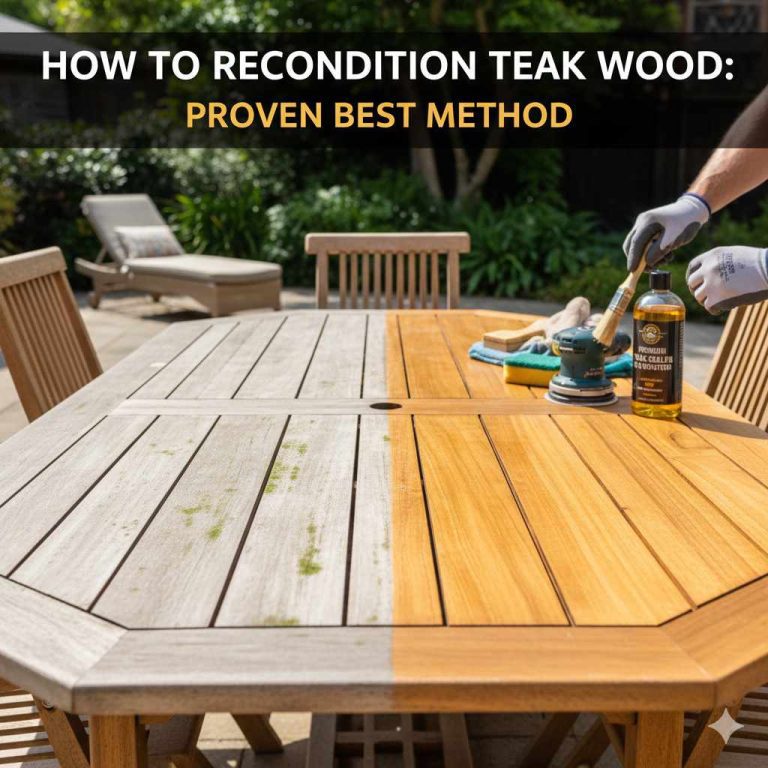
How To Restore Teak Wood: Essential Guide
Restoring teak wood is straightforward with the right steps. Clean, sand, and protect your teak furniture to bring back its natural beauty and prolong its life. This guide provides easy-to-follow instructions for beginners to achieve stunning results.
Teak wood is a dream for many homeowners and DIYers. Its natural oils give it amazing durability and a beautiful, warm color. But over time, especially when exposed to the elements, teak can lose its luster. It might turn a silvery-gray and feel rough. Don’t worry! Bringing a tired teak piece back to life is totally doable, even if you’re new to woodworking. We’ll walk through each simple step. You’ll be amazed at the beautiful, renewed teak you can create!
Why Restore Teak Wood?
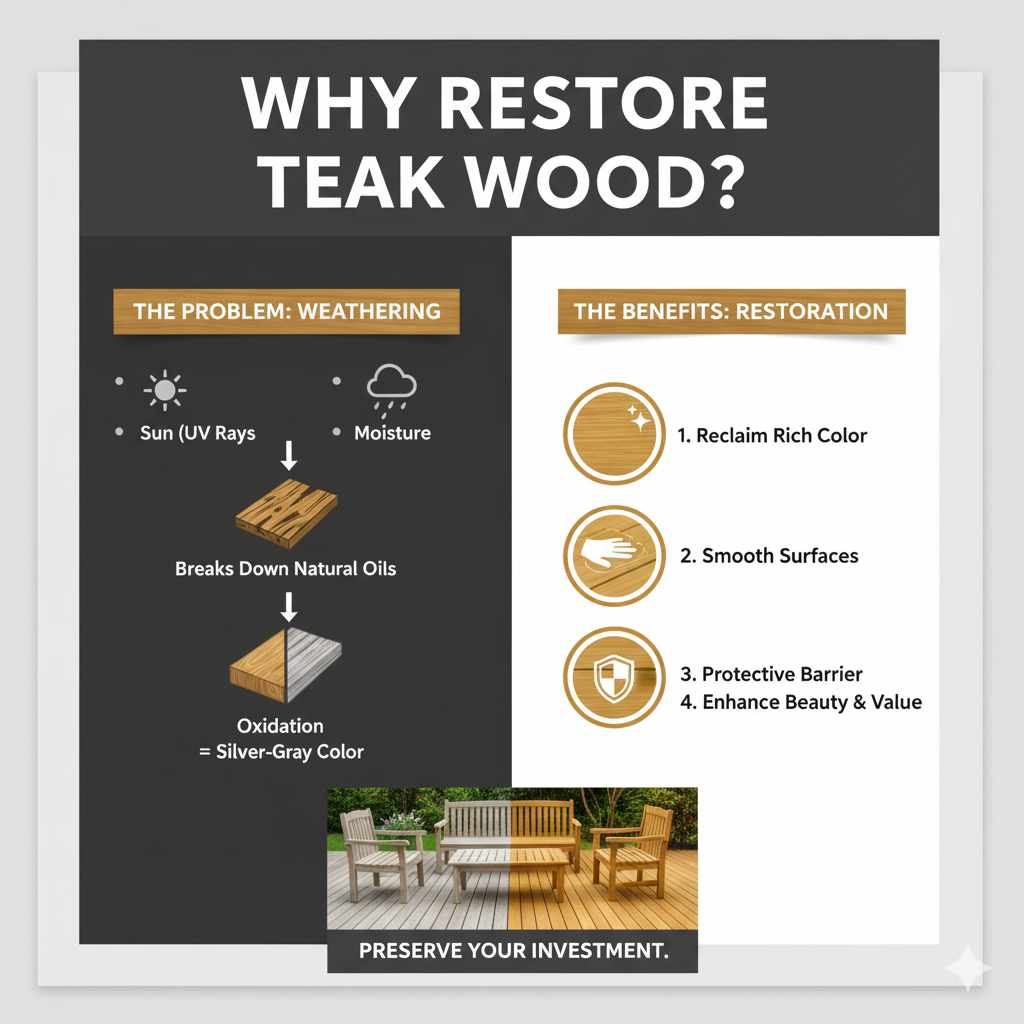
Teak wood is prized for its natural resilience. It contains high levels of natural oils and silica, which make it resistant to water, rot, and insects. This is why it’s a top choice for outdoor furniture, boat decks, and other applications where it faces harsh conditions. However, exposure to sunlight (UV rays) and moisture can break down these natural oils and cause the wood’s surface to oxidize. This oxidation process is what turns the beautiful golden-brown teak into that familiar weathered, silvery-gray look.
Restoring teak wood isn’t just about aesthetics. It’s about preserving your investment and extending the life of your furniture. By removing the oxidized layer and replenishing the wood’s protection, you:
- Reclaim the rich, golden-brown color of the wood.
- Smooth out rough surfaces caused by weathering.
- Provide a protective barrier against future damage from sun and moisture.
- Enhance the overall beauty and value of your teak items.
Whether it’s a beloved patio set, a garden bench, or an indoor piece that’s seen better days, restoring teak wood is a rewarding project that can make a big difference. It’s a fantastic way to learn basic woodworking skills and achieve professional-looking results right at home.
What You’ll Need: Essential Tools and Materials
Gathering your supplies before you start makes the restoration process smooth and enjoyable. You don’t need expensive, professional tools for this job. Most items can be found at your local hardware store or online.
Cleaning Supplies:
- Bucket
- Warm water
- Mild soap (like dish soap) or a dedicated teak cleaner
- Soft-bristle brush or sponge
- Old towels or cloths for drying
Sanding Supplies:
- Medium-grit sandpaper (around 80-120 grit)
- Fine-grit sandpaper (around 180-220 grit)
- Popsandpaper block or an orbital sander (optional, but speeds things up)
- Dust mask
- Safety glasses
Finishing Supplies:
- Teak oil or teak sealer (choose based on your desired finish and protection level)
- Clean, lint-free cloths or foam brushes
- Gloves (optional, to keep hands clean)
Optional but Helpful:
- Putty knife or scraper (for stubborn dirt or old finishes)
- Drop cloths or old sheets (to protect the surrounding area)
- Hose or pressure washer (for initial cleaning, use with caution)
Having everything ready means you can dive right into the restoration without interruptions. Let’s get started on bringing that teak back to its former glory!
Step-by-Step Guide to Restoring Teak Wood
Restoring weathered teak wood involves a few key stages: cleaning, sanding, and protecting. We’ll go through each one simply and clearly, so you know exactly what to do.
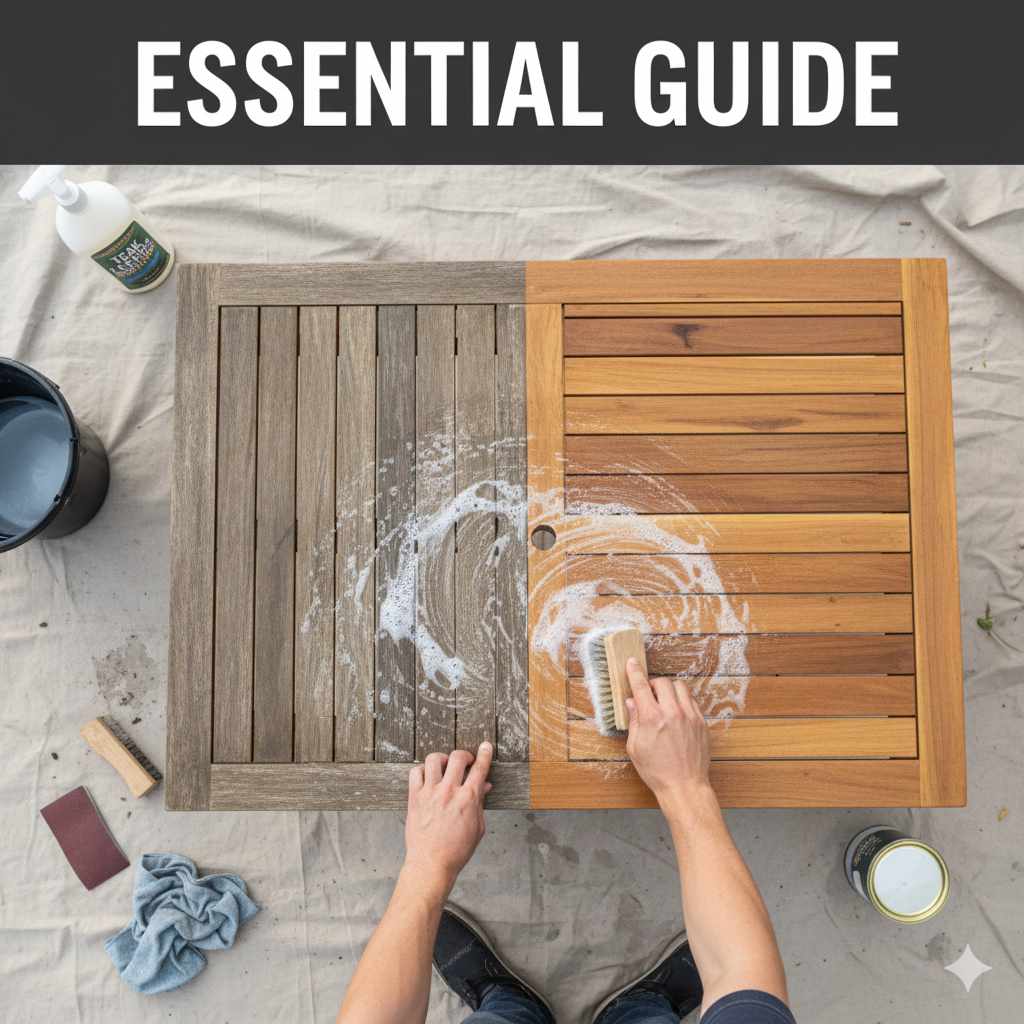
Step 1: Clean the Teak Wood
The first step is to remove all the dirt, grime, mildew, and any old, flaking finish from the teak. A good cleaning will reveal the true condition of the wood underneath and make sanding much more effective.
- Prepare your cleaning solution: Mix a tablespoon or two of mild soap (like dish soap) with a gallon of warm water. If you have a dedicated teak cleaner, follow the manufacturer’s instructions.
- Wet the wood: Lightly dampen the teak surface with plain water. This prevents the cleaning solution from soaking in too quickly and drying out, which can leave streaks.
- Apply the cleaner: Using a soft-bristle brush or a sponge, apply the cleaning solution to the teak. Scrub gently in the direction of the wood grain. For stubborn areas, you might need to apply a little more pressure or use a putty knife to gently scrape away built-up grime.
- Rinse thoroughly: Use a hose or a bucket of clean water to rinse off all soap residue. Make sure no soapy film remains, as this could interfere with the sanding and finishing later. If you’re using a pressure washer, set it to a low pressure and keep the nozzle at least 12-18 inches away from the wood to avoid damaging it. You can explore best practices for pressure washing wood from sources like Family Handyman for more details.
- Dry the wood: Let the teak air dry completely. This might take several hours, depending on the weather. You can speed up the drying process by wiping it down with old towels. Ensure it’s bone dry before moving to the next step.
A clean surface is essential for a successful restoration. Once it’s dry, you’ll likely see that the silvery-gray layer is still there, but the wood should look much better. Now, we’re ready to sand!
Step 2: Sand the Teak Wood
Sanding is where the magic happens – it removes the dull, weathered top layer and reveals the beautiful, vibrant teak underneath. This is usually the most labor-intensive part, but it’s very rewarding.
- Safety first: Always wear safety glasses to protect your eyes from dust and debris. A dust mask is also highly recommended, especially if you’re sanding indoors or for an extended period.
- Start with medium-grit sandpaper: Begin with sandpaper in the 80-120 grit range. This is coarse enough to cut through the oxidized layer effectively. If the wood is in particularly bad shape, you might even start with a slightly coarser grit like 60, but be cautious.
- Sand with the grain: Whether you’re using a sanding block or an orbital sander, always sand in the direction of the wood grain. Sanding against the grain will create visible scratches that are hard to remove. Apply even pressure and work in steady, overlapping strokes.
- Address stubborn spots: If you encounter any tough spots, like ingrained dirt or old wax buildup, you might need to focus a bit more effort there. An orbital sander can make this quicker, but a sanding block gives you more control.
- Progress to fine-grit sandpaper: Once you’ve removed the dull gray layer with the medium-grit paper and the wood is looking more uniform, switch to a finer grit, such as 180 or 220 grit. This step smooths out the surface, removes any minor scratches left by the coarser grit, and prepares the wood for finishing.
- Clean off dust: After sanding with each grit, use a brush or a vacuum cleaner to remove all the dust. A tack cloth can be very effective for picking up the very finest dust particles. Ensure the surface is completely free of dust before proceeding.
You should now see the warm, golden-brown color of the teak emerge. It will likely feel much smoother too. You’ve done the hard work! Now it’s time to protect your newly revealed treasure.
Step 3: Protect and Finish the Teak Wood
The final step is to apply a protective finish. This replenishes the natural oils, enhances the wood’s color, and guards it against future damage from the elements. You have a choice here: teak oil or a teak sealer.
Choosing Your Finish: Teak Oil vs. Teak Sealer
Both teak oil and teak sealer are designed to protect teak wood, but they offer slightly different results and protection levels.
| Feature | Teak Oil | Teak Sealer |
|---|---|---|
| Appearance | Enhances natural richness, provides a warm, slightly satin sheen. Looks very natural. | Can range from clear to slightly amber. Often offers a more matte or satin finish. Some sealers may contain UV inhibitors for better sun protection. |
| Protection | Penetrates the wood to replenish natural oils, offering good water resistance. Needs reapplication more frequently (e.g., seasonally). | Forms a protective barrier on the surface. Offers good protection against water, UV rays, and stains. Can last longer between applications than oil. |
| Application | Soaks into the wood. Can be applied liberally and wiped off. | Applied more like a paint or varnish, in thinner coats. |
| Maintenance | Requires more frequent application (e.g., every 6-12 months) to maintain color and protection. | Typically needs reapplication every 12-24 months, depending on exposure. |
For a more traditional, natural look and feel, teak oil is a popular choice. If you prefer a finish that might offer longer-lasting protection and potentially better UV resistance with less frequent application, a teak sealer might be better. Always read product labels and choose one suitable for your project and environment.
Applying the Finish:
- Ensure wood is clean and dry: Double-check that all sanding dust has been removed and the wood is completely dry.
- Test in an inconspicuous area: If possible, apply the finish to a small, hidden spot on the teak item to see how it looks.
- Apply one thin coat: Using a clean, lint-free cloth, foam brush, or applicator pad, apply a thin, even coat of teak oil or sealer. Work with long, smooth strokes, following the direction of the wood grain. Avoid leaving puddles or thick globs of finish.
- Allow to penetrate/dry:
- For Teak Oil: Let the oil soak into the wood for about 15-30 minutes (check product instructions).
- For Teak Sealer: Allow it to dry according to the manufacturer’s recommended drying time between coats. Some sealers may require light sanding between coats with very fine grit sandpaper (320+).
- Wipe off excess:
- For Teak Oil: After the penetration time, use a clean, dry cloth to wipe away any excess oil sitting on the surface. This is crucial to prevent a sticky finish. You want the oil to be absorbed, not to sit on top.
- For Teak Sealer: Typically built up in thin coats, so you just let it dry. Some products might suggest a light buffing.
- Apply additional coats (if needed): For teak oil, a second coat after the first has penetrated can enhance the color and protection. For sealers, follow the product’s instructions for multiple coats. Always allow proper drying time between coats.
- Cure time: Allow the finish to fully cure according to the product’s recommendations before exposing the teak item to heavy use or the elements. This can sometimes take 24-72 hours.
Your teak wood should now look refreshed, vibrant, and well-protected. You’ve successfully restored it!
Maintaining Your Restored Teak Wood
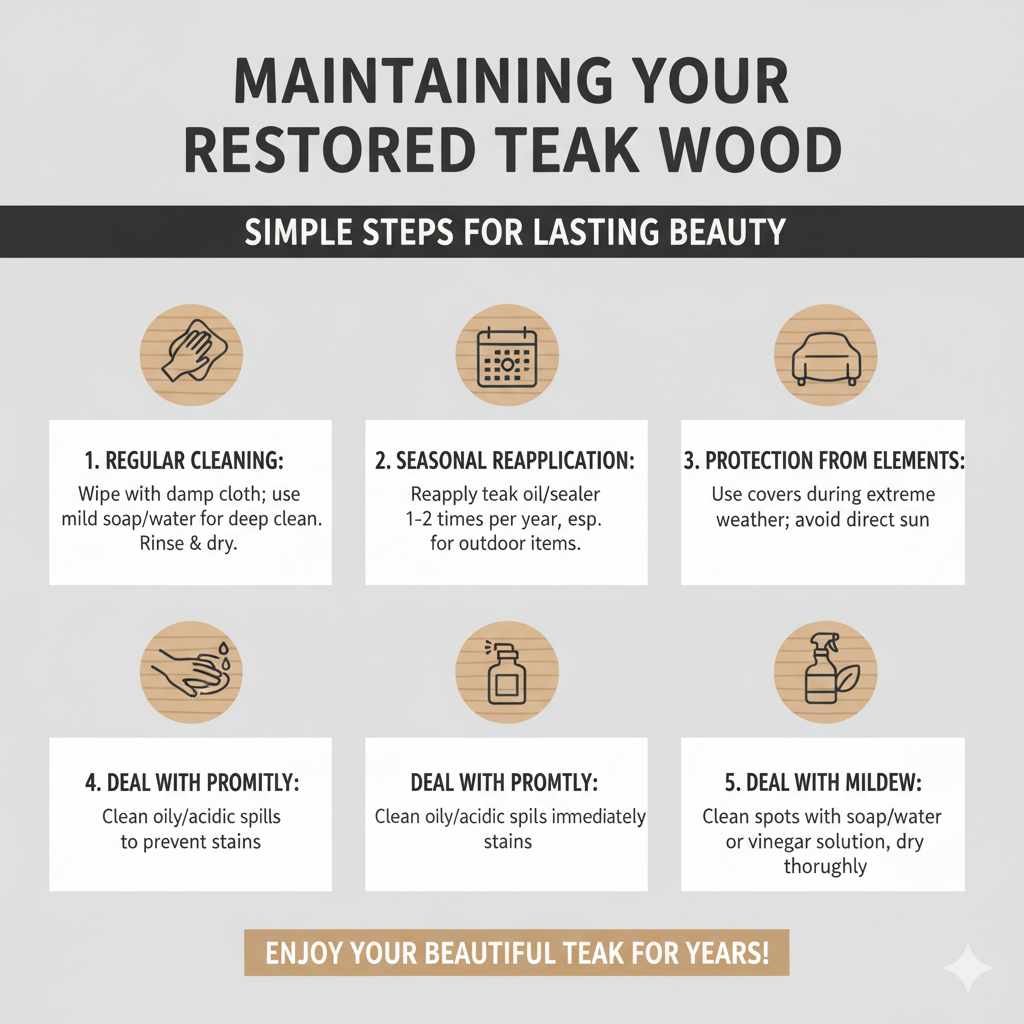
You’ve put in the work to restore your teak, and with a little ongoing care, you can keep it looking beautiful for years to come. Regular maintenance is key to preventing it from falling back into that weathered state.
- Regular Cleaning: Wipe down your teak furniture regularly with a damp cloth to remove dust and light dirt. For deeper cleaning, use a mild soap and water solution as described in Step 1, but remember to rinse and dry thoroughly.
- Seasonal Reapplication: Teak oil or sealer will naturally wear away over time, especially when items are outdoors. Plan to reapply a coat of your chosen finish at least once a year, typically in the spring before the heavy use season or in the fall before winter sets in. Check the product you used for specific recommendations.
- Protection from Elements: While teak is naturally weather-resistant, prolonged exposure to harsh sun and rain can still take a toll. Consider using furniture covers during extreme weather or when items are not in use for extended periods. Bringing indoor teak pieces out of direct sunlight can also help preserve their finish.
- Deal with Spills Promptly: Wipe up any spills, especially oily or acidic ones, as soon as possible to prevent staining.
- Deal with Mildew: If you notice any signs of mildew growth (often greenish or black spots), clean the affected area immediately with your mild soap and water solution, or a mixture of vinegar and water. Ensure the area dries completely.
Consistent, simple maintenance will ensure your restored teak furniture remains a source of pride and enjoyment for a long time.
Common Teak Restoration Questions (FAQ)
Q1: Can I restore teak furniture that has been painted or stained?
Yes, but it requires extra steps. You’ll need to remove the paint or stain first. This can be done using a paint stripper formulated for wood, followed by thorough sanding to get back to bare teak. Always test strippers in a small area first and follow safety precautions.
Q2: How often should I reapply teak oil or sealer?
This depends on the product used and the exposure the teak gets. For outdoor furniture, reapplication is often needed every 6 to 12 months. Indoor pieces might only need it every 1-2 years. Inspect your teak regularly; if the water no longer beads on the surface or the color starts to fade, it’s time for a reapplication.
Q3: What’s the difference between teak oil and teak sealer?
Teak oil penetrates the wood to replenish its natural oils and give a natural, warm sheen. Teak sealer often forms a protective film on the surface, which can offer more resistance to stains and UV rays, and may last longer between applications.
Q4: Can I power wash my teak furniture?
Yes, but with extreme caution. Use the lowest pressure setting, hold the nozzle at least 12-18 inches away from the wood, and always spray in the direction of the grain. High pressure can easily damage the soft wood fibers, causing fuzzing or gouging. It’s often safer to stick to scrubbing with a brush and cleaner.
Q5: My teak has black spots. What are they and how do I remove them?
Black spots are usually mildew or mold. They are caused by moisture and lack of airflow. You can remove them by scrubbing with a mild soap and water solution. A solution of equal parts water and white vinegar can also be effective. For persistent spots, a dedicated teak cleaner or a very light sanding might be necessary.
Q6: Do I need to sand teak if it’s not gray, just dirty?
If your teak is just dirty but still has its original color and a smooth surface, a thorough cleaning might be enough. However, if you plan to apply oil or a sealer, a light sanding (e.g., 220 grit) after cleaning will help the finish penetrate better and achieve a smoother final look. For a deep clean that might replace sanding for light dirt, consult resources from organizations like the Woodworking Network.
Conclusion
Restoring teak wood is a rewarding DIY project that can breathe new life into old furniture. By following these straightforward steps—cleaning away dirt and grime, sanding back to reveal the beautiful grain, and protecting with the right finish—you can achieve stunning results. Don’t be intimidated by the process; it’s designed for beginners, and the satisfaction of seeing your restored teak piece gleam is well worth the effort.
Remember, consistent care will keep your teak looking its best. A little bit of maintenance goes a long way in preserving its natural beauty and durability. So, gather your supplies, embrace the process, and enjoy your beautifully restored teak!