How to Stain Birch Wood: Step-by-Step Guide (2026)
To stain birch successfully, you must apply a pre-stain wood conditioner before any stain — birch’s alternating hard and soft grain absorbs stain unevenly, creating blotchy patches without it. Use a gel stain (not liquid penetrating stain) for the most even results. Sand to 150-grit, never finer — 220-grit closes birch’s grain and prevents stain from penetrating. With proper prep, birch can be stained to beautiful walnut, honey, or dark espresso tones.
⚡ Quick Answer: How to Stain Birch Wood
| Step | Action | Why |
|---|---|---|
| 1 | Sand to 150-grit (not finer) | Opens grain for even absorption; 220-grit closes pores |
| 2 | Apply pre-stain wood conditioner | Critical — prevents blotching on birch’s uneven grain |
| 3 | Apply gel stain (not liquid) | Gel sits on surface; liquid penetrates unevenly on birch |
| 4 | Wipe excess after 3–5 min | Leaving excess stain creates dark, tacky patches |
| 5 | Apply 2–3 coats polyurethane | Seals and protects; birch needs topcoat after staining |
To stain birch, start by sanding the surface to remove any imperfections. Next, apply a pre-stain conditioner before adding the stain for even color.
Birch wood has a fine, smooth grain that can be challenging to stain evenly. Due to its light color, birch often requires a pre-stain conditioner to avoid blotchiness. Proper preparation is crucial for achieving a beautiful finish. Use a high-quality stain that enhances the natural beauty of the wood.
Test the stain on a scrap piece to ensure it meets your expectations. Choosing the right tools and techniques helps achieve a professional-looking result. Whether you’re refinishing furniture or crafting new pieces, understanding how to stain birch will enhance your woodworking projects.
Not staining at all? See our full guide to treating and finishing birch wood for oil, varnish, and sealant options.
Introduction To Birch Wood
Best Gel Stain for Blotch-Prone Birch
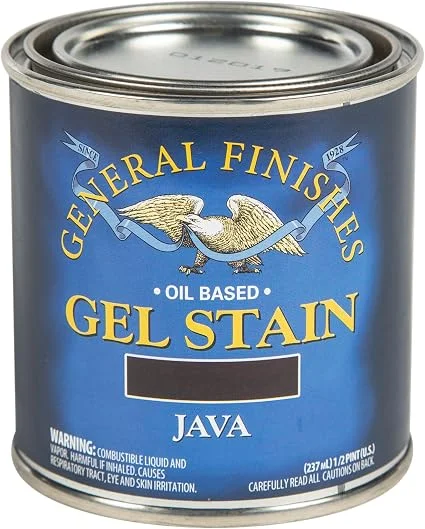 |
General Finishes Java Gel Stain, 1/2 Pint – $24.99 This guide’s solution for birch’s blotching problem is a gel stain like this – it sits on the surface rather than penetrating unevenly, so no pre-stain conditioner is needed.
|
Birch wood is known for its strength and durability. It has a light color, often with a smooth texture. This wood can range from white to pale yellow. Birch is easy to work with and takes stains well.
Woodworkers appreciate birch for its versatility. It is used in furniture, cabinets, and flooring. Its fine grain makes it a favorite among craftsmen. Birch is also a popular choice for plywood due to its strength.
This wood species holds stain beautifully. It can be finished to look rich and elegant. Many DIY enthusiasts choose birch for home projects. Its popularity continues to grow among woodworkers.
Preparation For Staining
Staining birch requires careful preparation. Gather essential materials and tools for the task. You will need:
- Sandpaper (120 to 220 grit)
- Clean cloths
- Wood stain of your choice
- Paintbrush or foam applicator
- Protective gloves
Begin by cleaning the surface. Remove any dust or dirt using a clean cloth. Sanding is crucial. Start with 120-grit sandpaper. This helps open the wood’s pores. Finish with 220-grit sandpaper for a smooth surface.
Always sand in the direction of the wood grain. This prevents scratches and ensures an even finish. Cleaning after sanding is important. Use a clean cloth to wipe away dust. Proper preparation leads to a beautiful stained finish.
Choosing The Right Stain
Choosing the right stain for birch is crucial. Different types of stains affect appearance and durability. Here are some common types:
| Type of Stain | Description |
|---|---|
| Oil-Based Stains | Penetrate wood deeply and enhance grain. |
| Water-Based Stains | Dry quickly and have low odor. Easy to clean. |
| Gel Stains | Thick consistency, ideal for vertical surfaces. Less drippage. |
Selecting the right color is important. Light colors can brighten a space. Dark colors add warmth and richness. Consider opacity as well. Transparent stains show more wood grain. Solid stains offer more color and less grain visibility.
Stain Application Techniques
Choosing between a brush and a rag for staining birch affects the finish. Brushes allow for precise application. They work well in corners and tight spots. Rags provide a softer look. They help in achieving a more natural finish.
For an even coating, start with light strokes. Apply the stain in the direction of the grain. Avoid overloading the brush or rag. This prevents drips and uneven spots. Wipe off excess stain promptly for a better result.
Test the stain on a small area first. This ensures the desired color. Adjust the application technique based on the wood’s response. Patience is key for a beautiful finish.
Troubleshooting Common Issues
To prevent blotches and streaks, choose a good quality wood conditioner. Apply it evenly before staining. Always test the stain on a small area first. This helps you see the final color.
For adhesion problems, ensure the surface is clean and free of dust. Sand the wood lightly to create a good grip for the stain. Use a primer if necessary for better results.
Stains work best on dry wood. Wait until the wood is fully dry after sanding. Choose the right type of stain for birch, as some stains suit better than others.
Sealing For Protection
Choosing the right sealer is key for protecting birch wood. Different types of sealers offer various benefits.
| Type of Sealer | Benefits |
|---|---|
| Polyurethane | Durable and water-resistant. |
| Lacquer | Quick-drying and gives a high-gloss finish. |
| Varnish | Flexible and protects against UV rays. |
| Oil-based Sealers | Enhances wood grain and adds warmth. |
Apply the sealer with a clean brush or cloth. Make sure to cover all areas evenly. Allow the sealer to dry completely. Lightly sand the surface between coats for better adhesion.
Final Touches
After staining, buffing and polishing give your birch wood a smooth finish. Use a soft cloth for buffing. This helps to remove any dust or uneven areas. Polish with a quality wood polish for a nice shine.
Inspect the finished product carefully. Look for any spots that need extra attention. Check for color consistency and smoothness. Touch up areas that seem uneven or rough. A well-finished piece showcases your hard work.
Maintenance And Care
To keep stained birch looking great, cleaning is essential. Use a soft, damp cloth for regular dusting. Avoid harsh chemicals, as they can damage the finish. For spills, clean them up immediately to prevent stains.
Long-term care helps maintain the beauty of birch. Apply a protective finish every few years. This helps guard against wear and tear. Store birch furniture away from direct sunlight to prevent fading.
Follow these tips for lasting results:
- Dust regularly with a soft cloth.
- Use mild soap and water for deeper cleaning.
- Avoid abrasive materials to prevent scratches.
- Reapply finish as needed for protection.
Frequently Asked Questions
How Do You Prepare Birch For Staining?
Preparing birch for staining involves sanding the wood to a smooth finish. Start with coarse sandpaper and gradually move to finer grits. Clean the surface to remove dust and debris. A pre-stain wood conditioner is recommended to ensure even absorption of the stain.
What Type Of Stain Works Best On Birch?
Oil-based stains are ideal for birch wood. They penetrate deeply and enhance the wood’s natural grain. Water-based stains can also be used but may require more careful application. Test different stains on scrap pieces to find the best match for your project.
Can You Stain Birch Without Sanding?
While it’s possible to stain birch without sanding, it’s not recommended. Sanding helps open up the wood’s pores for better stain absorption. Skipping this step may result in uneven color and a less appealing finish. Always sand for the best results.
How Long Should Stain Sit On Birch?
Typically, stain should sit for 5 to 15 minutes on birch. This allows the wood to absorb the color effectively. Be sure to follow the manufacturer’s instructions for the best results. Wipe off any excess stain to avoid a sticky finish.
Why Birch Is Difficult to Stain (And How to Fix It)
Birch wood is notorious among woodworkers for blotching. The problem is birch’s growth structure — it has alternating bands of dense late-wood and porous early-wood. When liquid stain is applied, the porous bands absorb much more stain than the dense bands, creating dark streaks and patches that look nothing like the color on the can.
The solution is either a pre-stain conditioner (which partially fills the porous bands before staining to even out absorption) or gel stain (which doesn’t penetrate — it coats the surface uniformly regardless of grain density). Professional cabinetmakers use gel stain on birch for this reason. Minwax Gel Stain and General Finishes Gel Stain are the two most reliable options.
Best Stain for Birch Wood
| Stain Type | Blotch Risk | Result on Birch | Recommended? |
|---|---|---|---|
| Gel Stain | Very Low | Even, rich color — best on birch | ✅ Yes — top choice |
| Oil-based penetrating stain + conditioner | Low (with conditioner) | Good results with proper prep | ✅ Yes — with conditioner |
| Water-based stain + conditioner | Medium | Acceptable; raise grain before sanding | ⚠️ Use with caution |
| Dye stain (TransFast, Keda) | Very Low | Excellent — penetrates evenly as molecules are tiny | ✅ Yes — professional choice |
| Liquid penetrating stain (no conditioner) | Very High | Blotchy — dark streaks along grain lines | ❌ Avoid on raw birch |
Birch Stain Colors: What Works and What Doesn’t
Birch accepts dark stains much better than medium tones. The reason: very dark stains (dark walnut, ebony, black) hide the grain variation under a deep, opaque color. Light honey or golden tones let the grain show through — but since birch’s grain isn’t as dramatic as oak or hickory, light stains on birch can look flat.
| Color | Works on Birch? | Notes |
|---|---|---|
| Dark Walnut | ✅ Excellent | Most popular on birch — covers grain variation well |
| Ebony / Black | ✅ Excellent | Dramatic; hides all blotching risk |
| Jacobean | ✅ Good | Rich brown with slight red; use gel stain for even coverage |
| Early American / Medium Brown | ⚠️ Moderate | Blotch-prone; always use pre-stain conditioner |
| Natural / Light Honey | ⚠️ Moderate | Birch’s natural color — consider clear topcoat only |
Staining Birch Cabinets
Birch is one of the most common cabinet woods because of its smooth, uniform face and affordability relative to maple or oak. Staining birch cabinets requires the same blotch-prevention approach — pre-stain conditioner or gel stain — plus attention to the cabinet box interior grain, which is often different from the face veneer.
For factory-finished birch cabinets being refinished: sand lightly to 150-grit, wipe clean, apply conditioner, then gel stain. On raw birch cabinet doors, a dark gel stain like General Finishes Java Gel or Minwax Gel Stain Dark Walnut gives the most predictable, even result. Apply 2 thin coats for depth, wiping off excess after 3–5 minutes each coat.
Staining Birch Veneer
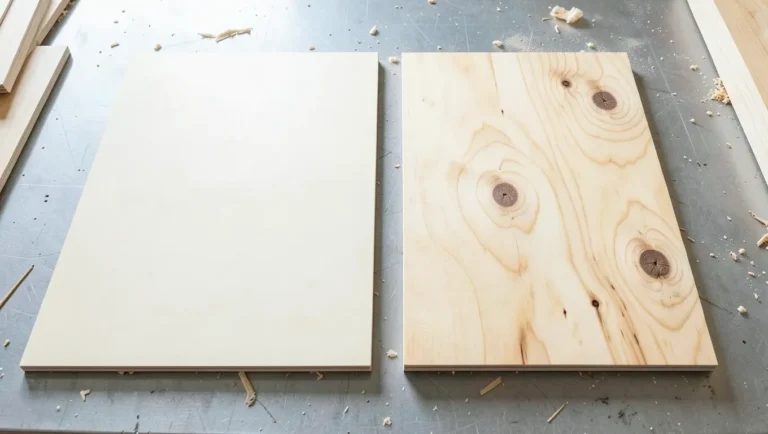
Birch veneer (on plywood panels or veneered doors) is more challenging than solid birch. The veneer layer is very thin (typically 1/42 to 1/28 inch) — aggressive sanding breaks through the veneer, and excessive liquid stain can cause delamination at the edges. Use these precautions:
- Sand very lightly — 150-grit by hand only, no power sanding. Check for burn-through near edges.
- Use gel stain exclusively — liquid stain can seep under the veneer at edges, causing bubbling and delamination.
- Apply with a foam brush — rags can apply uneven pressure; foam pads give a more consistent coat.
- Seal edges first — wipe edges with a thin coat of dewaxed shellac before staining to prevent moisture infiltration.
Best Products for Staining Birch
Sponsored / affiliate links. As an Amazon Associate I earn from qualifying purchases. I may earn additional commission from eligible campaigns.