How To Start Hardwood Flooring: Genius, Easy Way
Starting hardwood flooring the easy way means finding your longest, straightest wall and laying your first row parallel to it, leaving a small expansion gap. The genius trick is using spacers and temporary fasteners to ensure perfect alignment and stability for that crucial first run. This step sets the entire floor’s pattern, making proper setup essential for a professional finish.
Are you finally ready to install that beautiful hardwood floor, but feel nervous about where to start? We’ve all been there. That first row of planks can feel overwhelmingly important because it defines the straightness of your entire room. Mess up the start, and the whole floor looks crooked!
Don’t worry. As your woodworking mentor, I’m here to simplify this step. We’ll break down the process into easy, achievable steps that remove all the guesswork. Following this guide ensures a sturdy, beautiful, and straight floor, even if this is your first time. Let’s grab our tools and lay the foundation for a stunning room!
Why The Start Matters (And The Genius Secret)
The first row of your hardwood floor is the most important installation step. It determines the direction, alignment, and final appearance of every plank that follows. If the first row isn’t perfectly straight and correctly spaced from the walls, gaps will widen, and the floor will look angled relative to the room.
The Genius Trick: Finding Your Starting Wall
Most DIYers incorrectly assume they should start at the most visible wall. The real secret to a professional installation is starting along the longest, straightest wall in the room. This greatly minimizes visible tapering or gaps. If your room is perfectly square, you simply choose the outer wall that runs perpendicular to your floor joists (to allow easy nailing).
When in doubt, always follow this rule: Install the boards parallel to the longest dimension of the room.
Phase 1: Preparation – The Foundation of Success
A successful floor installation is 90% preparation. Skipping these initial steps guarantees frustration later.
Step 1: Acclimate Your Wood
Hardwood is a natural material that expands and contracts with changes in humidity. If you install it before it adjusts to your home’s environment, the floor will buckle or gap later.
The Rule: Bring the sealed flooring bundles into the installation area for 3 to 7 days before cutting or installing. This allows the moisture content to equalize.
Step 2: Prepare the Subfloor
The subfloor must be clean, dry, and flat. Think of the subfloor as the canvas—any bumps or dips will transfer to your finished hardwood, causing squeaks or weak spots.
- Sweep and Vacuum: Remove all debris, nails, or staples.
- Level Check: Use a long, straight edge (a 6-foot level works well). Look for deviations greater than 3/16 inch over 10 feet. Use floor leveling compound for low spots or sanding for high spots.
- Moisture Barrier (If Needed): For installations over concrete slabs or crawlspaces, apply a vapor barrier according to the manufacturer’s directions.
Step 3: Gather Your Essential Tools
While installing hardwood professionally requires specialized tools, a beginner can manage the crucial start with simpler equipment.
| Tool Name | Purpose | Md Meraj’s Usage Tip |
|---|---|---|
| Chalk Line or Laser Level | Establishing a perfectly straight reference line. | Use a fine chalk line (blue or red) for lines that won’t smudge. |
| Spacers/Shims | Maintaining the mandated expansion gap. | Use specialized floor spacers or simple scrap pieces of wood (usually 3/8″ or 1/2″ thick). |
| Mitre Saw or Hand Saw | Cutting planks to length. | Always cut planks outside of the installation room to minimize sawdust contamination. |
| Drill and Finishing Nails | Securing the critical first row (face-nailing). | Pre-drill pilot holes to prevent splitting near the edges of expensive boards. |
| Tape Measure & Pencil | Measuring and marking cuts. | Measure twice, cut once—it saves wood and headaches! |
Phase 2: Plotting and Planning the First Row
This is where we apply the genius starting strategy. We aren’t just starting at the wall; we are establishing a perfect, temporary boundary.
Step 4: Determining the Minimum Plank Width (The Check Calculation)
If your room is not an even multiple of your board width, you will end up with a tiny, unstable sliver of wood on the final wall. This looks amateur and is structurally weak. We must plan the final width first.
- Measure the width of the room (perpendicular to the direction of installation).
- Divide this measurement by the width of a single plank.
- If the remainder is less than half the width of a plank, adjust your plan.
Example: If your room is 100 inches wide and your planks are 3 inches wide. 100 / 3 = 33 full boards with 1 inch remaining. Instead of leaving a 1-inch board at the end, you should rip (cut lengthwise) your first row down. If you cut 1 inch off your first row (making it 2 inches wide), your final row will be 2 inches wide, which is much more stable.
Step 5: Establishing the Expansion Gap
Wood requires space to expand. If you install the floor flush against the drywall, the expanding wood will buckle or “tent” when humidity changes. Flooring expansion gaps are typically 1/2 inch or 3/8 inch, depending on the manufacturer and the size of the room.
- Place spacers (usually 1/2 inch thick) along the entire length of your starting wall and the adjacent side walls where the border planks will touch.
- These spacers must be left in place until the glue or fasteners have set completely, usually after the first three rows are installed.
Step 6: Snapping the Chalk Line (The Straight Edge)
This chalk line is your truth teller. It confirms the actual start line, compensating for any minor waviness in the drywall.
Calculation: Measure out from the starting wall (where the spacers are) the width of one plank, plus the 1/2 inch expansion gap, minus the width of the tongue.
For Simplicity: Measure from the edge of the wall to where the body (shoulder) of the first board will sit. Mark this point on both ends of the room and several points in between.
- Stretch a chalk line tightly between these points.
- Snap the line to create a perfectly straight guide across the subfloor.
The inside edge of your first hardwood row (the groove side) should align perfectly with this chalk line.
Phase 3: Installing the Critical First Three Rows
Why three rows? Because you cannot use a pneumatic floor nailer until the planks are far enough from the wall. These first few rows must be secured by hand (face-nailing or pre-drilling and blind-nailing) to hold the alignment until the flooring nailer can fit.
Step 7: Choosing and Positioning the First Plank
Start with a full-length board in the corner. If you are trimming the width of the first row (as determined in Step 4), rip the first board now.
- Position: Place the first board against the spacers, ensuring the factory edge (the groove side) is resting exactly on your chalk line. The tongue should face away from the starting wall.
- End Grain Alignment: Always plan your end joints. They must be staggered for strength and visual appeal. No two joints should ever be closer than 6 inches to each other in neighboring rows. Aim for 8-10 inches of offset.
- The Starter Piece Trick: Instead of starting row 2 with a full plank, cut the remaining piece from row 1 (as long as it’s over 6 inches) to start row 2. This automatically creates the stagger pattern (Source: This Old House – Hardwood Installation).
Step 8: Securing the First Plank (Face-Nailing)
This row is secured through the top surface (face-nailed) because it’s too close to the wall for a professional blind-nailer.
Md Meraj’s Expert Tip: Always pre-drill holes for finishing nails near the edges to prevent splitting the plank, especially with harder woods like oak or maple.
- Drill pilot holes about 1 inch from the wall, centered on the plank face. Space these guide holes every 6 to 8 inches.
- Drive 6d or 8d finishing nails through these holes.
- Use a nail set to recess the nail heads just below the surface of the wood. These holes will later be filled with wood putty matched to the plank color, hidden by the baseboard trim.
Step 9: Blind Nailing the Tongue
The first row also needs extra security in the tongue area, which keeps the board snugly against the subfloor and helps hold its shape. This is called blind nailing.
- Angle the pilot drill hole through the “shoulder” of the tongue at a 45-degree angle.
- Drive a finishing nail through this hole.
- The goal is to drive the nail head completely below the tongue surface so it doesn’t interfere with the groove of the next plank.
Step 10: Installing Rows 2 and 3 (The Bridge to the Nailer)
Continue laying planks for the second and third rows, ensuring the end joints are staggered by at least 8 inches relative to the previous row.
Use Force: You may need a scrap block of wood and a rubber mallet to gently tap the new plank groove over the tongue of the previous plank to ensure a tight fit.
Securing Rows 2 & 3: Since these rows are still too close for the large floor nailer, continue using the blind-nailing method (drills and finishing nails) through the tongue every 8-10 inches on these rows. Do not face-nail these inner rows, only the first row which will be covered by trim.
Phase 4: Transitioning to the Floor Nailer
Once you are about 6 to 8 inches away from the starting wall (which is typically achieved by the beginning of the fourth row), you can transition to the efficient, powerful pneumatic cleat or staple nailer.
Step 11: Setting Up the Pneumatic Nailer
Pneumatic floor nailers drive specialized cleats or staples into the tongue of the flooring at an angle, securing the floor while leaving the surface clean. They require an air compressor running at the specifications recommended by the tool (usually 80-100 PSI).
Safety First: Always wear safety glasses when operating pneumatic tools. Check all hose connections before charging the system.
Step 12: Laying the Remaining Floor
Continue checking for squareness every few rows. Use the pneumatic nailer to drive fasteners into the tongue of each plank at intervals of 8 to 12 inches, and within 2 inches of the end joints.
Managing Waste: The piece of wood cut off to finish one row often becomes the starter piece for another row, minimizing waste and ensuring the necessary end-stagger pattern. Rotate your wood supply to ensure you don’t use all the shorter or highly figured boards in one section (Resource: National Research Council – Wood Durability).
Troubleshooting Common First-Row Issues
| Issue | Cause | Md Meraj’s Quick Fix |
|---|---|---|
| First row is slightly bowed. | The wall itself is not perfectly straight. | Use longer, wider spacers (or wedges) near the center of the bow to push the row straighter against the tension. Once nailed, the row will hold its new shape. |
| Planks are gapping at the ends. | End joints are not tight enough (usually due to inaccurate cuts). | Use a floor clamp or ratchet strap designed for flooring to pull the end joints together before securing the plank. |
| Planks won’t fit together easily. | Tongue and groove may be pinched by debris or swelling. | Run a piece of scrap wood over the groove to check for debris. Ensure you are hitting the tapping block (not the actual plank) squarely with the mallet. |
FAQs for the Beginner Hardwood Installer
Q: Do I need underlayment for solid hardwood flooring?
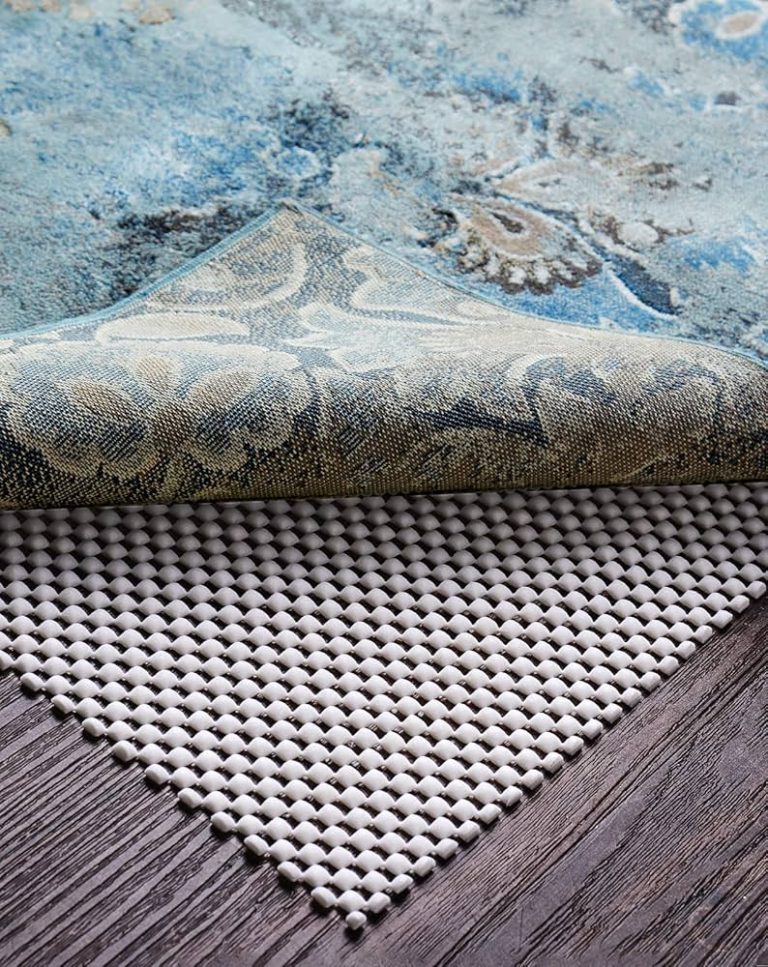
A: Yes, you absolutely should use an underlayment, typically 15lb or 30lb asphalt-saturated felt paper (often called “tar paper” or “builders felt”). This acts as a secondary moisture barrier and greatly helps reduce squeaks caused by rubbing between the hardwood and the subfloor. It unrolls easily and is secured with staples.
Q: How wide should my expansion gap be?
A: Most manufacturers recommend an expansion gap of 3/8 inch to 1/2 inch (approximately 10mm to 12mm) around the entire perimeter of the room. Larger gaps may be recommended for extremely humid environments or very wide rooms (over 20 feet). Follow your specific flooring manufacturer’s guidelines.
Q: What is the difference between face nailing and blind nailing?
A: Face nailing means driving fasteners straight down through the visible surface of the wood. This is used only on the first and last few rows that will be covered by baseboard trim. Blind nailing means driving the fastener through the tongue of the plank at an angle, hiding the nail within the joint, ensuring the surface remains clean and smooth.
Q: How do I handle doorways and casings in the first row?
A: The easiest way to deal with door casings and jambs is to undercut them. Use a scrap piece of your hardwood flooring, lay it on the subfloor, and rest a hand saw (or jamb saw) on top. Saw horizontally to remove the bottom part of the casing.