How to Use Wood Ash to Grow Bigger Buds on Flowering Plants
Wood ash from a clean hardwood fire is a real, if modest, source of potassium and calcium for flowering plants – the same “potash” gardeners used for centuries before bagged fertilizer existed. It won’t replace a balanced fertilizer on its own, since it carries essentially no nitrogen, but used correctly in small amounts it can support bud and flower development while also nudging acidic soil toward neutral.
What Wood Ash Actually Provides
Test Before You Apply Ash
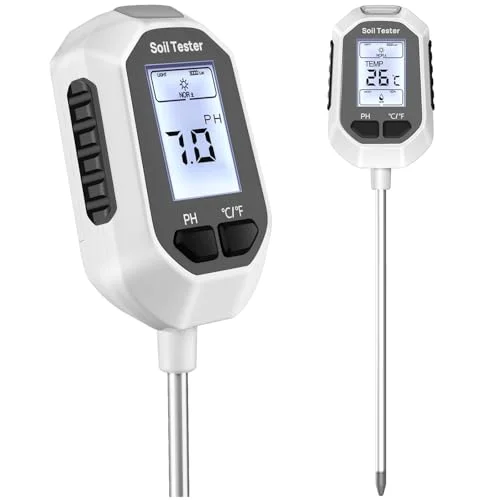 |
YAMRON 4-in-1 Digital Soil Meter Checks soil pH before and after adding ash, so you know whether it’s actually helping or pushing your soil past where plants can use the nutrients.
|
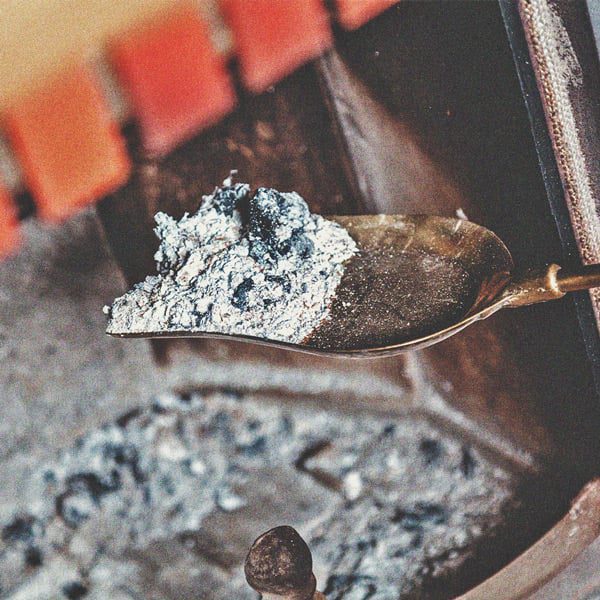
Wood ash is mostly calcium carbonate, with meaningful amounts of potassium and smaller amounts of phosphorus, magnesium, and trace minerals – the exact ratio depends on what wood it came from. Potassium supports flower and fruit development specifically, which is the real basis for the “bigger buds” claim, while the calcium content raises soil pH, similar to garden lime. What it doesn’t provide is nitrogen, the nutrient most responsible for leafy green growth, so wood ash alone leaves a real gap in a plant’s overall nutrition.
This is exactly the same reasoning gardeners have used with “potash” for generations, long before synthetic fertilizers existed – wood ash was often the only concentrated potassium source a farm or homestead had on hand. It still works on the same principle today; it just isn’t a complete fertilizer on its own any more than it was two hundred years ago.
Choosing the Right Ash
Hardwood ash (oak, maple, ash) carries more usable minerals than softwood ash from pine or fir, simply because hardwoods burn down to a denser, more mineral-rich residue. Only use ash from clean, untreated wood – anything painted, stained, or pressure-treated can carry chemicals into your soil, and ash from trash or glossy printed paper can contain heavy metals. Store finished ash somewhere bone dry; it clumps and loses its handling qualities fast if it picks up moisture.
Wear gloves and eye protection when handling it – wood ash is genuinely alkaline (similar pH range to mild lye) and dry ash dust irritates skin, eyes, and lungs easily on a windy day.
Sift raw ash through a mesh screen before storing or applying it, to strain out unburned charcoal chunks and debris that don’t break down the way fine ash does. What passes through the screen is the usable fraction – keep it in a sealed container rather than an open bucket, since ash left exposed to humid air clumps into a hard mass that’s much harder to spread evenly.
How to Apply It
- Direct application: sift out chunks, sprinkle a thin, even layer over the soil surface, and work it lightly into the top inch or two. A little goes a long way – a light dusting is more useful (and safer) than a heavy layer.
- Ash tea: steep sifted ash in a bucket of water for a few days, stirring occasionally, then strain and pour the liquid around the base of plants. This delivers nutrients more gradually and gently than dry ash applied directly to roots.
Test your soil’s pH before adding ash, and again after a few weeks – because ash raises pH, repeated applications on already-neutral or alkaline soil can push it too high, locking out iron and other nutrients plants need even when those nutrients are technically present in the soil.
Timing for Bud and Flower Development
A light early application supports general root and plant establishment, but the more relevant timing for “bigger buds” is a modest application as the plant transitions into its flowering or fruiting stage, when potassium demand rises. Avoid heavy applications during active vegetative growth, when nitrogen (which ash doesn’t supply) matters more, and skip it entirely during dormancy in winter, when the plant isn’t actively taking up nutrients anyway.
Container-grown plants need extra caution with timing and quantity compared to plants in open garden soil – a pot has a much smaller total soil volume to buffer a pH swing, so the same tablespoon of ash that barely registers in a garden bed can meaningfully shift a container’s chemistry. Cut the quantities in this guide roughly in half for containers, and test the soil more often.
Pairing Wood Ash With a Real Fertilizer
Because wood ash lacks nitrogen, pairing it with compost, aged manure, or a balanced fertilizer gives plants the fuller nutrient profile ash alone can’t. Think of ash as a potassium-and-pH supplement layered onto a real feeding program, not a standalone fertilizer – used that way, it’s a genuinely useful, free byproduct rather than a magic bullet.
Avoid mixing ash directly into fresh compost that still contains a lot of nitrogen-rich material, though – the combination can release ammonia gas and actually drive off some of the nitrogen you were trying to preserve in the compost. Add ash to finished, cured compost, or apply the two separately to the soil instead of blending them together while the compost is still actively breaking down.
Common Mistakes
- Overapplying – too much ash raises pH beyond what most plants tolerate and can chemically burn roots, the opposite of the intended benefit.
- Skipping a soil test – without knowing your starting pH, you’re guessing whether ash will help or push your soil into a range that locks out other nutrients.
- Using ash on acid-loving plants – blueberries, azaleas, rhododendrons, and other acid-loving species do poorly as ash pushes soil toward alkaline.
- Using contaminated ash – ash from treated wood, painted wood, or trash carries real contamination risk into edible or ornamental beds.
Frequently Asked Questions
What is the best way to use wood ash?
Use wood ash as a soil amendment for gardens. It enriches soil with potassium and other nutrients. Sprinkle it sparingly around plants. Avoid using on acid-loving plants. Always wear gloves when handling wood ash. Store in a dry container to prevent clumping.
How much wood ash to a 5 gallon bucket?
Use 2-3 cups of wood ash per 5-gallon bucket for optimal nutrient balance. Ensure ash is dry and cool. Mix thoroughly with soil to avoid clumping and uneven distribution. Adjust quantity based on soil needs and plant type for best results.
What are the disadvantages of wood ash as fertilizer?
Wood ash can raise soil pH, harming acid-loving plants. It may contain harmful metals and reduce nutrient availability. Excessive use can lead to nutrient imbalance. It lacks nitrogen, essential for plant growth. Always test soil before applying wood ash to avoid negative effects.
How much wood ash per gallon of water?
Use one tablespoon of wood ash per gallon of water. This mix can enhance soil nutrients. Stir thoroughly to ensure the ash dissolves. Avoid using ash from chemically treated wood. Test soil pH before applying, as wood ash is alkaline. Adjust quantity based on soil needs.
Conclusion
Wood ash is a genuine, free source of potassium and calcium that can support bud and flower development when used correctly – light applications, tested soil pH, and clean hardwood-only ash. It’s a supplement to a real feeding program, not a replacement for one, since it carries no nitrogen. Test before you apply, apply sparingly, and pair it with compost or a balanced fertilizer for the fuller nutrition ash alone can’t provide.
Sponsored / affiliate links. As an Amazon Associate I earn from qualifying purchases. I may earn additional commission from eligible campaigns.