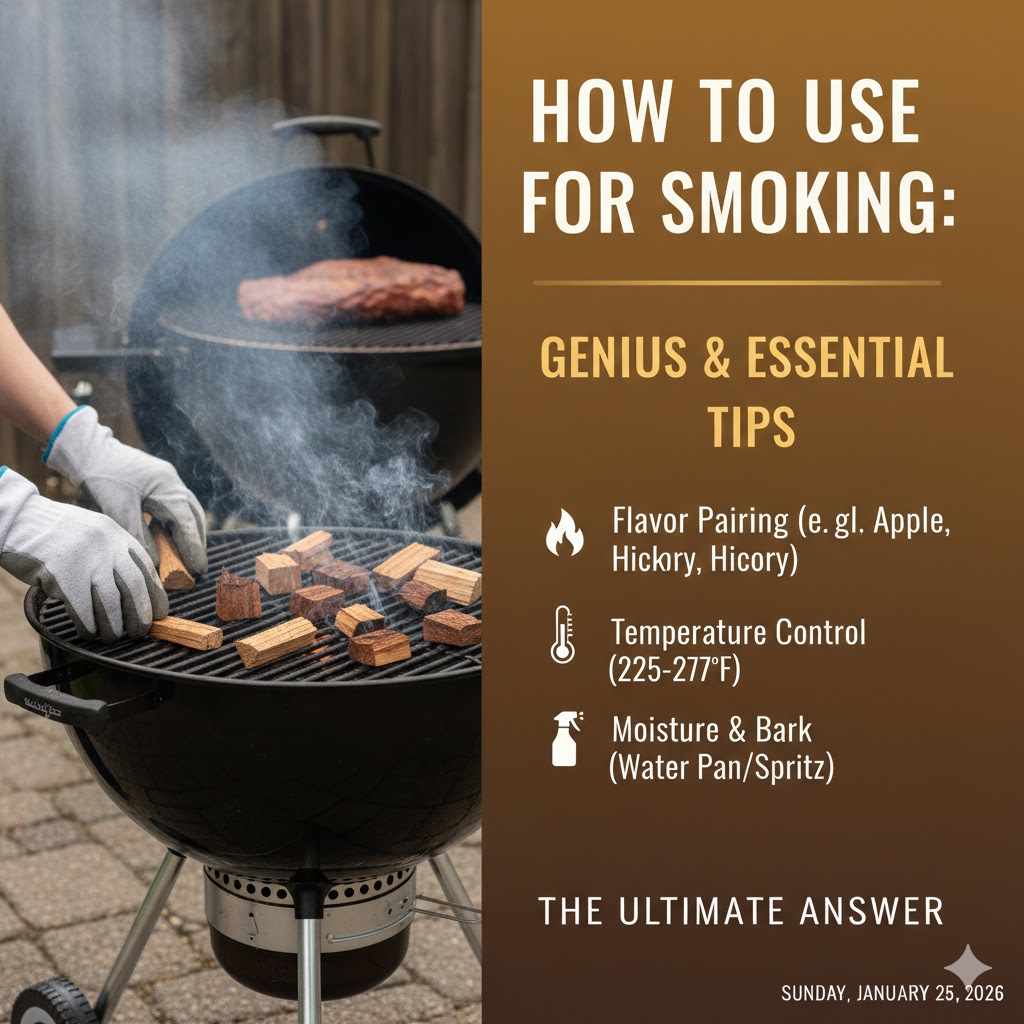
How To Use Wood For Smoking: Genius & Essential Tips
Using wood for smoking involves choosing the right wood type, like hickory for pork or alder for fish, and the right form—chunks for long smokes, chips for shorter ones. Place the wood on your heat source to smolder and produce flavorful smoke, aiming for a thin, blueish stream that gently seasons your food without making it bitter.
Hello friend! Md Meraj here. If you’ve ever dreamed of pulling a perfectly smoked brisket or a rack of tender ribs off your smoker, you know that the magic is in the smoke. But getting that smoke right can feel like a tricky puzzle. It’s easy to end up with food that tastes more like an ashtray than a delicacy. This can be so frustrating, and it might make you want to give up.
But don’t you worry. Making amazing smoked food is much easier than you think. You just need a little guidance. In this guide, I’ll walk you through everything, step-by-step. We will cover choosing the right wood, preparing it correctly, and getting that perfect, sweet smoke. You’ll soon be smoking like a pro!
First, Why Is Wood So Important for Smoking?
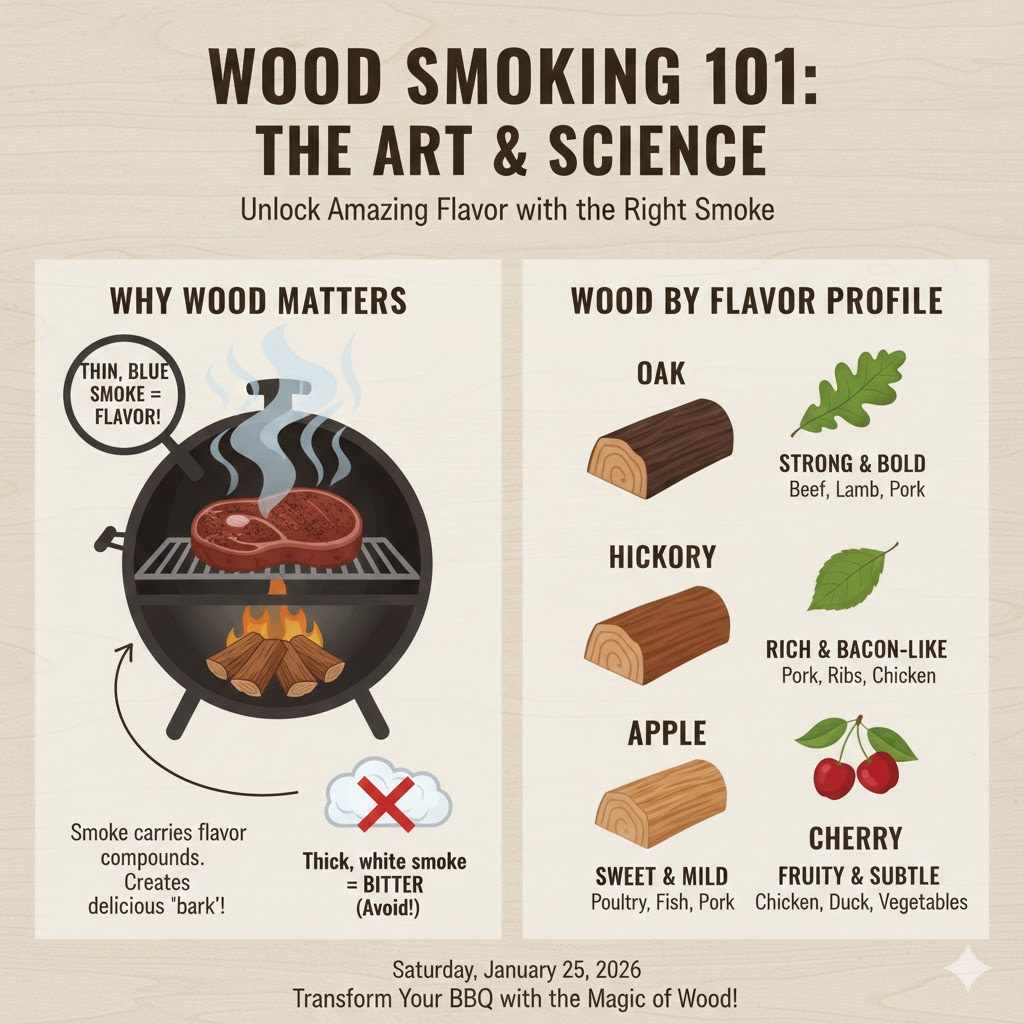
Before we dive into the “how,” let’s quickly understand the “why.” When wood smolders at a low temperature, it releases a wonderful combination of compounds. This isn’t just smoke; it’s flavor! These tiny particles land on your food, creating that delicious, smoky taste and the beautiful dark crust known as “bark.”
The type of wood you choose directly impacts the final flavor. Some woods are strong and bold, while others are light and sweet. The goal isn’t to create thick, white, billowing smoke. That kind of smoke is full of creosote and will make your food taste bitter. The secret is to create a clean, thin, almost invisible blue smoke. That’s the good stuff, and I’ll show you exactly how to get it.
Choosing Your Wood Form: Chips, Chunks, Pellets, or Logs?
Walking down the grilling aisle, you’ll see wood in several different forms. It can be confusing, but each has a specific purpose. Think of it like choosing the right tool for a job. Let’s break it down simply.
Wood Chips
These are small, thin pieces of wood that ignite and burn up pretty quickly. They are perfect for shorter cooking times and for adding a quick burst of smoke flavor. You’ll often use them in electric smokers or by placing them in a foil pouch or smoker box on a gas grill.
- Best for: Gas grills, electric smokers, short smokes (under an hour), and foods like fish, chicken breasts, or vegetables.
- How to use: Place them in a smoker box or a homemade foil pouch with holes poked in it. Place the container directly above the heat source.
Wood Chunks
Wood chunks are exactly what they sound like—fist-sized blocks of wood. They burn much slower and more consistently than chips, releasing smoke over a longer period. This makes them the go-to choice for classic low-and-slow barbecue where you’re cooking for several hours.
- Best for: Charcoal smokers, offset smokers, and long smokes (2+ hours), like brisket, pork butt, and ribs.
- How to use: Simply place a few chunks directly on top of your hot coals. They will start to smolder and release a steady stream of smoke.
Wood Pellets
Pellets are made from compressed sawdust. They are designed specifically for pellet grills, which use an automated auger to feed them into a fire pot. They offer a very consistent, clean-burning smoke and precise temperature control. You get the authentic wood flavor with modern convenience.
- Best for: Pellet grills.
- How to use: Just pour them into the hopper on your pellet grill. The grill does the rest of the work for you!
Logs or Splits
These are for the serious pitmasters using large offset smokers (often called “stick burners”). You use logs as both the fuel source and the smoke source. Managing a log fire takes skill and practice, so it’s usually not where beginners start.
- Best for: Large offset smokers and whole-hog pits.
- How to use: You maintain a small, hot fire in the firebox and add logs as needed to maintain temperature and produce clean smoke.
Comparison of Wood Forms
| Wood Form | Best Use Case | Pros | Cons |
|---|---|---|---|
| Chips | Short cooks, gas/electric grills | Quick to produce smoke, widely available | Burn out quickly, requires frequent replenishment |
| Chunks | Long cooks, charcoal smokers | Long-lasting smoke, stable temperatures | Can overwhelm food if you use too many |
| Pellets | Pellet grills | Extremely easy to use, precise control | Requires a specific type of grill |
| Logs | Large offset smokers | Purest wood flavor, primary fuel source | Requires constant management, difficult for beginners |
Matching Wood Flavor to Your Food: The Ultimate Pairing Guide
Now for the fun part! Choosing the right flavor of wood is like a chef choosing the right spice. The right pairing can elevate your food from good to unforgettable. As a rule of thumb, stronger woods work well with robust meats like beef and pork, while lighter woods are better for delicate foods like fish and poultry.
Here’s a handy chart to get you started. Don’t be afraid to experiment and mix woods once you get the hang of it!
| Wood Type | Flavor Profile | Pairs Great With |
|---|---|---|
| Hickory | Strong, savory, bacon-like. Can be pungent. | Pork (especially ribs and bacon), beef, and poultry. A true barbecue classic. |
| Mesquite | Very strong, earthy, intense. Burns hot and fast. | Beef (especially brisket and steaks), dark meat poultry. Use sparingly! |
| Oak | Medium, classic smoky flavor. Not overpowering. | Beef, lamb, pork, and sausages. A great all-purpose wood. |
| Pecan | Medium, sweet, and nutty. A milder cousin to hickory. | Pork, poultry, and great for baking or smoking cheeses. |
| Apple | Mild, subtly sweet, and fruity. | Pork (ham), poultry, and game birds. Excellent for a delicate smoke flavor. |
| Cherry | Mild, sweet, fruity. Gives food a beautiful dark-red finish. | Poultry, pork, beef, and ham. Great for mixing with other woods like hickory. |
| Alder | Very delicate, slightly sweet. The traditional wood for salmon. | Fish (especially salmon), poultry, and pork. |
A Quick Warning: Never use wood from lumber scraps, treated pallets, or painted/stained wood. These contain chemicals that are toxic when burned and will ruin your food. Also, avoid softwoods like pine, fir, or cedar (except for cedar planks, which are used differently), as they produce a harsh, resinous smoke. Stick to hardwoods specifically sold for smoking food.
The Great Debate: To Soak or Not to Soak Your Wood?
You will hear a lot of different opinions on this. Many bags of wood chips come with instructions to soak them in water for at least 30 minutes before use. The idea is that wet wood will smolder instead of catching fire, creating more smoke.
Here’s my friendly advice: Don’t soak your wood chunks, and it’s usually not necessary for chips either.
Why? Soaking wood only wets the surface. When you put the wet wood on the hot coals, it first has to steam off all the water before it can start to produce smoke. This water vapor doesn’t add flavor. It just cools down your fire, which can mess with your temperature control and create a “dirty” smoke at the beginning.
Instead of soaking, it’s much better to control your fire. If you manage the oxygen flow to your fire properly, your wood will smolder and produce that perfect clean smoke without needing to be wet. If you are using chips in a gas grill smoker box and struggle with them catching fire, soaking can be a crutch. A better solution is often a better smoker box or wrapping them tightly in foil.
How to Use Wood in Your Smoker: A Step-by-Step Guide
The exact method will change slightly depending on the type of cooker you are using. Let’s walk through the most common setups.
For a Charcoal Grill or Smoker (like a Kettle or Weber Smokey Mountain)
This is where wood chunks truly shine. Their slow, steady burn is perfect for charcoal.
- Get Your Fire Ready: Light your charcoal using a chimney starter. Once the coals are hot (glowing red and covered in a light layer of white ash), arrange them for indirect cooking. This usually means piling them on one side of the grill.
- Add Your Wood: Place 2-3 wood chunks directly on top of the hot coals. Don’t bury them; just set them right on top. There’s no need to use more than that to start.
- Wait for Clean Smoke: Close the lid and open your vents about halfway. Watch the smoke coming out of the top vent. At first, it might be thick and white. Wait for it to thin out and turn a light grey or almost blue. This should only take 5-10 minutes.
- Add Your Food: Once you see that beautiful “thin blue smoke,” it’s time to put your food on the cooler side of the grill, away from the direct heat of the coals.
- Manage Your Fire: Keep an eye on your temperature. You may need to add more charcoal and another wood chunk every hour or so for very long cooks.
For a Gas or Propane Grill
You don’t have coals, so you need a way to contain the wood. Wood chips are your best friend here.
- Use a Smoker Box: A smoker box is a small metal container with holes in it. Fill the box with dry wood chips and place it directly on top of one of the burners you will be lighting.
- Or Make a Foil Pouch: If you don’t have a smoker box, take a large piece of heavy-duty aluminum foil. Place a handful of chips in the center, and fold it into a sealed packet. Poke a few holes in the top with a fork to let the smoke escape.
- Preheat the Grill: Place the smoker box or foil pouch on the grill grate directly over a burner. Turn that burner to high and keep the others off (or on low for indirect heat). Close the lid.
- Wait for Smoke: It will take 10-15 minutes for the chips to get hot enough to start smoking. Once you see smoke coming out of the grill, you can turn the burner down to your target cooking temperature.
- Add Food and Cook: Place your food on the cooler side of the grill and cook with indirect heat. The chips will likely burn out in 45-60 minutes, so you may need to have a second pouch or a refilled smoker box ready if you want more smoke.
For an Electric Smoker
Electric smokers are designed to be simple, and using wood is no exception.
- Find the Wood Tray: Your electric smoker has a designated tray or box for wood chips, usually located near the electric heating element.
- Add Dry Chips: Fill the tray with dry wood chips. You don’t need to overfill it; just follow your manufacturer’s instructions. Some models have a chute that allows you to add more chips from the outside without opening the door.
- Set Your Temperature: Turn on the smoker and set your desired cooking temperature. The heating element will heat the chips, and they will start to smolder.
- Cook Your Food: Once the smoker is up to temperature and producing smoke, it’s ready for your food. The smoker will cycle the heating element on and off to maintain the temperature. You may need to add more chips every hour or two, depending on the model.
Genius Tips for That Perfect Smoke Flavor
Now that you know the basics, let’s talk about the little details that separate good barbecue from truly great barbecue.
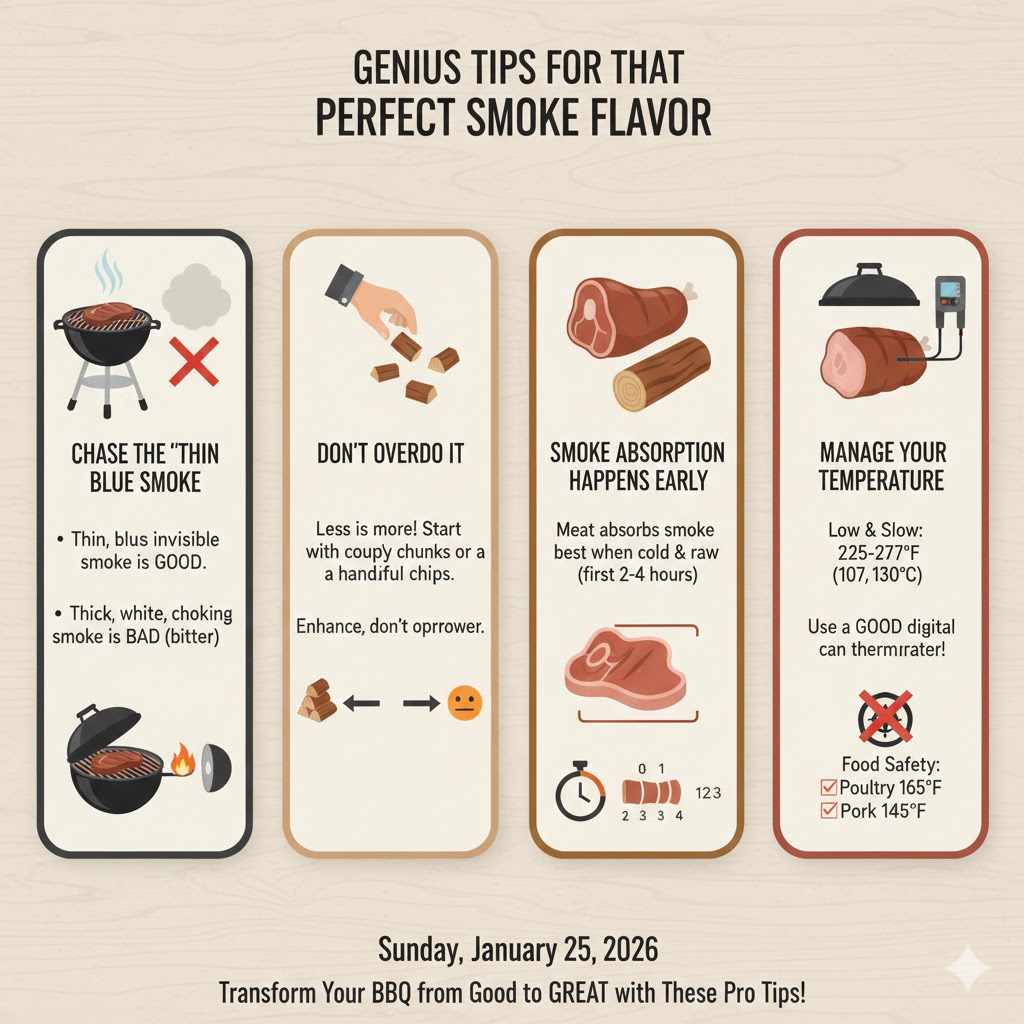
Chase the “Thin Blue Smoke”
I mentioned this before, but it’s the single most important concept in smoking. Thick, white, choking smoke is bad. It means the wood is smoldering inefficiently, and it will make your food taste harsh and bitter. What you want is a clean fire that produces a very light, almost invisible smoke with a slight blue tint. To get it, make sure your fire has enough oxygen. Adjust your smoker’s vents until the smoke thins out. A smaller, hotter fire is better than a big, choked-out, smoldering one.
Don’t Overdo It
A common beginner mistake is using way too much wood. You might think more smoke equals more flavor, but it’s easy to go too far and make the food inedible. Start with just a couple of chunks or one handful of chips. You can always add more later if you feel it’s needed. The goal is a balance where the smoke enhances the flavor of the meat, not overpowers it.
Smoke Absorption Happens Early
Meat absorbs smoke flavor most effectively when it is cold and raw. The smoke flavor penetrates much less once the surface of the meat has cooked and dried out. This means the first few hours of your cook are the most critical for smoke flavor. You don’t need to be adding wood for the entire 12-hour cook of a brisket. Get a good, clean smoke going for the first 2-4 hours, and then you can focus just on maintaining your temperature.
Manage Your Temperature
Great barbecue is all about consistency. The golden rule is “low and slow.” Most traditional smoking happens between 225°F and 275°F (107°C to 135°C). Use a good digital thermometer with a probe for the meat and another to monitor the smoker’s internal temperature at grate level. Don’t rely on the thermometer built into the lid, as it can be off by as much as 50 degrees! For food safety, always ensure poultry reaches 165°F and pork is cooked to at least 145°F, as recommended by the USDA.
Frequently Asked Questions (FAQ)
Can I use wood from my backyard?
It’s risky unless you can positively identify the tree as a safe hardwood (like oak, maple, or apple) and know that it hasn’t been treated with any pesticides or chemicals. The wood must also be properly seasoned (dried) for at least 6-12 months. For beginners, it’s much safer to buy wood specifically sold for smoking.
How much wood should I use?
Start with less than you think you need. For a long cook in a charcoal smoker, 2-4 fist-sized chunks is plenty to start. For a gas grill, one smoker box or a single foil pouch of chips is a good starting point. You want smoke to be an ingredient, not the main flavor.
Why does my food taste bitter?
This is almost always a sign of “dirty smoke.” The cause is usually thick, white smoke produced by a fire that isn’t getting enough oxygen or by wood that is smoldering poorly. Open your vents more to let the fire breathe and aim for that thin, blueish smoke.
Can I mix different types of wood?
Absolutely! This is a great way to create your own unique flavor profiles. A common combination is a strong wood like hickory with a milder, sweet wood like apple or cherry. For example, a 70% cherry and 30% hickory mix is fantastic on pork ribs.
Do I leave the smoker vents open or closed?
You need to leave them at least partially open. Vents control airflow. The intake vent (at the bottom) feeds oxygen to the fire, controlling how hot it burns. The exhaust vent (at the top) lets out smoke and heat. You adjust both to dial in your target temperature. Closing them completely will kill your fire and create dirty smoke.
How long do wood chips last?
In a hot smoker or grill, a handful of wood chips will typically produce smoke for about 45-60 minutes before turning to ash. If you are doing a longer cook, you will need to add more chips periodically.
Is bark from the wood okay to use?
Yes, for most hardwoods like oak and hickory, the bark is perfectly fine to leave on. It will burn and produce smoke just like the rest of the wood. Some people prefer to remove it, but it’s generally not necessary.
Time to Get Smoking!
Learning how to use wood for smoking is a journey, not a destination. It’s one of the most rewarding and enjoyable ways to cook. It connects us to a long tradition of cooking with fire and creating food that is deeply satisfying.
Don’t be afraid to make mistakes. Every pitmaster has made a bitter brisket or dry ribs at some point. It’s part of the process. Take what you’ve learned here, start with a simple recipe, and just have fun with it. Pay attention to your fire, chase that clean smoke, and before you know it, you’ll be sharing incredible, homemade barbecue with your friends and family. Happy smoking!